Activity
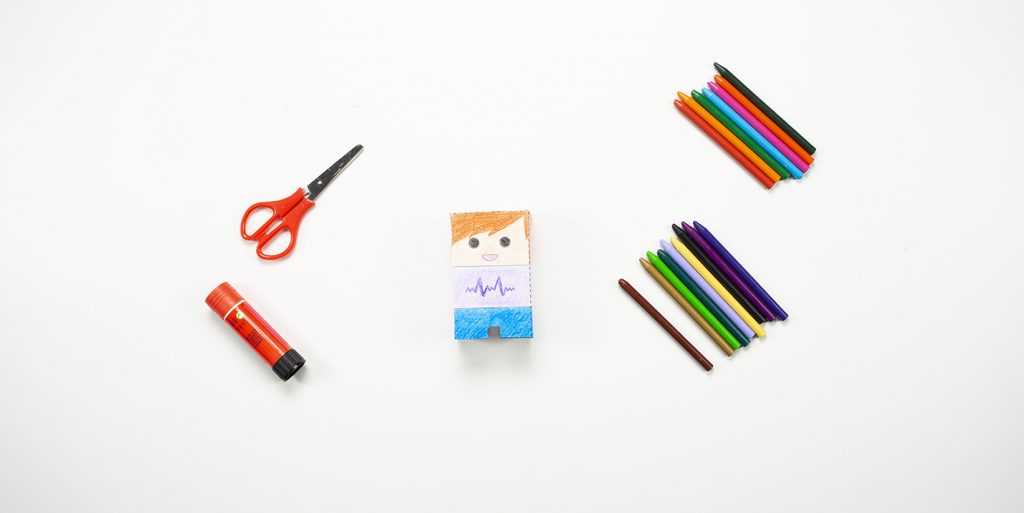
1. After printing the document with your character’s model, cut the model along the thick outer lines.


2. Then, use crayons to draw and paint your character to your liking.


3. To build the character in 3D, fold the pattern along the perforated lines. Apply glue on the tabs to complete the assembly.

4. Now that you have your character in 3D, draw it on the computer. To do this, you first need to log in to your Tinkercad account.
• If you already have an account created, click Sign in.
• If you don’t have an account, click on the JOIN NOW button and ask an adult for help in performing the following steps.
For security reasons and in order to protect our privacy, it is recommended that you:
– avoid using your full name as a username;
– choose a password that contains as many elements as possible (upper-case and lower-case letters, numbers and special characters), but does not include personal data, such as your date of birth.
If Tinkercad isn’t in the language you want, you can change it in the orange block at the bottom of the homepage.
SIDE NOTE: You may click the images to amplify.

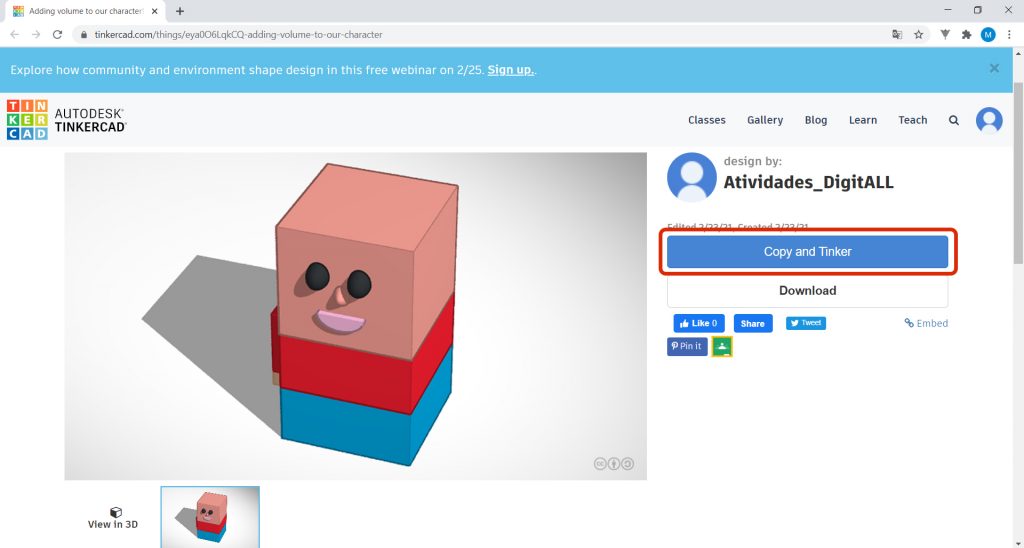
5. After logging in to your Tinkercad account, access this activity’s project using the following link: https://www.tinkercad.com/things/eya0O6LqkCQ-adding-volume-to-our-character
The link will direct you to a page, where you must click on Copy and Tinker.
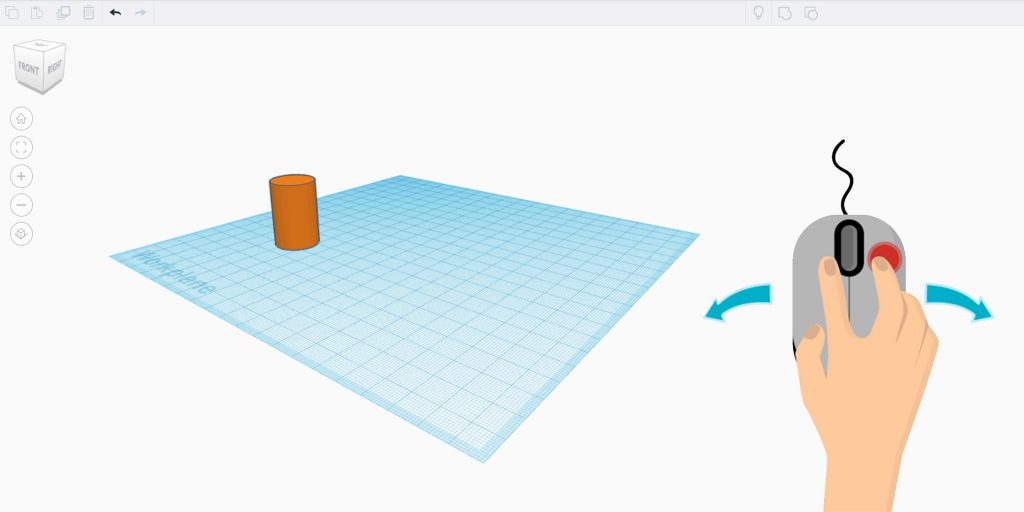
In order to view the different areas of your Workplane, click and hold the right mouse button. Move the mouse to see the different perspectives of your project.
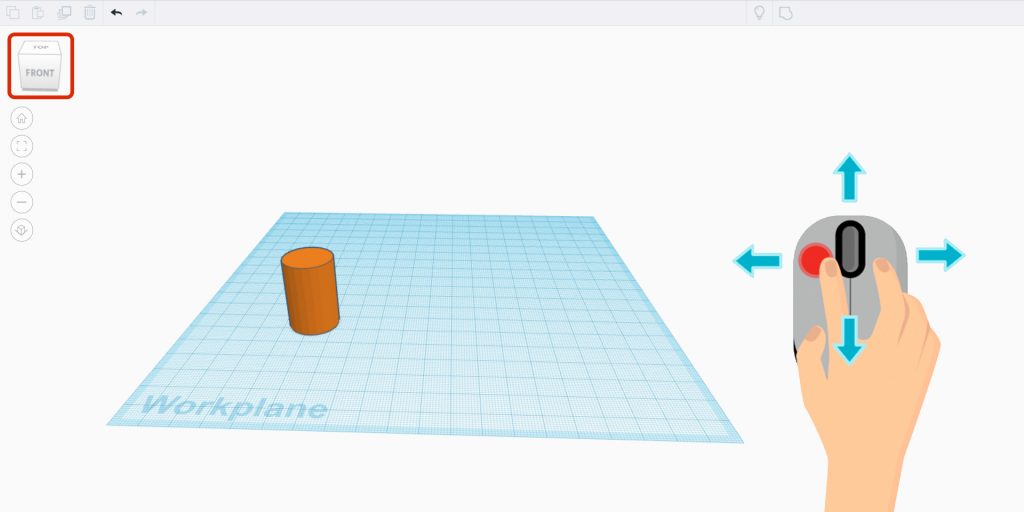
You can also click on the cube at the top, on the left side of the screen. Hold the left mouse button while moving the cube sideways, up and down, to see your design from all angles.
To zoom in or out on the object, you must use the mouse wheel. You can also use the + and – signs, which are on the left side of the screen.

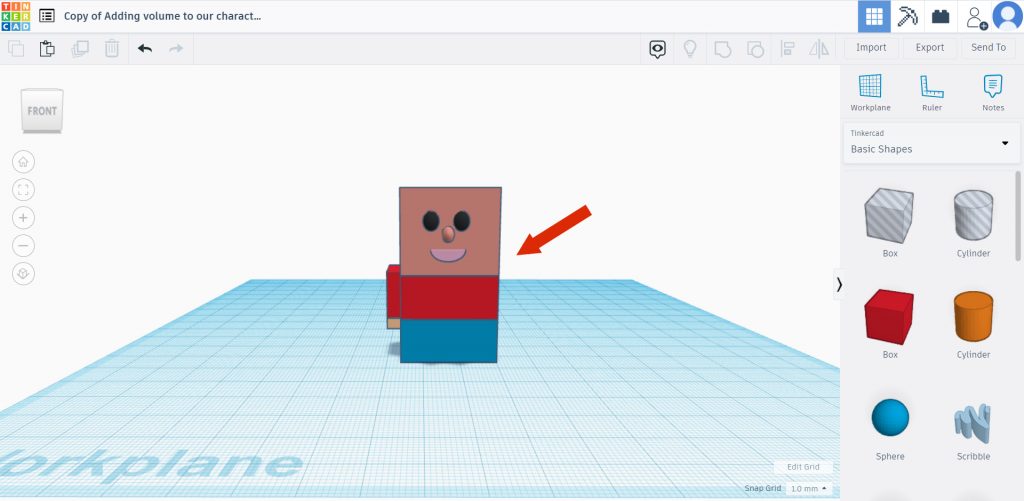
6. You already have some parts of your character created, but… you need to complete it.

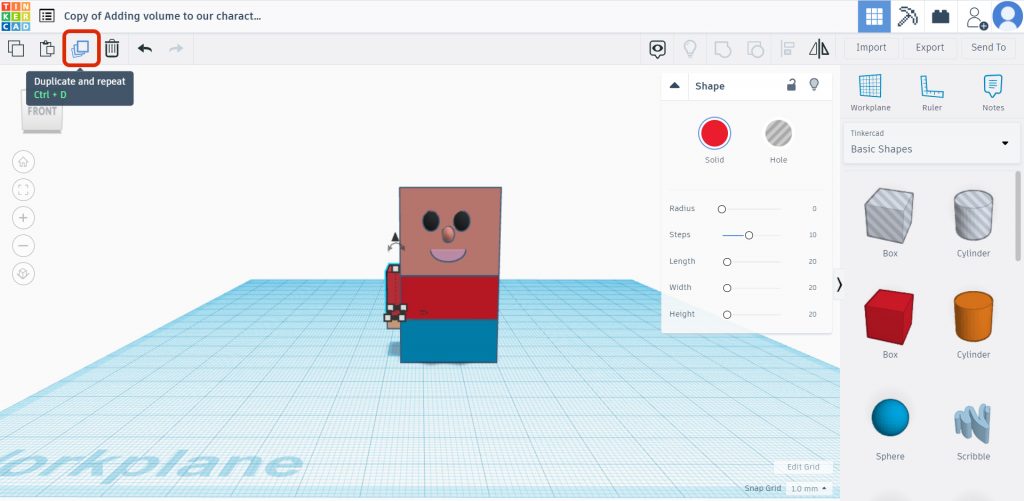
7. To do this, you must first make the arm that is missing. Select the arm by clicking on it. Then, you must click on Duplicate and repeat.

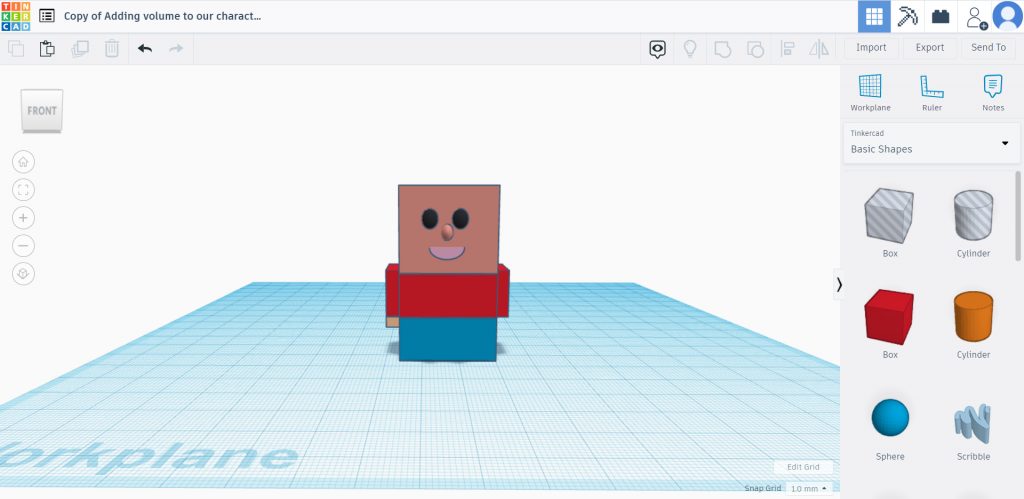
8. To put the new arm in the correct place, click on it with the left mouse button and drag it to the correct place. You can also move it with the arrow keys. In this case, you must click on the right arrow.
It is advisable to look at your design from different angles, to confirm that the arm is correctly placed.

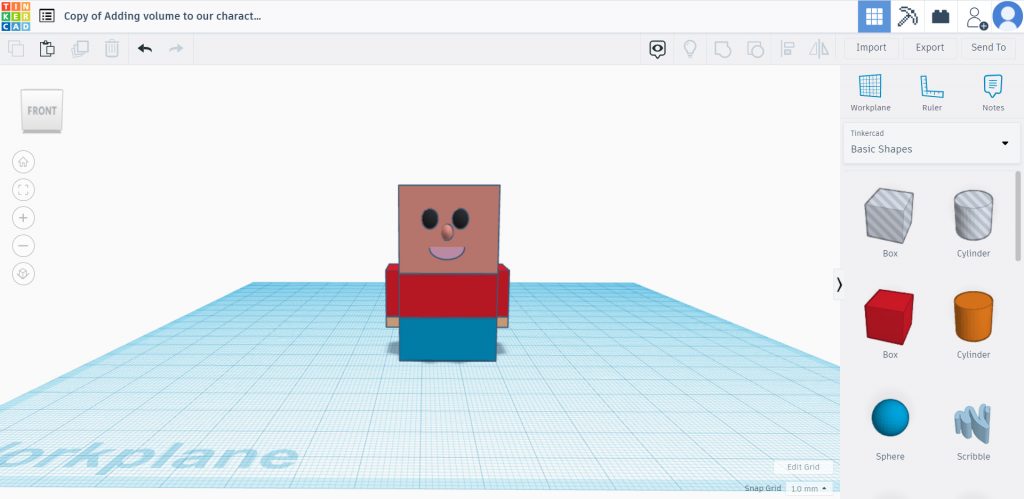
9. Repeat steps 7 and 8 to draw the missing hand.

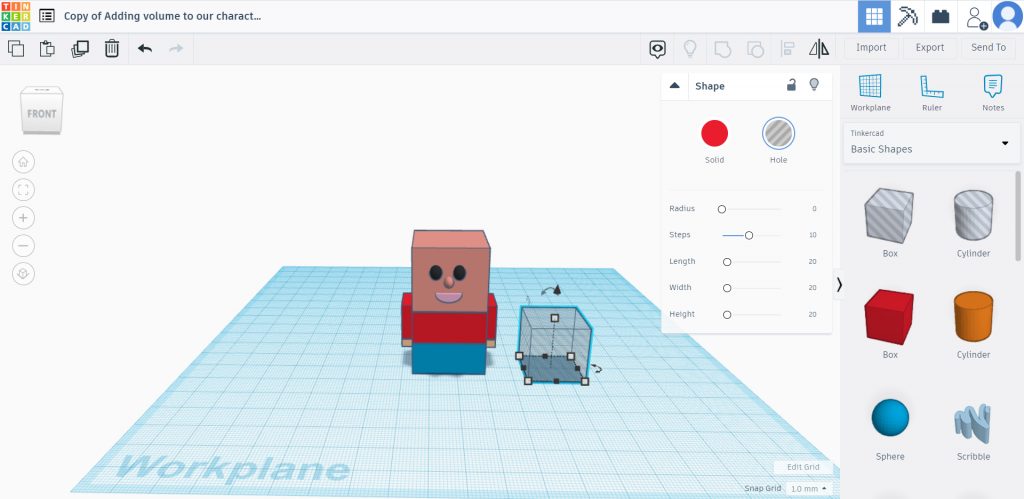
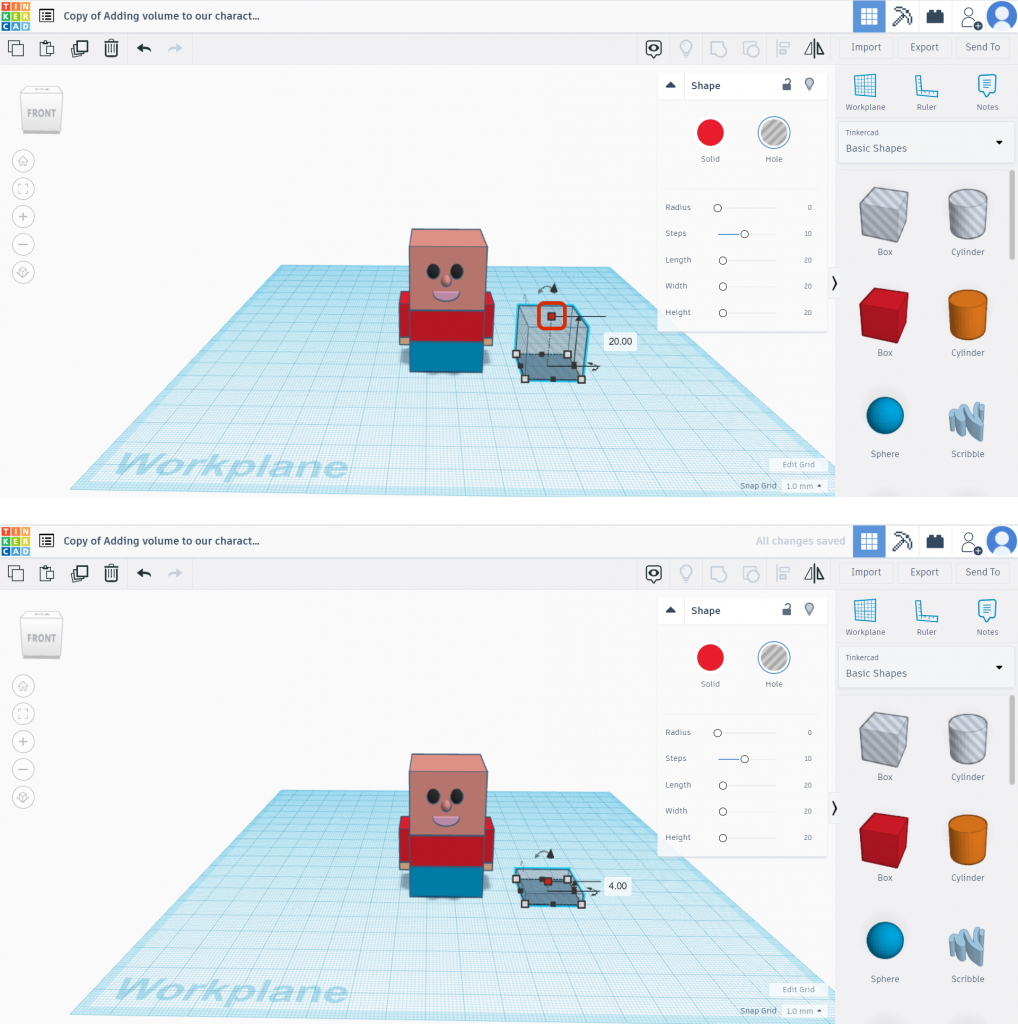
10. To create the character’s legs, you need to make a hole in the middle of the character’s lower part. To do this, in the Basic Shapes shown on the right side of the screen, click on the first Box that appears in gray and drag it to the Workplane.

11. Then, alter its dimensions. To change its height, use the square on top of the Box. Click and hold while dragging it down until “4” appears in the square.

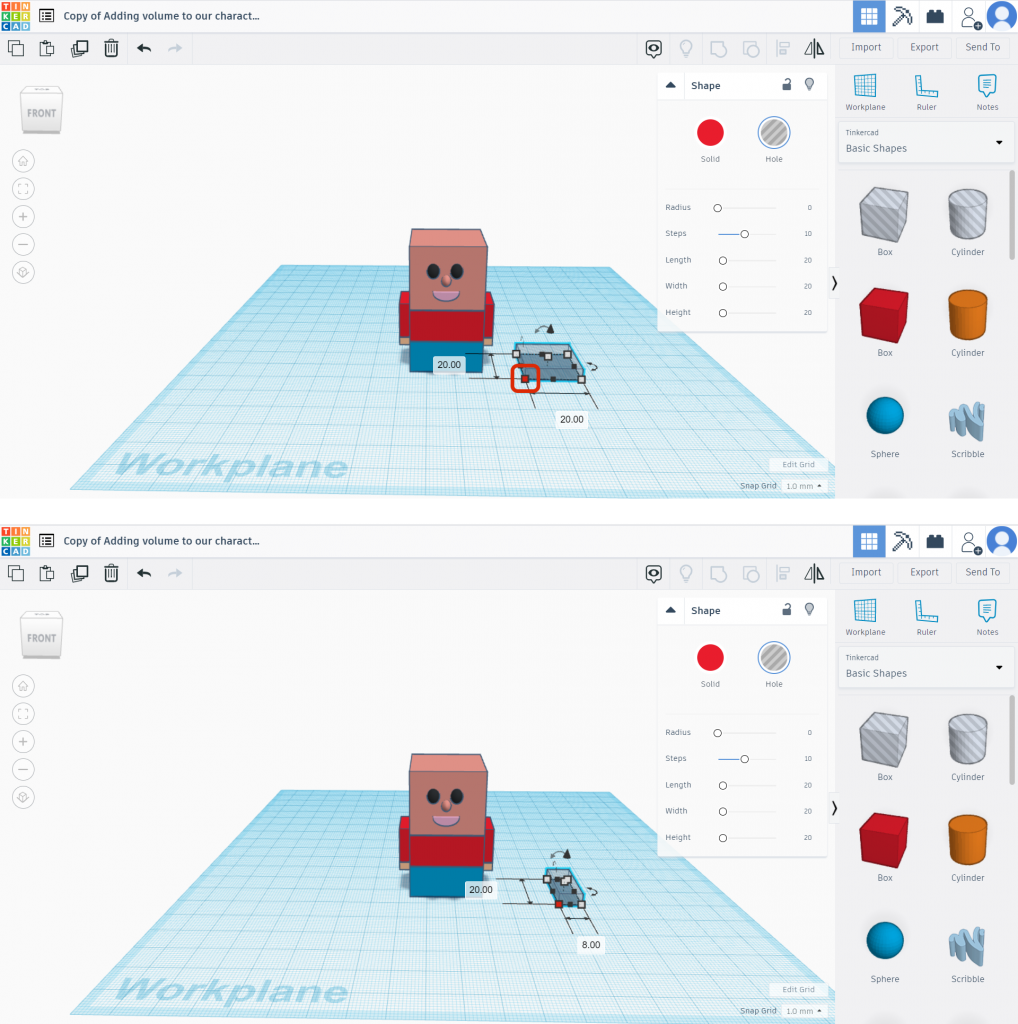
12. To alter its width and make it as narrow as possible, click and hold the square that appears on the left side of the shape and then drag it to the right until the number “8” appears.

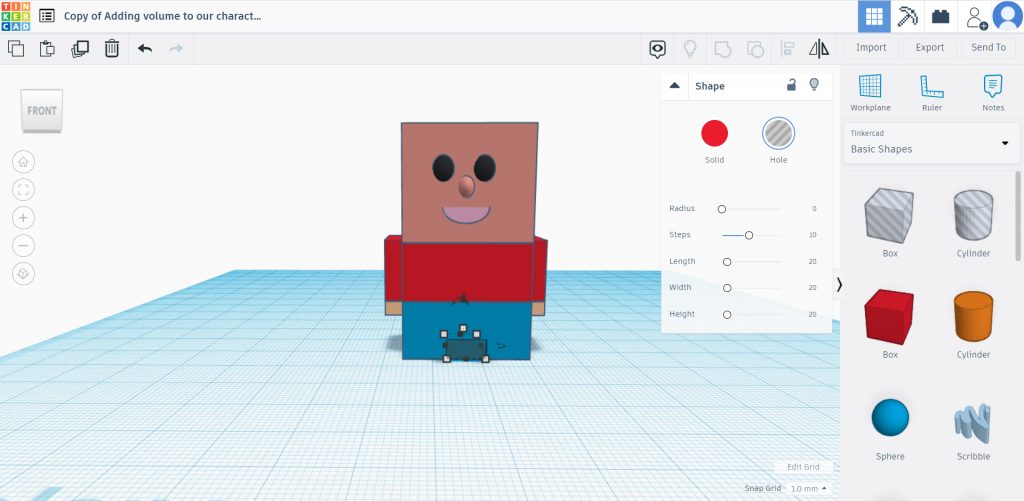
13. After changing the size of the shape, drag it and place it centered on the bottom of the character.

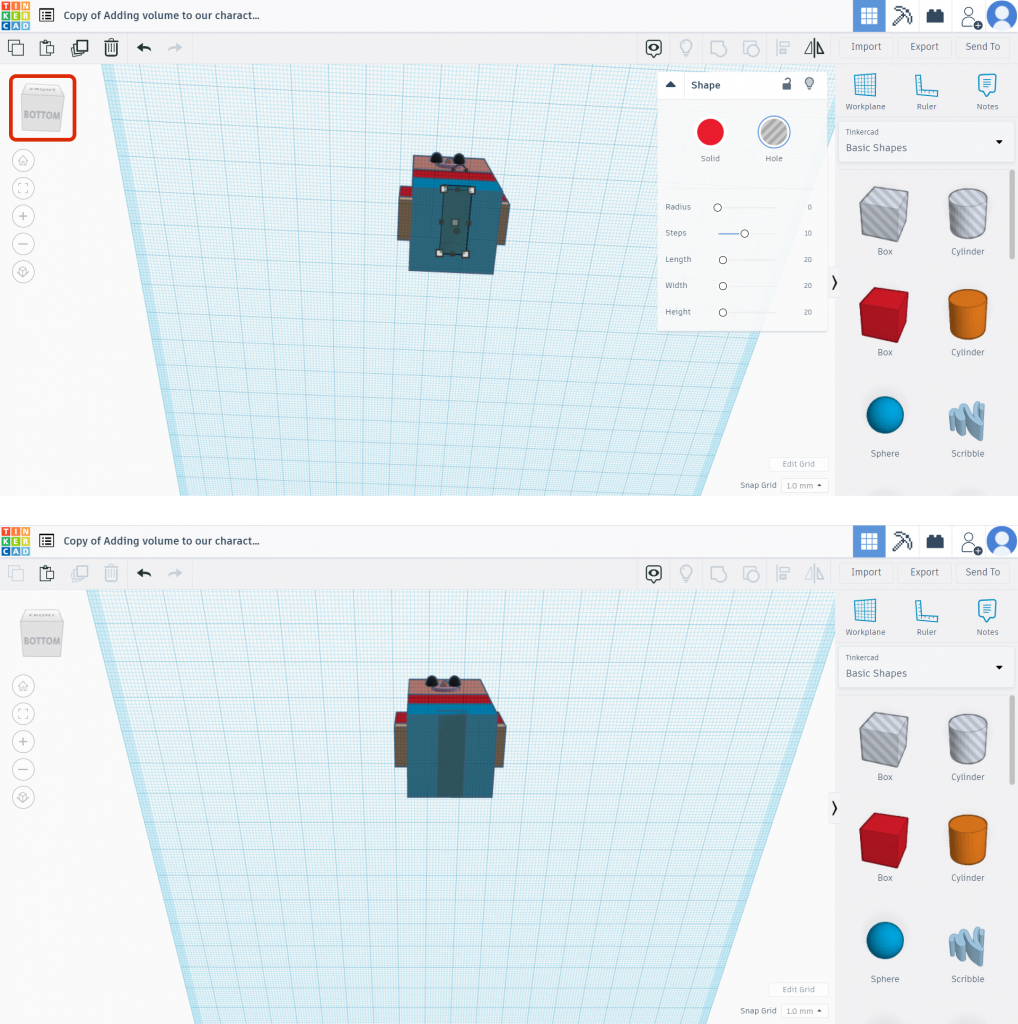
14. Confirm that it is placed correctly, moving the plane until you see the bottom of the character.
It is possible that the shape is shorter than the character. In that case, it may be necessary to alter it, widening it until it is the same size.

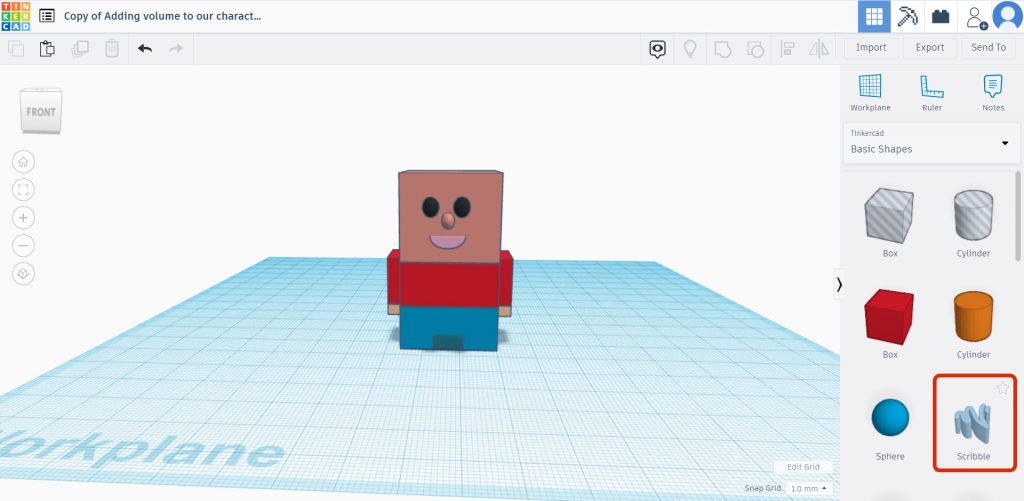
15. Once the structure of your character is done, you have to draw the hair. To do this, go back to the FRONT plane, select Scribble, in the Basic Forms, which is on the lower right side of the program. Then, click on the Workplane with the left mouse button.

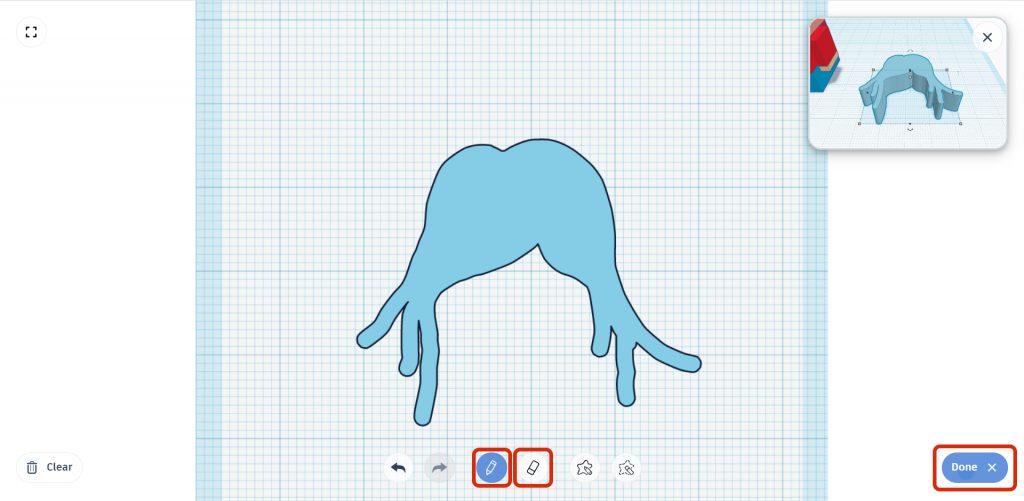
16. A grid will appear, on which you can draw the hair you want your character to have. Use the Draw, the button with the pencil symbol, at the bottom. To draw, hold the left mouse button and drag the Draw.
As soon as you release the button, you will see the line you drew. You can add new strokes by clicking the left button again and holding it down.
To delete a stroke, click on Erase. Once you’re done drawing, click Done.
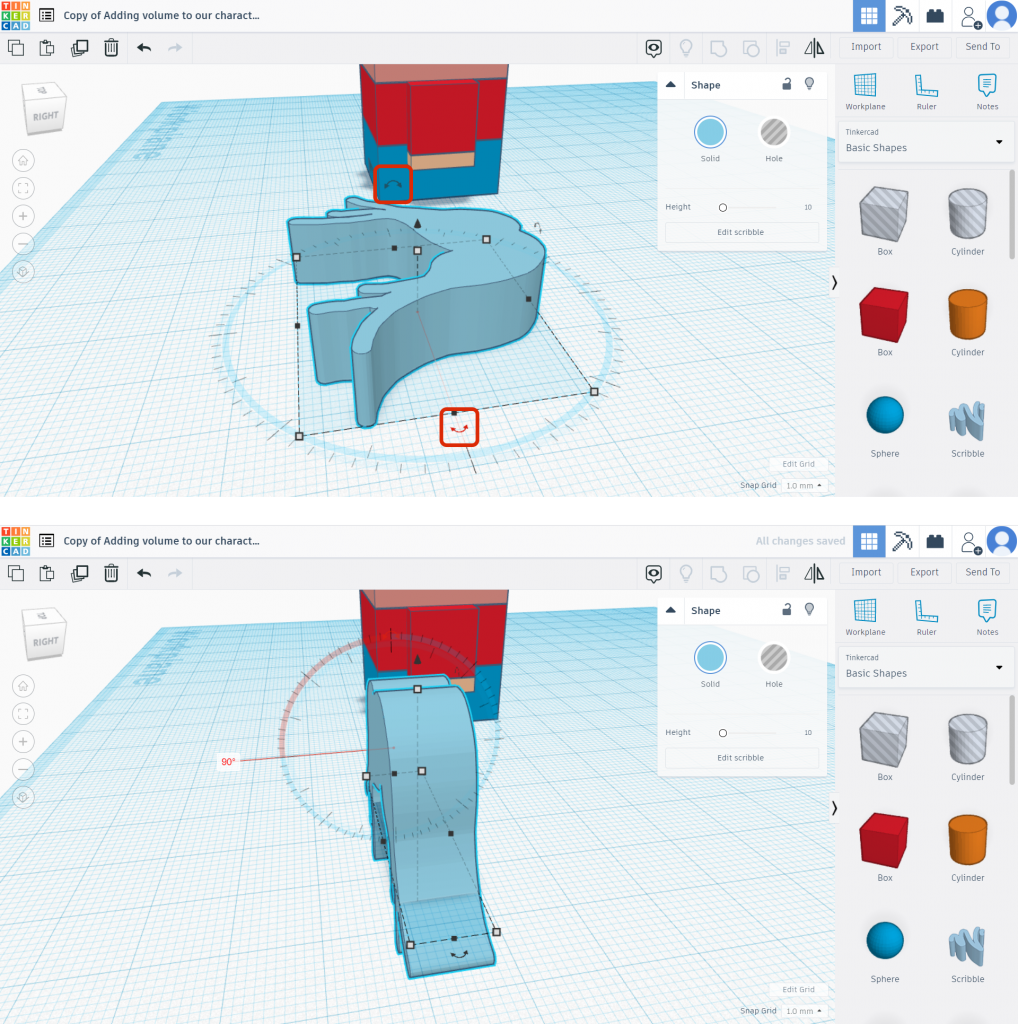
To rotate a figure, use the curved arrows that appear when you click on the figure.
When you place the mouse cursor over the curved arrows, a circle will appear. You must place the mouse on the red line, click the left button and, while holding it, rotate the object to the right or left.
There are three curved arrows, each of which rotates the figure at different angles.

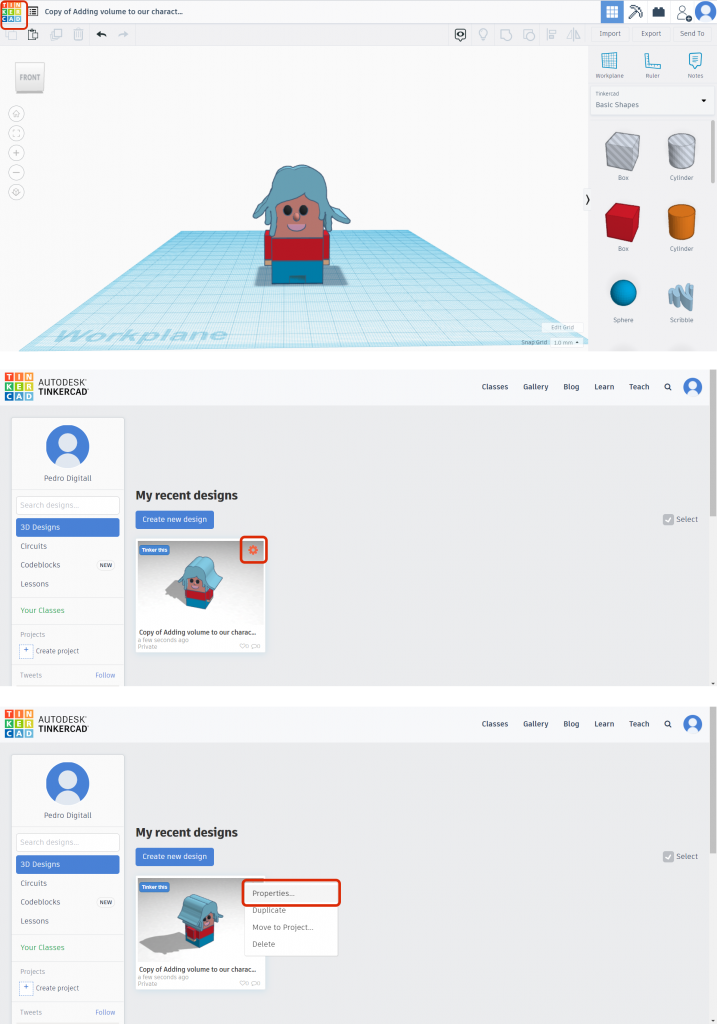
17. Finally, you can share your work with the Tinkercad community. Go to the home page and click on the Tinkercad icon in the upper left corner.
Place the mouse cursor over your character. An Options wheel will appear in the right corner. Click on it and select the Properties option.

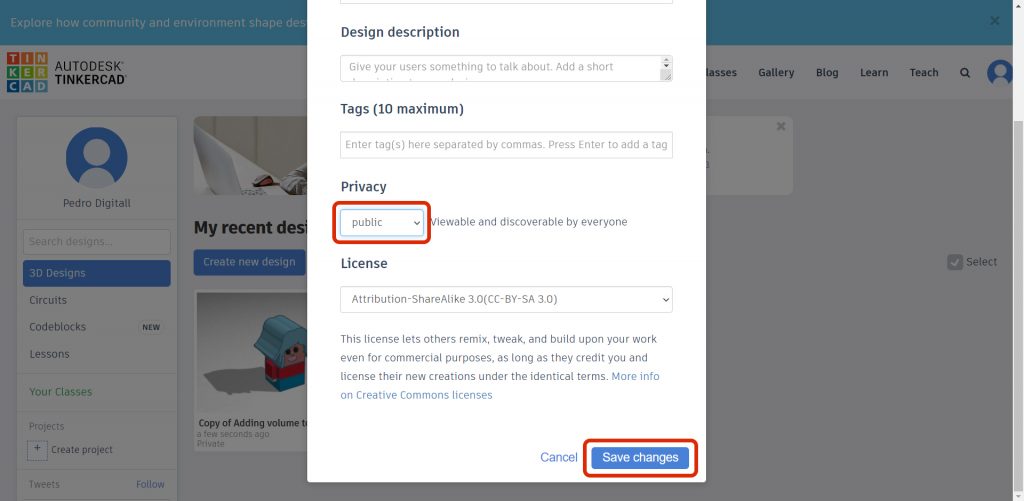
18. In Privacy, change the state to public and click Save changes. From now on, the whole community will be able to see and comment on your project.
You can also explore other projects and write your opinion.
Remember never to share your personal data.
