Activity
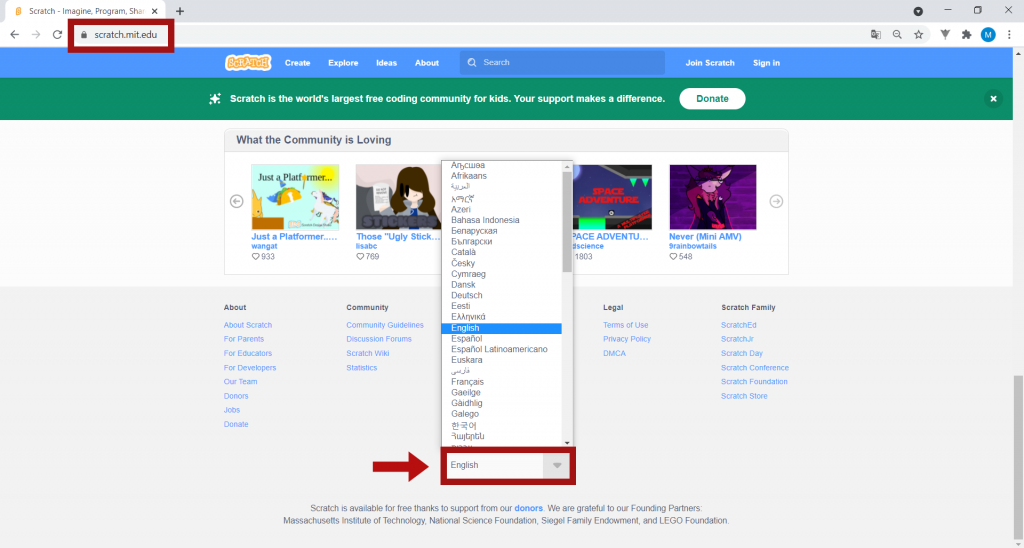
1. To start the activity, go to the Scratch page: www.scratch.mit.edu.
You can change the language at the bottom of the home page.
SIDE NOTE: You may click the images to amplify.

2. If you still haven’t signed up with Scratch, click on Join Scratch and ask an adult to help you fill in the requested fields in order to complete your registration.
For security reasons, and to protect your privacy, we recommend the following:
– avoid using your full name as your username;
– use a password with a wide range of characters (uppercase, numbers and symbols), and never personal data such as your date of birth.

3. Click Create to start a new project.
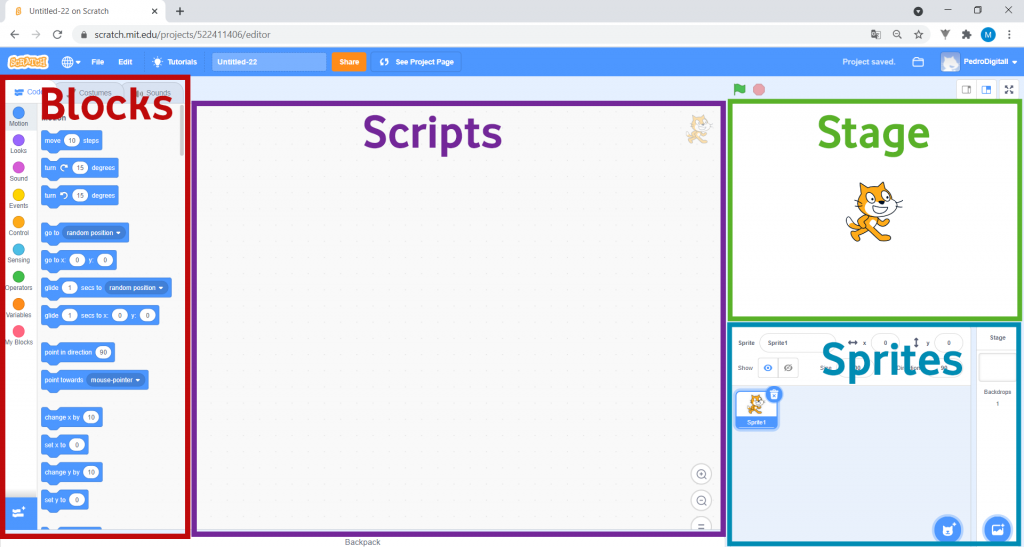
This is the Scratch interface. This is where you will program the Maze game, by dragging blocks from the blocks area on the left to the scripts area in the middle.
• The Stage is where you can see your project’s graphs and animations. This is where you test your code.
• The Sprites area is where you can see, change, add or remove all of the images appearing on the Stage.
• You program in the Scripts area by dragging the blocks you need here, then assembling them.
• The Blocks area has all of the blocks you can use to build your code. If you look closely, there are various types of blocks, each responsible for a given function. You can distinguish between them by their different colours.

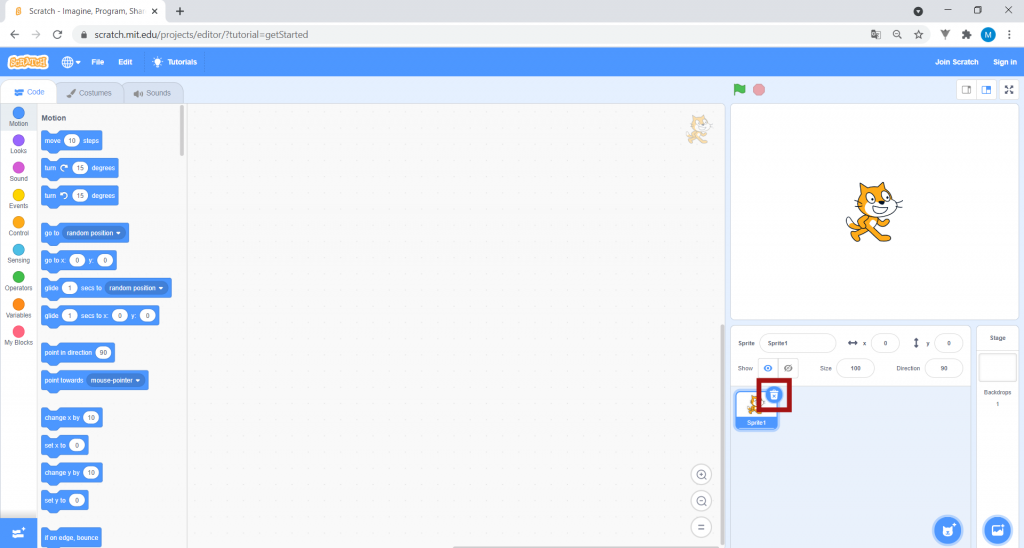
4. On the right side, on the Stage, there is cat, but this is not the character you will use for this game. To delete it, go to the “Sprites” area and click on the button highlighted in the image:

5. The game you are going to make with Scratch is called Maze with Scratch! In this game, you must help Pico get out of the maze so that he can find Giga, without making a mistake or touching the walls!

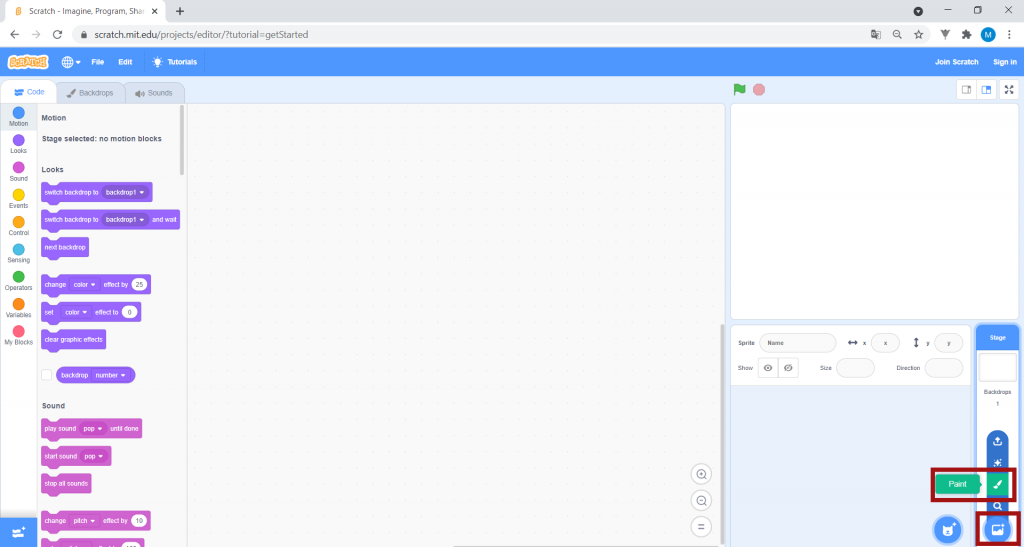
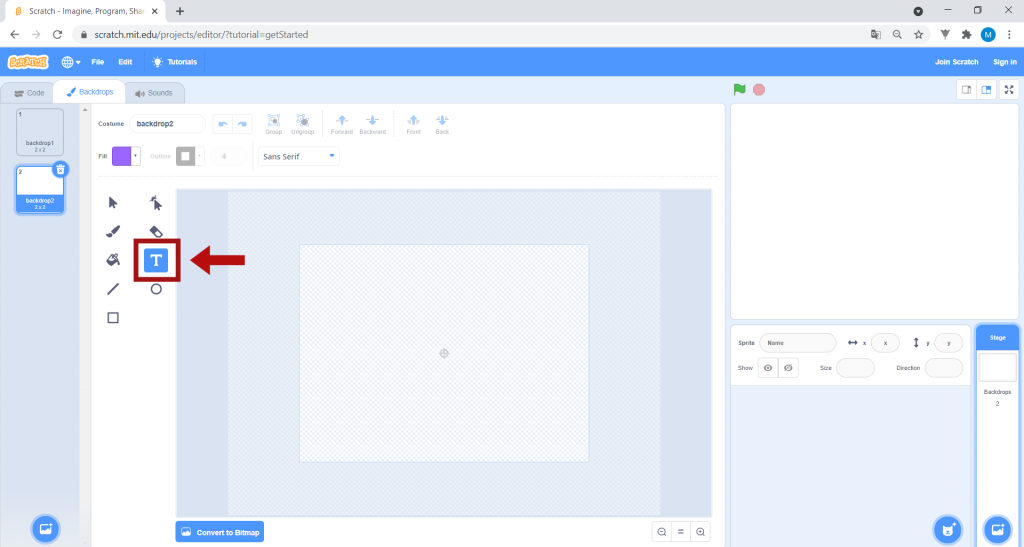
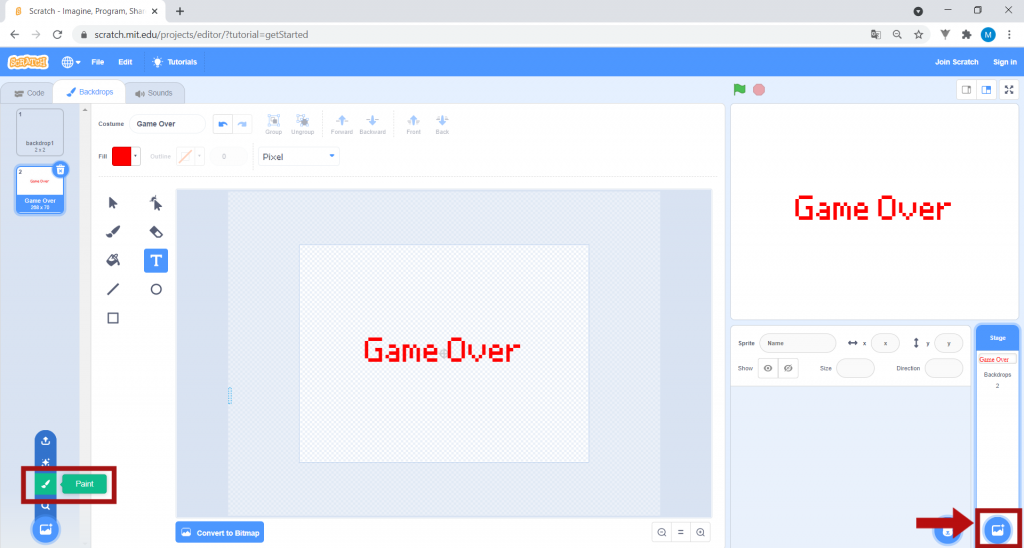
6. You will create a scenario that says “Game Over”. This should appear when the player loses. To do this, hover your cursor over Choose a Backdrop in the bottom right-hand corner and click on the Paint option.
Next, click on the Text button.
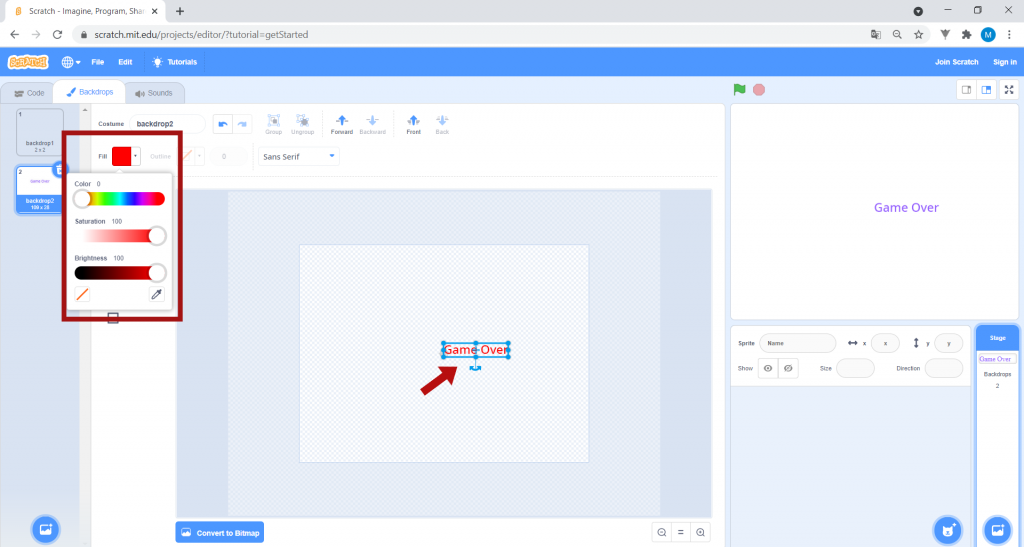
Click on the centre of the screen and type “Game Over”. If, while you are typing, you don’t see the words, it is because the colour selected for the text is white. Switch it to red by choosing the colour under Fill.
Make the box larger by dragging the dots around it.
To reposition the text in the backdrop, click and hold inside the text box and drag it where you want it.
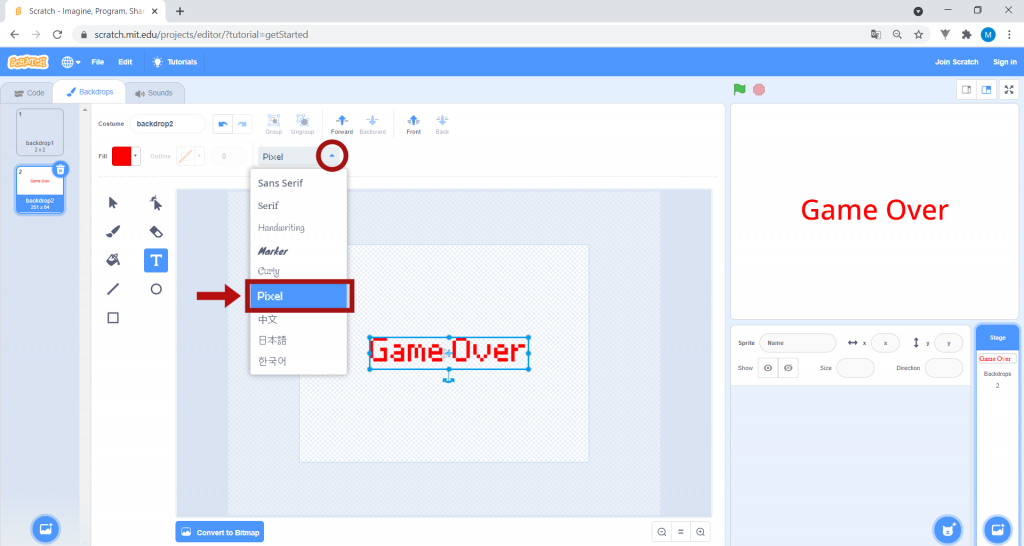
The default font is Sans Serif. Click on the arrow next to Sans Serif and choose the Pixel font.
In Costume, type the name of your backdrop: “Game Over”.

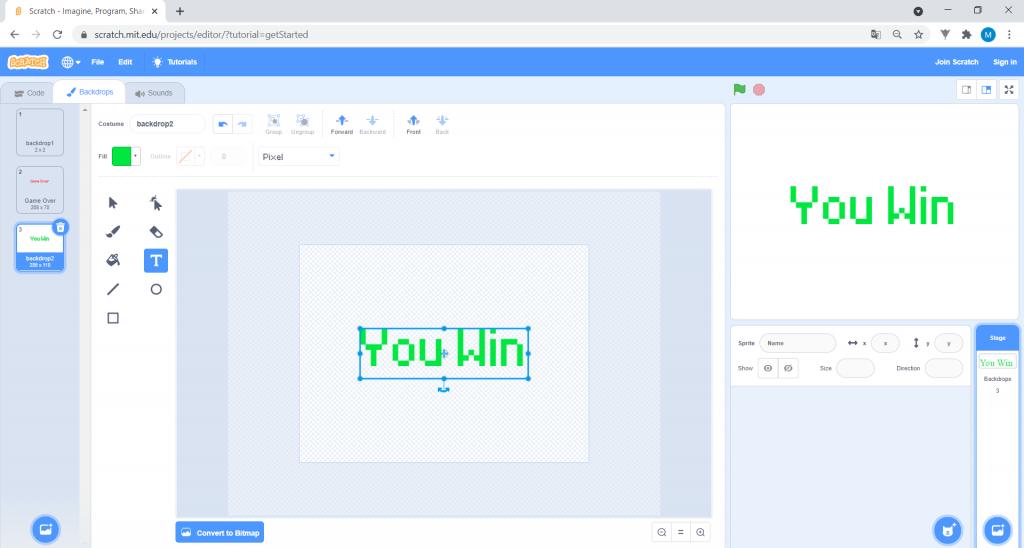
7. Now, create another scenario that will appear when you win the game. This one will say “You Win!”. Click on the Paint option in the bottom left or right corner.
Repeat what you did in the previous steps, writing “You Win!” in green, instead of “Game Over”, as shown in the image:
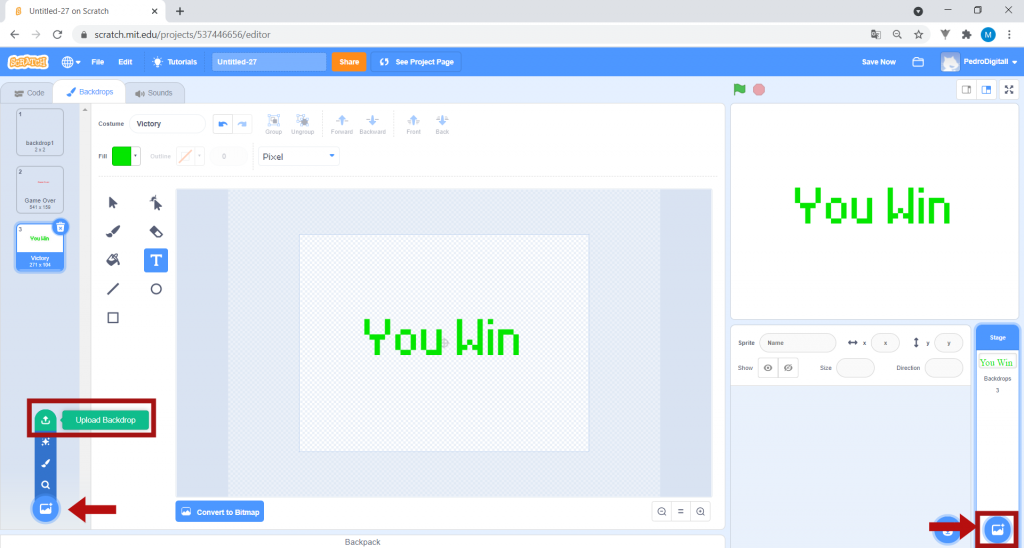
In Costume, type the name of the scenario: “Victory”.

8. Create a third backdrop that will correspond to the maze. If you have not yet downloaded the Maze image to your computer, click here. Save it to your computer, in a folder or on your desktop, for later use.
In the bottom right-hand corner, under Choose a Backdrop, select Upload Backdrop.
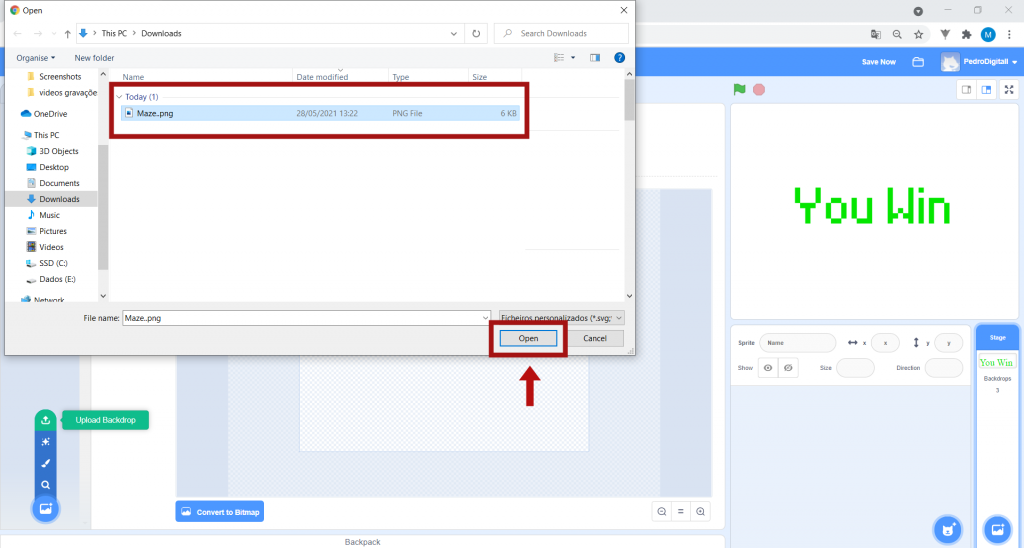
Select the maze you downloaded and click Open.

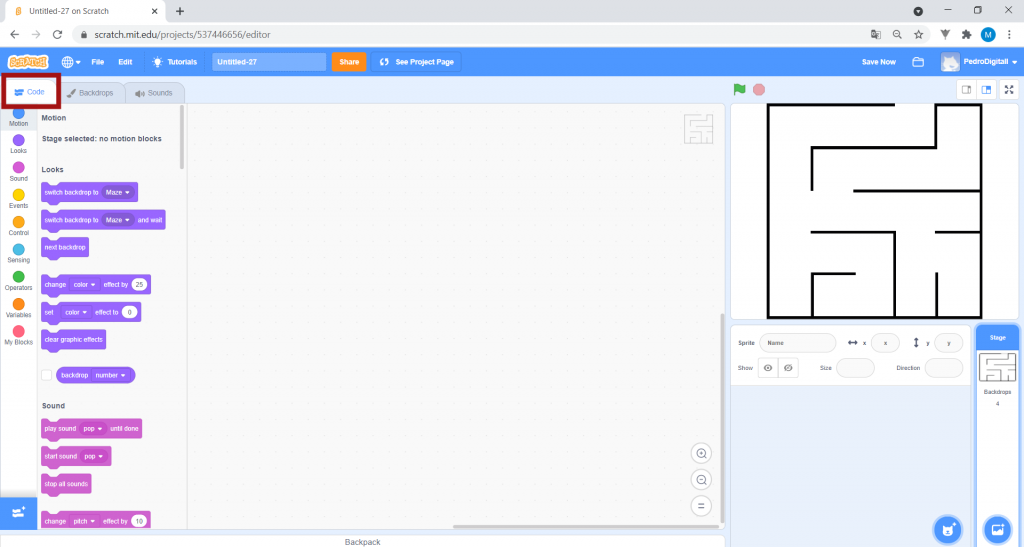
9. Click on Code to start programming your game!

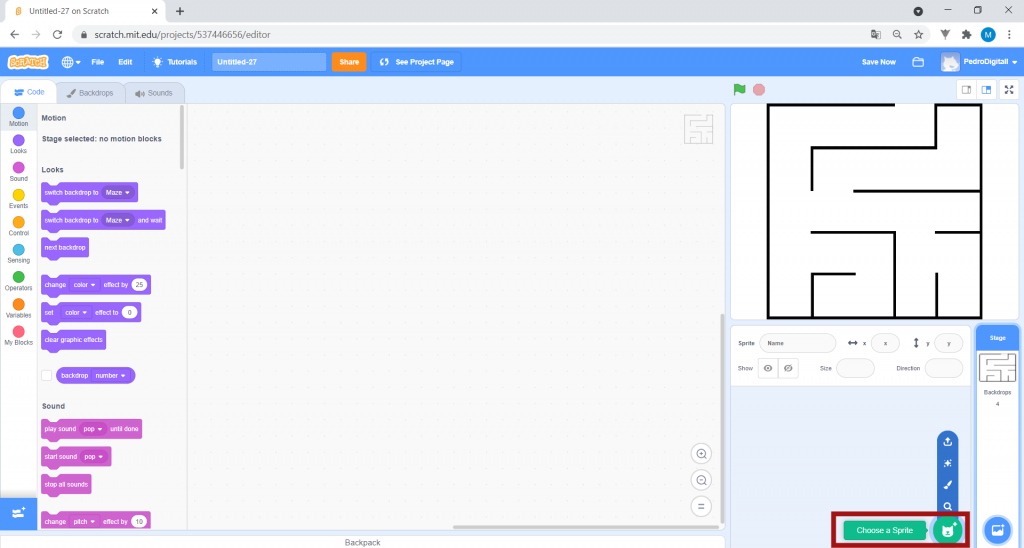
10. In this game, we will use the actors Giga and Pico. Click on Choose a Sprite.
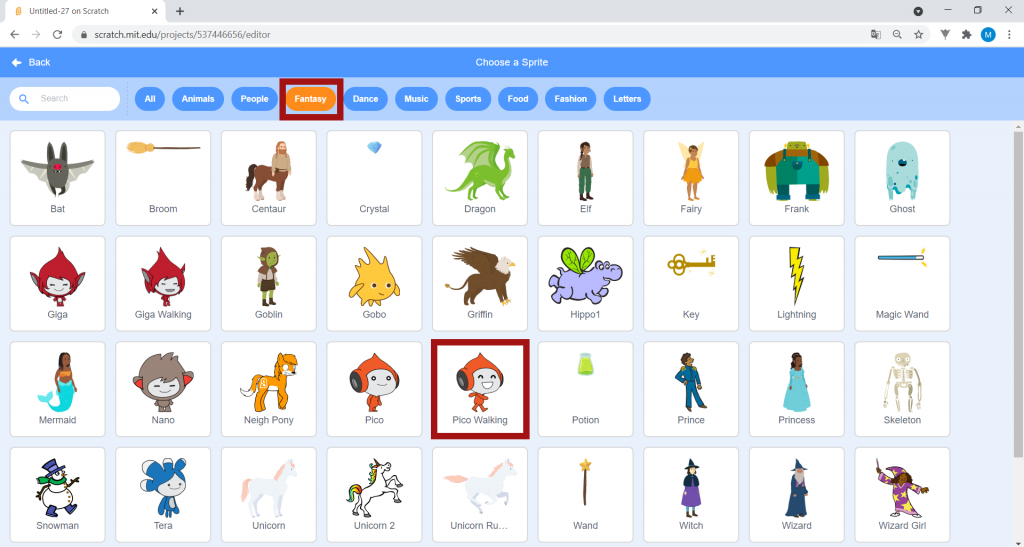
In Fantasy, select Pico Walking. The character names appear in alphabetical order to make it easier to find the one you are looking for.
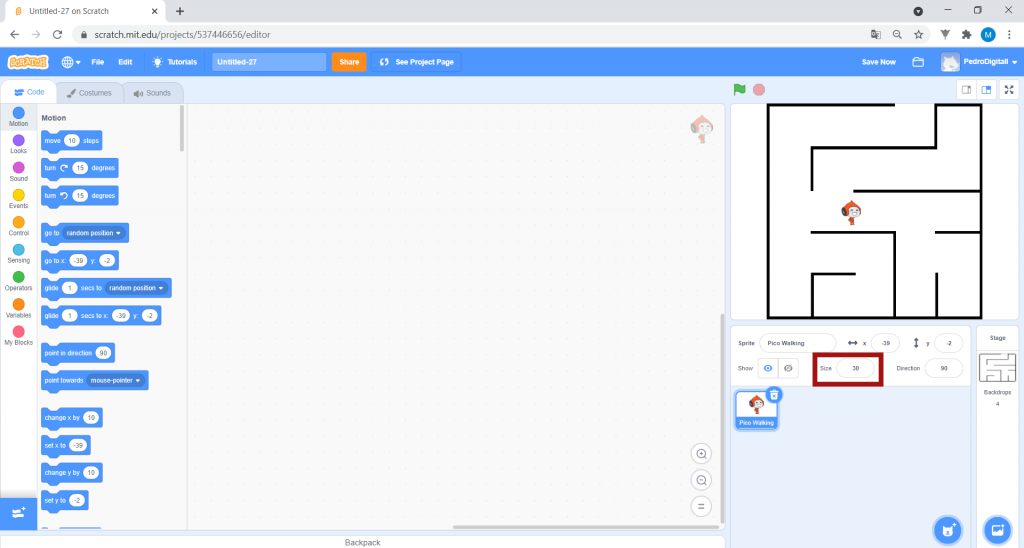
Change the size of Pico. In the Sprites area, type “30” in the text box next to Size.

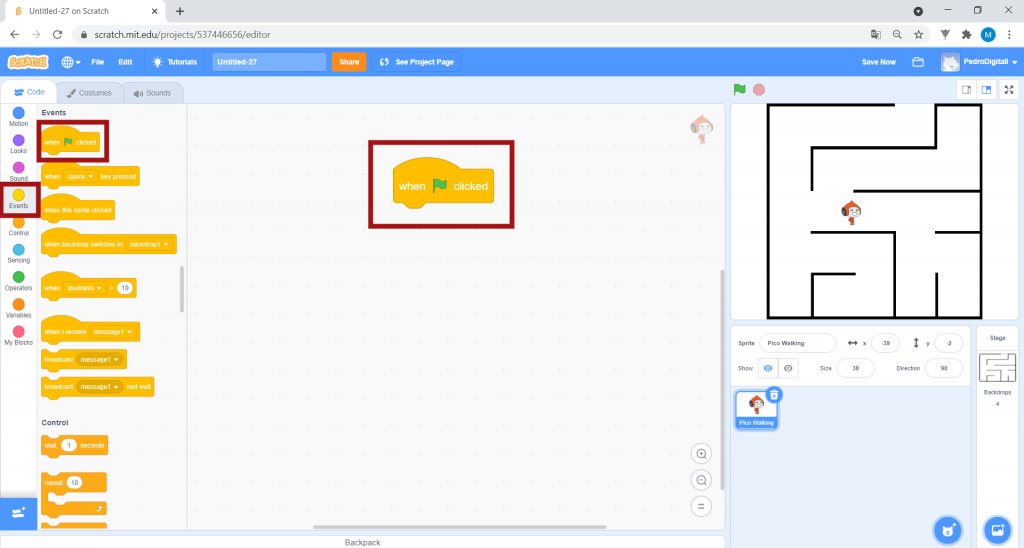
11. Then, in the Blocks area, click on Events and drag the block that says when on green flag clicked into the scripts area.

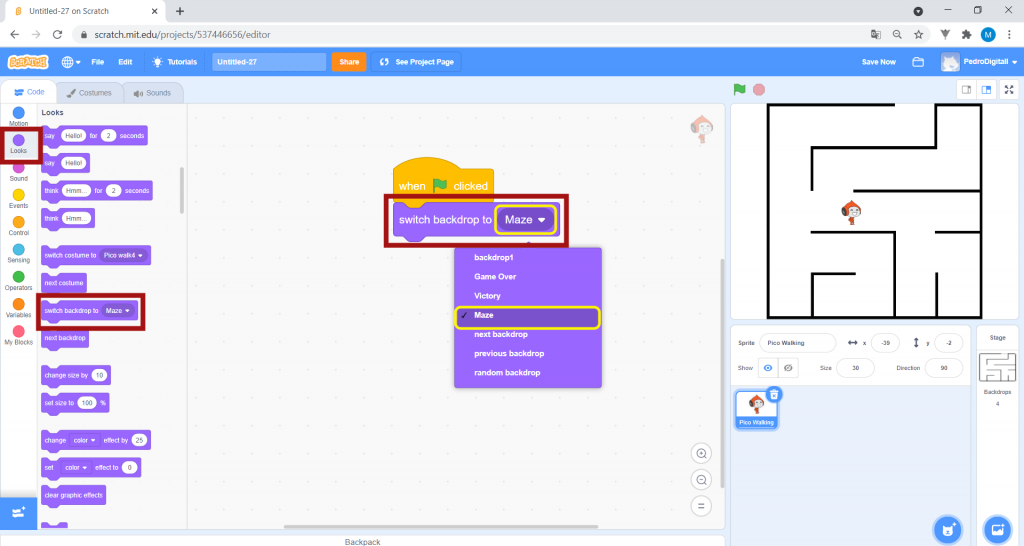
12. In Looks, drag the switch backdrop to “_” block to the scripts area, putting it inside the previous block. If the backdrop appearing as selected in this block is not the maze, as shown in the image, click on the arrow of that block and select the option Maze.
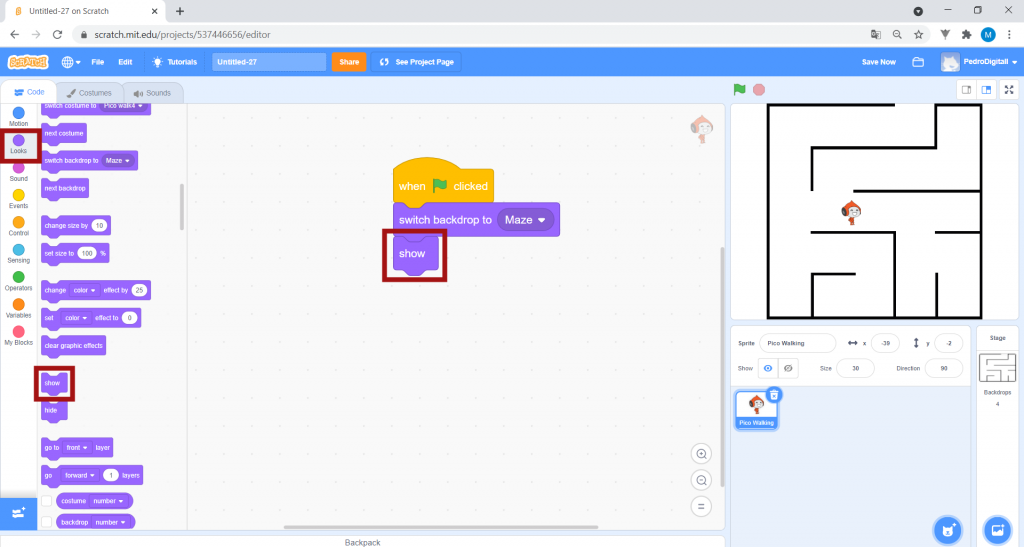
Then drag one show block, joining it to the previous blocks. If you need to delete a block, simply drag it back to the blocks area.

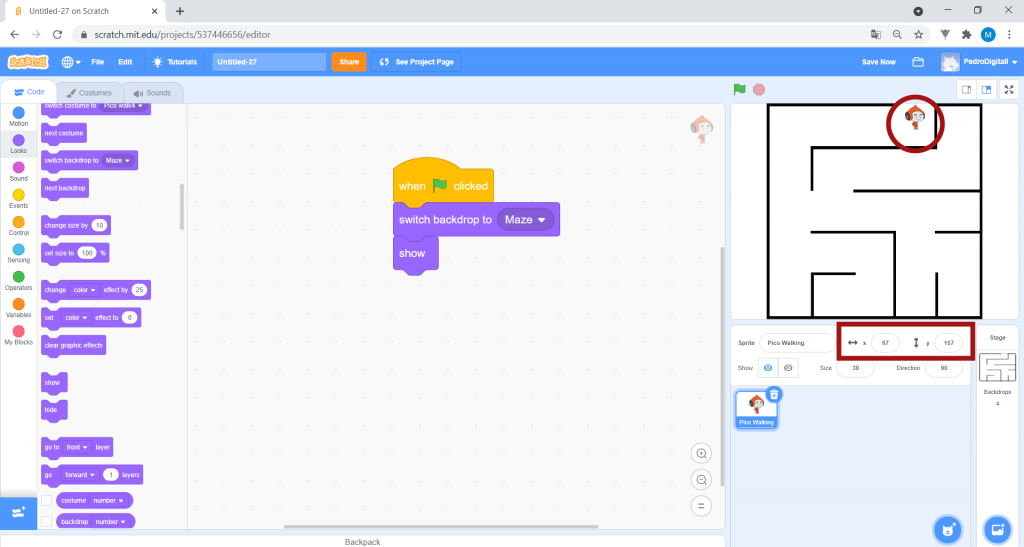
13. Drag Pico to the starting position of the maze. Below the picture of the maze will be two numbers, one to the right of the x and one to the right of the y. These numbers are the coordinates indicating where Pico is located.
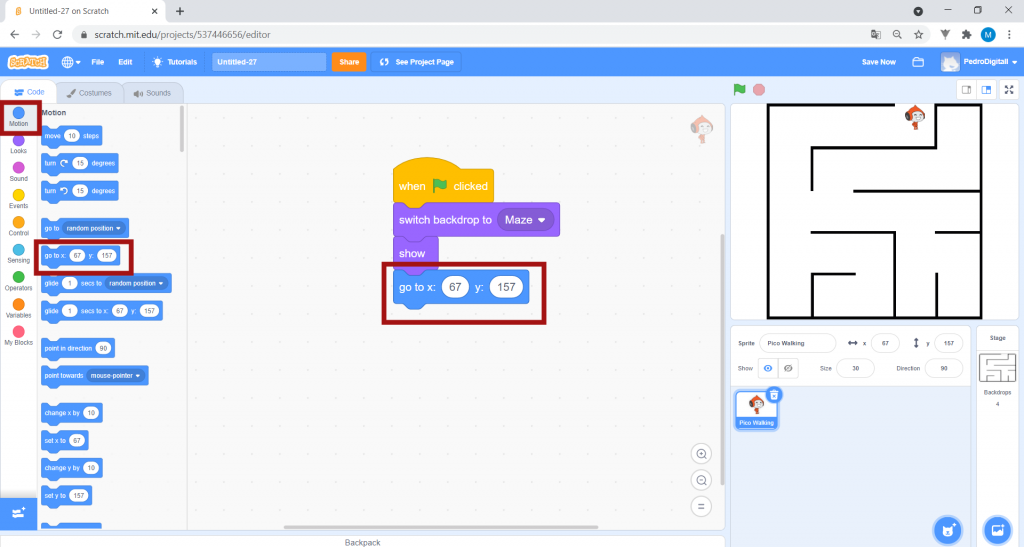
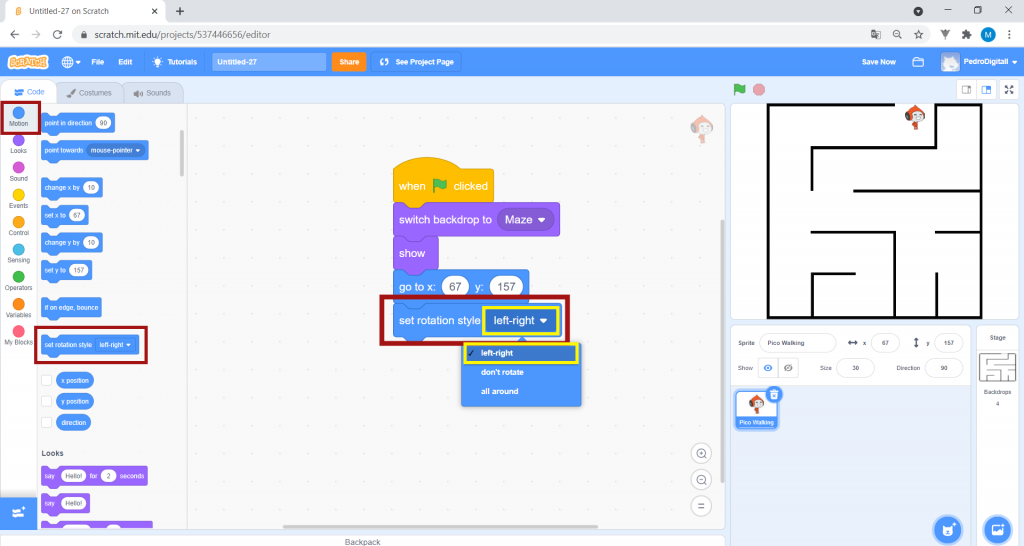
In the blocks area, click on Motion, and drag the block Go to x: “_” y: “_” down below the remaining blocks. The coordinates shown in the block are Pico’s coordinates at the time you dragged the block.
Drag the set rotation style to “_” block to the scripts area. Click on the arrow in this block and select the option left-right.

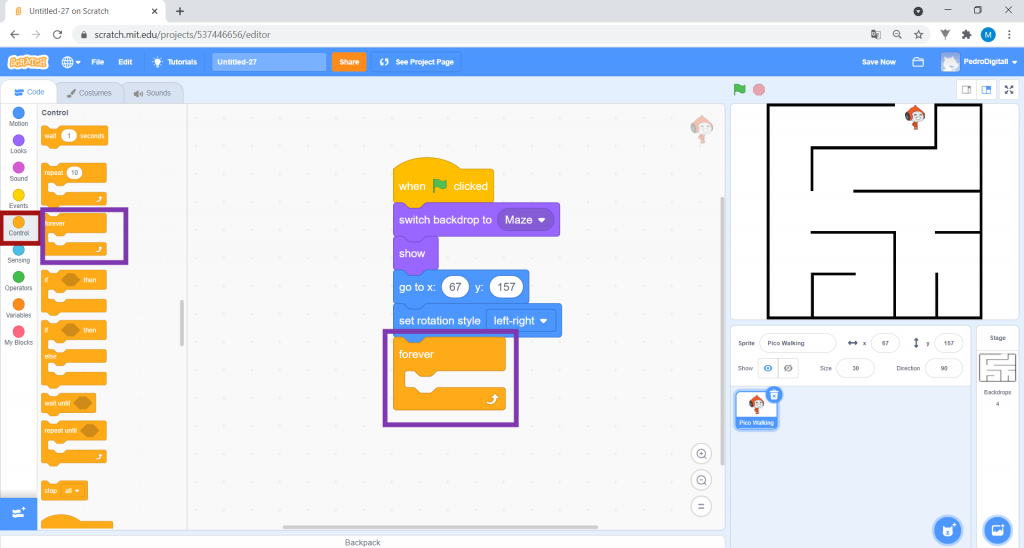
14. In Control, drag the forever block and insert it, as shown in the image:
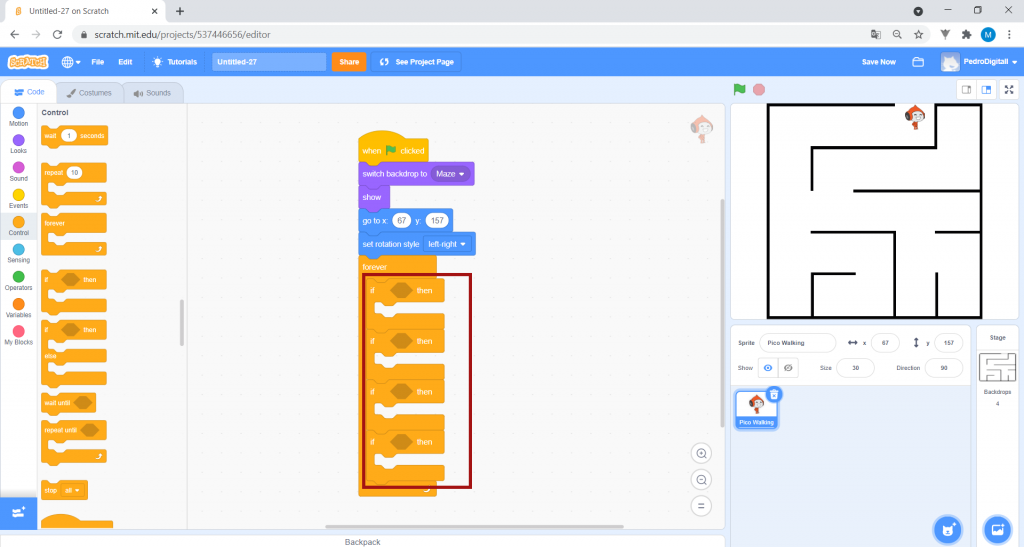
Drag four if _ then blocks into the previous block, as shown in the image.

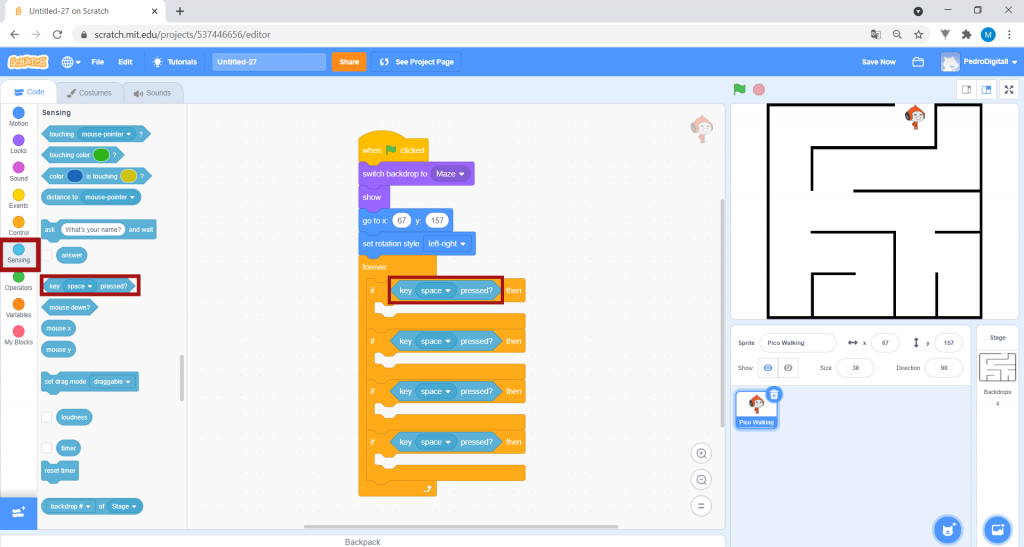
15. In Sensing, drag one key “_” pressed? block into each of the if _ then block slots.
In the first key “_” pressed? block, click on the arrow and select the up arrow option. In the second block, select the down arrow option. In the third, choose the right arrow option, and in the last one select left arrow. See the image:

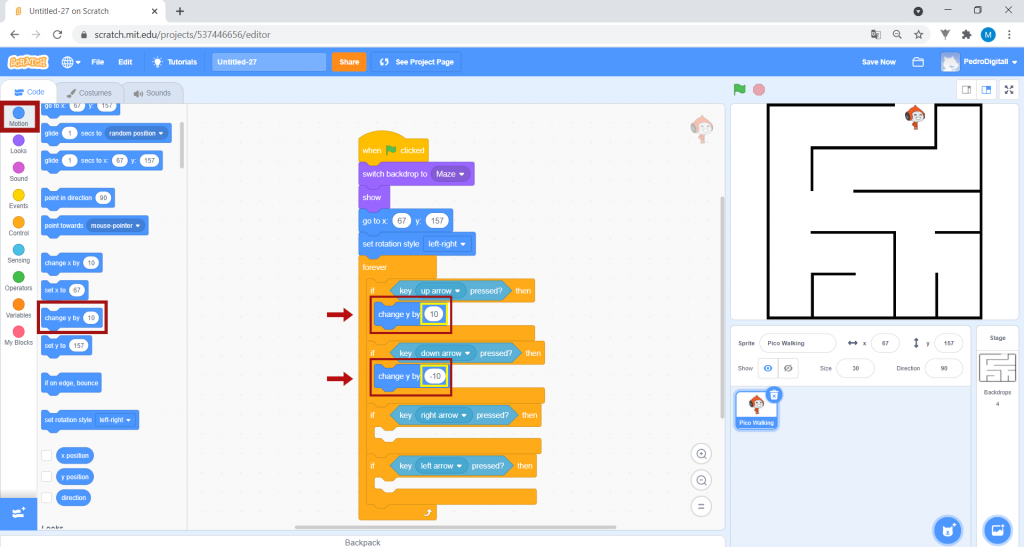
16. In Motion, drag two change y by “_” blocks, one for each of the first two if _ then blocks. Change the values appearing in these blocks to “10” and “-10”, as shown in the image. Pay attention to negative values!
Then drag two change x by “_” blocks, one into each of the last two if _ then blocks. Once again, change the values appearing in these blocks to “10” and “-10”, as shown in the image. Pay attention to negative values!
Also in Motion, drag two point in direction “_” blocks to the scripts area, placing them underneath the change x by “_” blocks and changing the values appearing in these blocks to “90” and “-90”, as shown in the image.

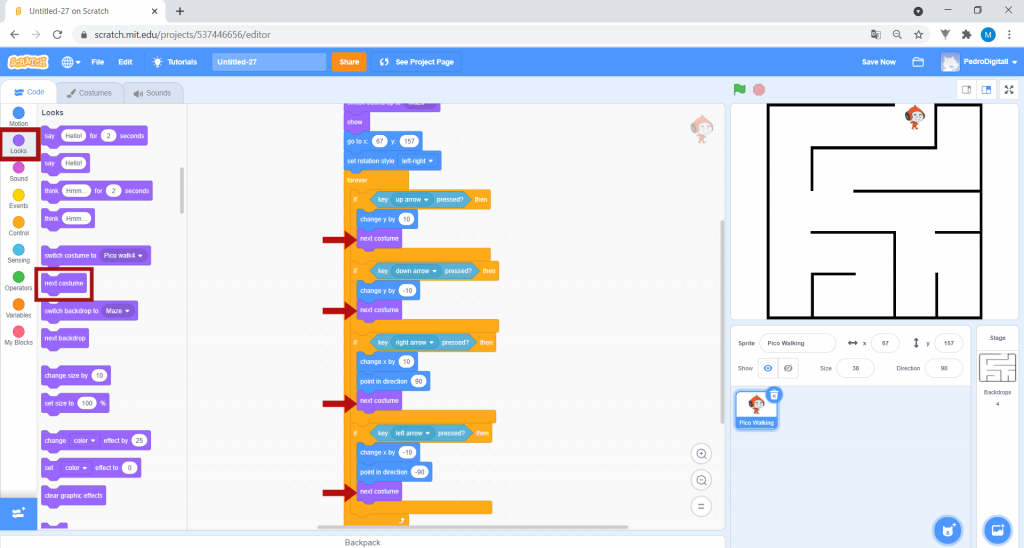
17. In Looks, drag four next costume blocks, each one into one of the four if _ then blocks, as shown in the image:

18. What you have programmed so far allows Pico to start the game in your chosen starting position (beginning of the maze) and move according to your instructions. Try moving him with the arrow keys.

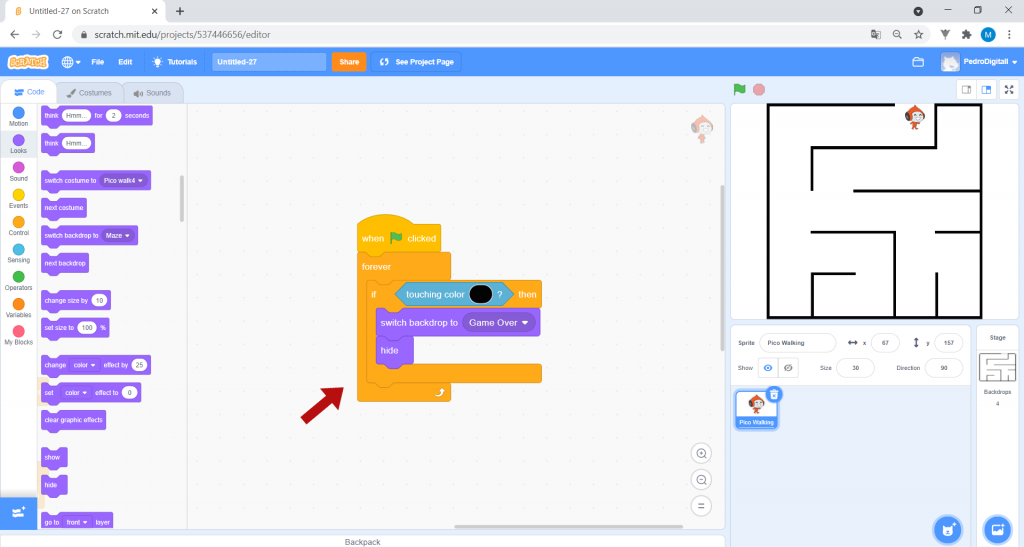
19. Now that you know where the blocks are and how you can add and change them, assemble this set of blocks underneath the previous set:
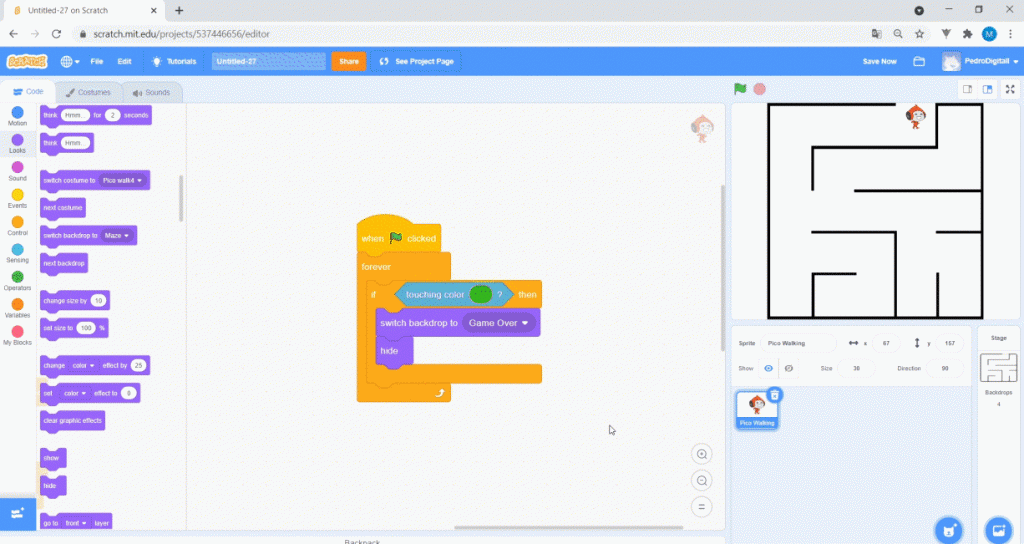
Click on the colour inside the touching the color_ block, and select the pipette. Then click on one of the maze’s black lines to change the colour in the block to black.
Now, whenever Pico touches a black line, the program indicates that you have lost, showing the “Game Over” backdrop.

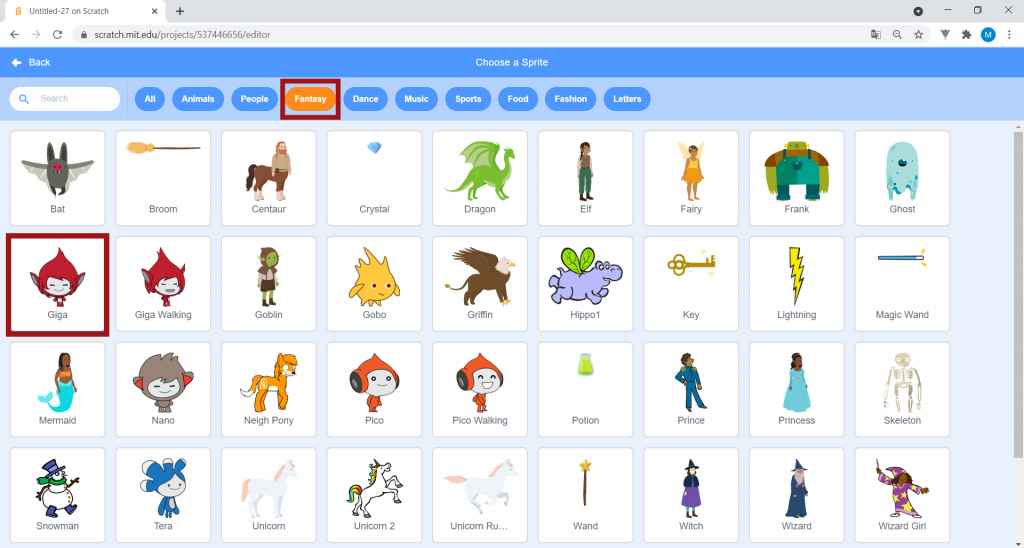
20. Now you’re going to add another sprite to the game. Click on Choose a Sprite, and under Fantasy, select Giga.
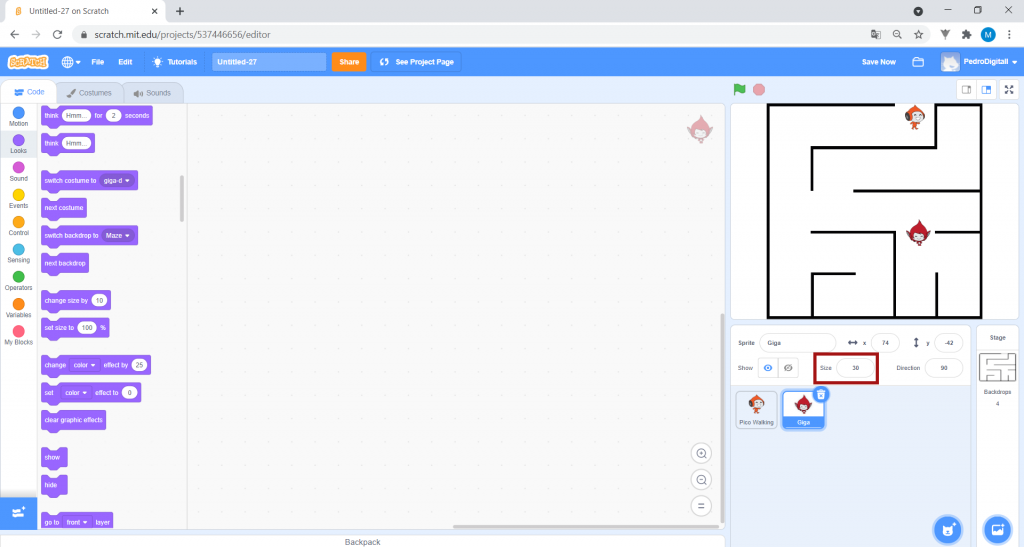
Change the size of Giga. In the Sprites area, type “30” in the text box next to Size.

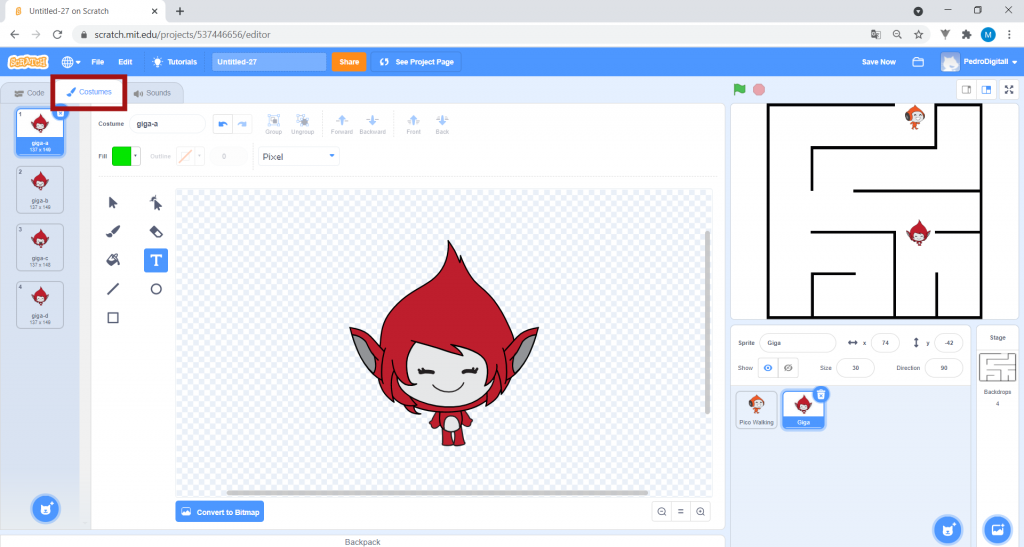
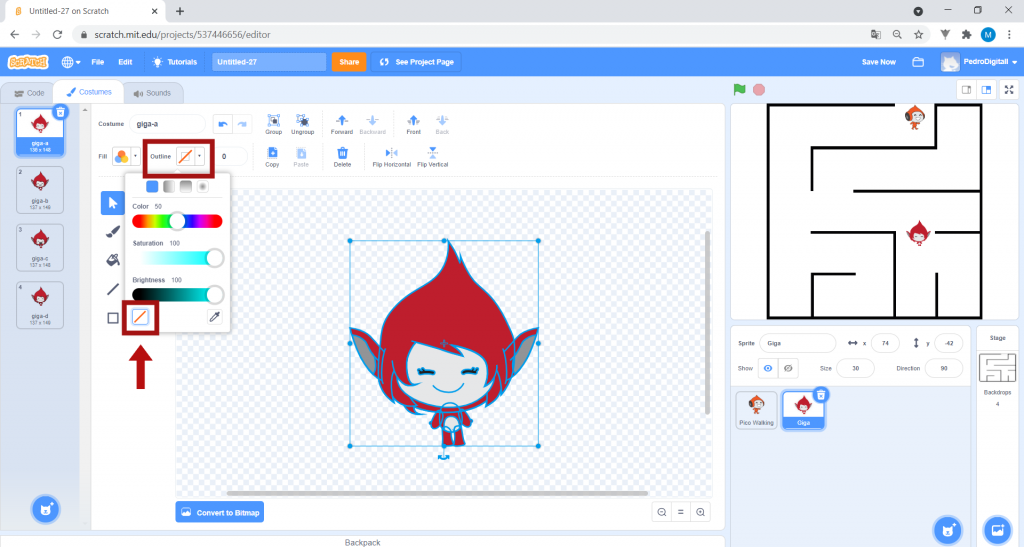
21. You need to change Giga’s appearance. In the top left corner, click on Costumes.
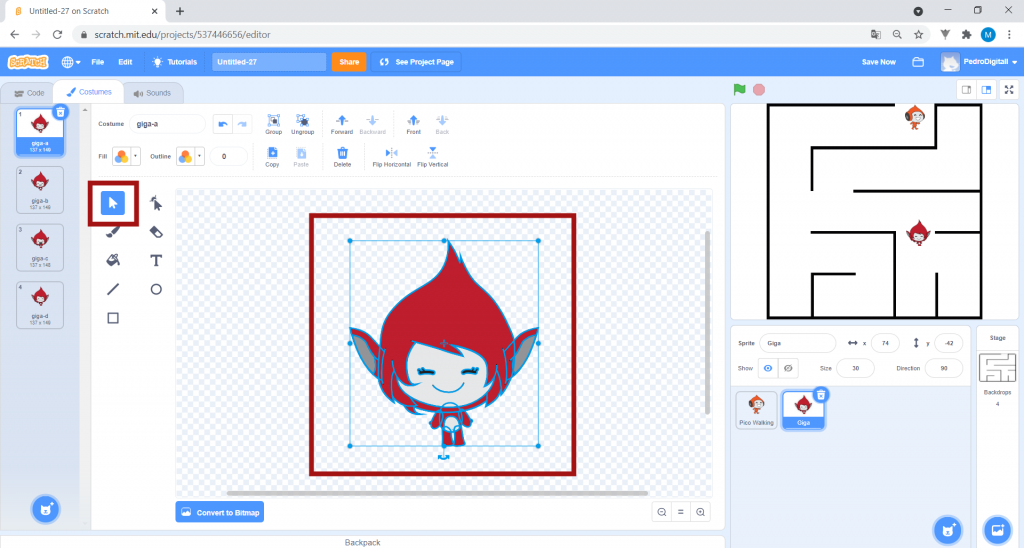
Click the Select button. Click on a point away from Giga, hold down the left mouse button and drag it to select all of Giga.
Click on the arrow to the right of Outline, and select the little red line at the bottom to remove any outline.
Any outlines must be removed from Giga, since it is black, and the game is programmed so that the player loses whenever Pico touches a black line.

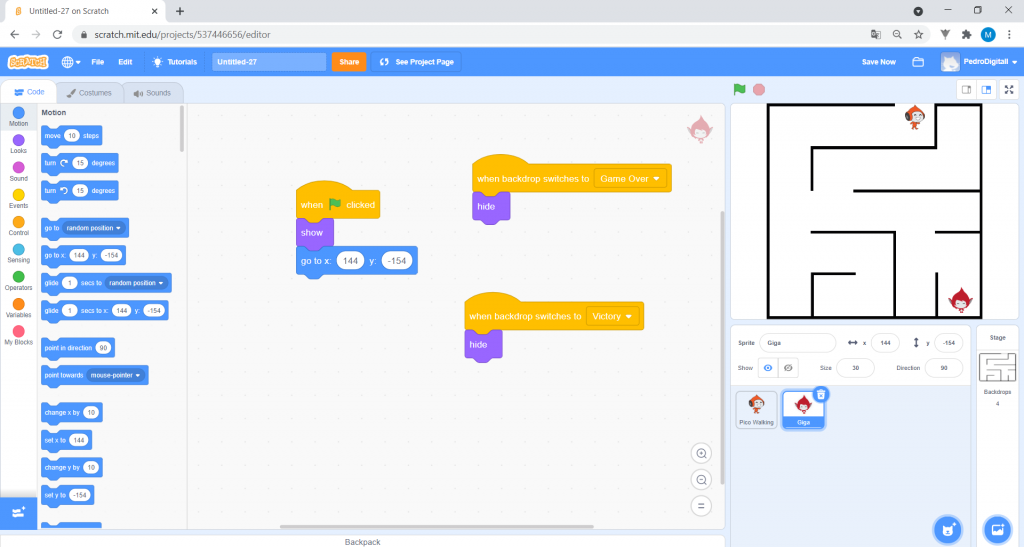
22. Next, click on Code and program Giga by selecting the following set of blocks:

23. Click on the image of Pico in the Sprites’ area.

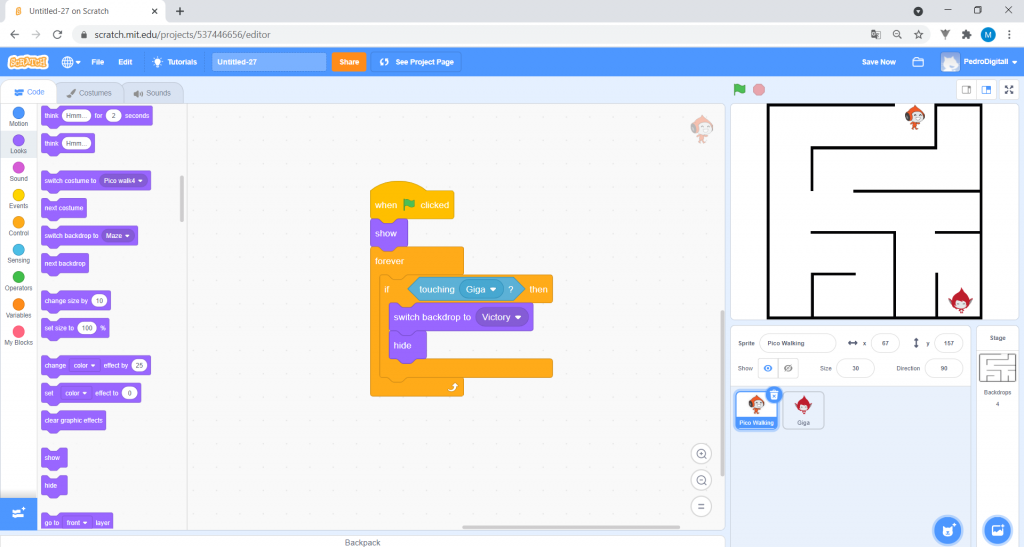
24. Build this last set of blocks:
In this way, when Pico touches Giga, the victory screen appears. You have won!

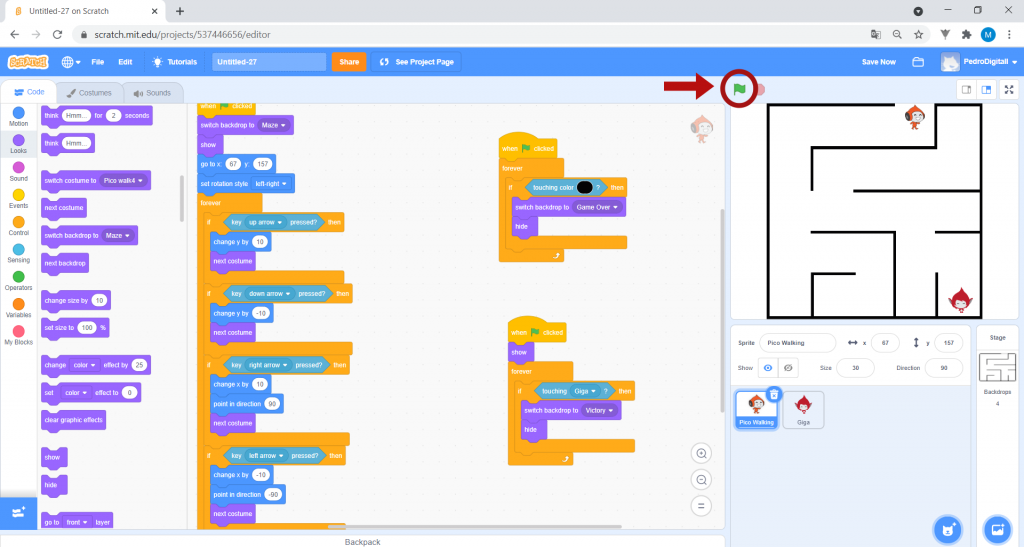
25. The code is finished! Click on the green flag and start playing!

26. You have reached the end of the activity. Keep trying Scratch, explore everything it has to offer and have fun!
