Activity
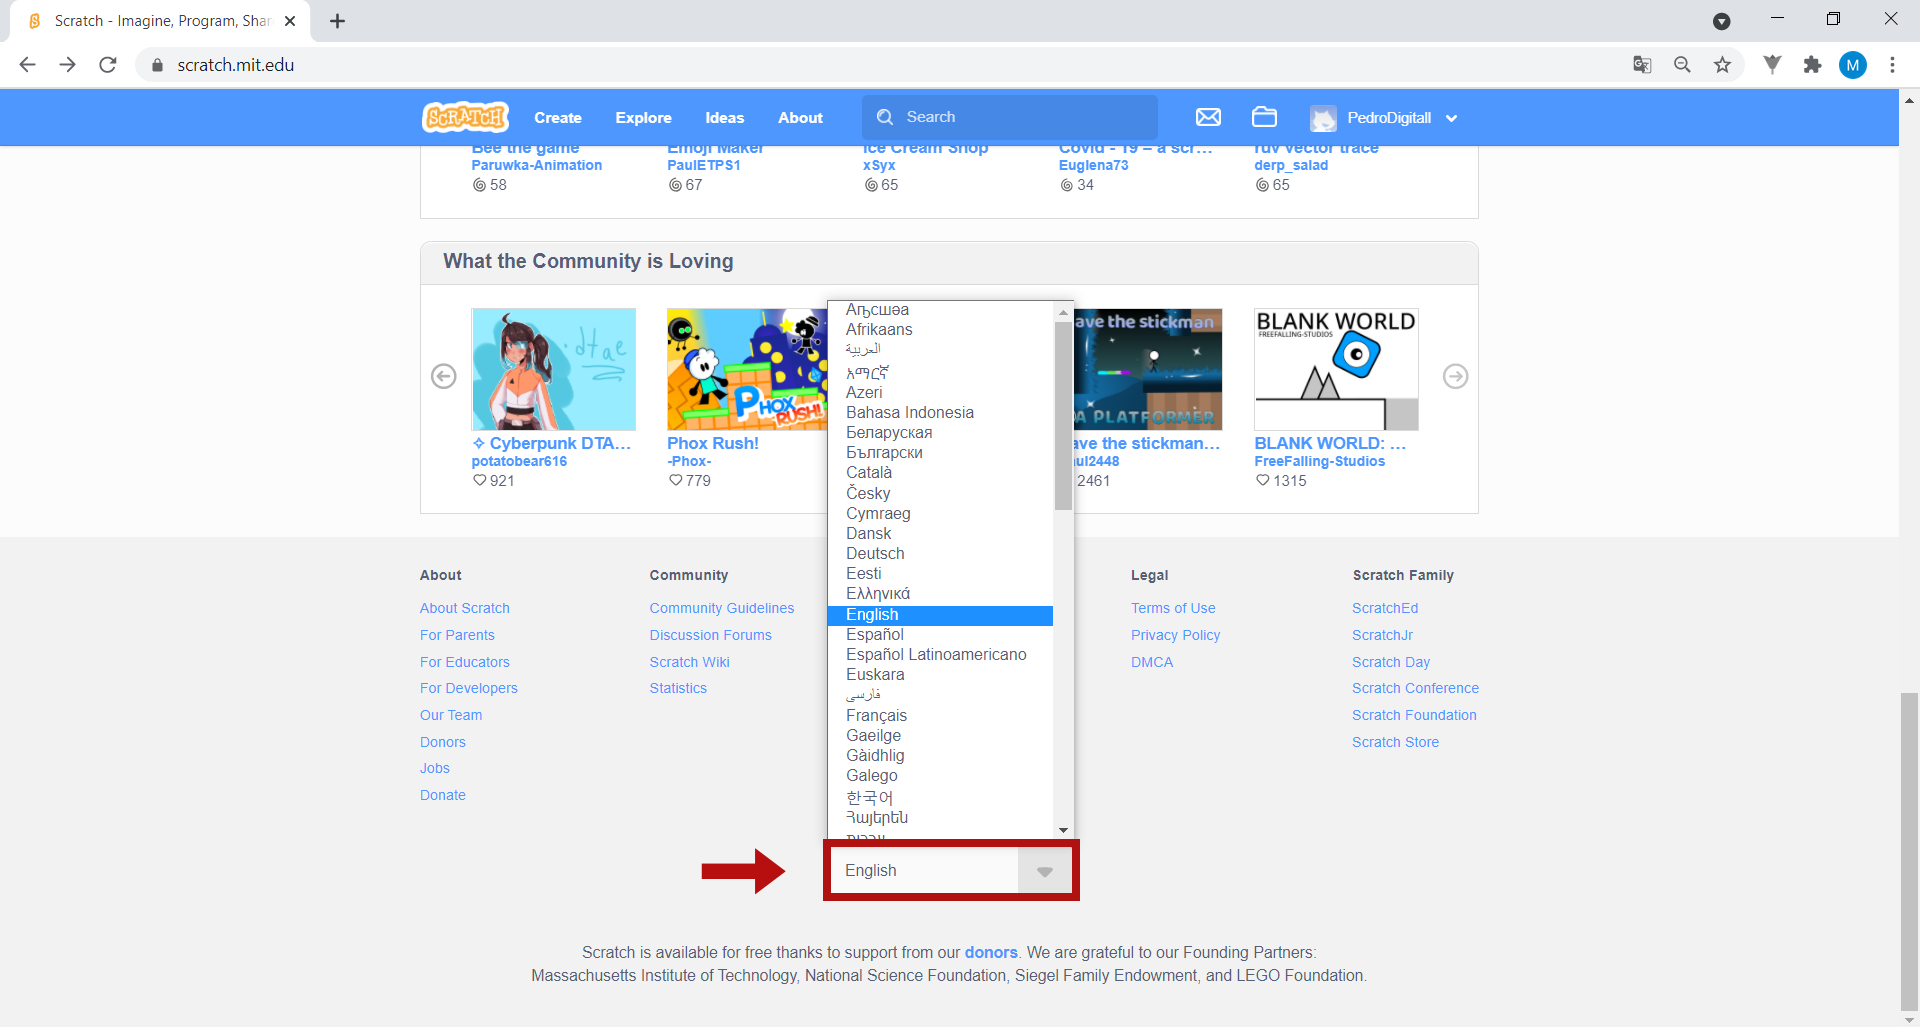
1. To start the activity, go to the Scratch page: https://scratch.mit.edu/ . If Scratch is not in your language, you can change it at the bottom of the home page.
SIDE NOTE: You may click the images to amplify.

2. If you still don’t have a Scratch account, click on Join Scratch and ask an adult to help you fill in the requested fields in order to complete your registration.
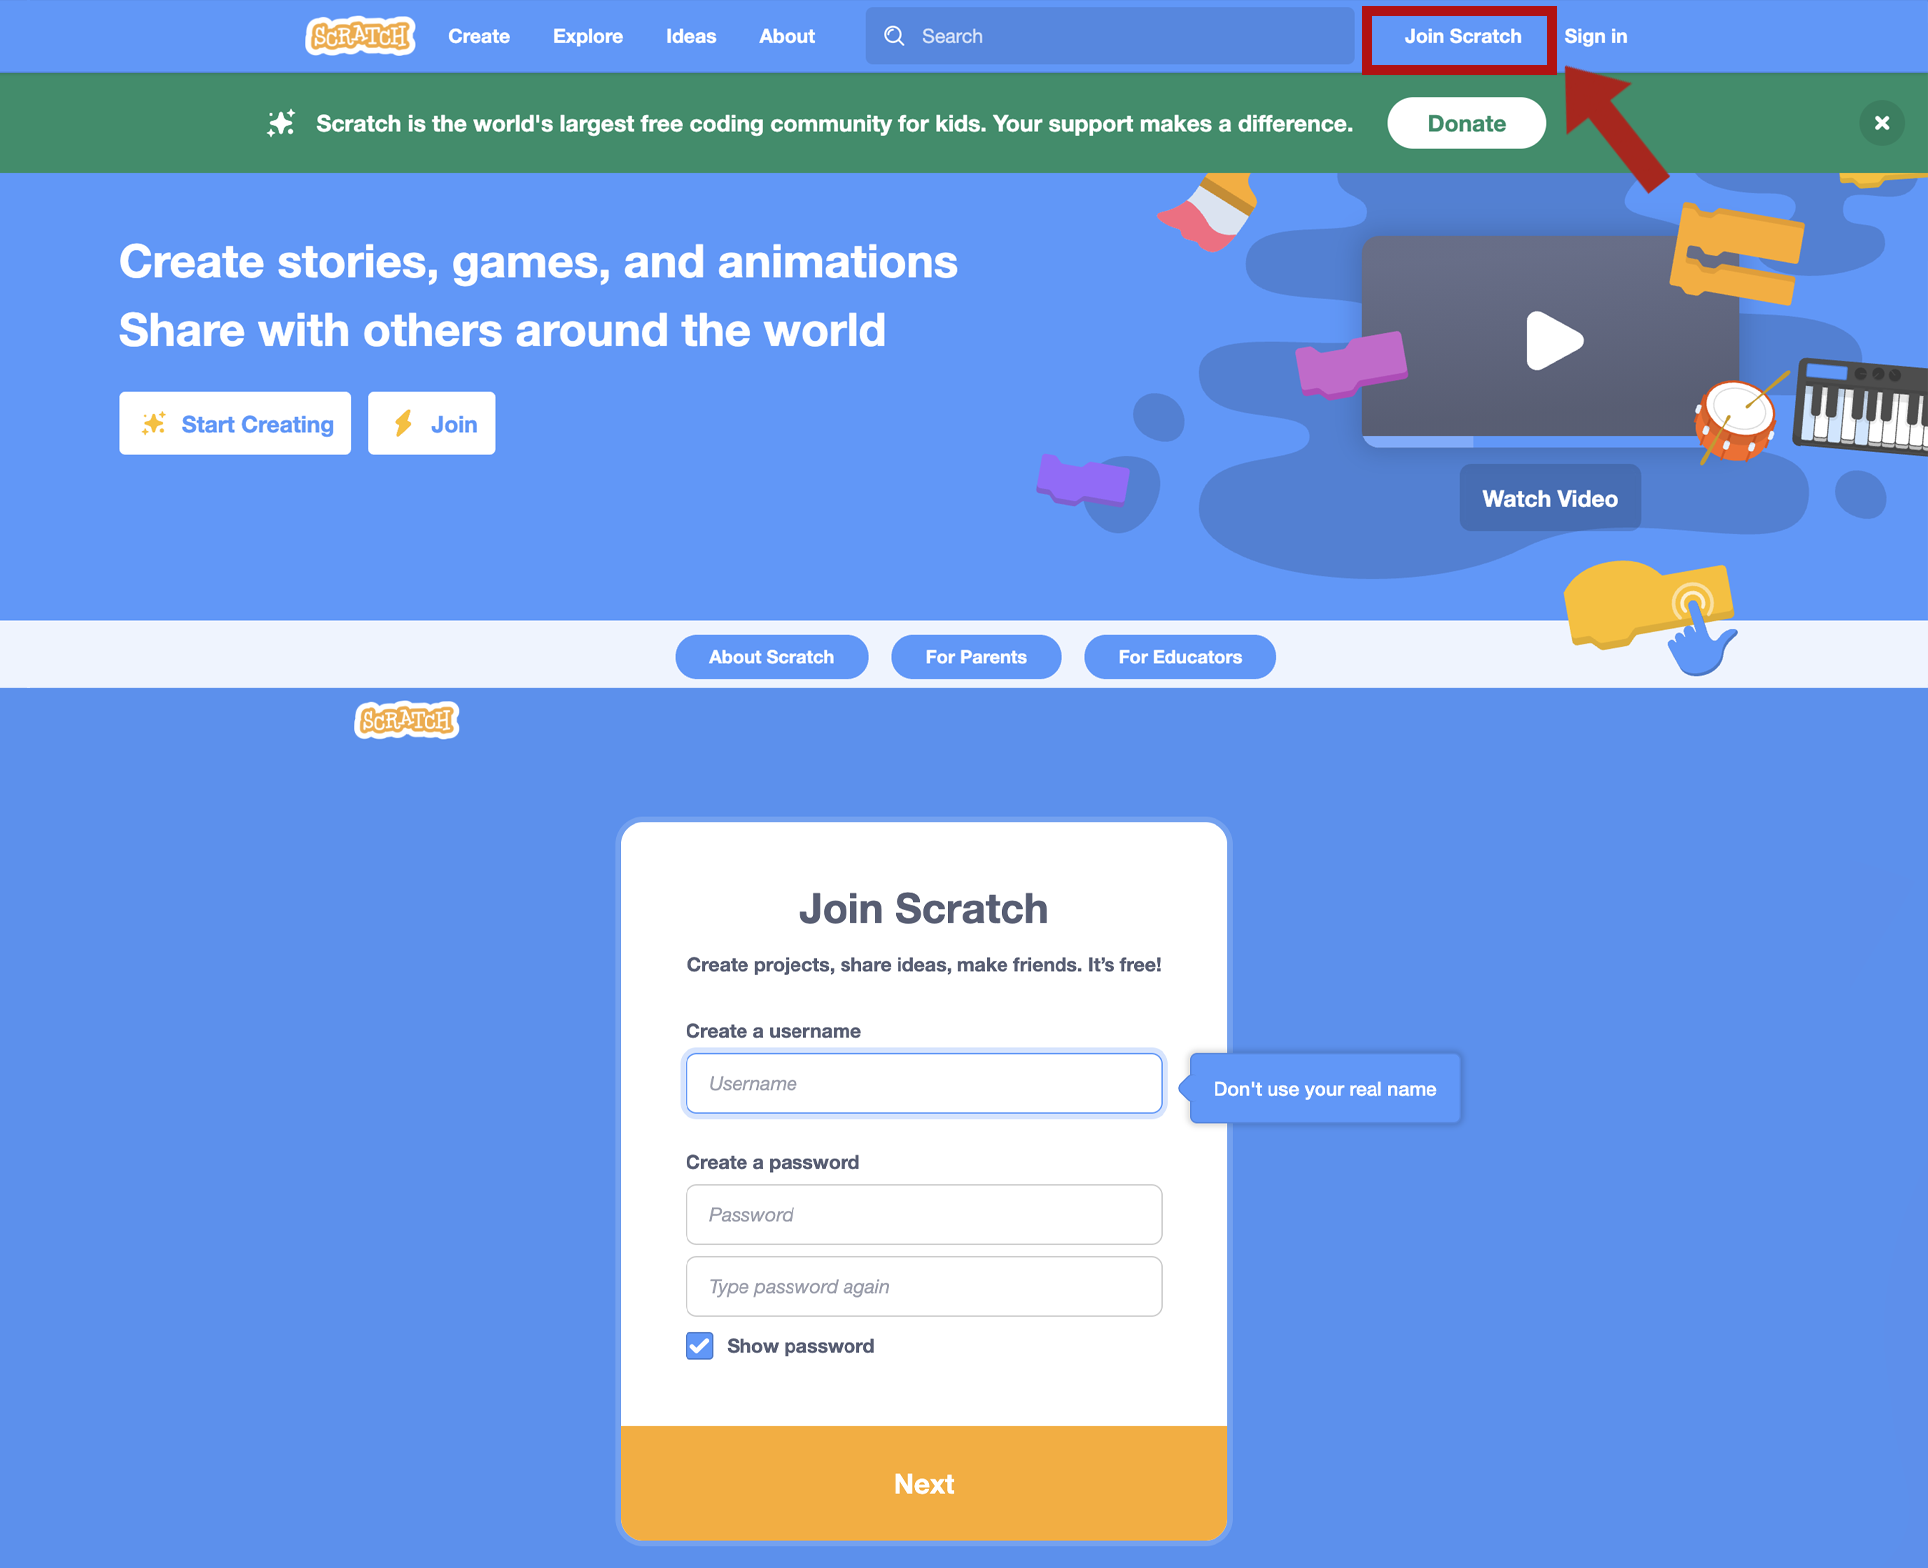
For security reasons, and to protect your privacy, we recommend the following:
– avoid using your full name as your username;
– use a password with a wide range of characters (uppercase, numbers and symbols), and never personal data such as your date of birth.
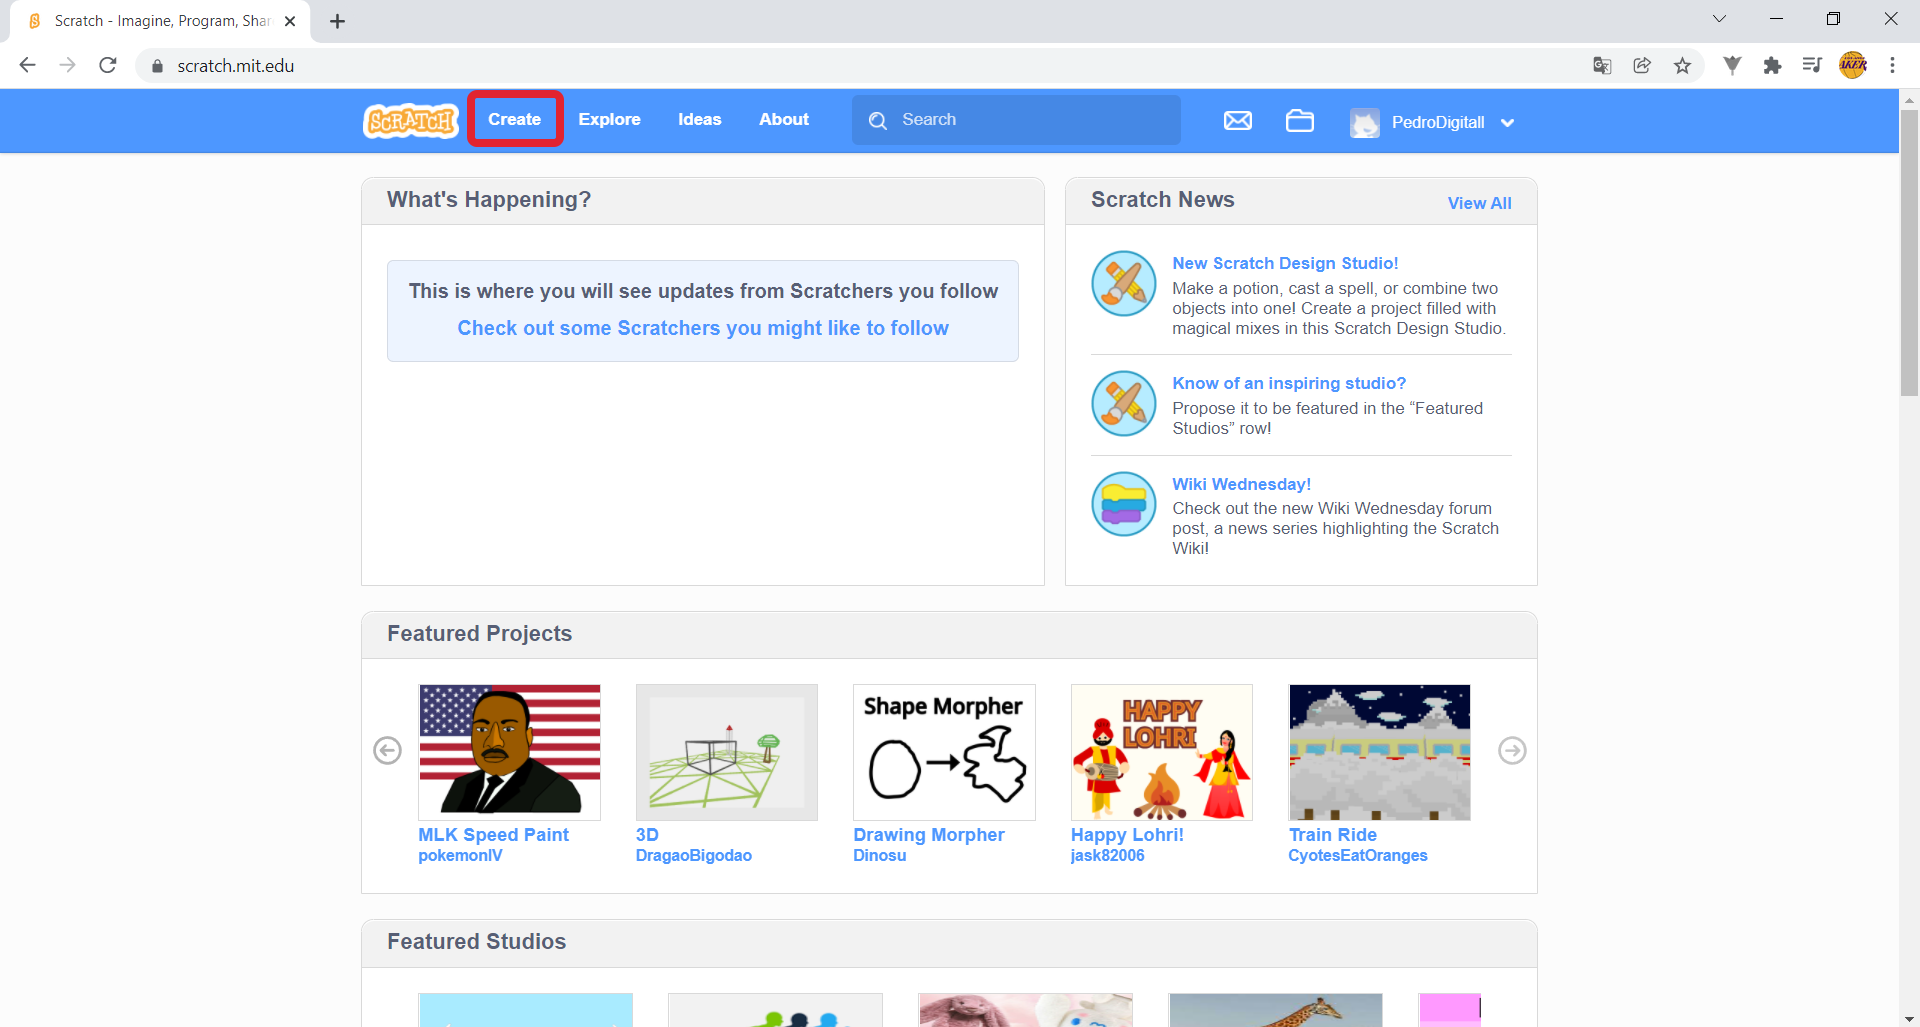
3. After you log in to your account, click on Create to start creating a new project.
Before we start the activity, it is important to know what programming is. Programming consists of giving instructions to a computer in a simple, direct way.
In this activity, we will use Scratch, which is a block-based programming language because it works with… blocks. It is a very simple, easy to learn language.
This is the Scratch interface. Here, you will simulate your dice to use them when you want to play a board game, by dragging blocks from the Blocks area on the left to the Scripts area in the middle.
Our Sprite1: the cat will be the one to give us our results!
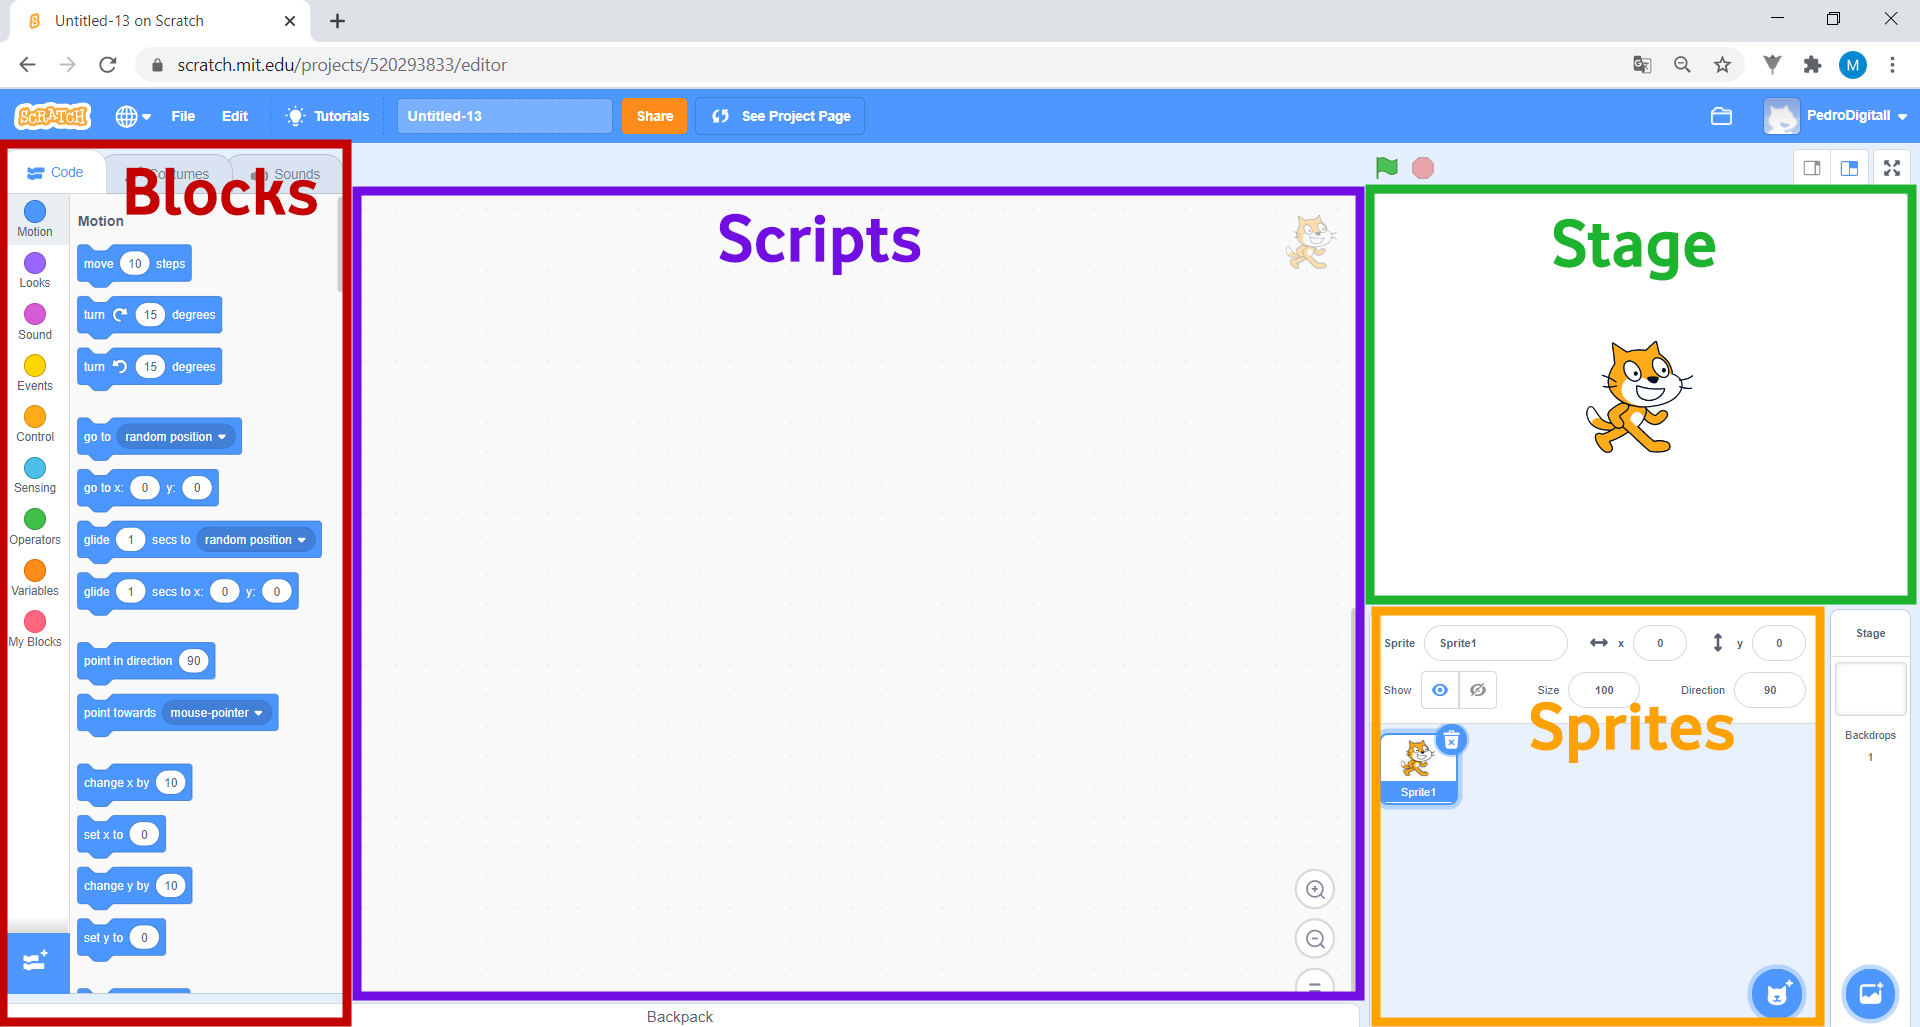
• The Stage is where you can see your project’s graphs and animations. This is where you will test your code, and where you can see your dice working.
• The Sprites area is where you can see, change, add or remove all of the images and characters appearing on the Stage.
• You can program in the Scripts area by dragging the blocks you need here, then assembling them.
• The Blocks area has all of the blocks you can use to build your code. If you look closely, there are various types of blocks, each responsible for a given function. You can distinguish between them by their different colours.
4. In this activity, you will program two dice. Each will give a value between 1 and 6. Then, these two values will be added together, and the Cat will tell you the result!
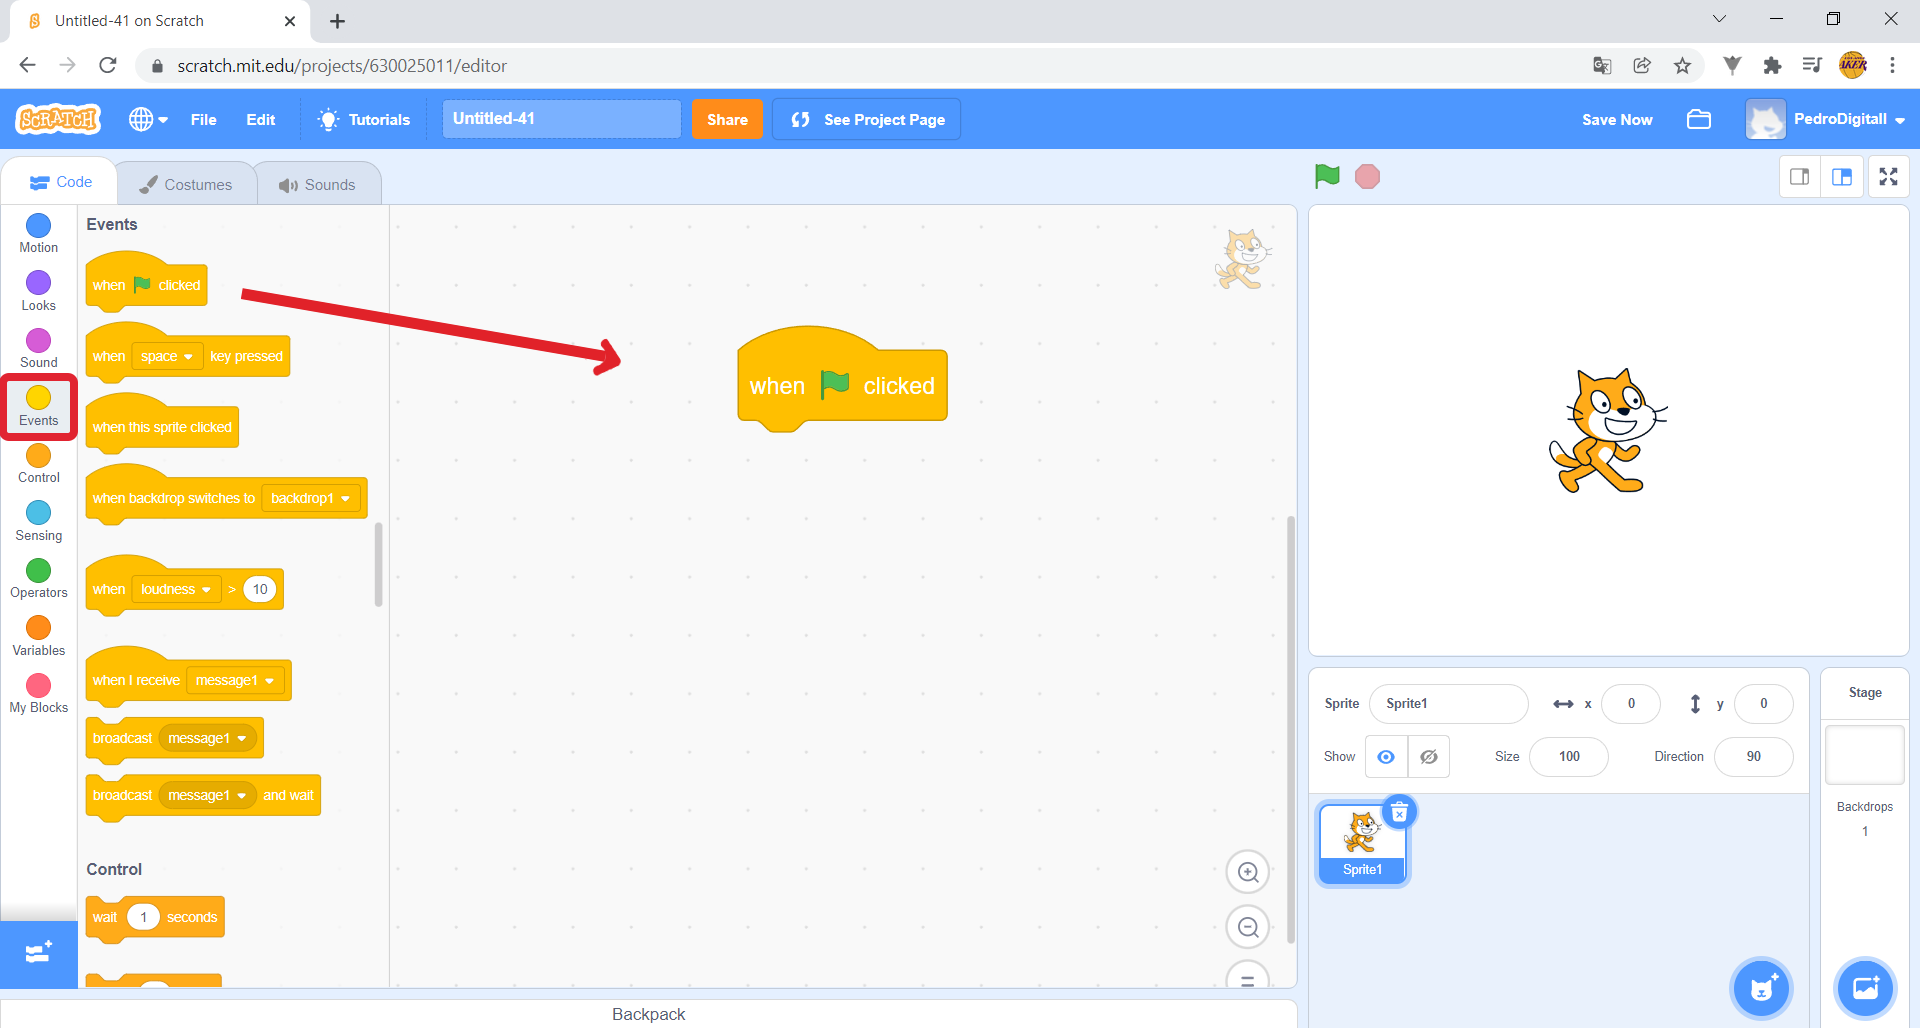
5. In the Blocks area, click Events and drag the block when green flag clicked to the Scripts area. This block allows you to roll the dice at the end of the activity when you click on the green flag above the Sprites area.
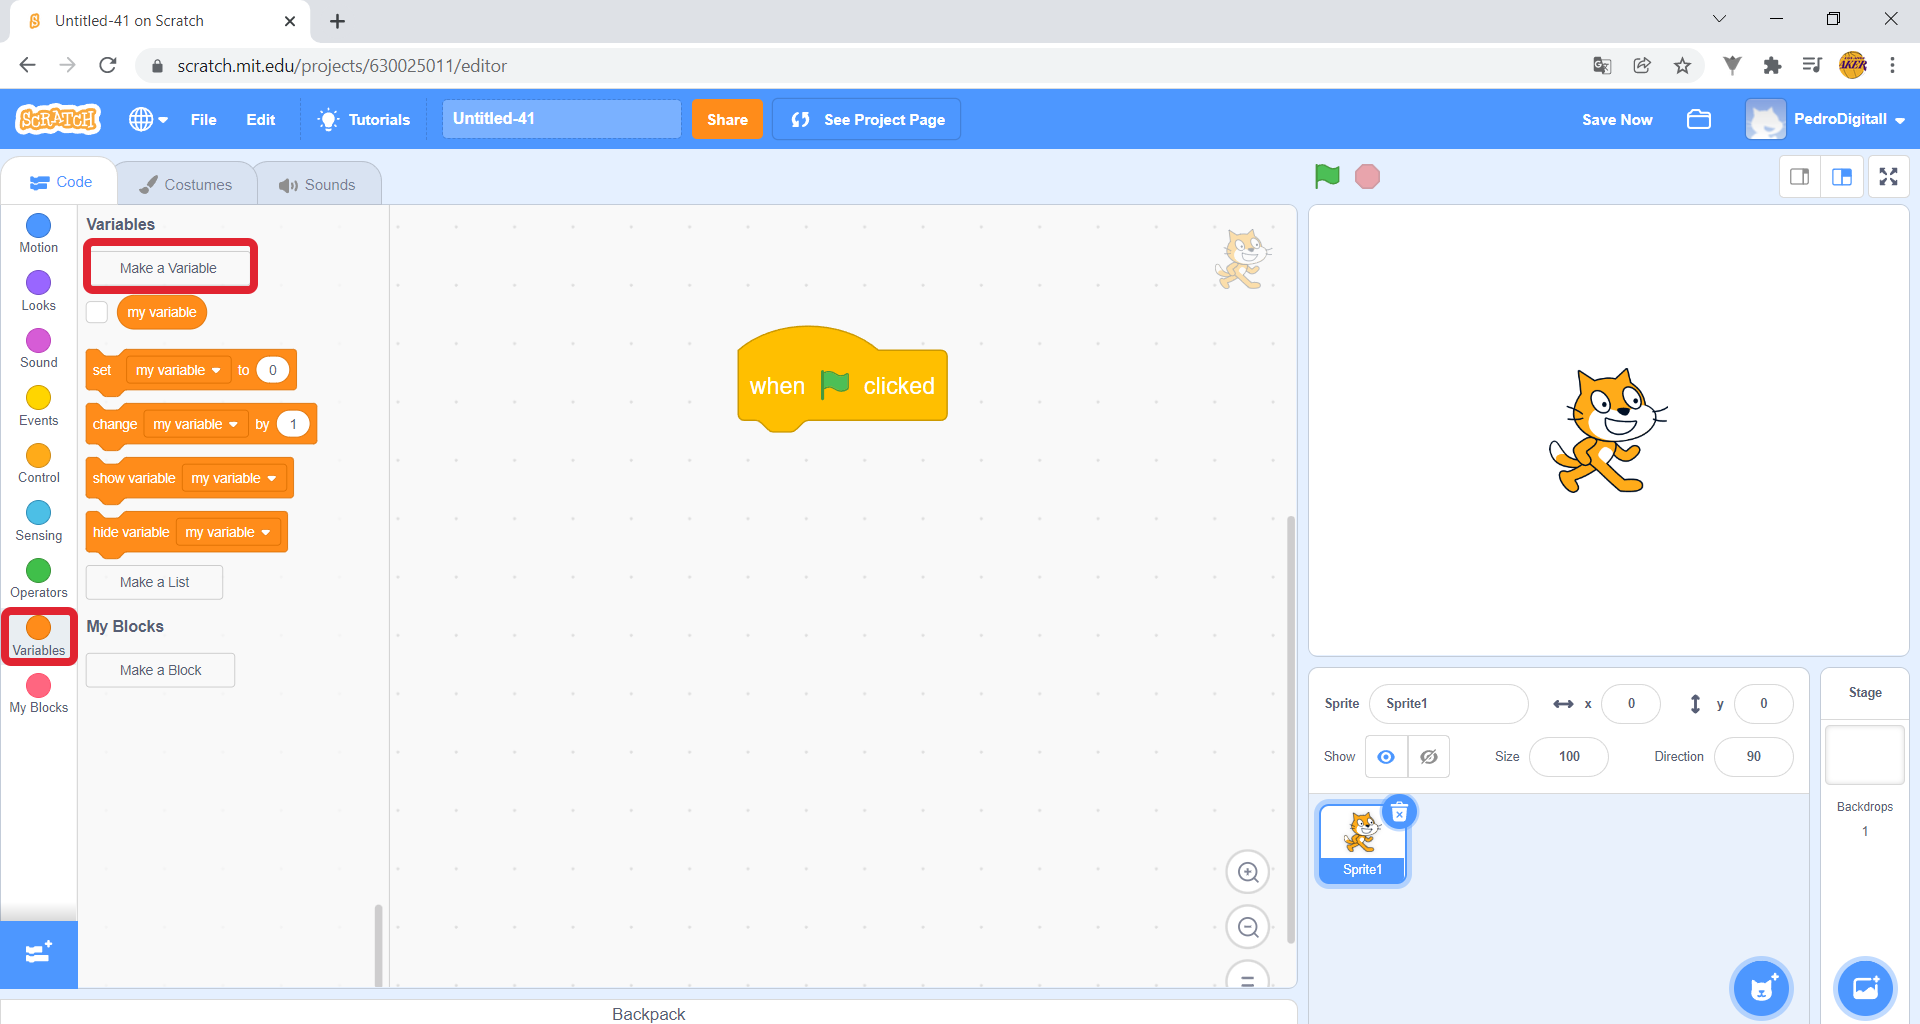
6. Next, you will create the first dice. On the left hand side, in the Blocks area, go to Variables and click on Make a Variable.
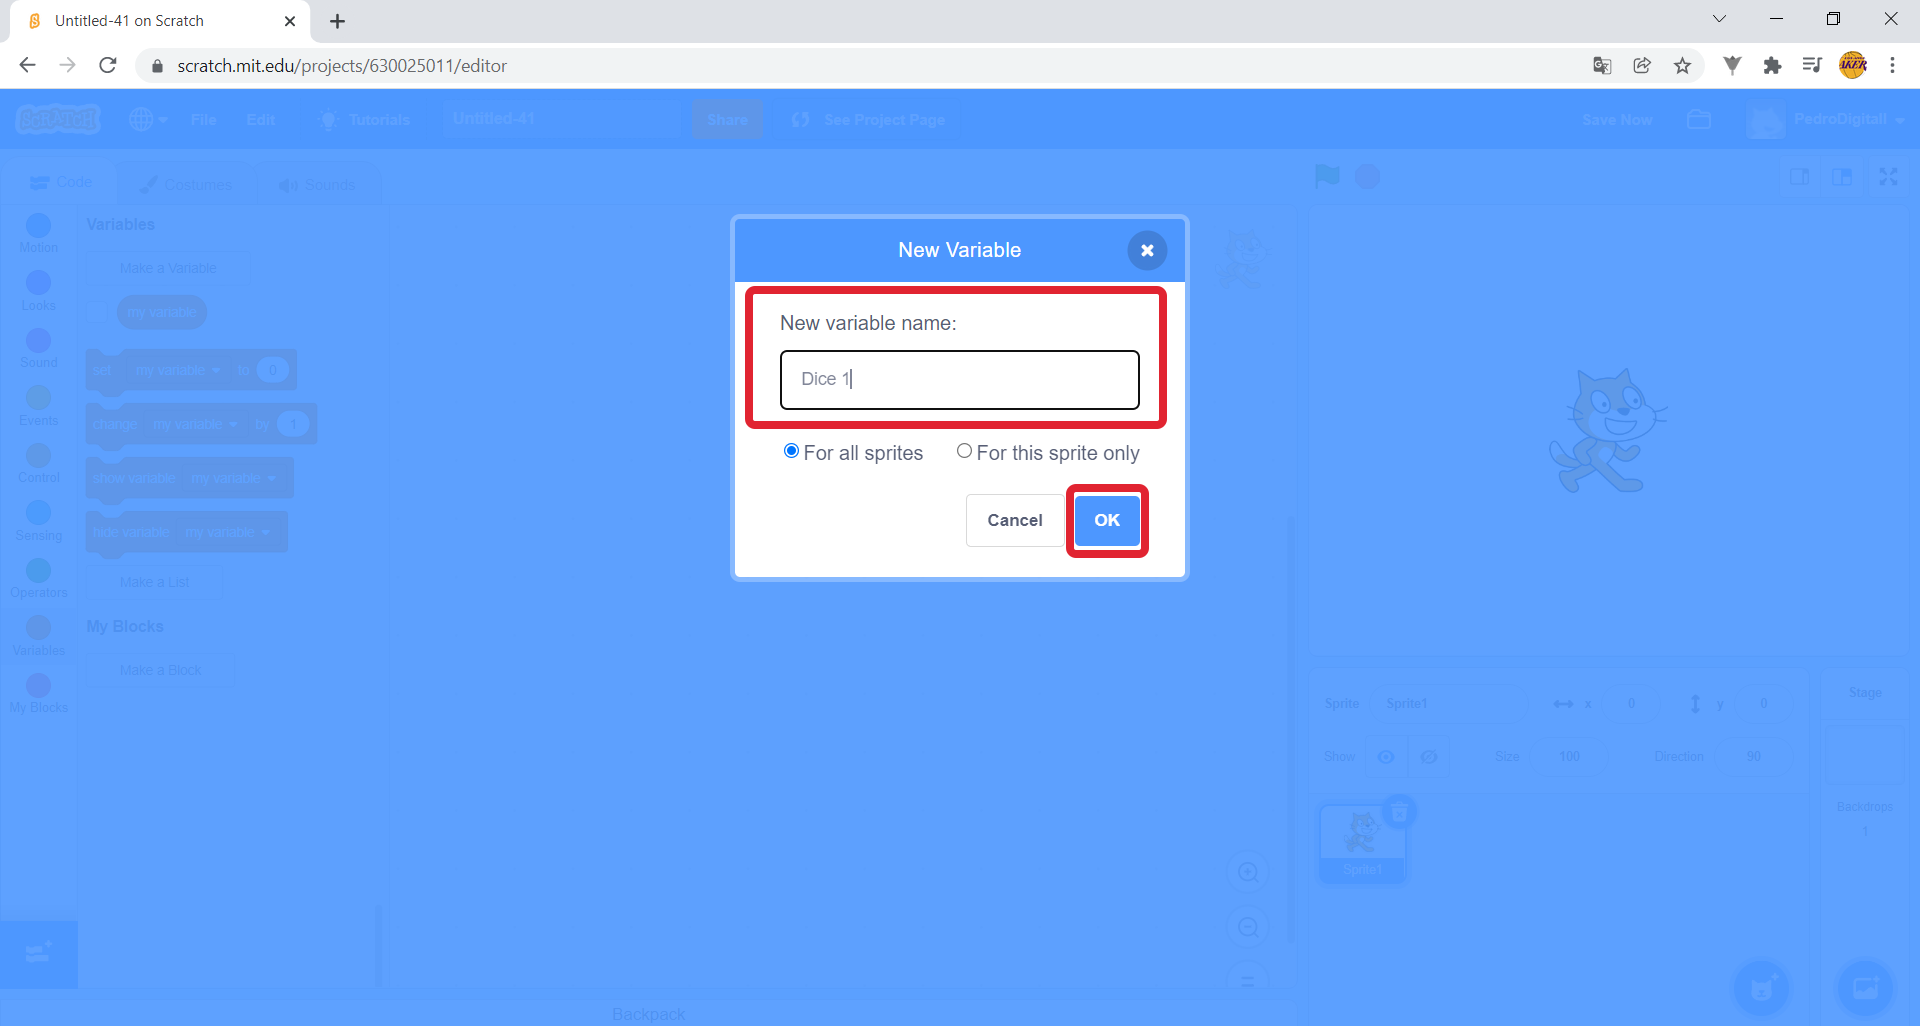
In New variable name, write “Dice 1” and click on OK. This variable has been saved so you can use it later.
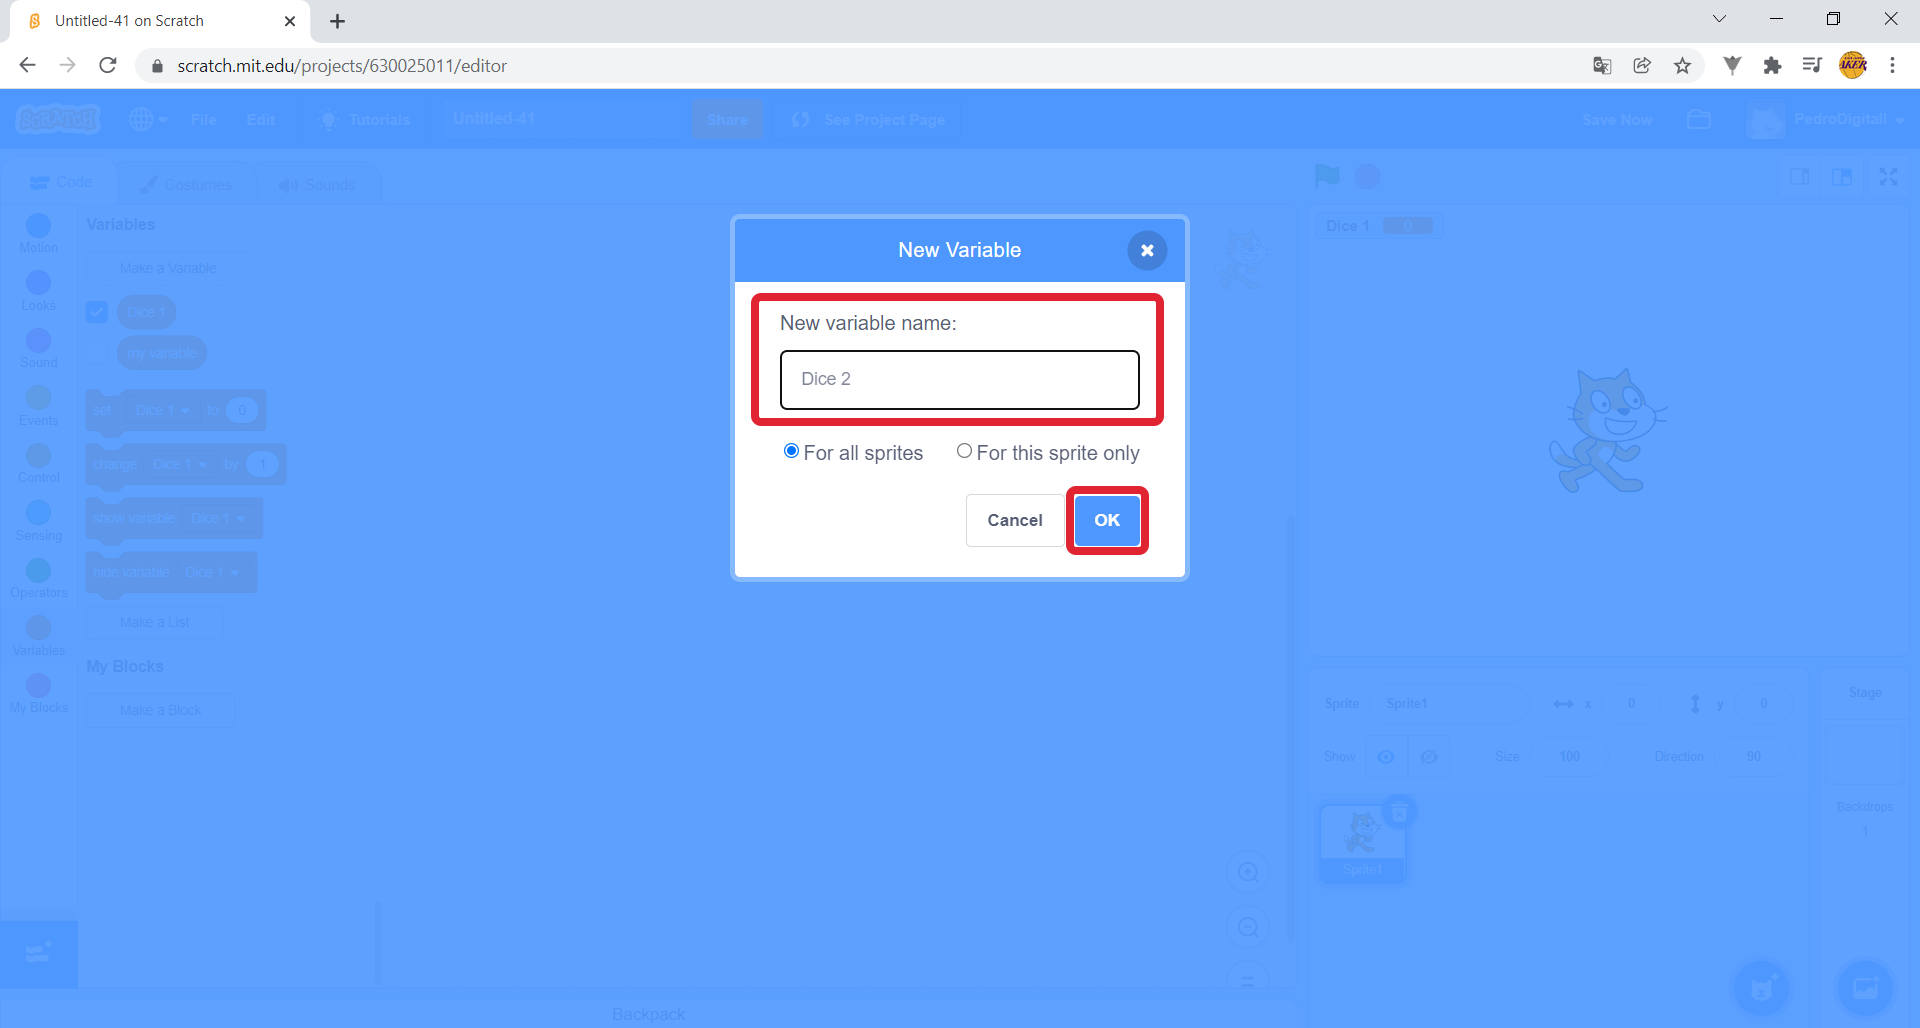
To create the second dice, in the Blocks area, go back to Variables and click on Make a Variable.

In New variable name, write “Dice 2” and click on OK. This variable has also been saved for you to use.
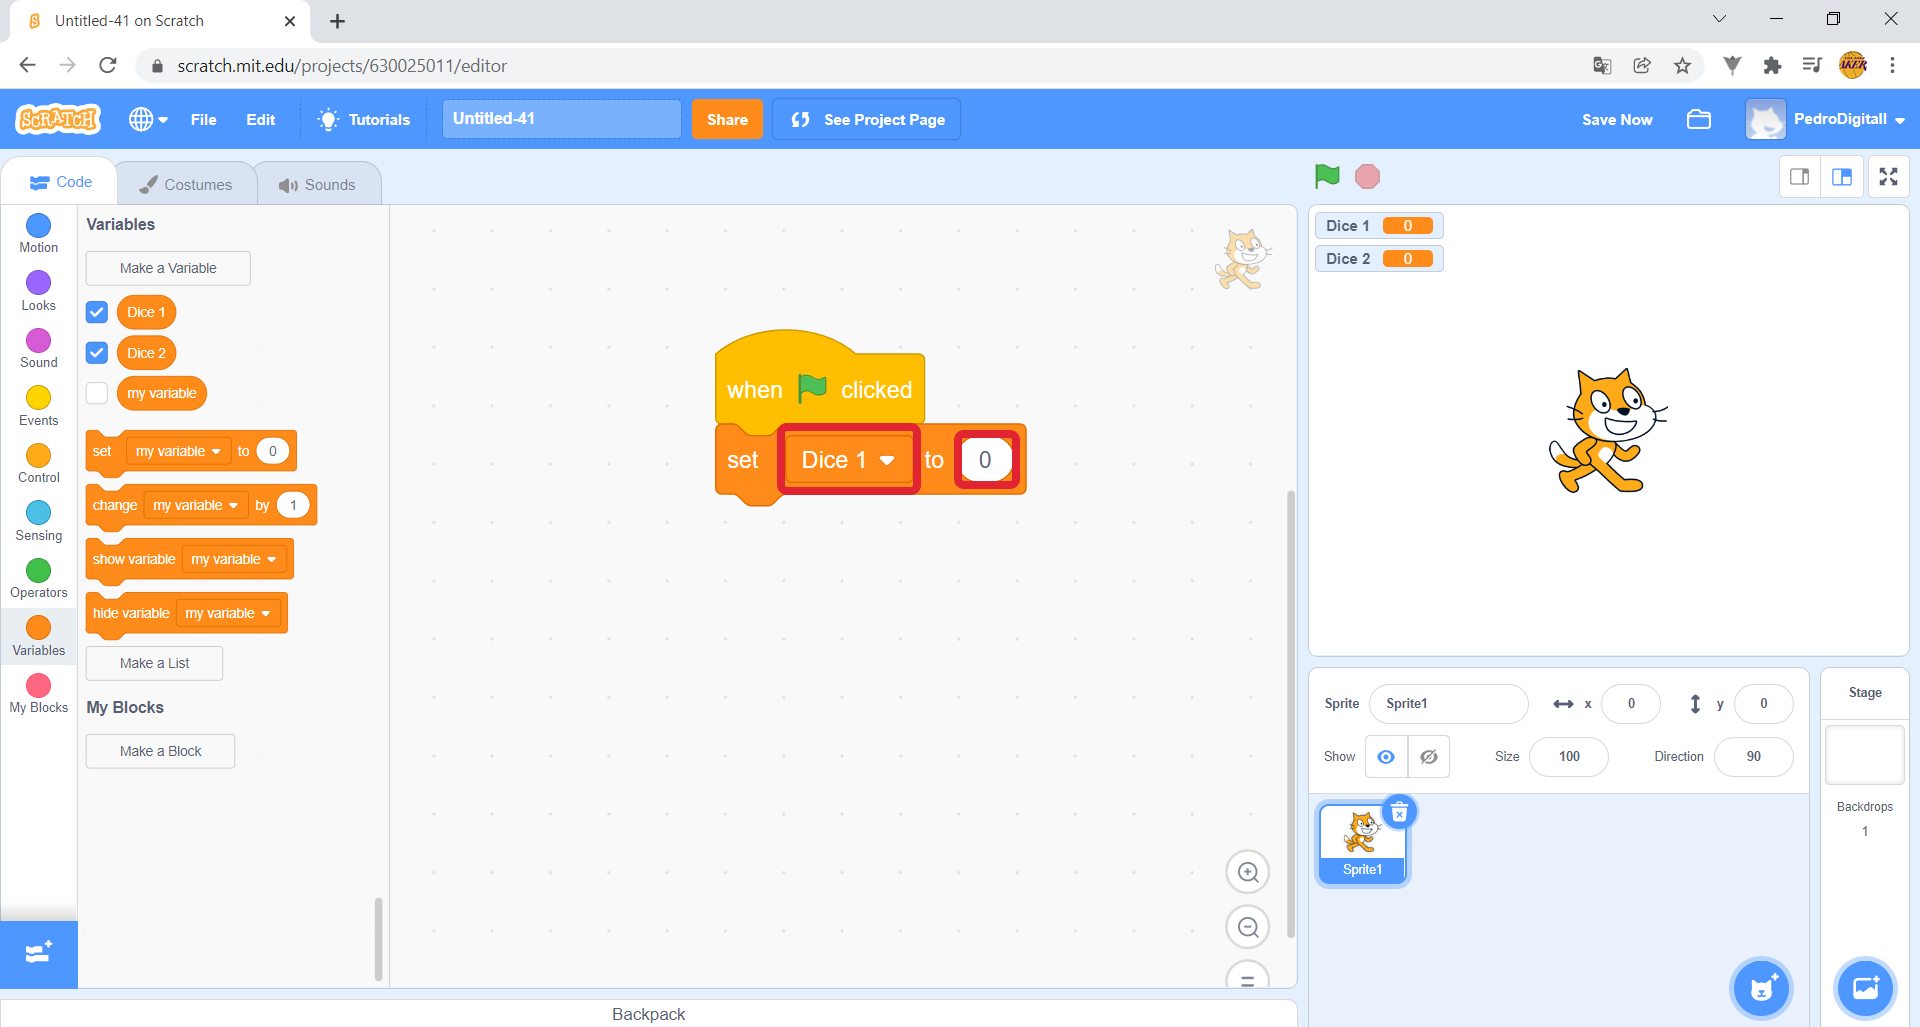
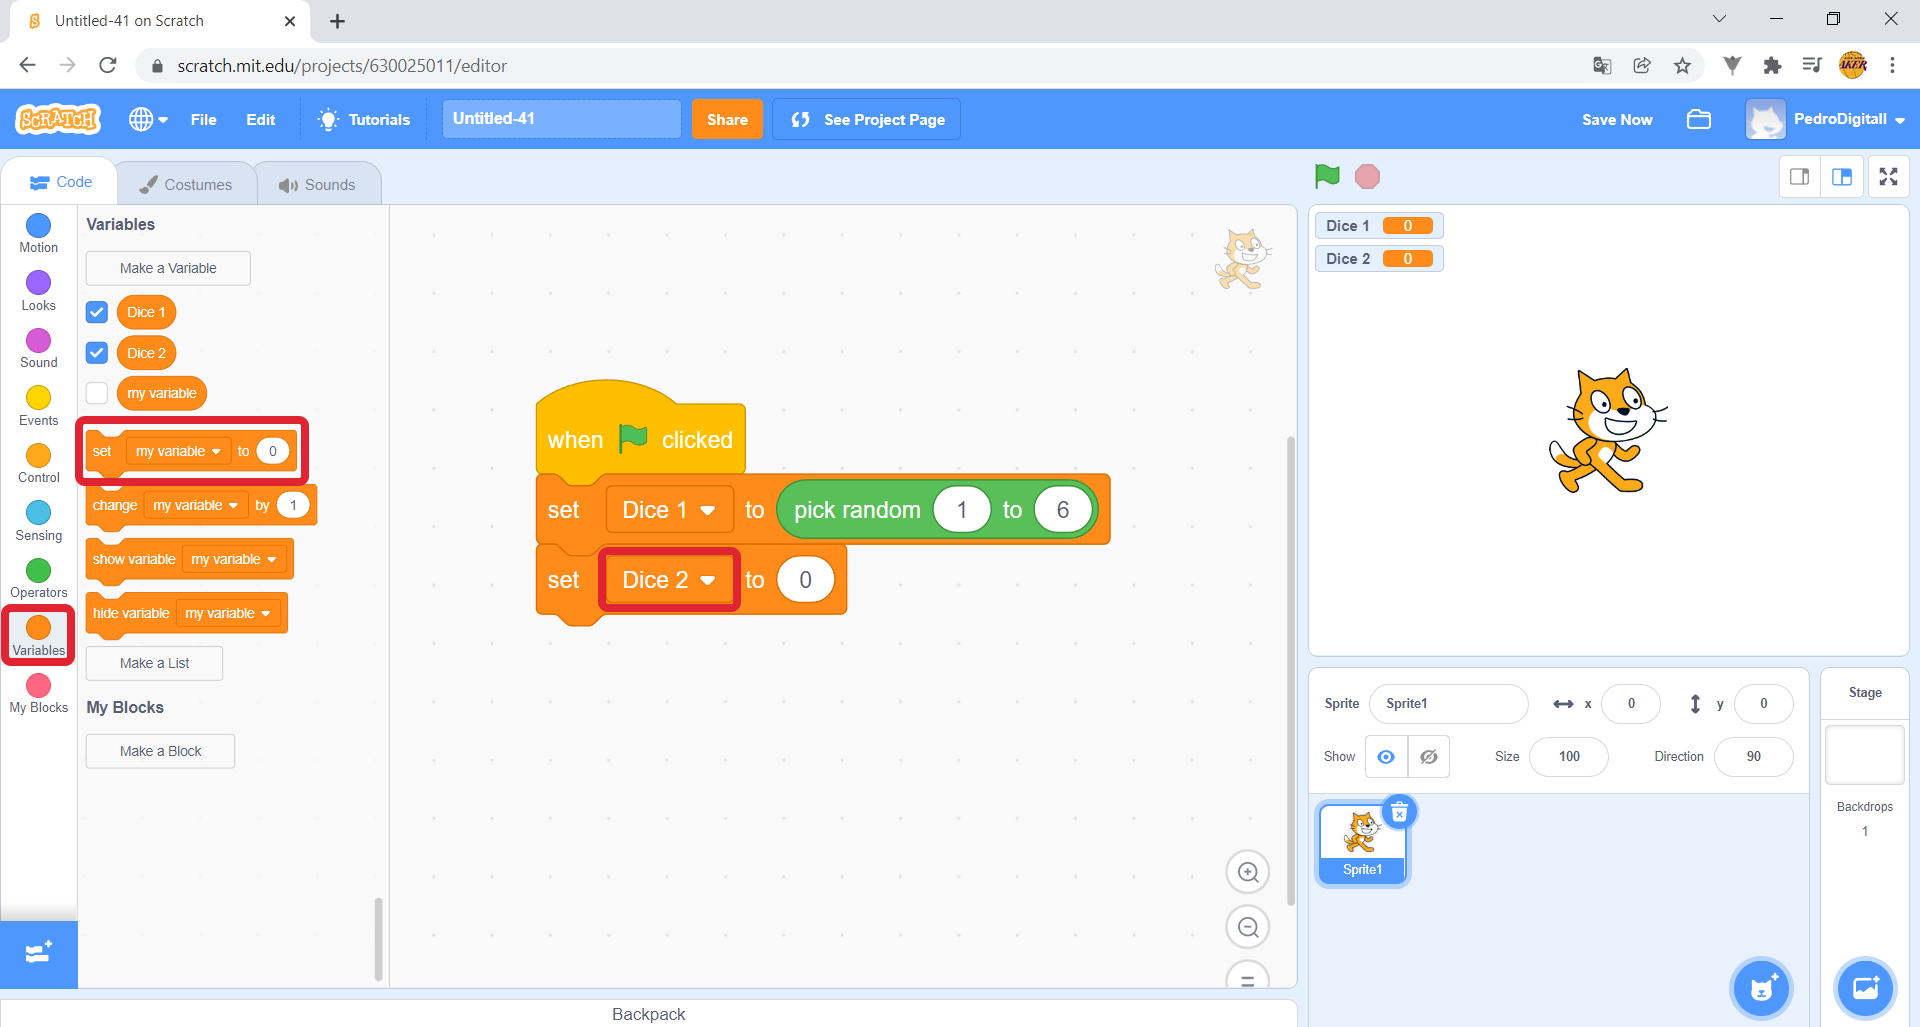
7. Let’s start programming the dice. In Variables, drag the set my variable to 0 block to the Scripts area, and insert it below the block when green flag clicked.
Click on “my variable”, and select the option “Dice 1”. See how to do this below:
The last block you dragged allows you to change the number of the dice. At this point, the block indicates that the number on the dice will change to “0”, because this is the number on that block, as you can see.
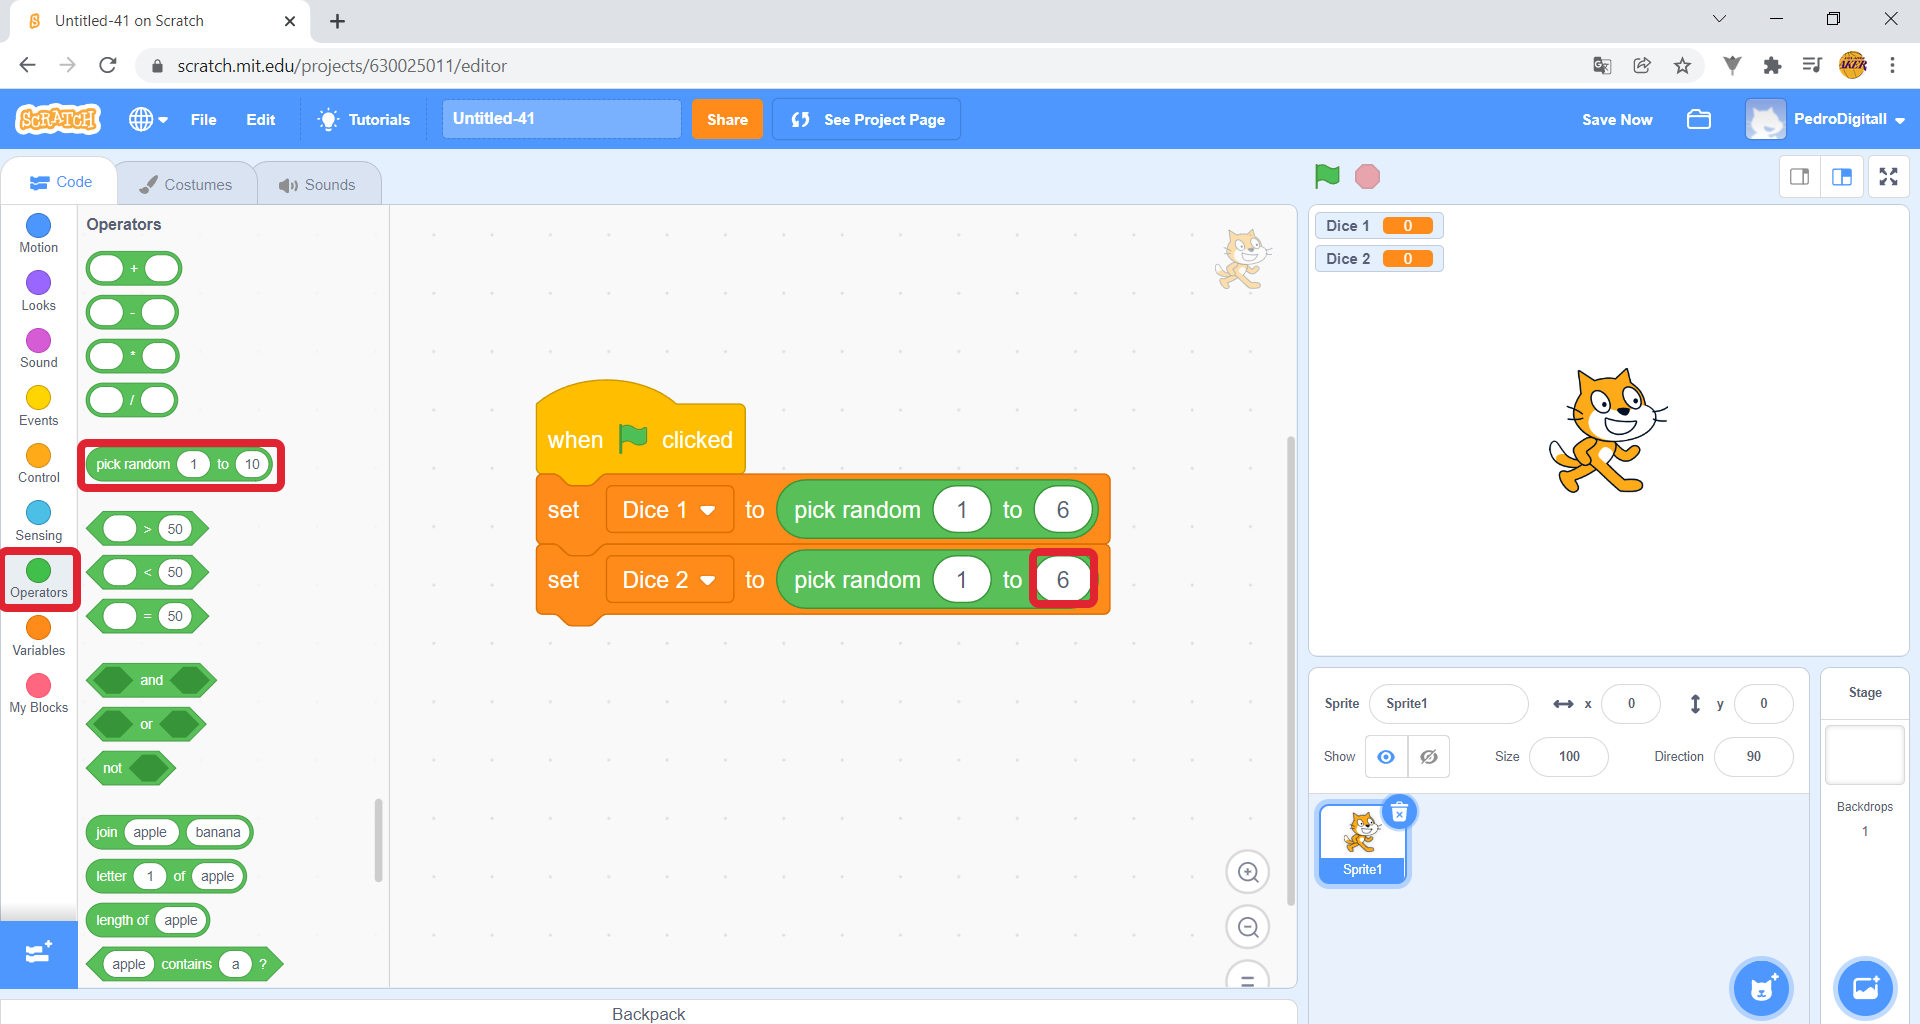
But we all know that we always get a number from 1 to 6 when we roll a dice, so we have to change this “0”.To make your dice give a number from 1 to 6, in the Blocks area, go to Operators, and drag the block pick random “1” to “10 ” to the place where you have the “0”, in the block set “Dice 1” to “0“. See how to do this in the image below, to make it easier.
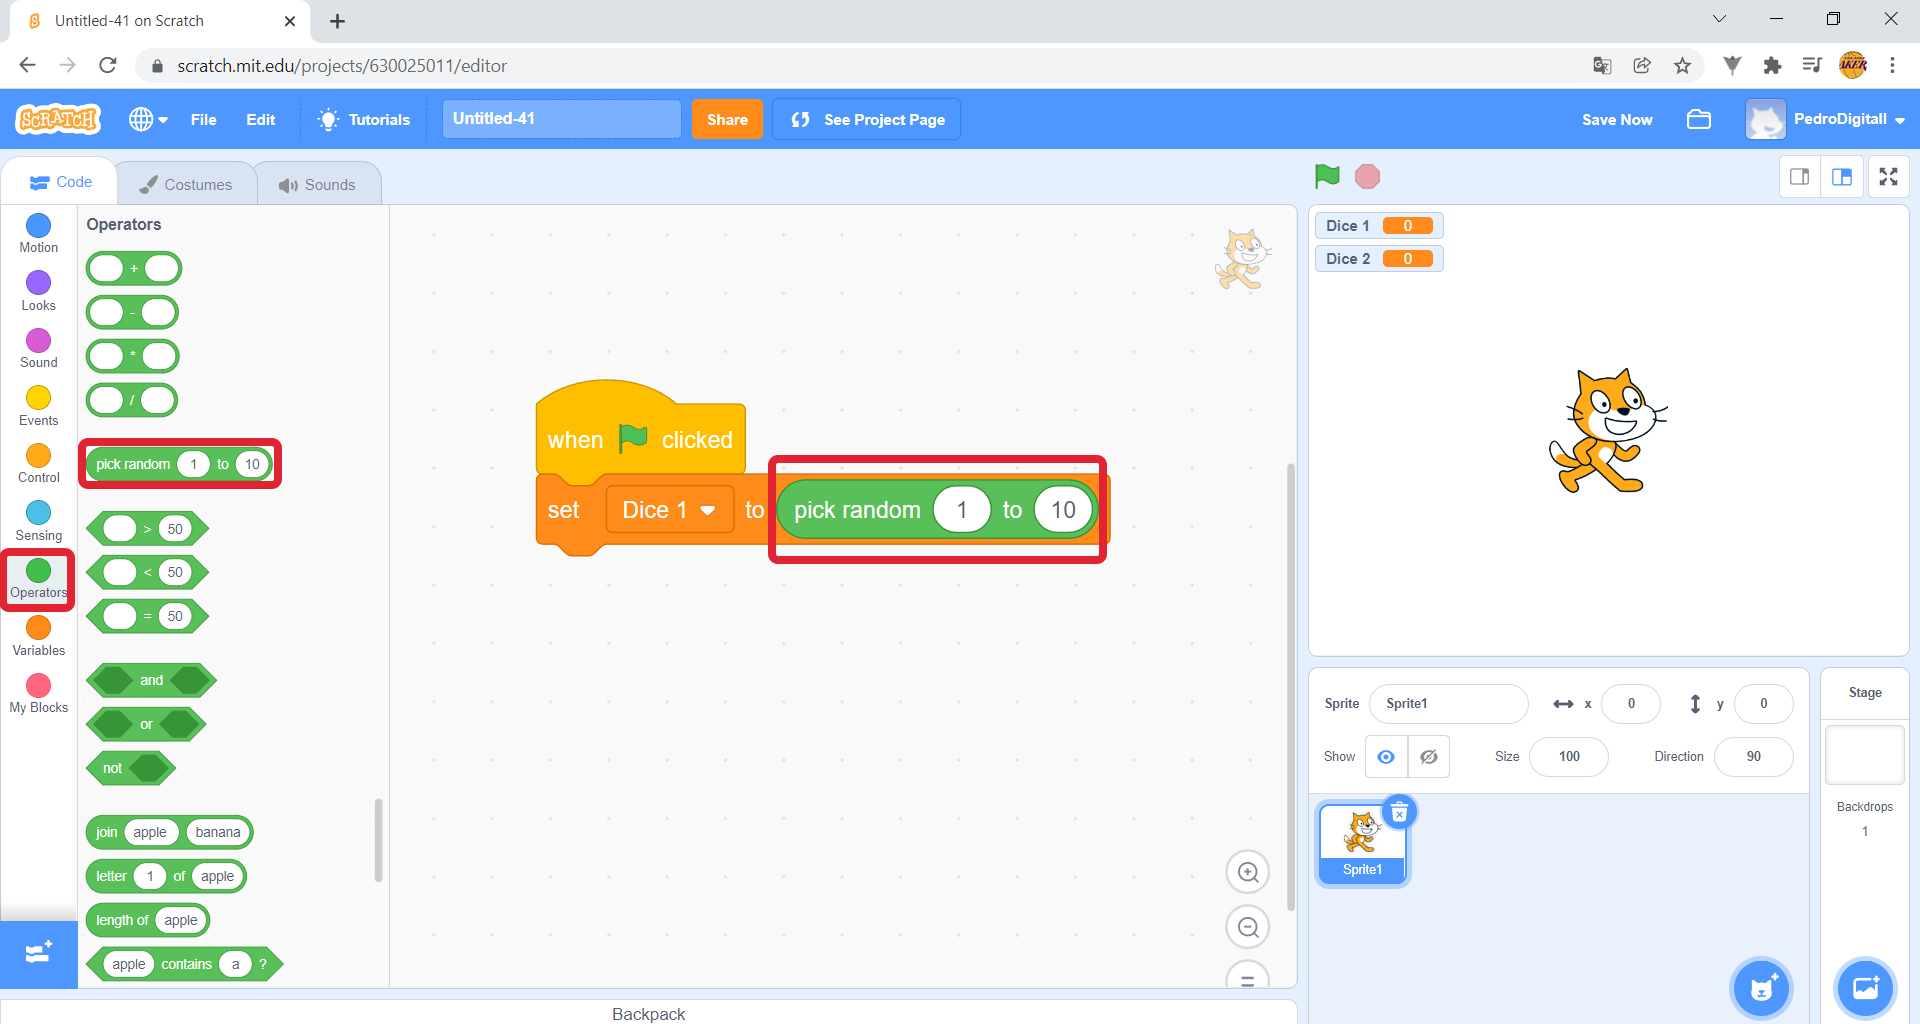
Then, in the block you just dragged, click on the number 10, delete it and type “6”, since we want the dice to give only one number between 1 and 6.

8. You will then program the second dice. In the Blocks area, under Variables, drag the set my variable to 0 block to the Scripts area and insert it below the block set “Dice 1” to pick random “1” to “6”. Click on “my variable”, and select the option “Dice 2”, as you did previously with Dice 1.
Under Operators, drag the pick random “1” to “10” block into the Blocks area, as shown in the image. Click on the number 10, delete it and type “6”, since we want the dice to give only one number between 1 and 6.
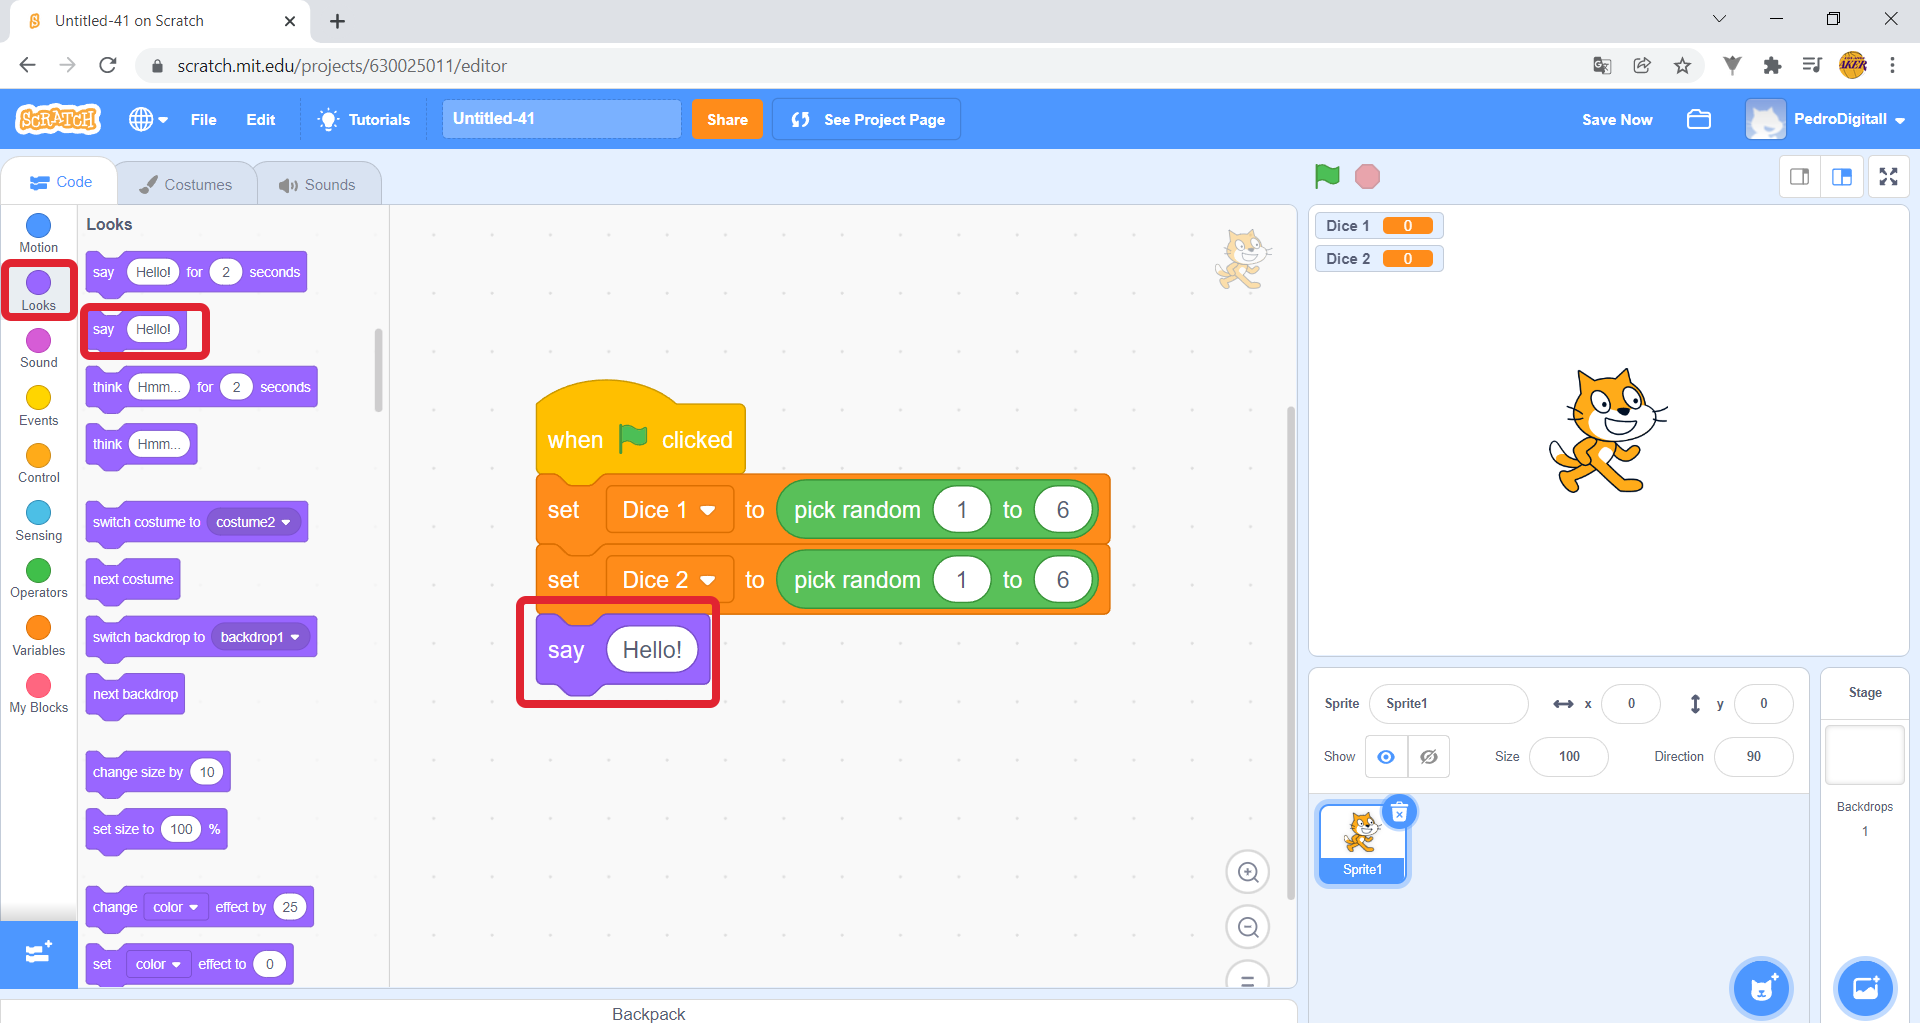
9. We now have the two dices programmed. Now, the goal is to add up the result of each dice and make the cat say the result! How can we do this? First, in the Blocks area on the left, go to Appearance, drag the say “Hello!” block to the Scripts area, and insert it under the last block. This block makes the cat say “Hello”, but you want it to say the result of the dice.
To do this, under Operators, drag the “_” + “_” block inside the purple block, like this:
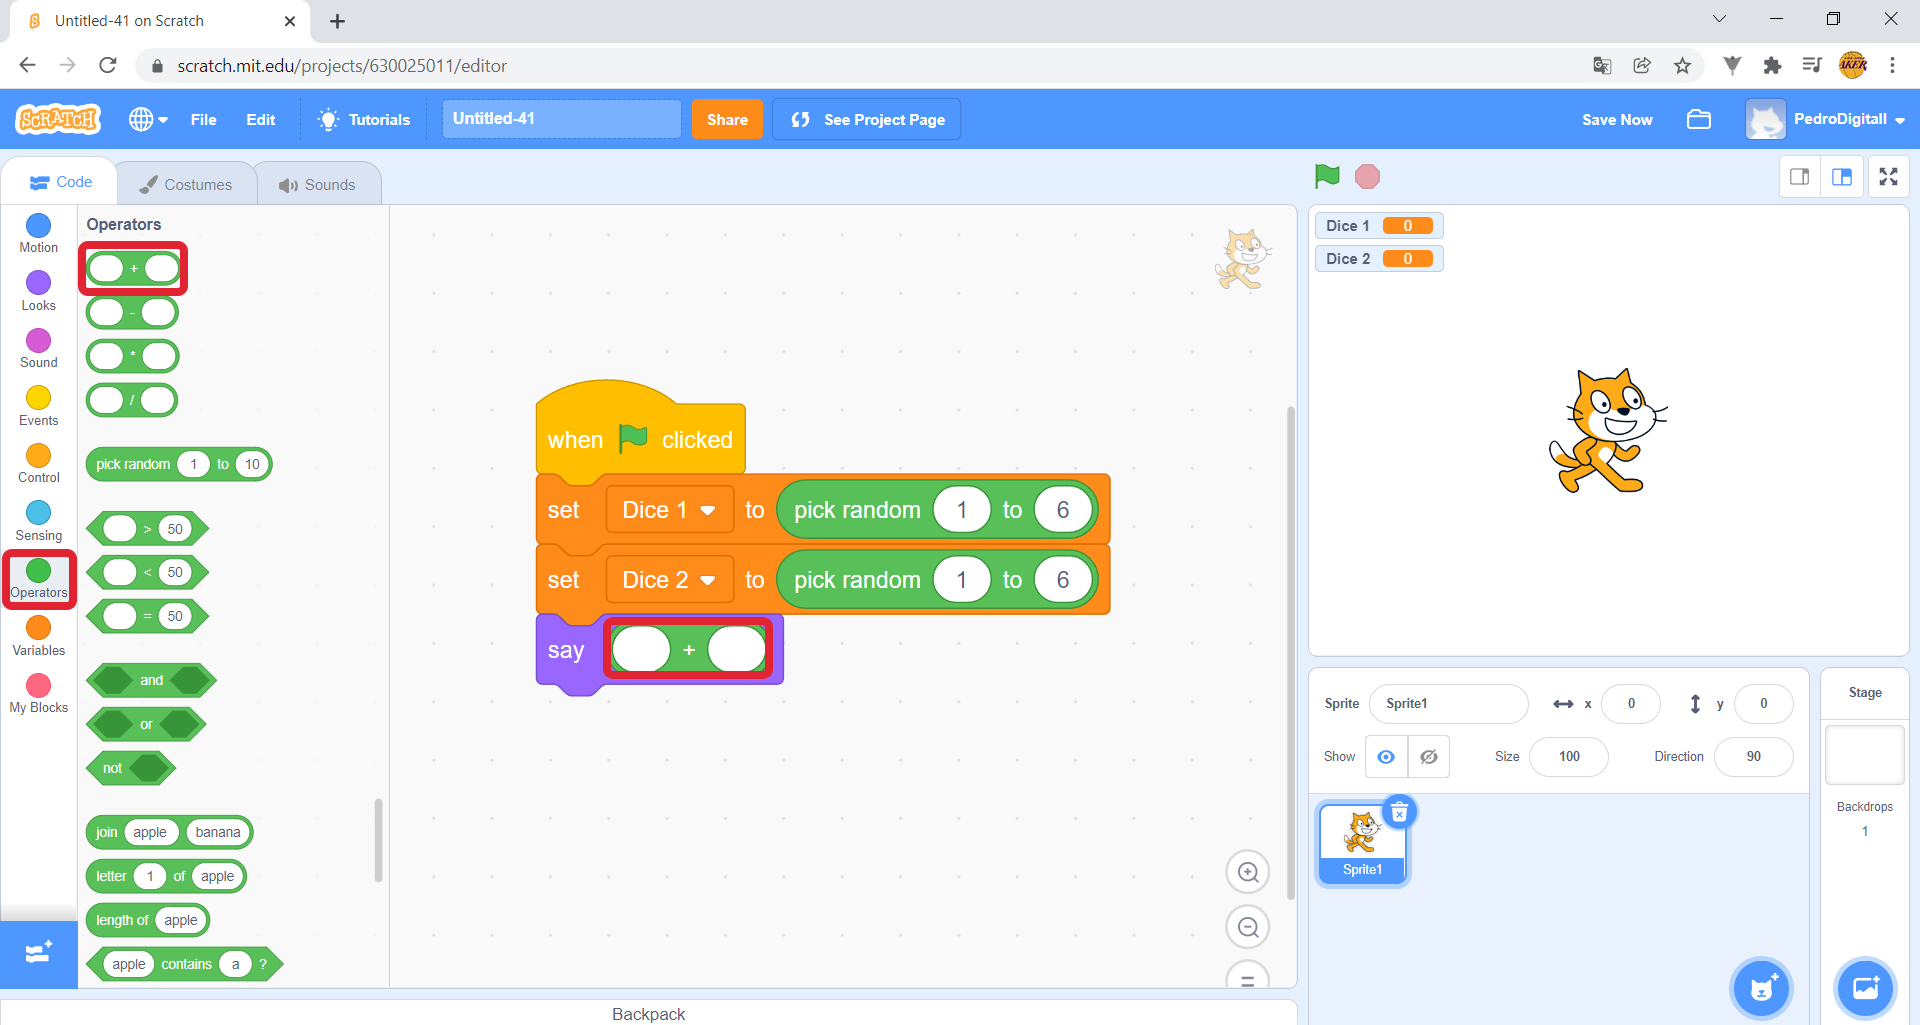
This block allows you to add up two numbers. In this project, we want to add up the values of the dices. To do this, in the Blocks area on the left, go to Variables and drag the Dice 1 block into the first space of the “_” + “_” block. Then go to Variables again, and drag the Dice 2 block into the second blank space of the “_” + “_” block, like this:
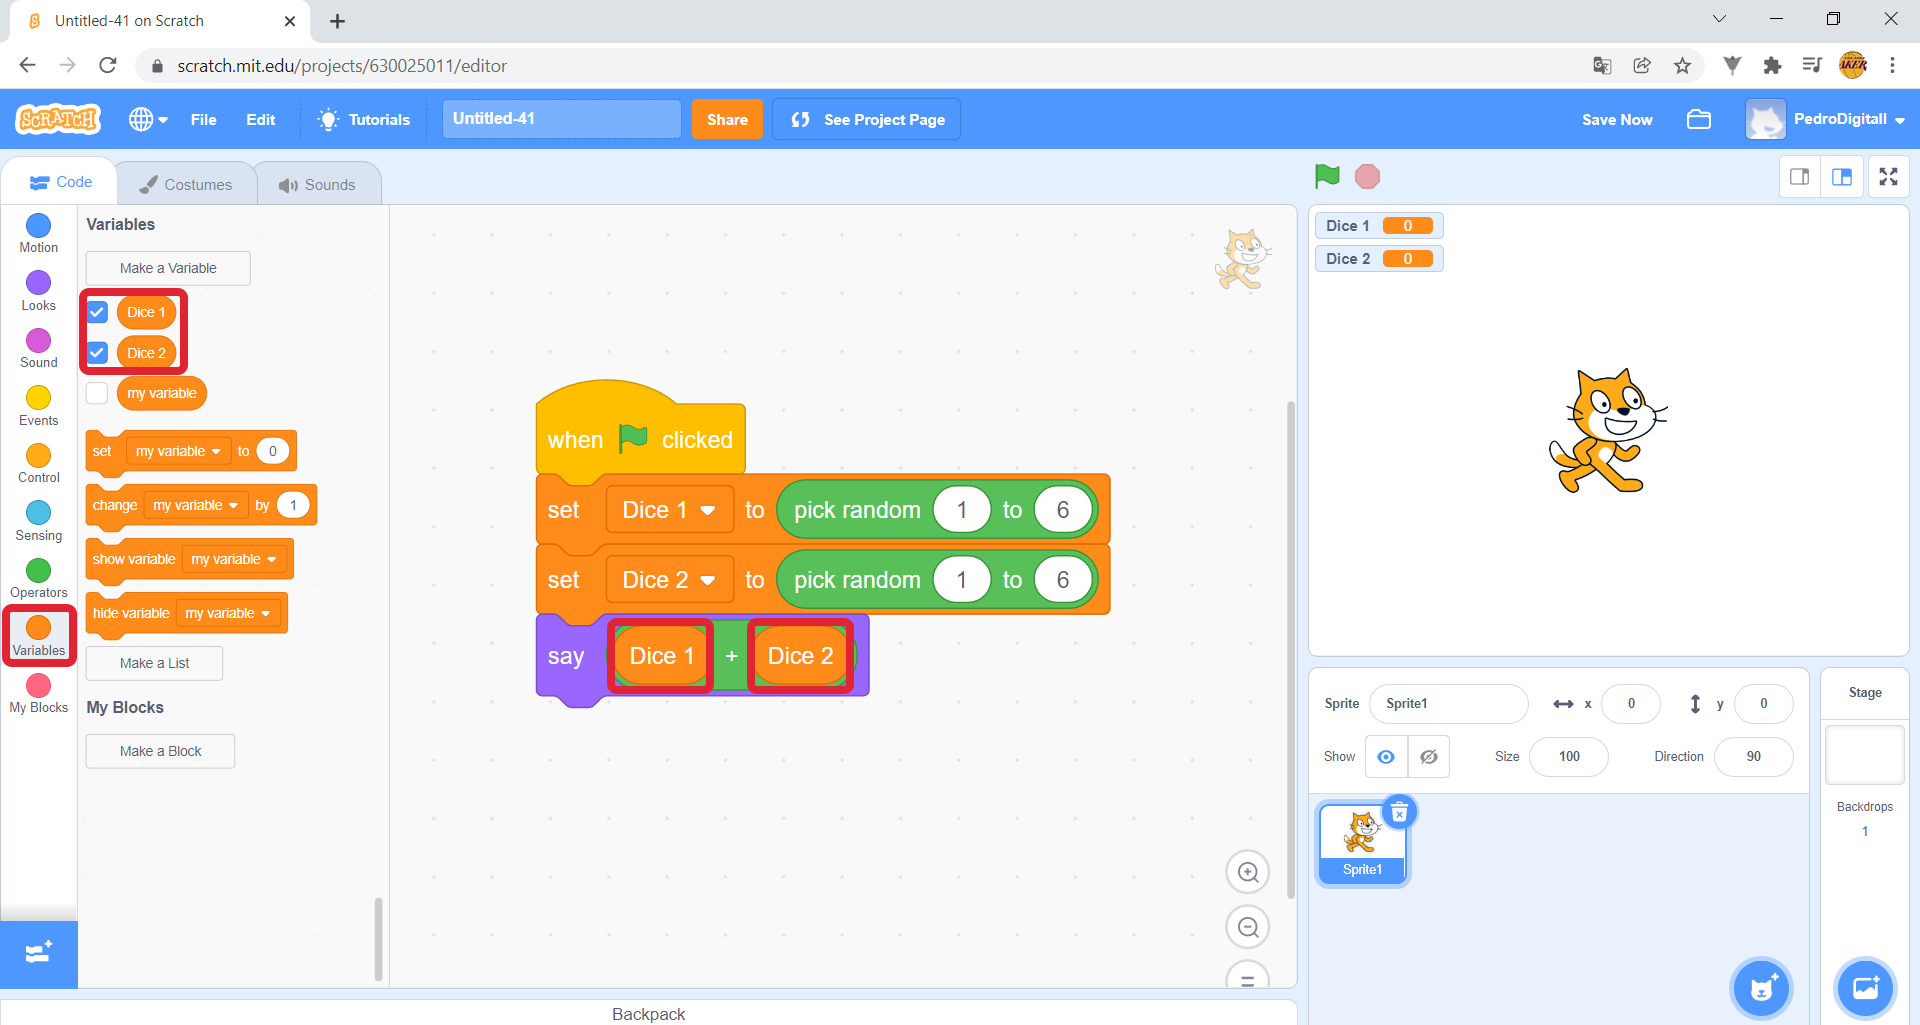
To make your project work and have the cat say the value of the rolled dices, click on the Green Flag.
Each time you click on the Green Flag, the dices are rolled, and the cat tells you a different number.
10. Good! You have now learned how to program dices in Scratch. Have fun playing with them!