Lesson 4
1. You already know what algorithms are and how important they are to communicate with the computer. So, shall we start communicating with the computer?

2. The programming language you are going to use is Scratch. This is a block programming language as it works with… blocks. It’s a very simple and easy to learn language.
3. Turn on the computer and click on the Scratch icon on the Desktop.
4. When you open Scratch, its interface appears. This is where you’ll program and test your programs.
INSTRUCTIONS FOR TEACHERS
The default language may not be english. Before proceeding with the lesson, you should check that all students have the program interface in English. To change the language, click on the globe icon in the upper left corner and select the desired language (English).

The interface is divided into four areas: Stage, Actors, Scripts and Blocks.
SIDE NOTE: You can click on the images in the Scratch interface to enlarge them.

• The Stage is where you can see your project’s graphics and animations. That’s where you test your code.
• The Actors area is where you can view, change, add or remove all images that will appear on the Stage.
• You’ll program in the Scripts area, dragging the blocks you need here, assembling them.
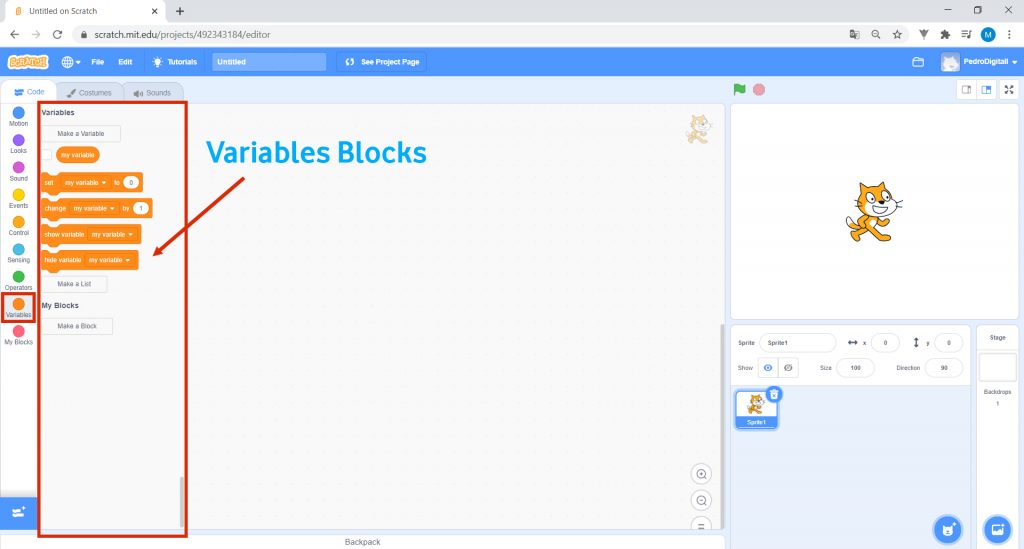
• In the Blocks area, you have all the blocks that you can use to build your code. If you look carefully, there are several types of blocks, each one responsible for a certain function. You can tell them apart through their different colors.
5. Do you want to explore the Blocks area a bit?
• First, the Motion blocks. You use movement blocks when you want an object to move. You can make it spin, walk or slide to a specific or random place, among others.

• In turn, Looks blocks let you to make an object speak, change its size, change its outfit or even the scenario where it is.

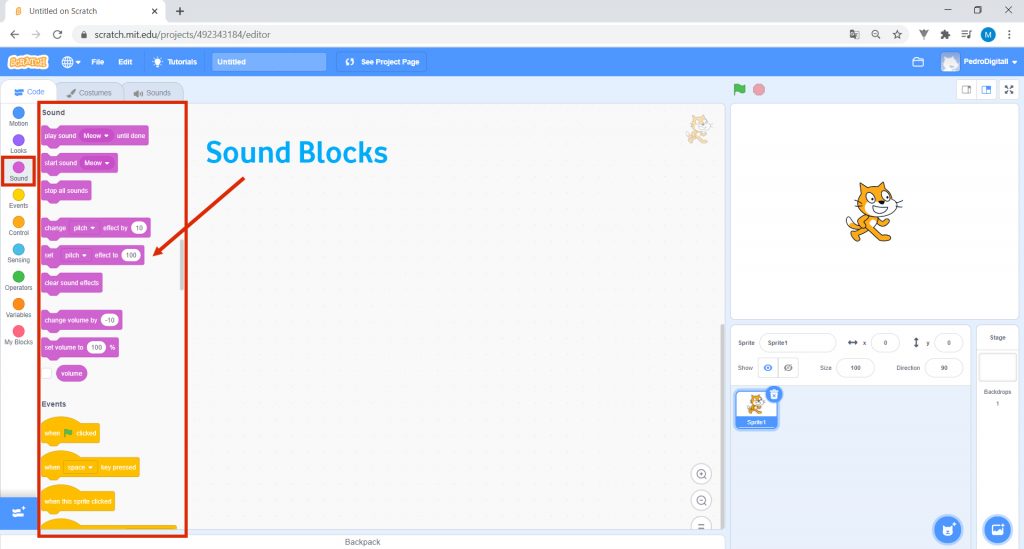
• Sound blocks are used to add certain sound effects, or change the volume, for example.
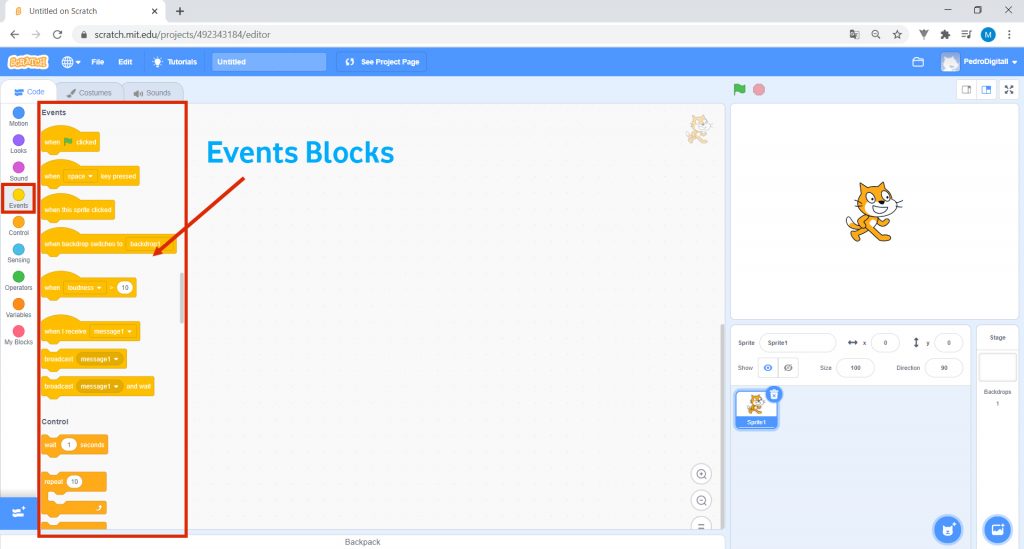
• As for Events, the blocks let you create situations as When “_” happens, do “_”. For example, in a game I may want a condition: When “space” key pressed, the game is over.
• You use the Control blocks when you want a given action to depend on a given condition. If “_” happens, do “_”. You can also use them when you want to repeat a given action, for example: Repeat “5” times move “2” steps.

• Sensing give you the value of a given feature. They are often used as conditions in “If” structures.

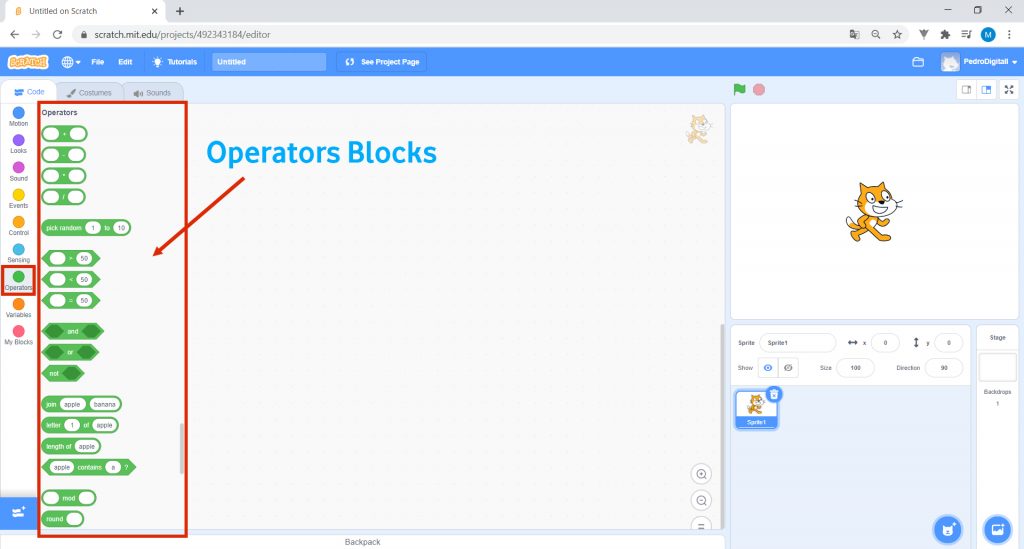
• In Operators, there are two types of blocks: hexagonal and rounded vertices. Within hexagonal, we’ll focus on the comparison operators: all those who have the symbols you know so well from Mathematics. They let you compare things.
• In Variables, you can create variables. You can think of variables as boxes where you can save some values for the computer to use later.
• Finally, My Blocks. Here you can create your custom blocks.

6. Now that you know the Scratch environment from end to end, you’ll learn how to create a small program. First of all, go to the Sprite area (on the right side of the screen) and delete the Cat by clicking on the x in the upper right corner of the screen.

7. In the bottom right corner of the Scratch interface, you’ll find the Stage. Hover your mouse over the icon with an image design and click on Choose a Backdrop.
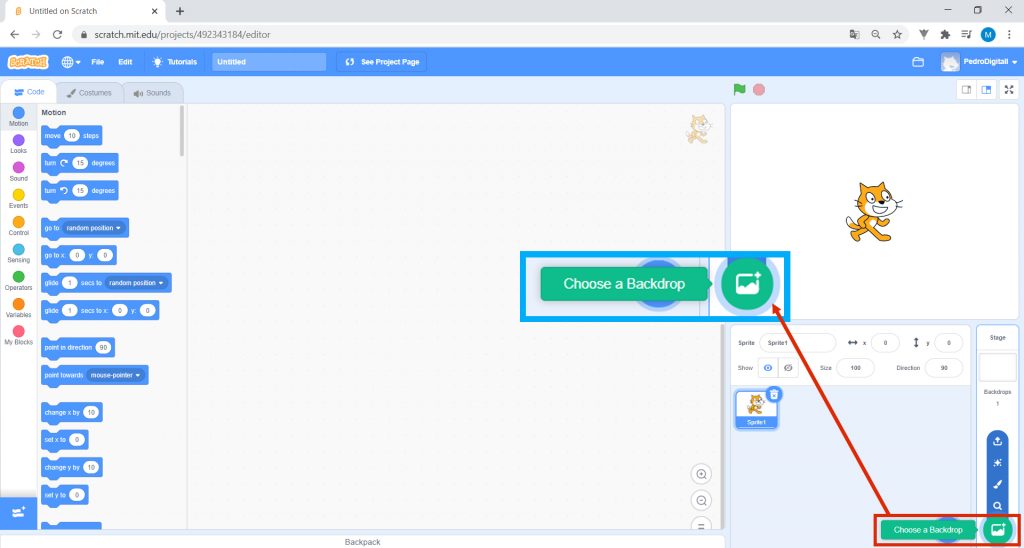
When you click, several available scenarios appear that you can use. At the top, click Outdoors and select Arctic.

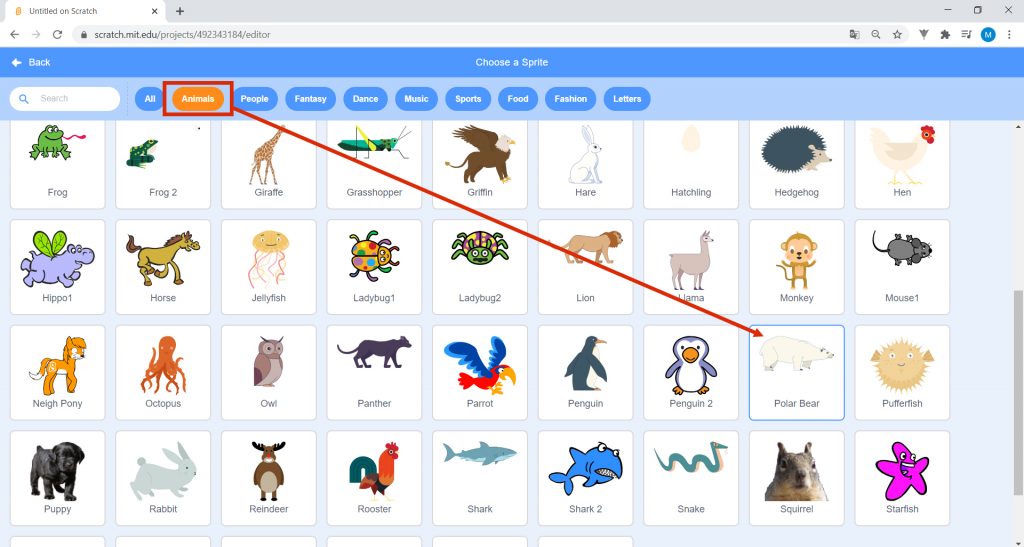
8. Then, in the character area, select Choose a Sprite.

Click on Animals and select Polar Bear.
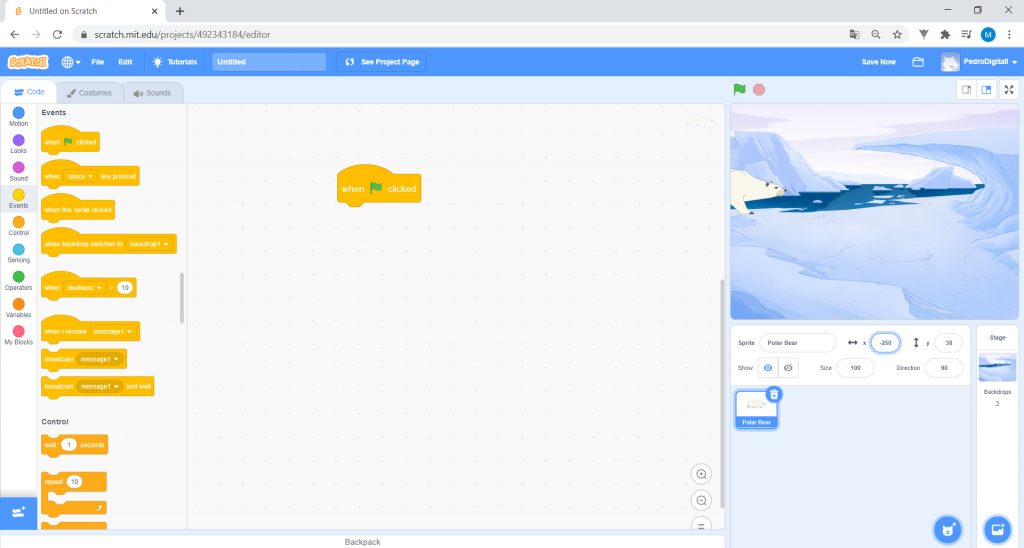
9. In the blocks area, go to the Events blocks, select the block When green flag clicked and drag it to the Scripts area.
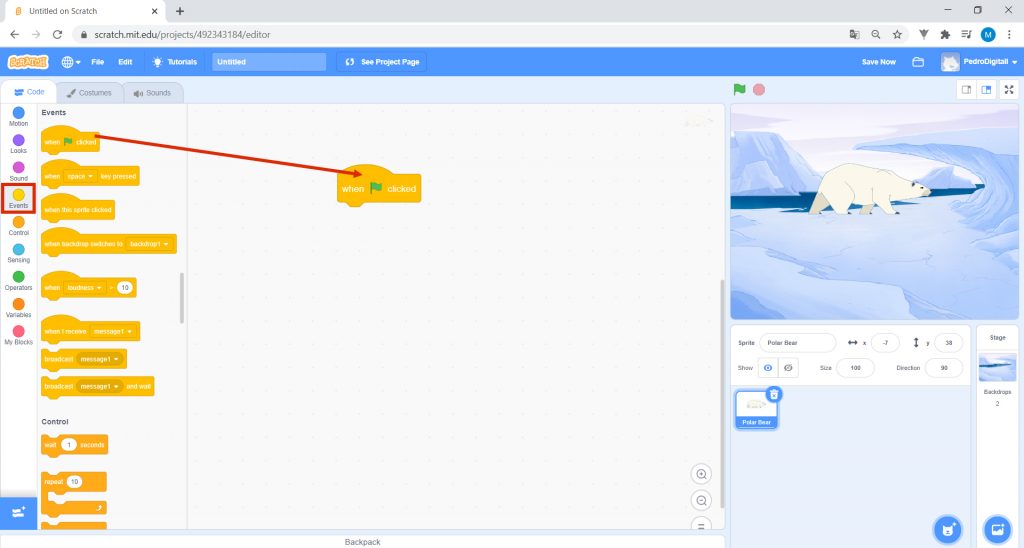
This command ensures that the program starts whenever you press the green flag and ends whenever you press the stop button.
10. In this program, you’ll want the bear to walk from one end of the scenario to the other. You will place the bear at the beginning of your scenario, as you see in the image.
Whenever you start the program, you want the bear to start walking from this place. To do so, go to Motion and drag the block go to x: “_” y: “_” to the Scripts area, immediately below the previous block.
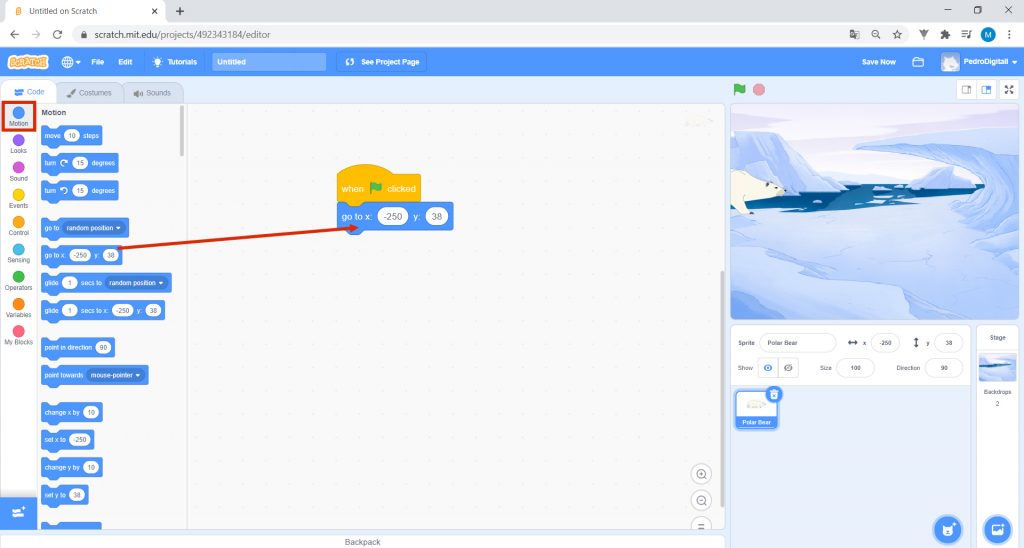
11. You probably found the values in x and y strange. These values are called coordinates. The coordinates indicate where the bear is on the Stage. In Scratch, x indicates the position of the bear along the length of the Stage (horizontal). y indicates the position of the bear along the height of the Stage (vertical).

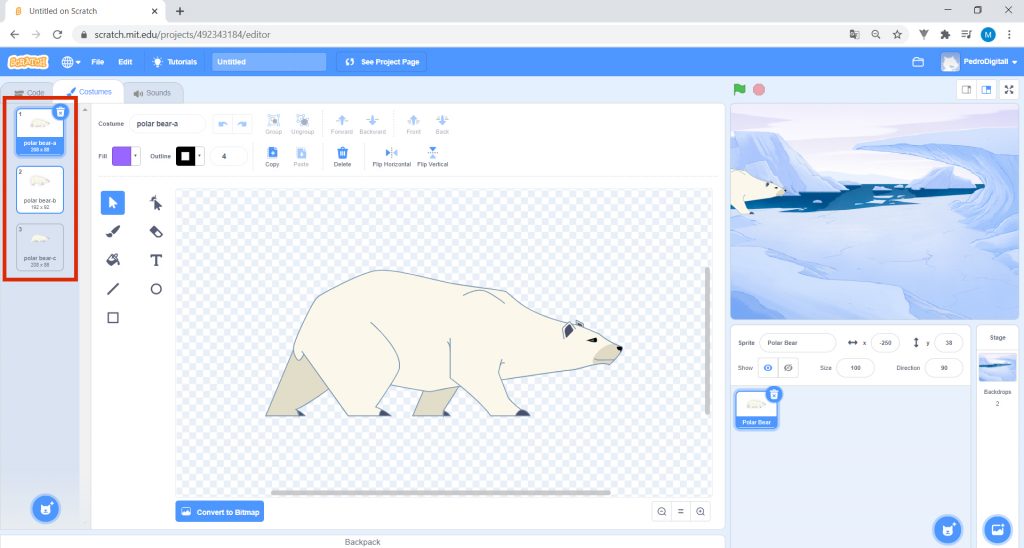
12. On the Costumes tab, you can personalize your actors by changing their colors, their sizes, adding details or removing other details.

Within the Costumes tab, various bear outfits appear. To simulate movement, you’ll make the bear change its outfit many times: from “a” to “b”, from “b” to “c”, from “c” to “a” and so on.
13. Then return to the Code tab.

14. Click on the Control blocks and drag the block repeat “_” to Scripts, fitting it under the previous block. In the number of times you want to repeat, put “10”.

15. Then, select Motion and drag the block move “_” steps to Scripts, placing it inside the block repeat “_”. In the number of steps to walk, put “20”.
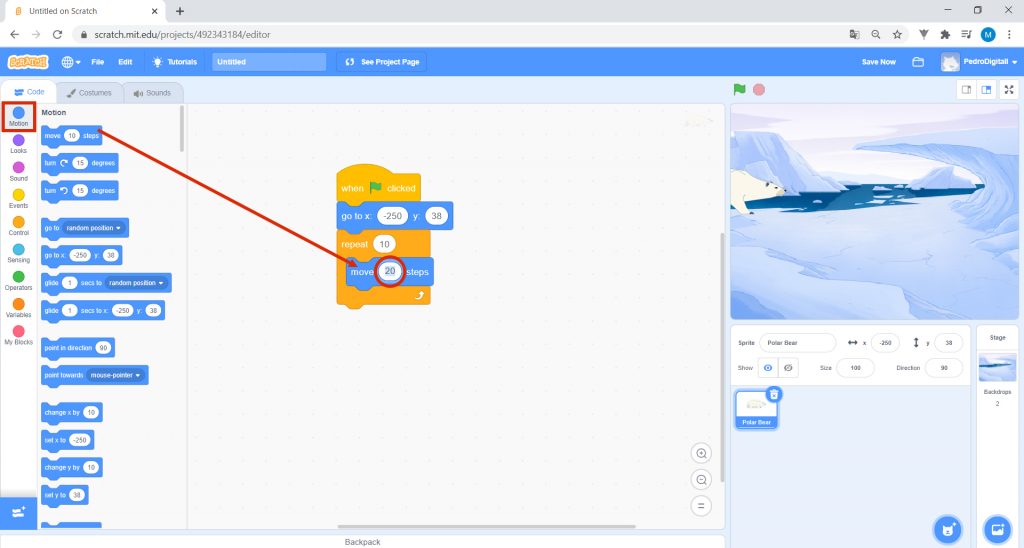
16. After that, in Looks, drag the block next costume to Scripts. Place it inside the block repeat “_”.
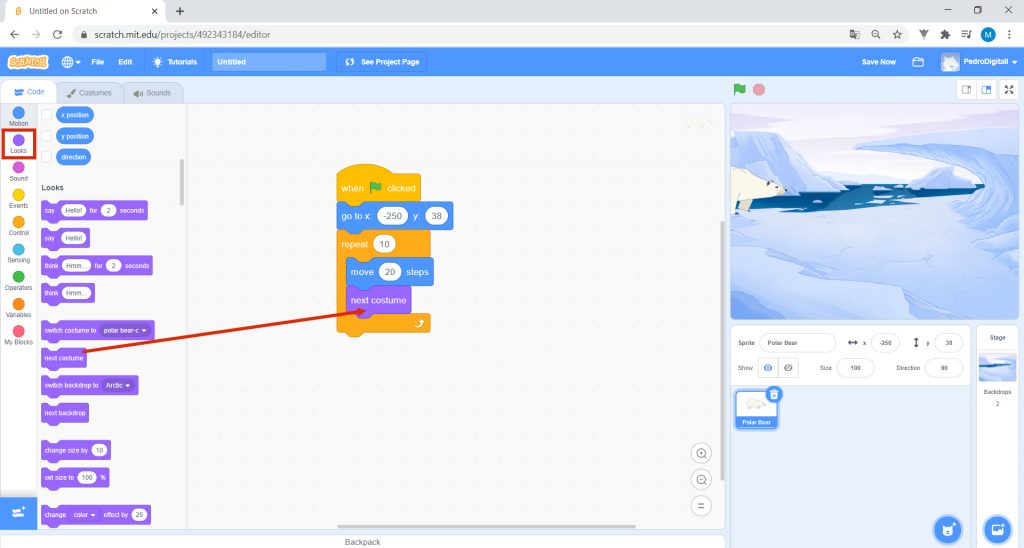
17. Everything ready? Click on the green flag above the block and see what happens! The bear walked! Can you understand why?

When you click on the green flag, as the code says, the bear returns to its starting position. Then, the code tells the bear to walk 20 steps and change its outfit. The bear repeats these two instructions 10 times, and stops.
18. Try to get the bear to walk faster or slower. If you can do that, try to program it to say something.
We’ll continue exploring Scratch in the next lesson!