Activity
1. Today, you will learn how to edit photos on your tablet or smartphone! In the end, you’ll be able to save them or even share them with your friends and family! To get started, open the Lightroom app and select SKIP.
SIDE NOTE: You may click the images to amplify.

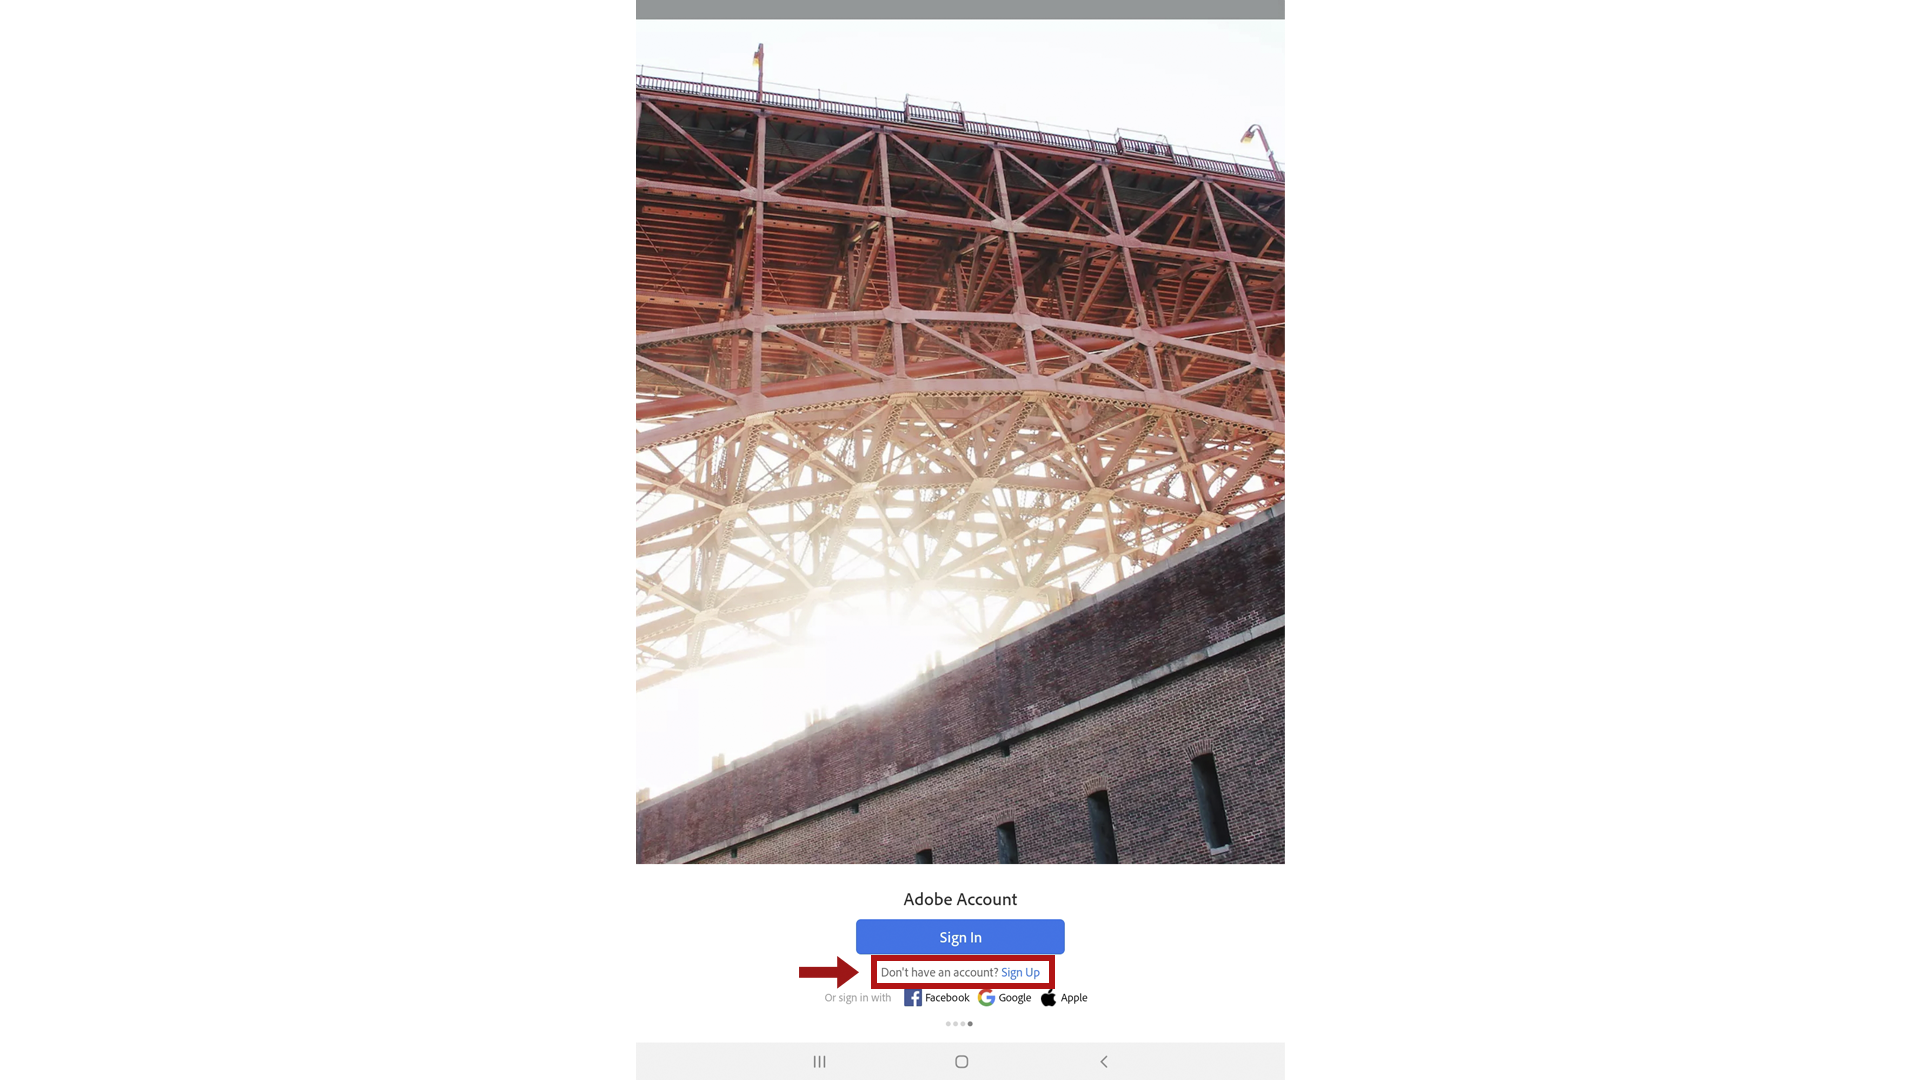
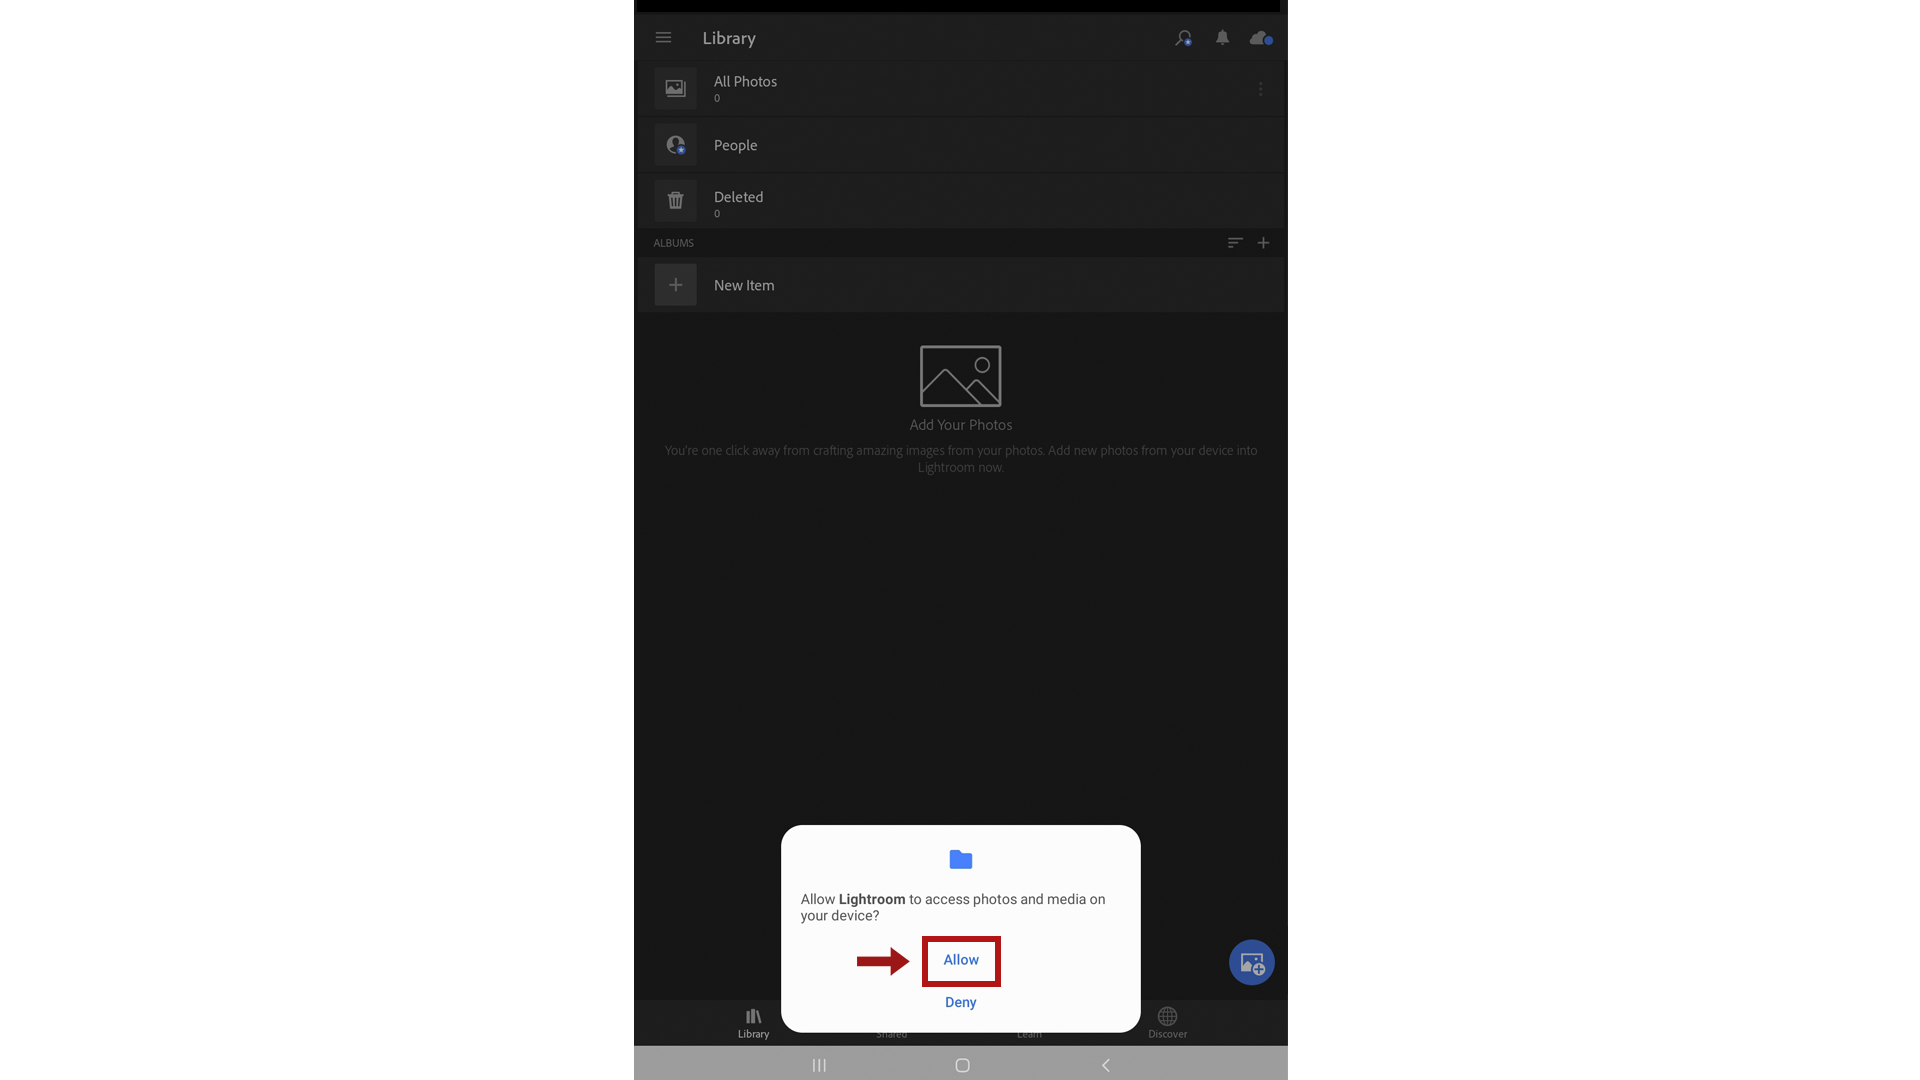
If you already have a Lightroom account, click the blue Sign In button to log on. If you don’t have an account, ask an adult to help you create one.
For security reasons, and to protect your privacy, we recommend the following:
– avoid using your full name as your username;
– use a password with a wide range of characters (uppercase, numbers and symbols), and never personal data such as your date of birth.
While using the app, notifications may pop up to allow you to receive notifications or notices of new updates, to allow the app to access the device’s camera, photo gallery, media and files. Ask an adult for help during this process.

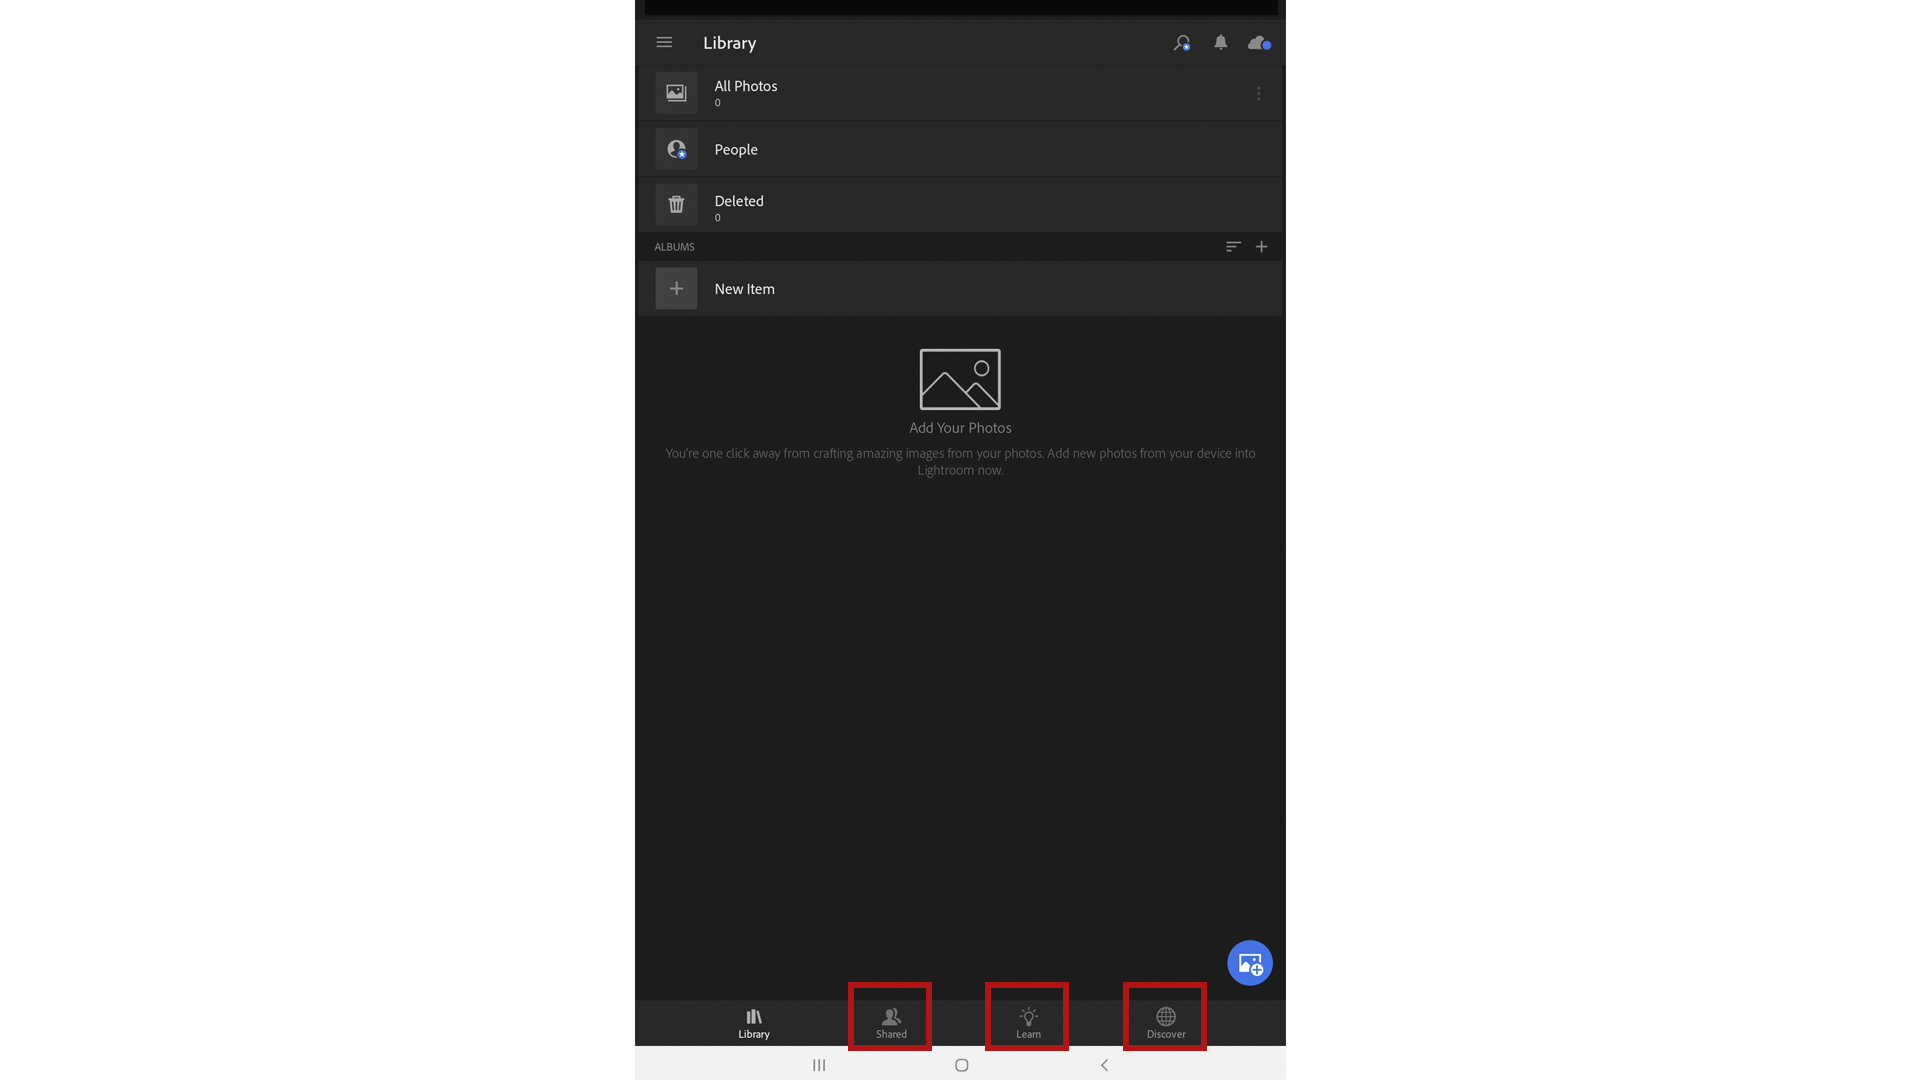
2. This is the Lightroom Library. Under All you can see all your edited and to-be-edited photos (in iOS, this button is called All Photos). Under Deleted, you can see all the photos you have deleted. In People, you can identify the people in your photos, although this option is only available for Premium accounts, which does not apply here. In Albums, you can create photo albums according to themes: a friend or family member’s birthday, a special day, etc.
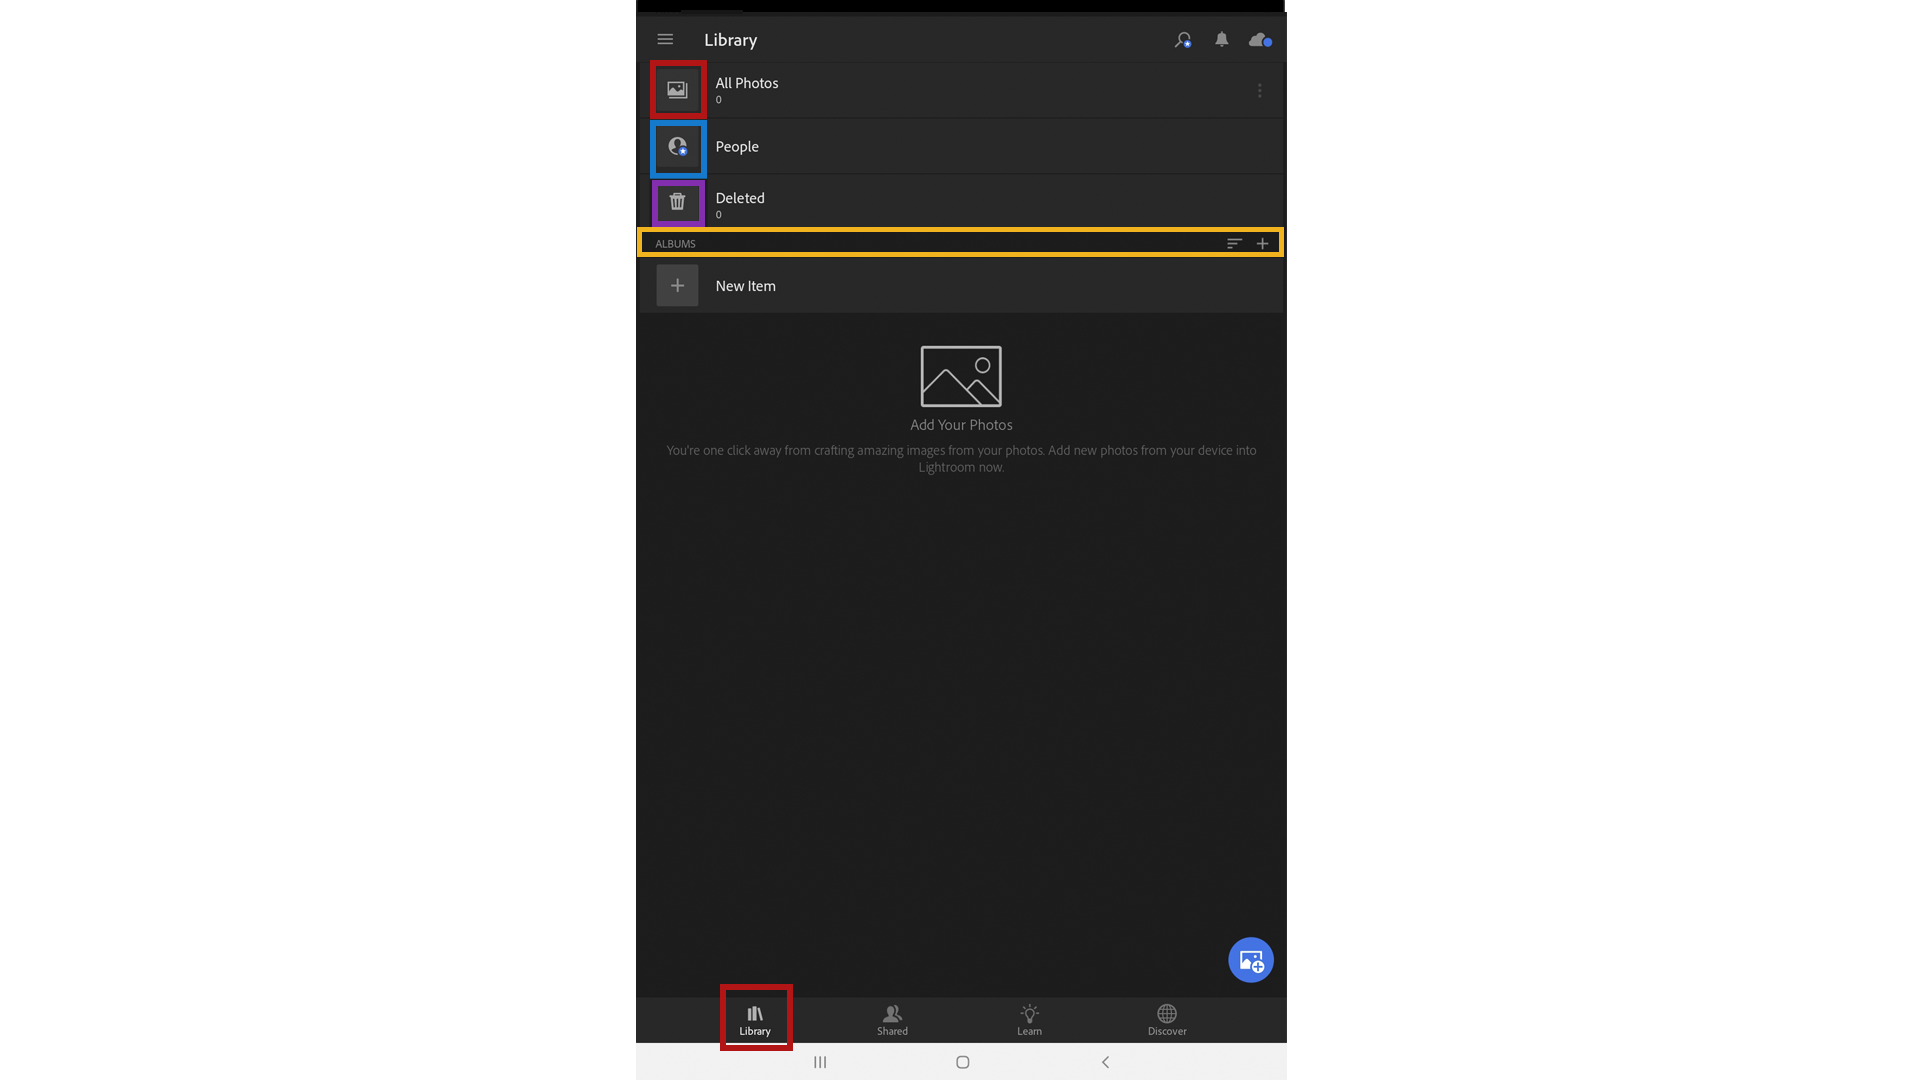
In the bottom bar, you will find the tabs:
• Shared where you can find all the photos you have shared;
• Learn where several tutorials are available;
• Discover where you can explore photos edited by other users of the app.
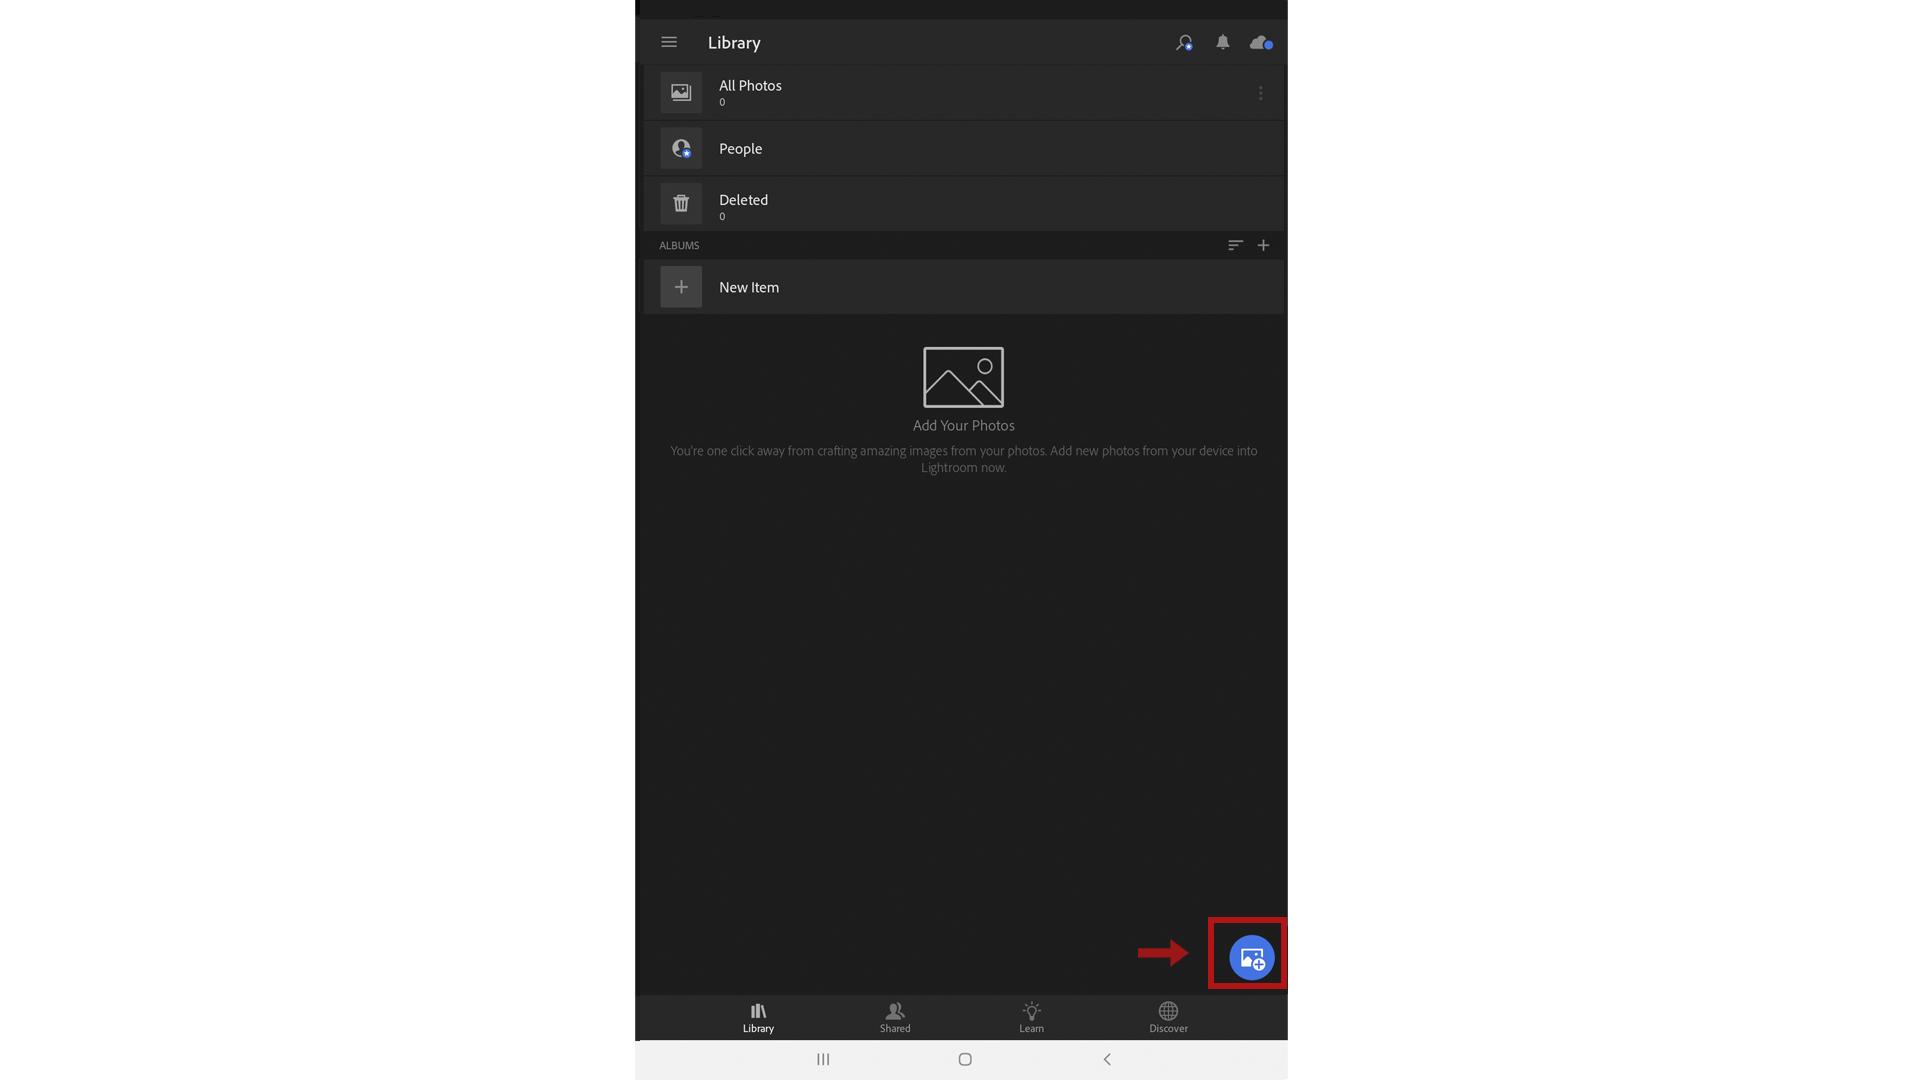
3. Select the button shown in the image. This allows you to select the photos to edit on your tablet or smartphone.
NOTE: On iOS, after clicking on the button highlighted in the image, click on the Camera Roll option to see all the photos.
If you see a box asking for permission to access your device’s photos and media files, click Allow.
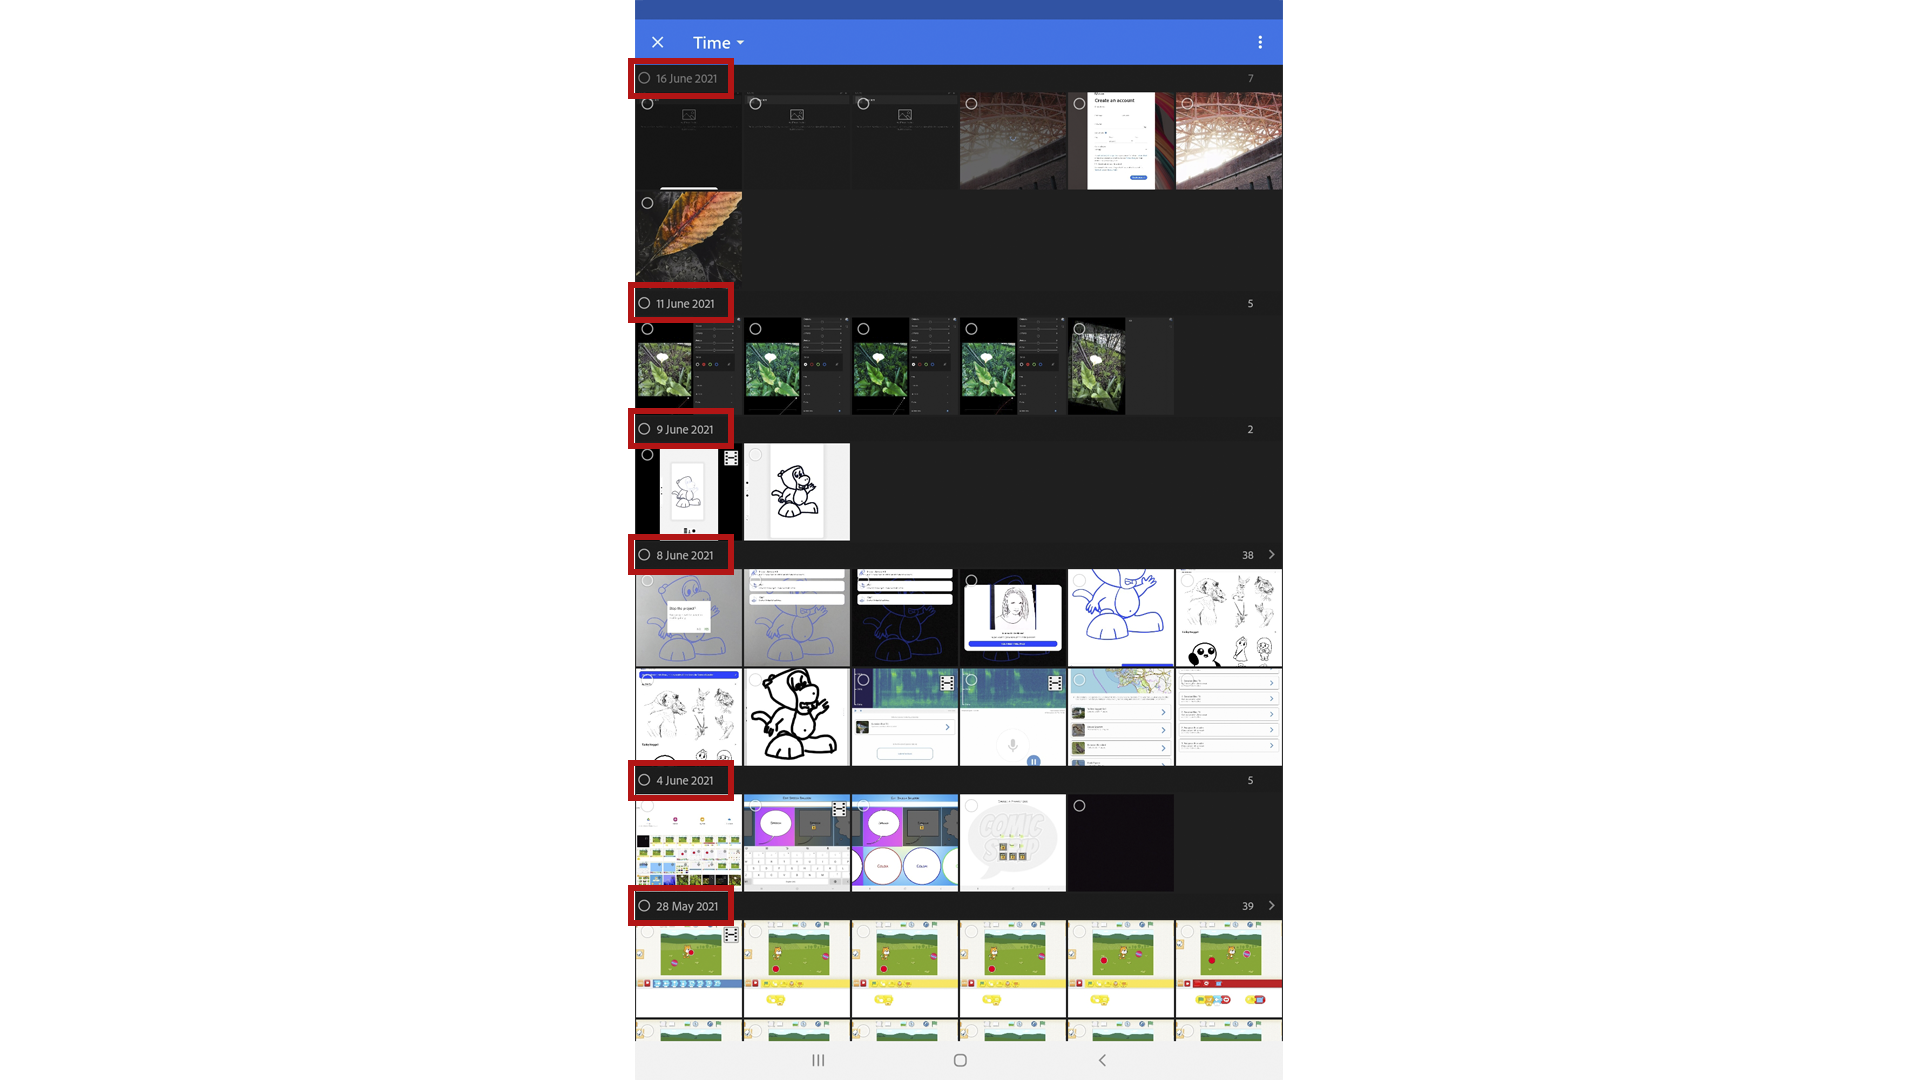
Here, all the photos will appear organized by date, from the most recent to the oldest.
4. You can also click on the three dots in the upper right-hand corner and select all photos, or none, as well as choose to view all files, JPG/PNG files only, RAW or videos.
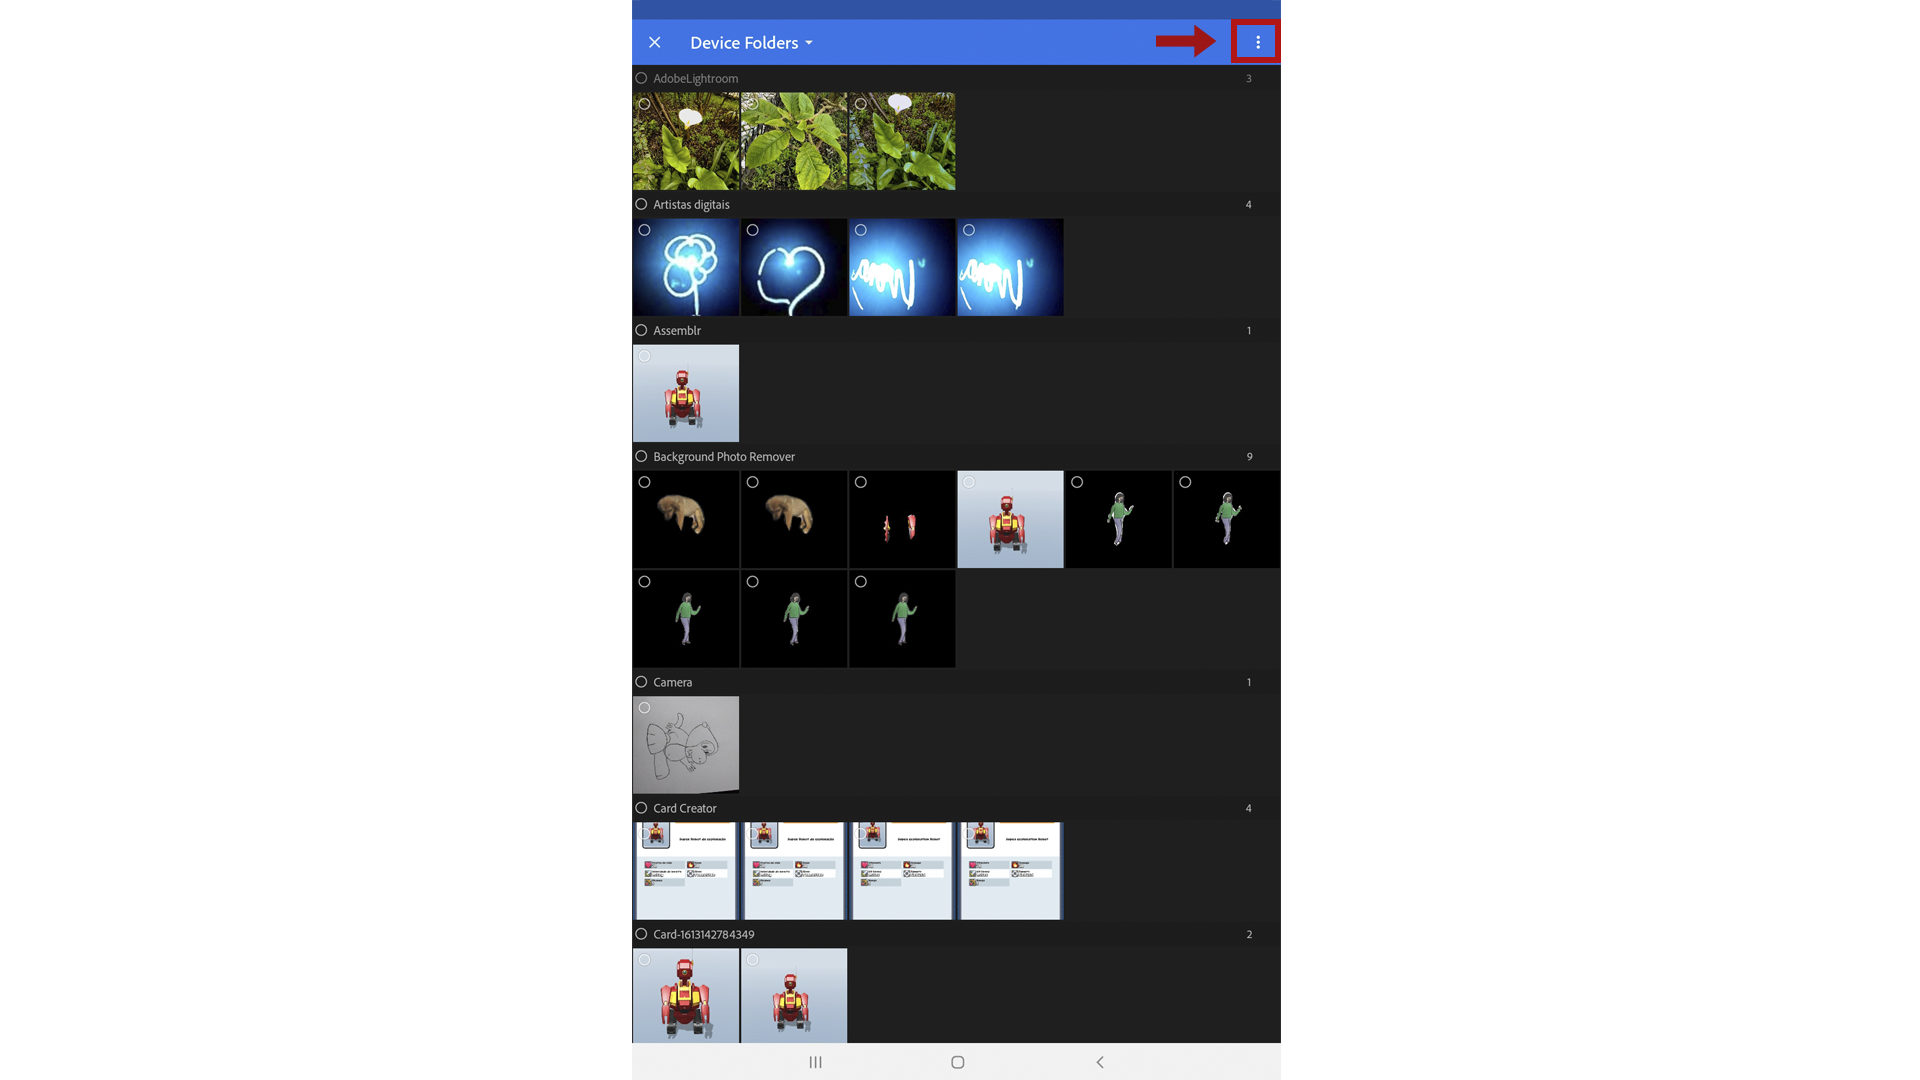
There are several types of multimedia files, each identified by its extension.
JPG (Joint Photographic Expert Group) – An image that can be saved at a slightly smaller size than the original with little loss of quality;
PNG (Portable Network Graphics) – Specific image for use on the internet.
RAW is not an extension. Corresponds to files that store all the information captured by a camera. In turn, video is not an extension either, but is identified by several different extensions such as mp4, mpg2, mov, h264, etc.
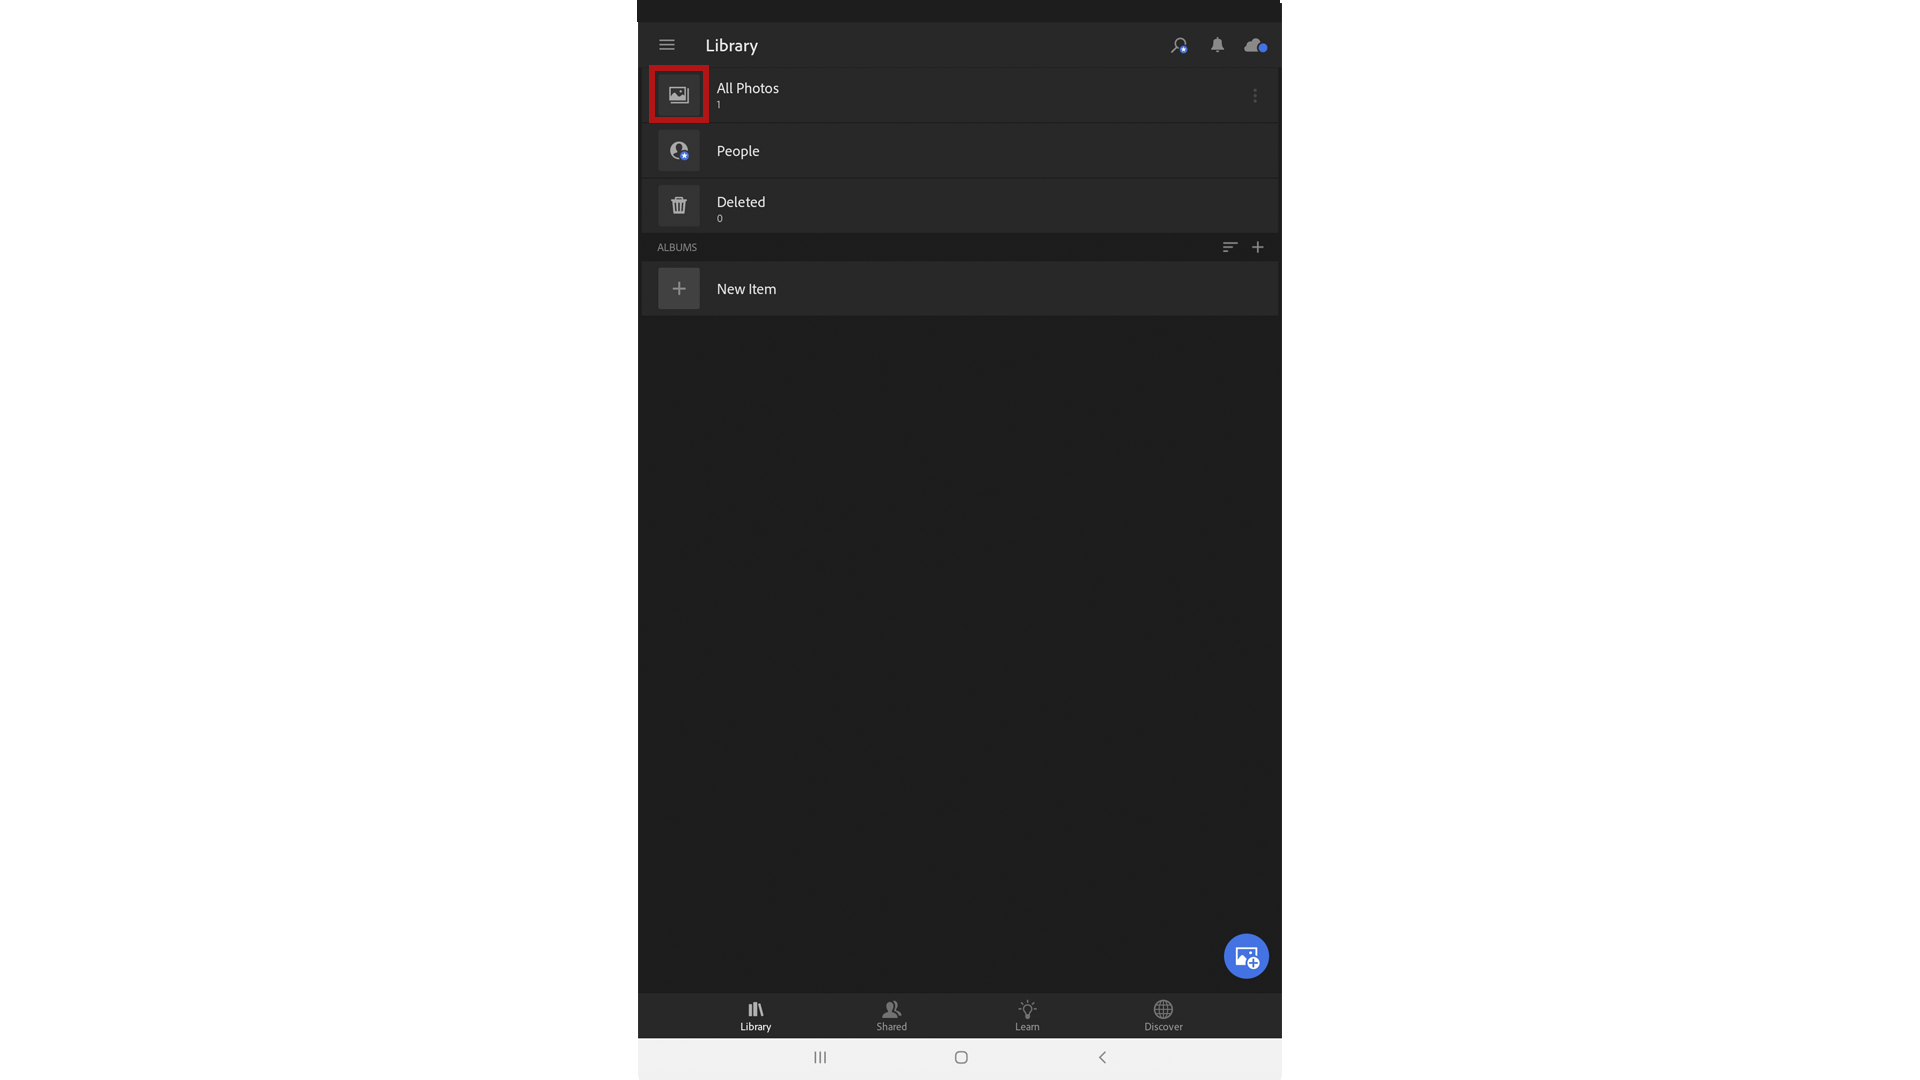
5. Select one or more photos by clicking on them. If you want to select more than one photo, you should hold down the first photo for a while.When you have finished your selection, click on ADD.

Under All (or All Photos, for iOS devices), the number of photos you selected previously now appears. Click on All (or All Photos).
6. Here are the photos you have selected. Choose the photo you want to edit.

7. Click Resize (if you’re using an Android device) or Crop (if you’re using an iOS device).

Choose how to crop the photo by dragging the white strokes/corners, highlighted in blue on the image.
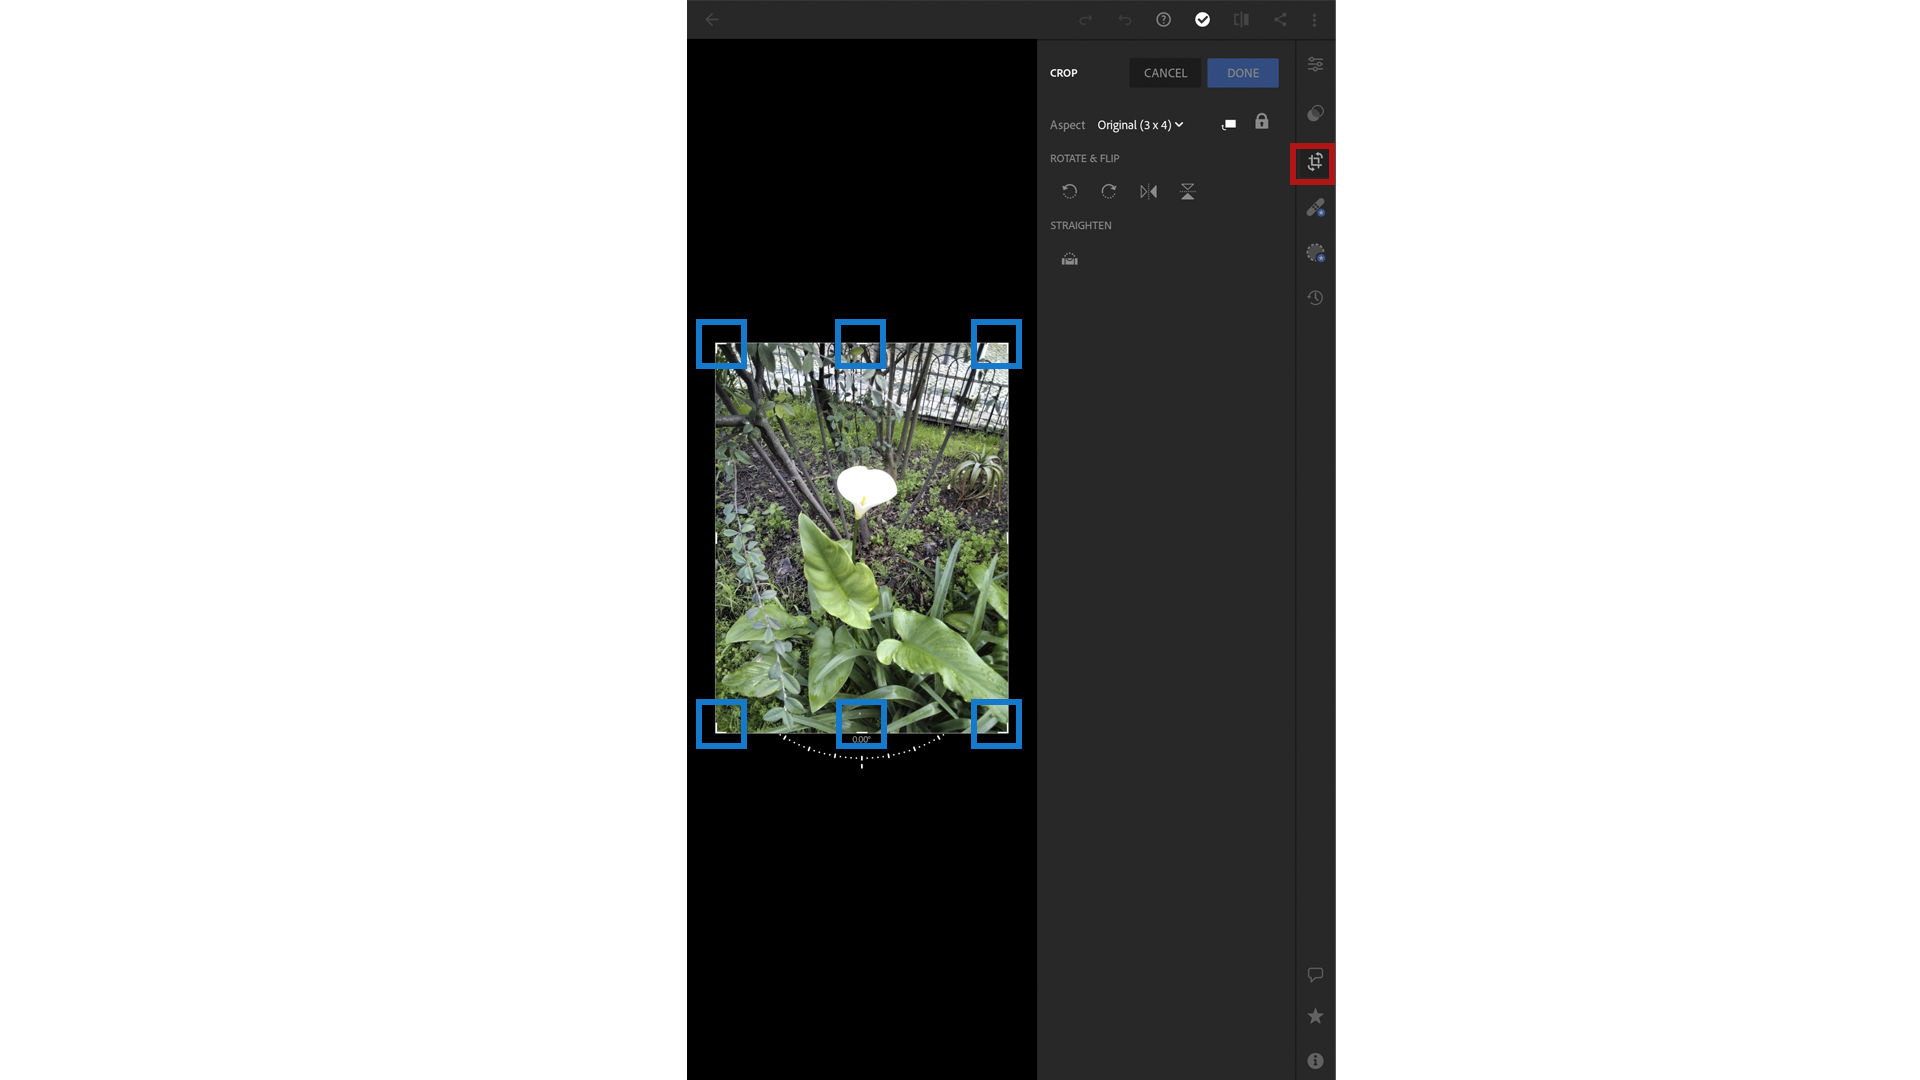
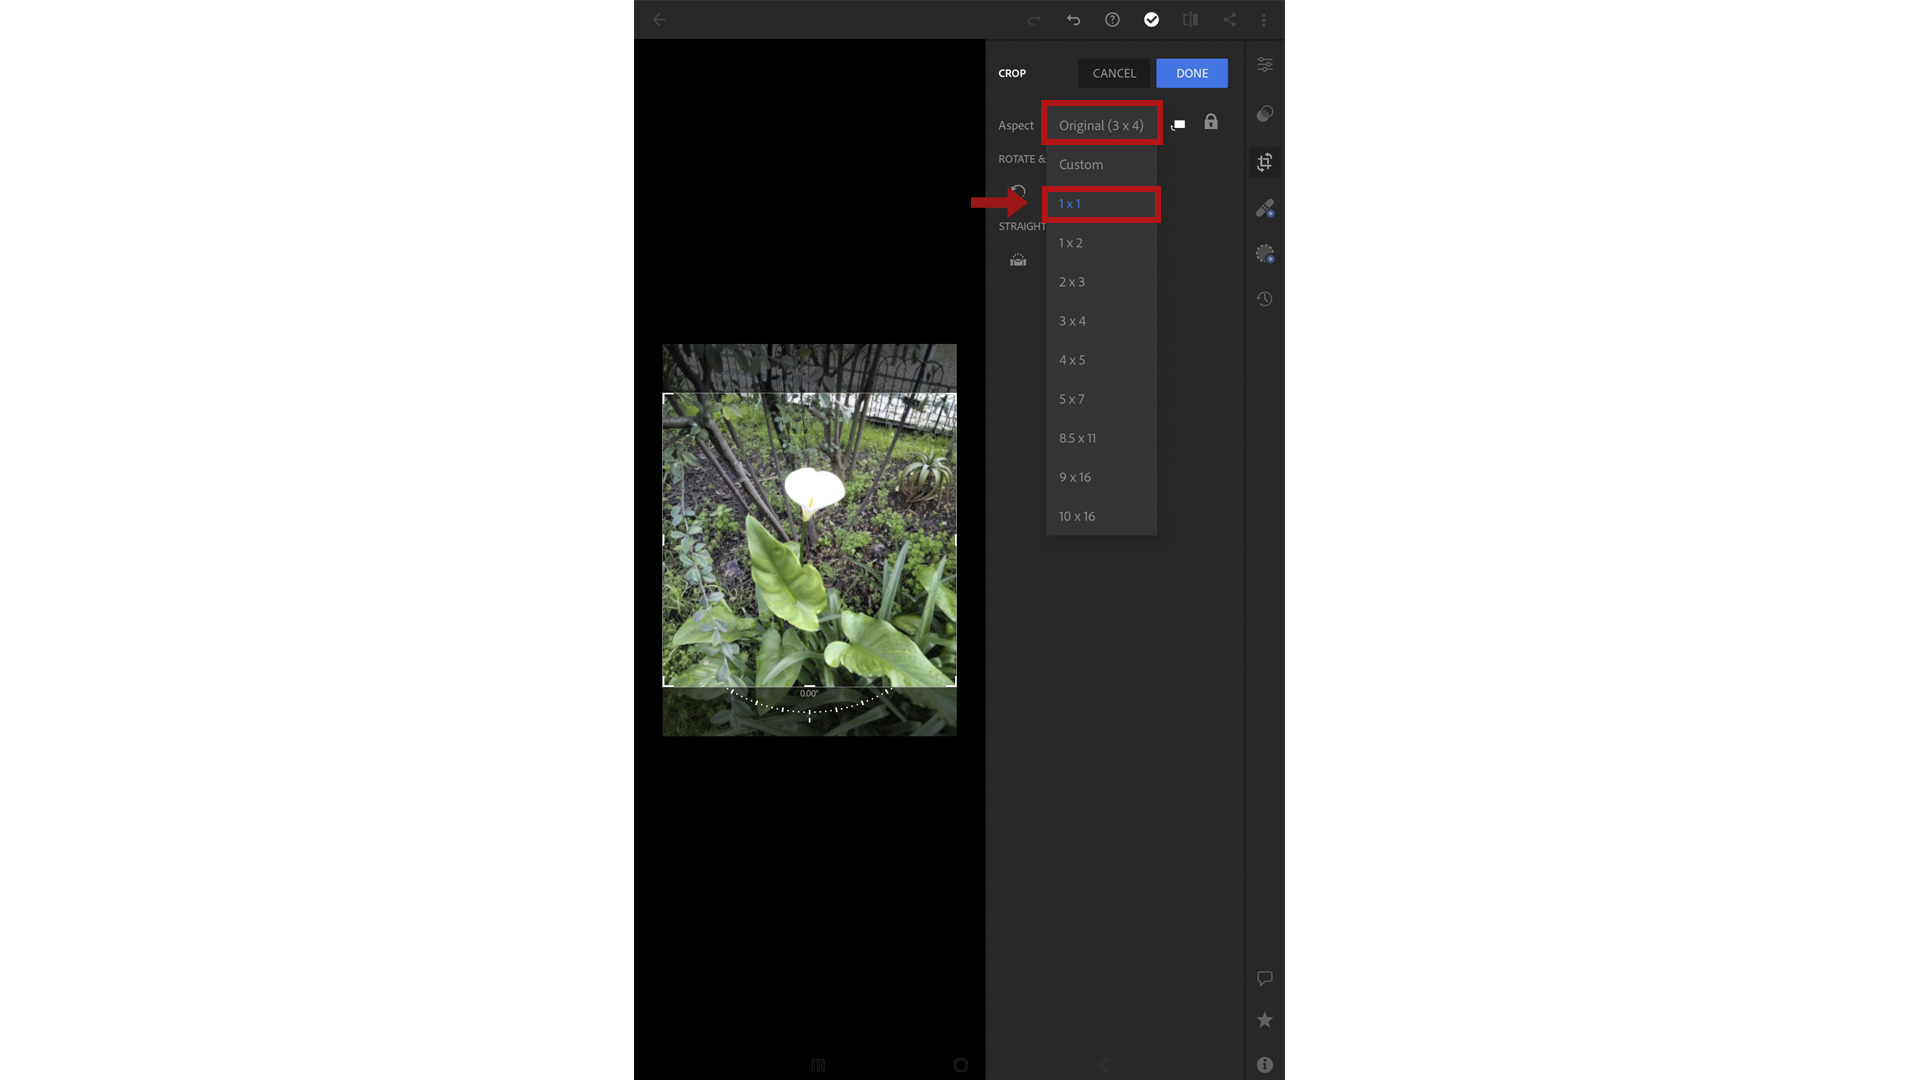
If you want to crop your photo to a specific format, go to Original (if you’re using an Android device) or click the 3×4 button in the bottom left-hand corner of the screen (if you’re using an iOS device).
The size 1×1 means that the height of the photo is equal to its length, while the size 2×1 means that the height is twice the length of the photo. Select the option 1×1.
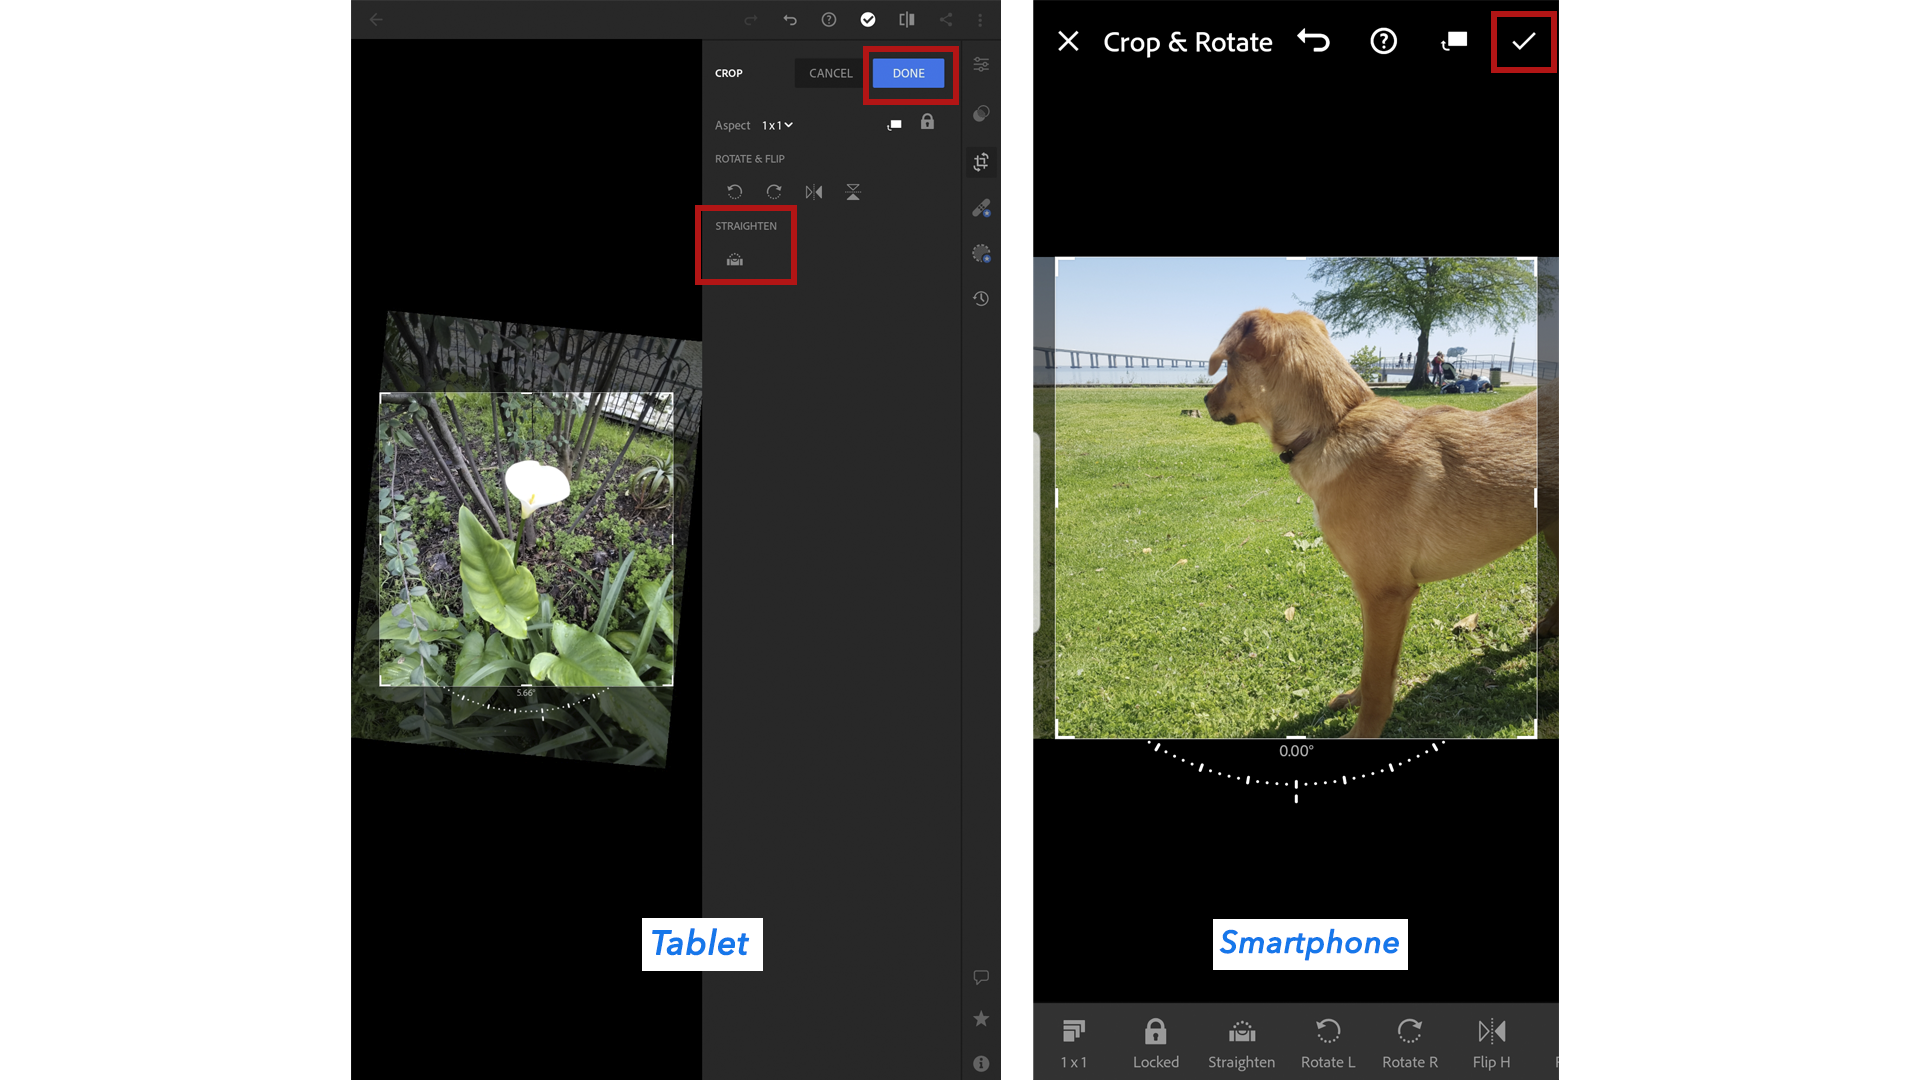
To crop the photo, click DONE if you have a tablet or OK if you have a smartphone.
If you want to undo the last change, click on the left arrow.
In the case of iOS devices, these buttons may be in different positions on the screen, although they follow the same logic.

Still in Resize (Android) or Crop (iOS), you can change the tilt angle of the photo by moving the line under the tilt angle to the right or left, as shown in the image.
If you make a mistake, double-click on it and the photo will return to its original tilt.
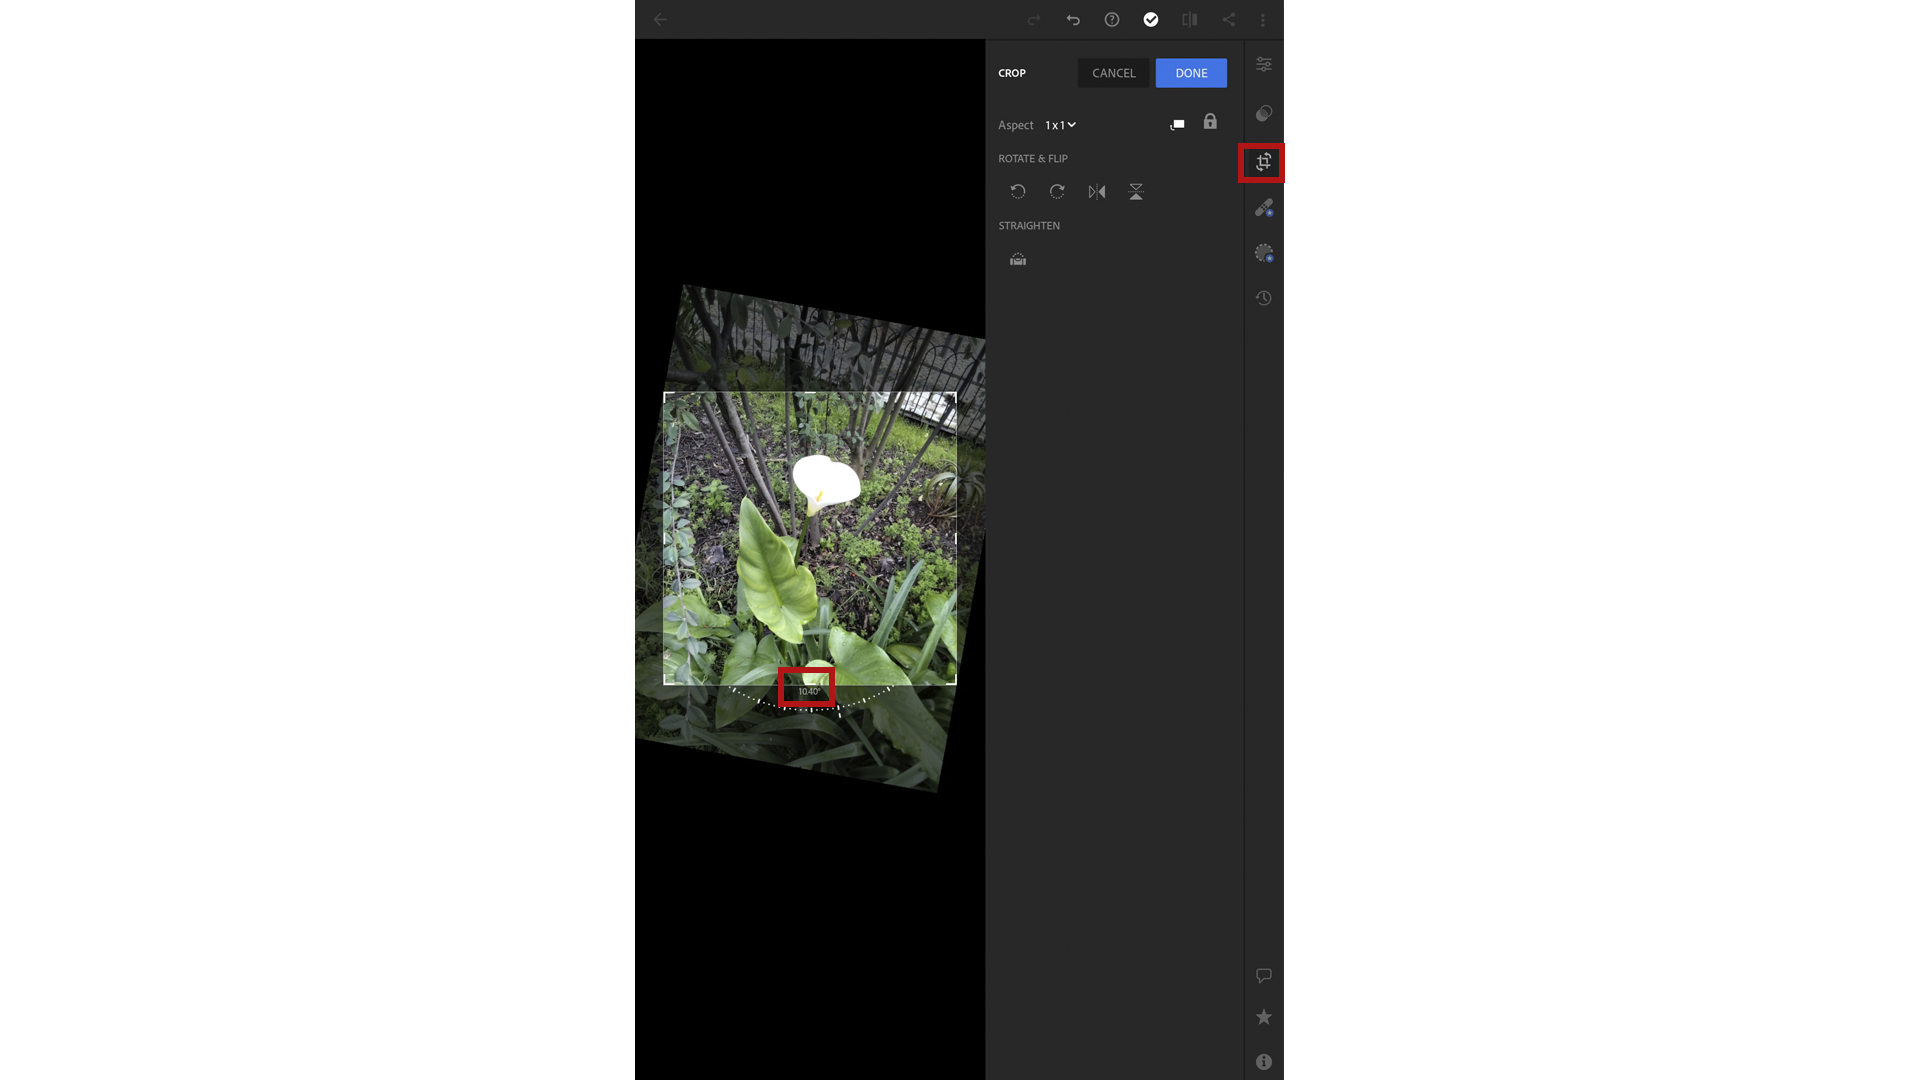
If you are unable to do so, click on STRAIGHTEN and the program will automatically correct the image’s tilt.
When you think the image is the way you want it, click DONE if you’re using a tablet, or OK if you’re using a smartphone.
8. Next, if you are using a tablet, click on the symbol highlighted in the image (Settings) and then under PROFILE click on BROWSE.
If you are using a smartphone:
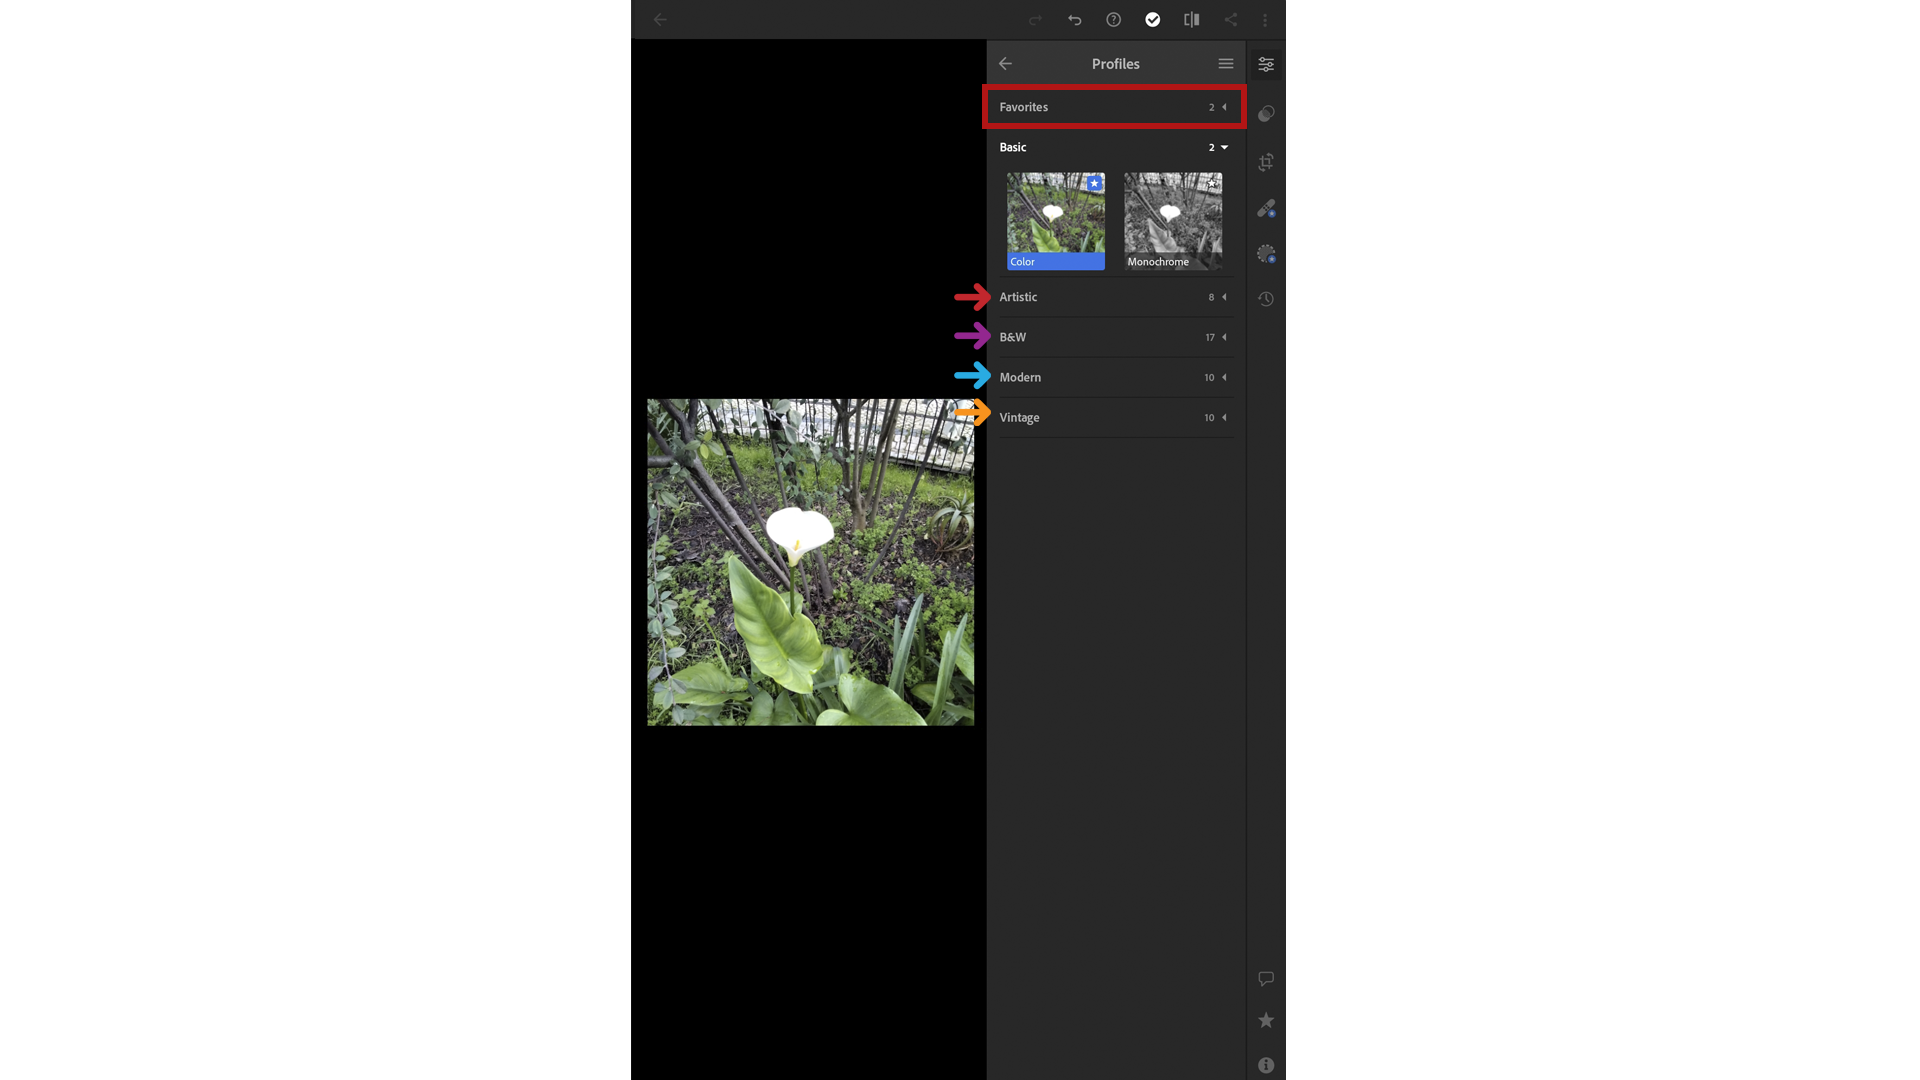
• Slide the menu bar to find the Profiles menu;
• You can then choose from various types of presets by scrolling down the menu bar.

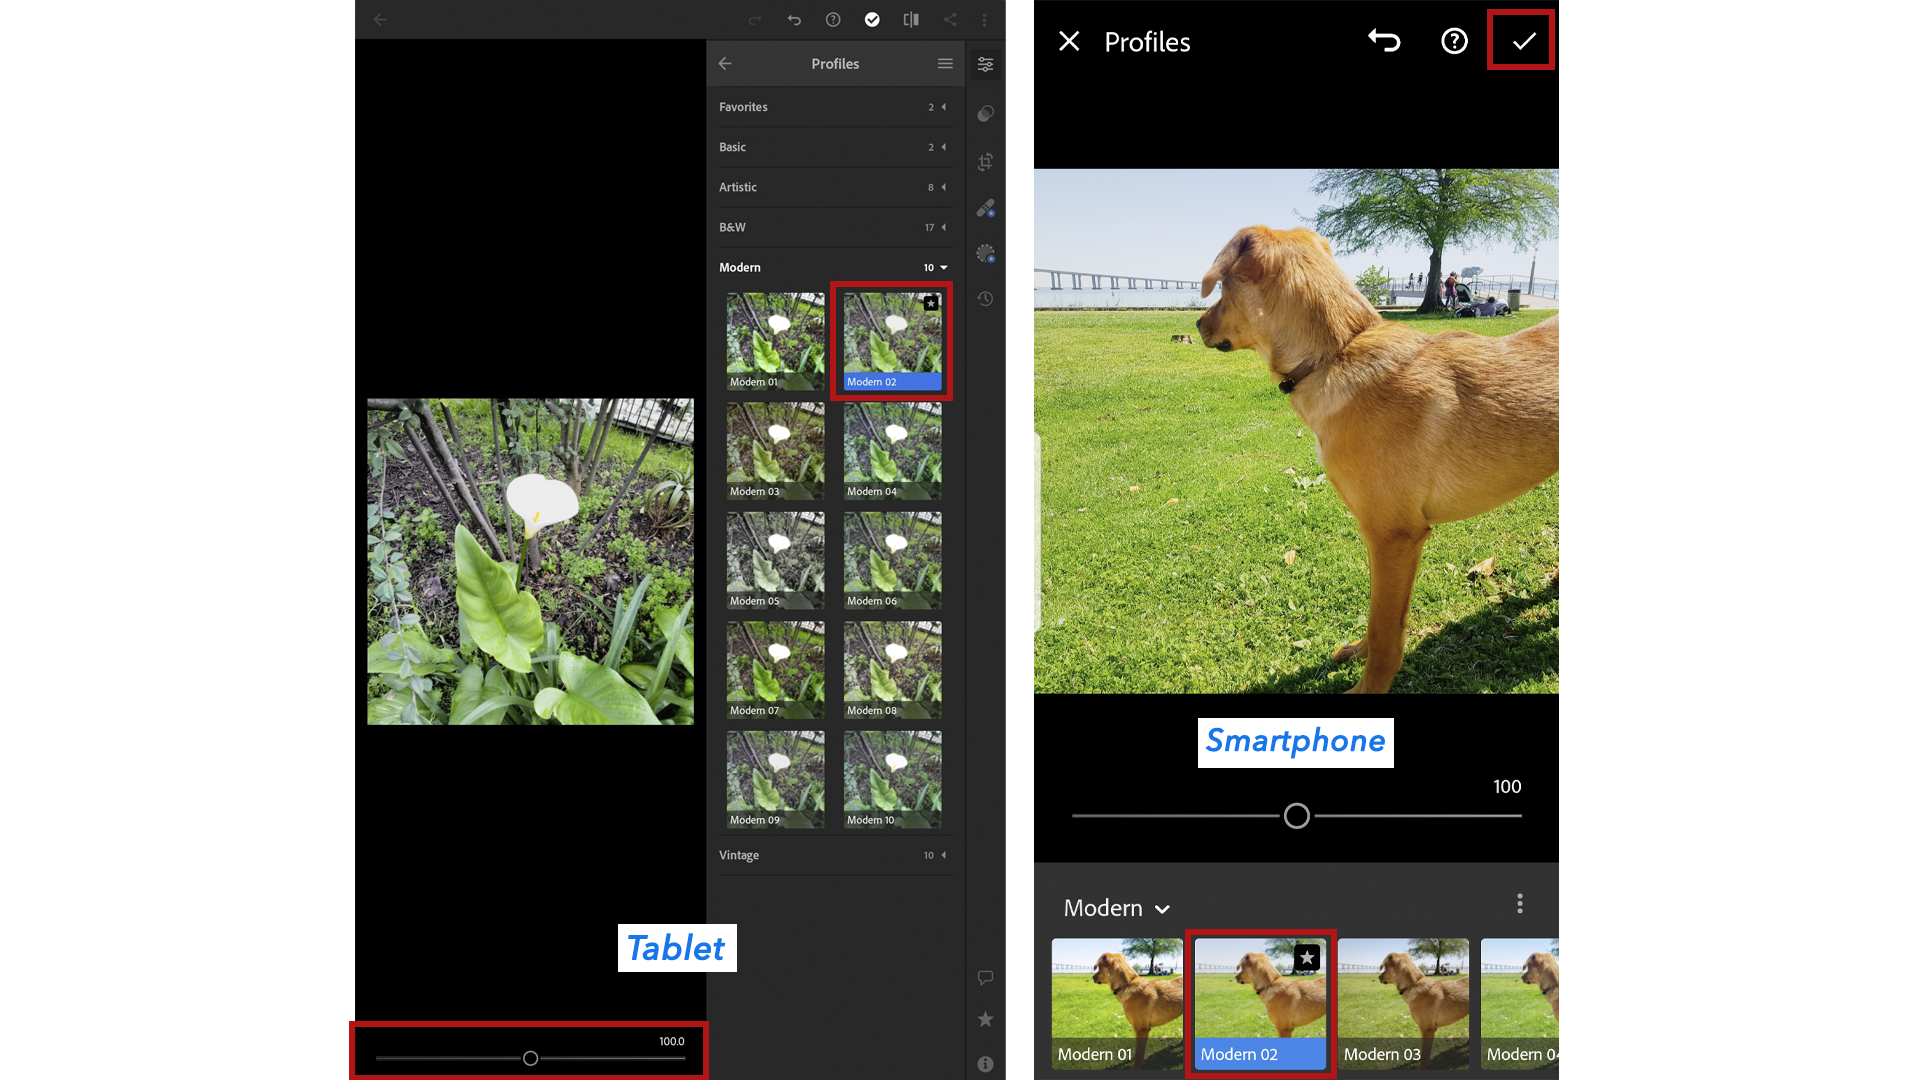
To see your photo before and after applying your chosen preset, press and hold the photo to see the differences.

There are several presets you can choose from. These are filters with predefined characteristics that you can apply to your photos.
Select the preset Modern 02. A circular cursor appears. By dragging it along the line, you can change the filter’s intensity. To save the changes on your smartphone, click on OK.
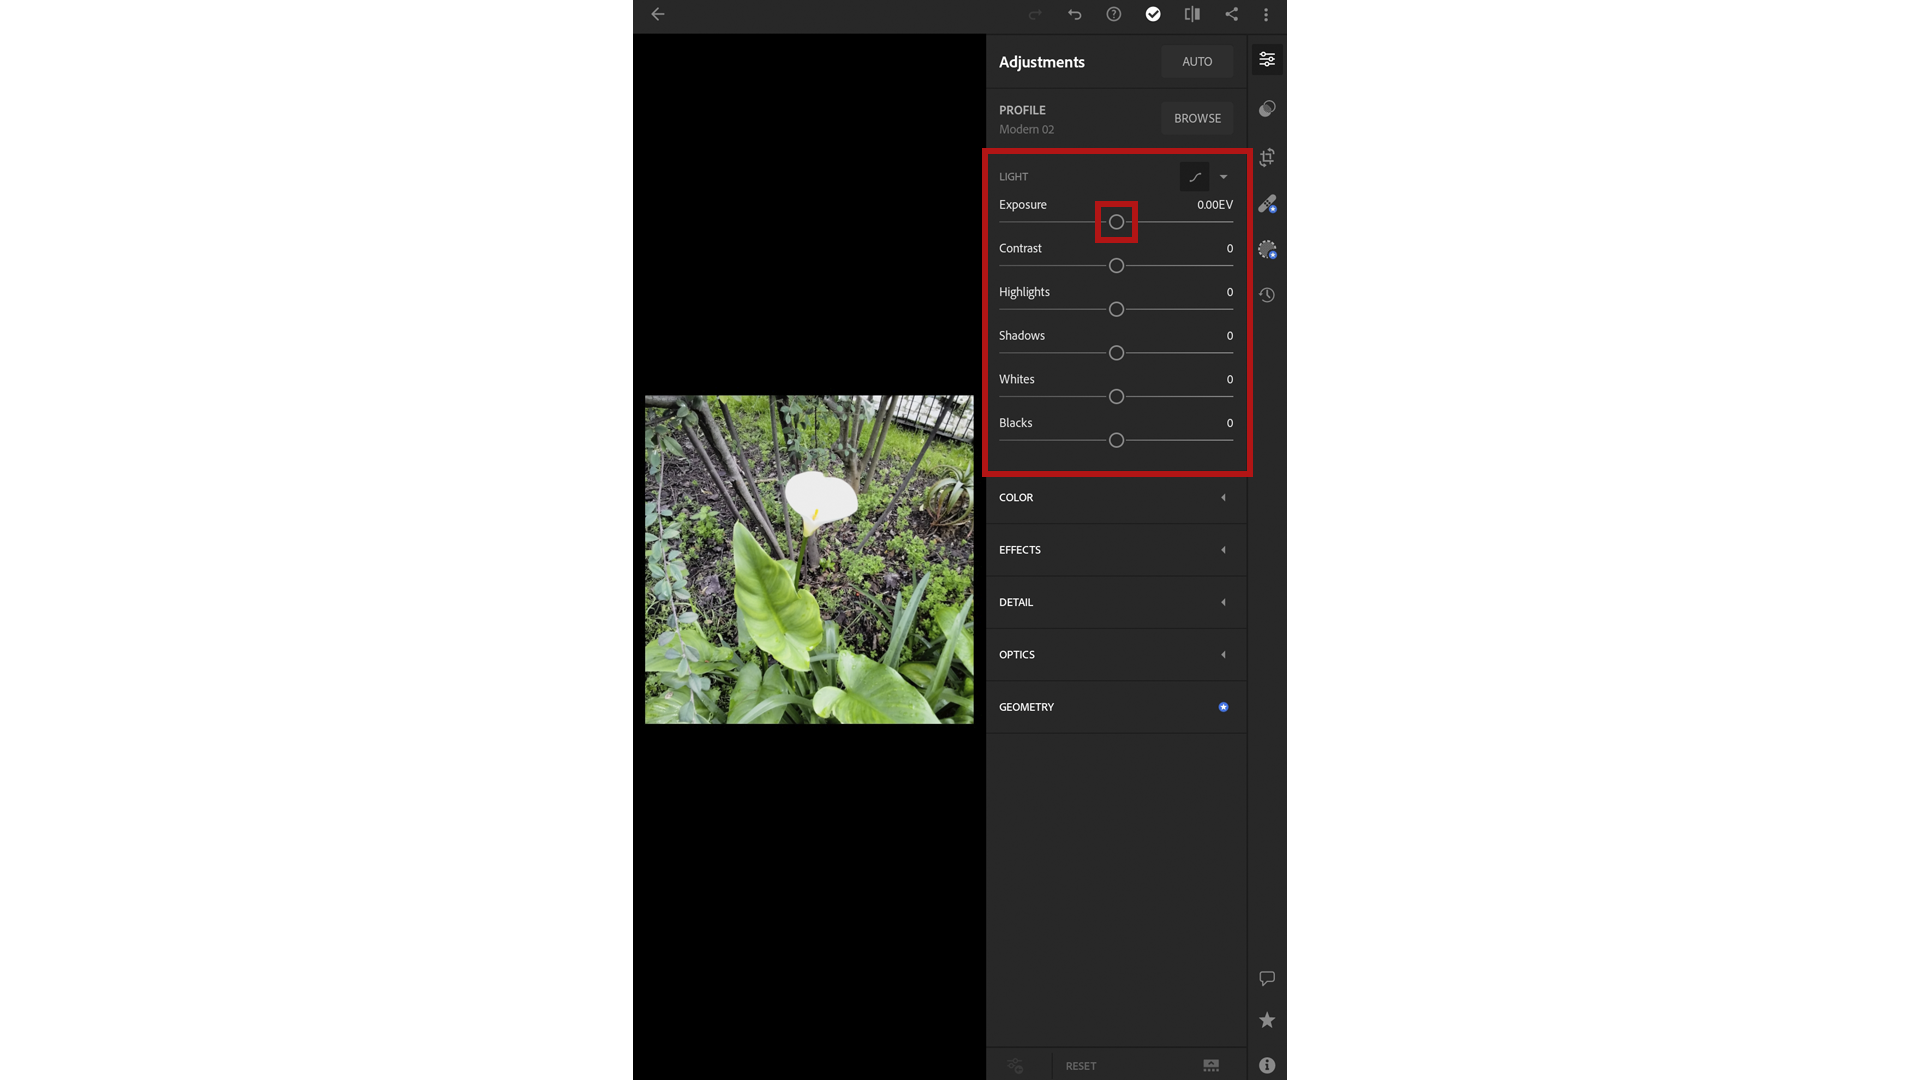
9. Midtones are all the shades that lie between the lightest and darkest shade in the photo. When you choose the AUTO menu (Automatic on smartphone), Lightroom analyses the tones of the photo and corrects the midtones.
However, you can also adjust the midtones manually. Click on the Settings menu and then on LIGHT. On your smartphone, click directly on Light.

By dragging the various cursors to the right and left, you can change the values of each item:
Exposure – Brightens or darkens the photo;
Contrast – Makes the shadows stand out more;
Highlights – Increases the definition of the photo’s details;
Shadows – Lighten or darken, by decreasing or increasing the areas of the photo in shadow;
Whites – Increases the white areas of the photo and lightens colours;
Blacks – Increases the dark areas of the photo and darkens colours.
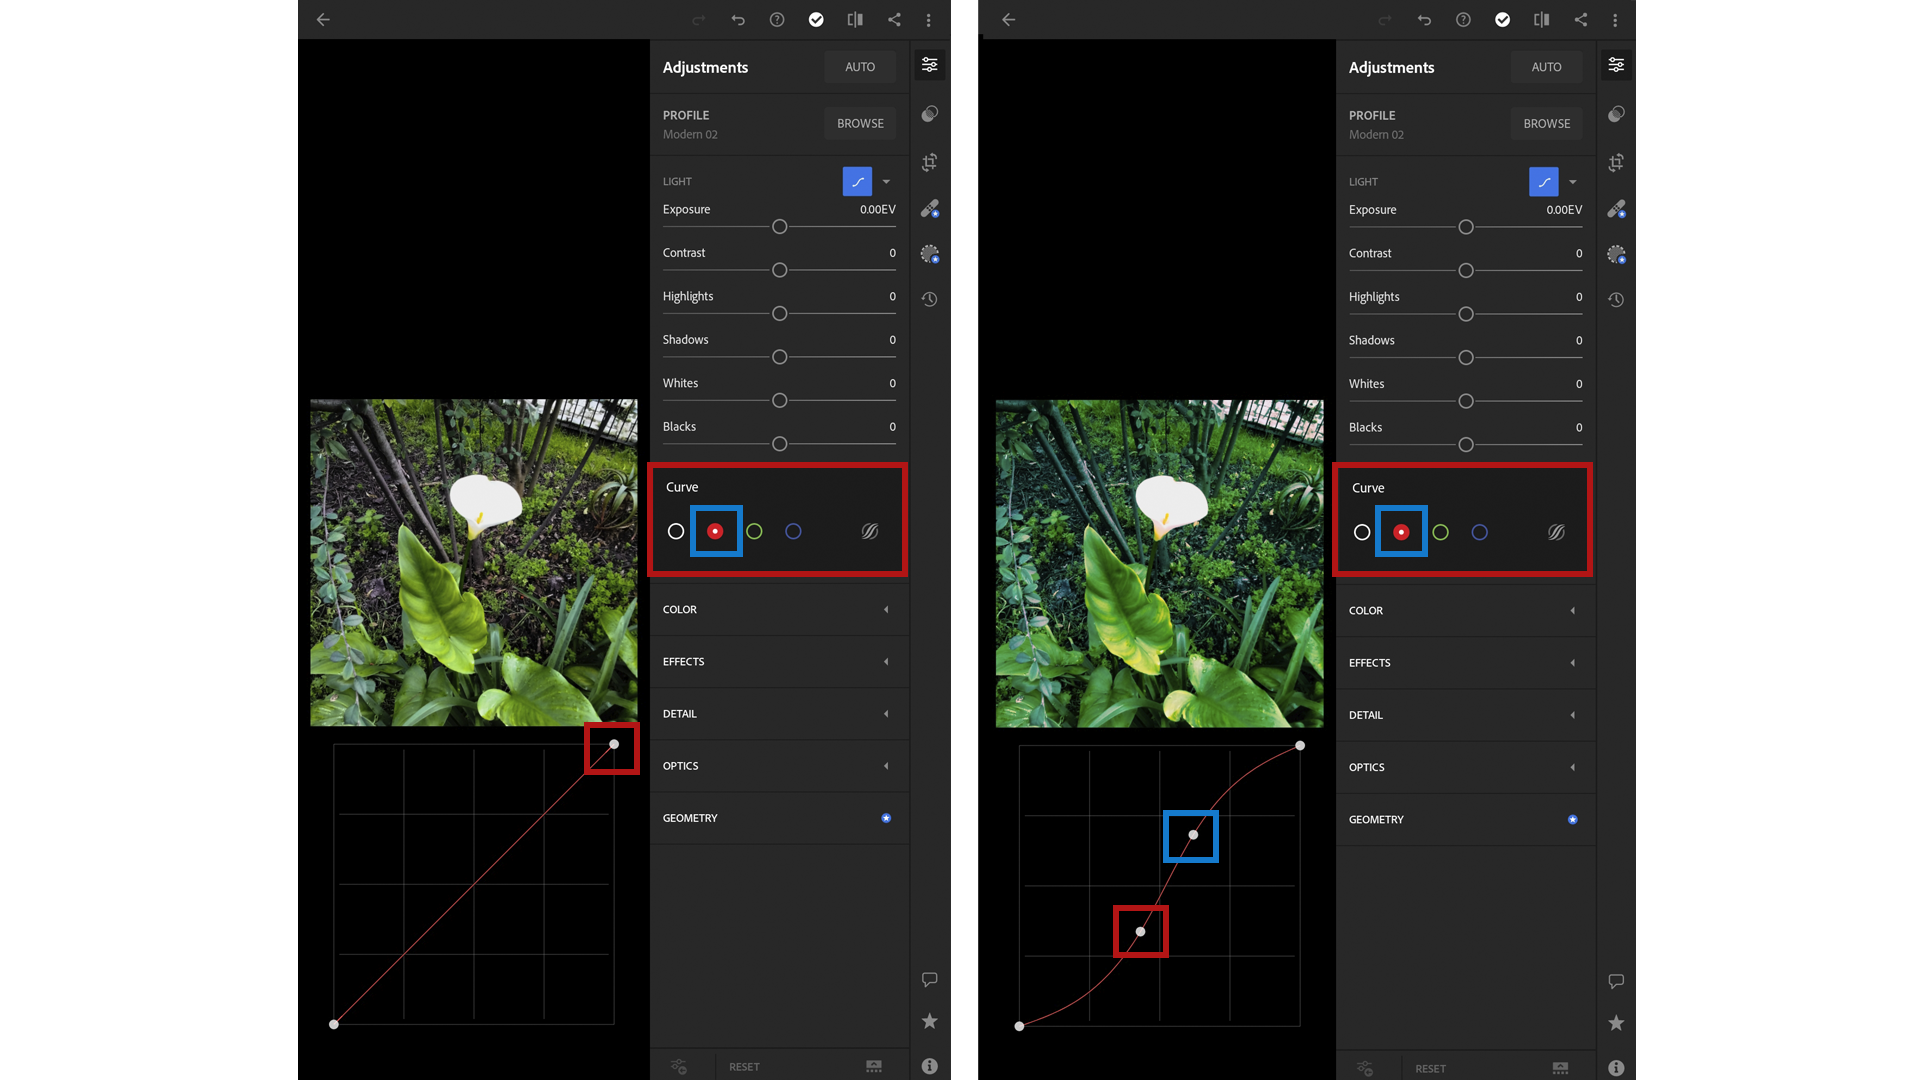
Then, in the Light menu, click on Curve.
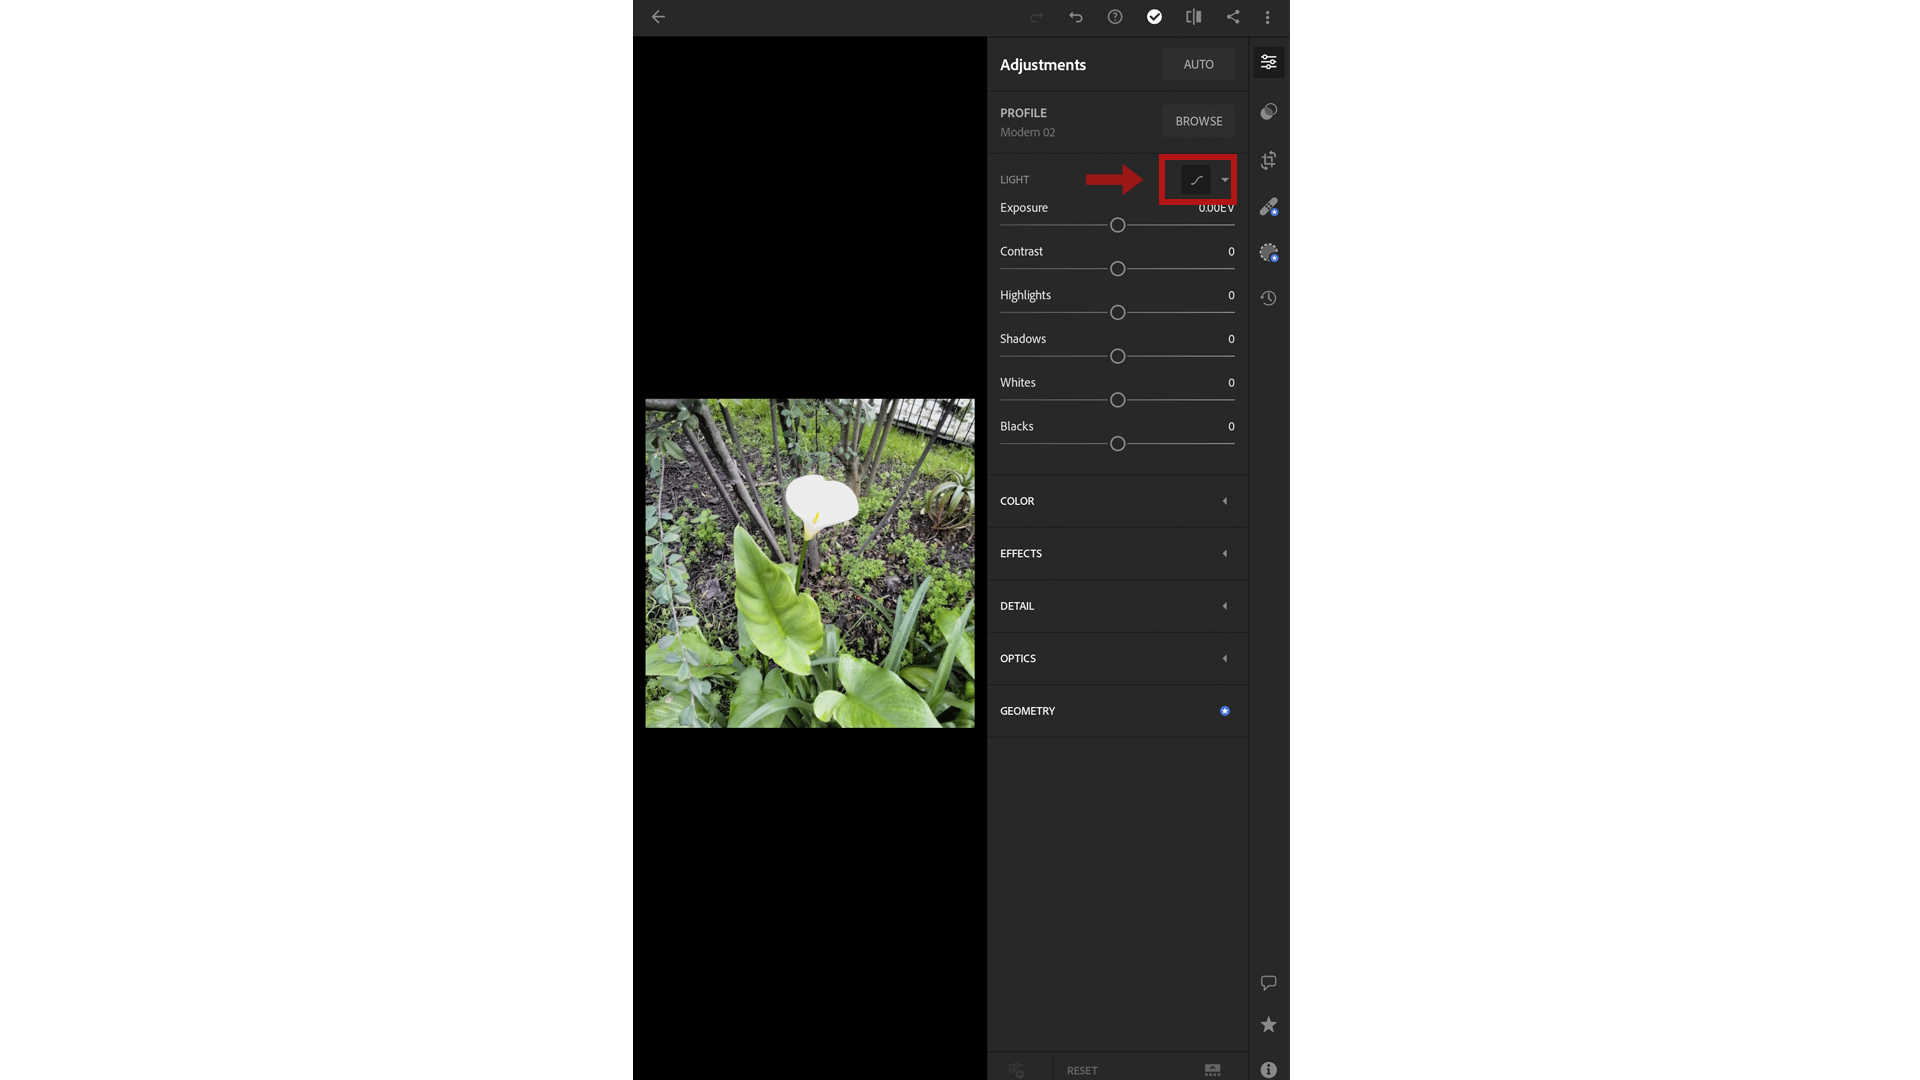
The curves allow us to change the balance between mid-tones, lighter tones and darker tones.

By clicking on the white line below your image, you will be able to create fixed points. You can move these points, thus changing the light tones. By pulling the line up or down on the left side, you can darken or lighten the dark tones. By pulling the line up or down on the right side, you can darken or lighten the light tones.

You can also select the colour of your curve, i.e. the tone you want to edit in your photo. The curve you initially changed was white. White light is composed of three primary colours: the so-called RGB, or red, green and blue. All other colours are obtained from these three colours. Select the red circle.
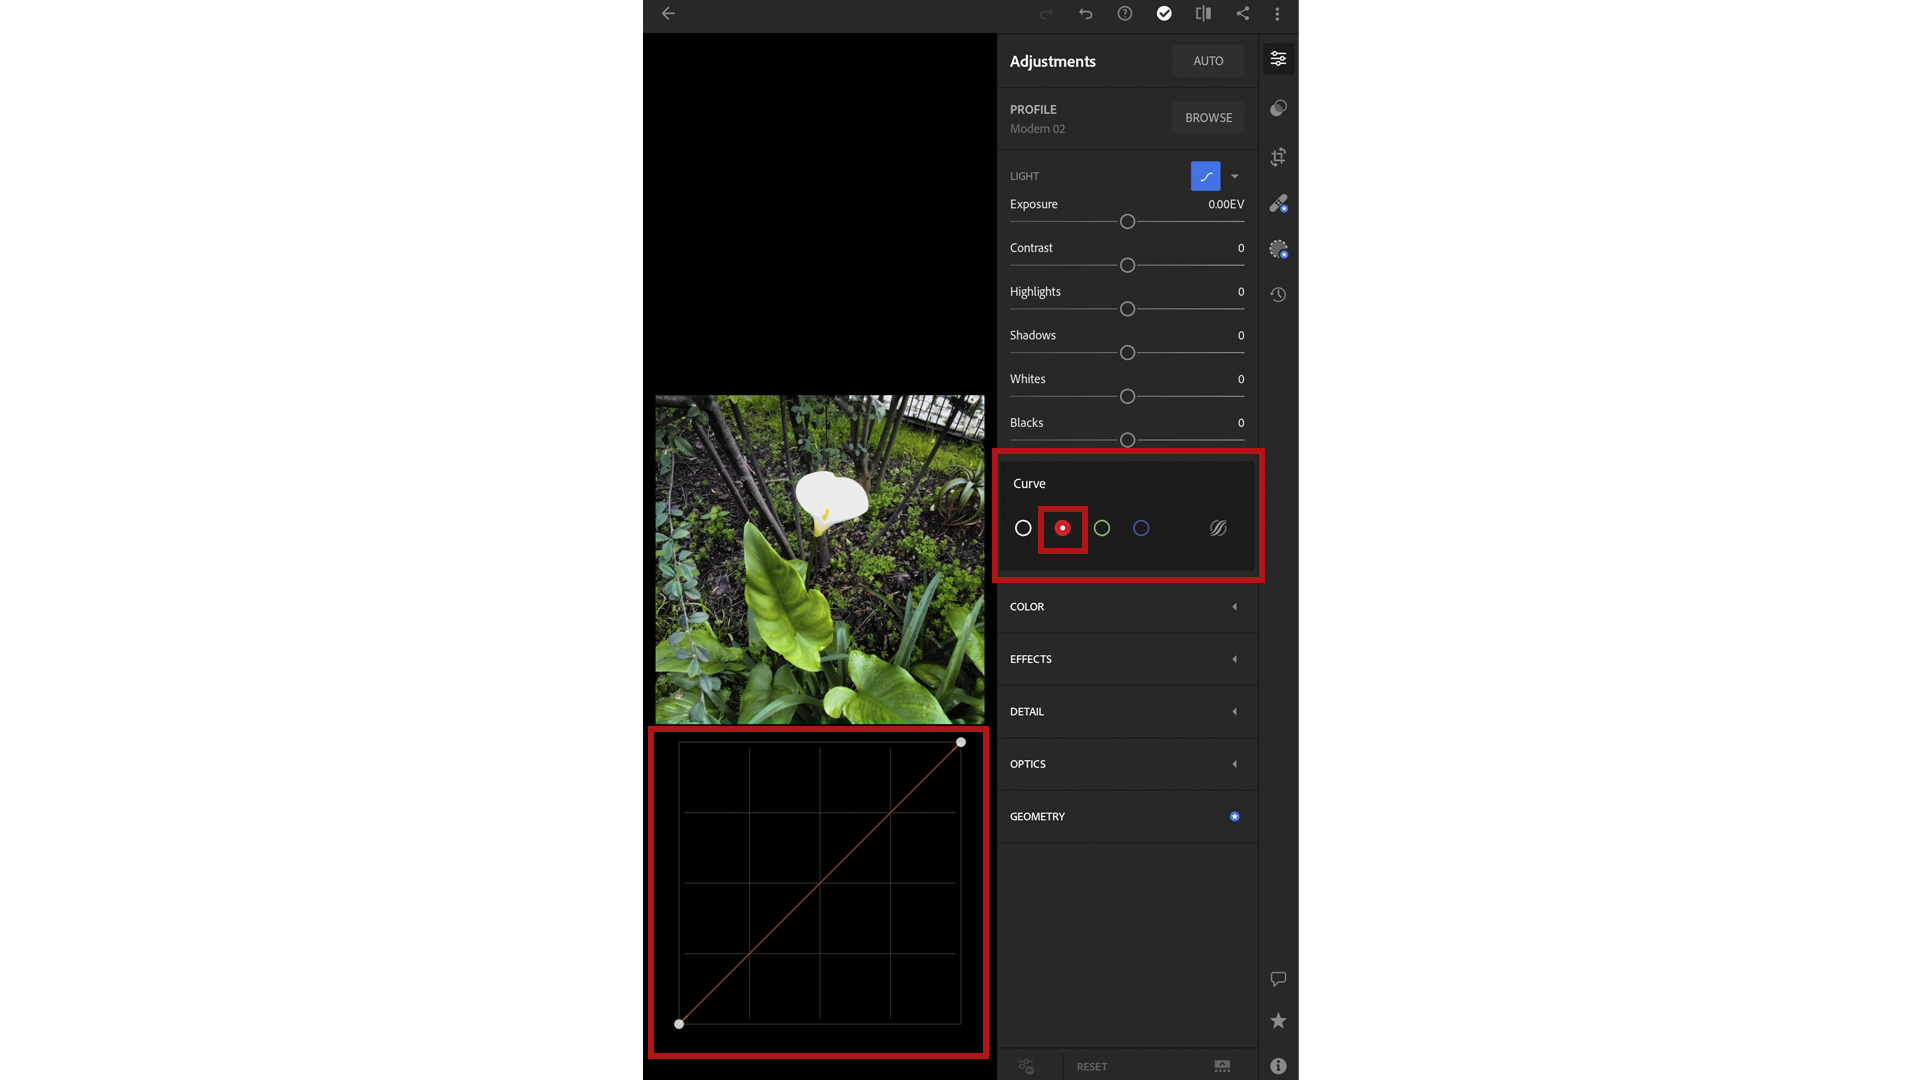
The curve has turned red, so you will adapt this same tone in your photo. Clicking on this line will create fixed points. You can move these points, thus changing the red tones. By pulling the line up or down on the left side, you can darken or lighten the dark red tones. By pulling the line up or down on the right side, you can darken or lighten the light red tones.
Also try changing the blue and green tones. To save the changes on your smartphone, click DONE.

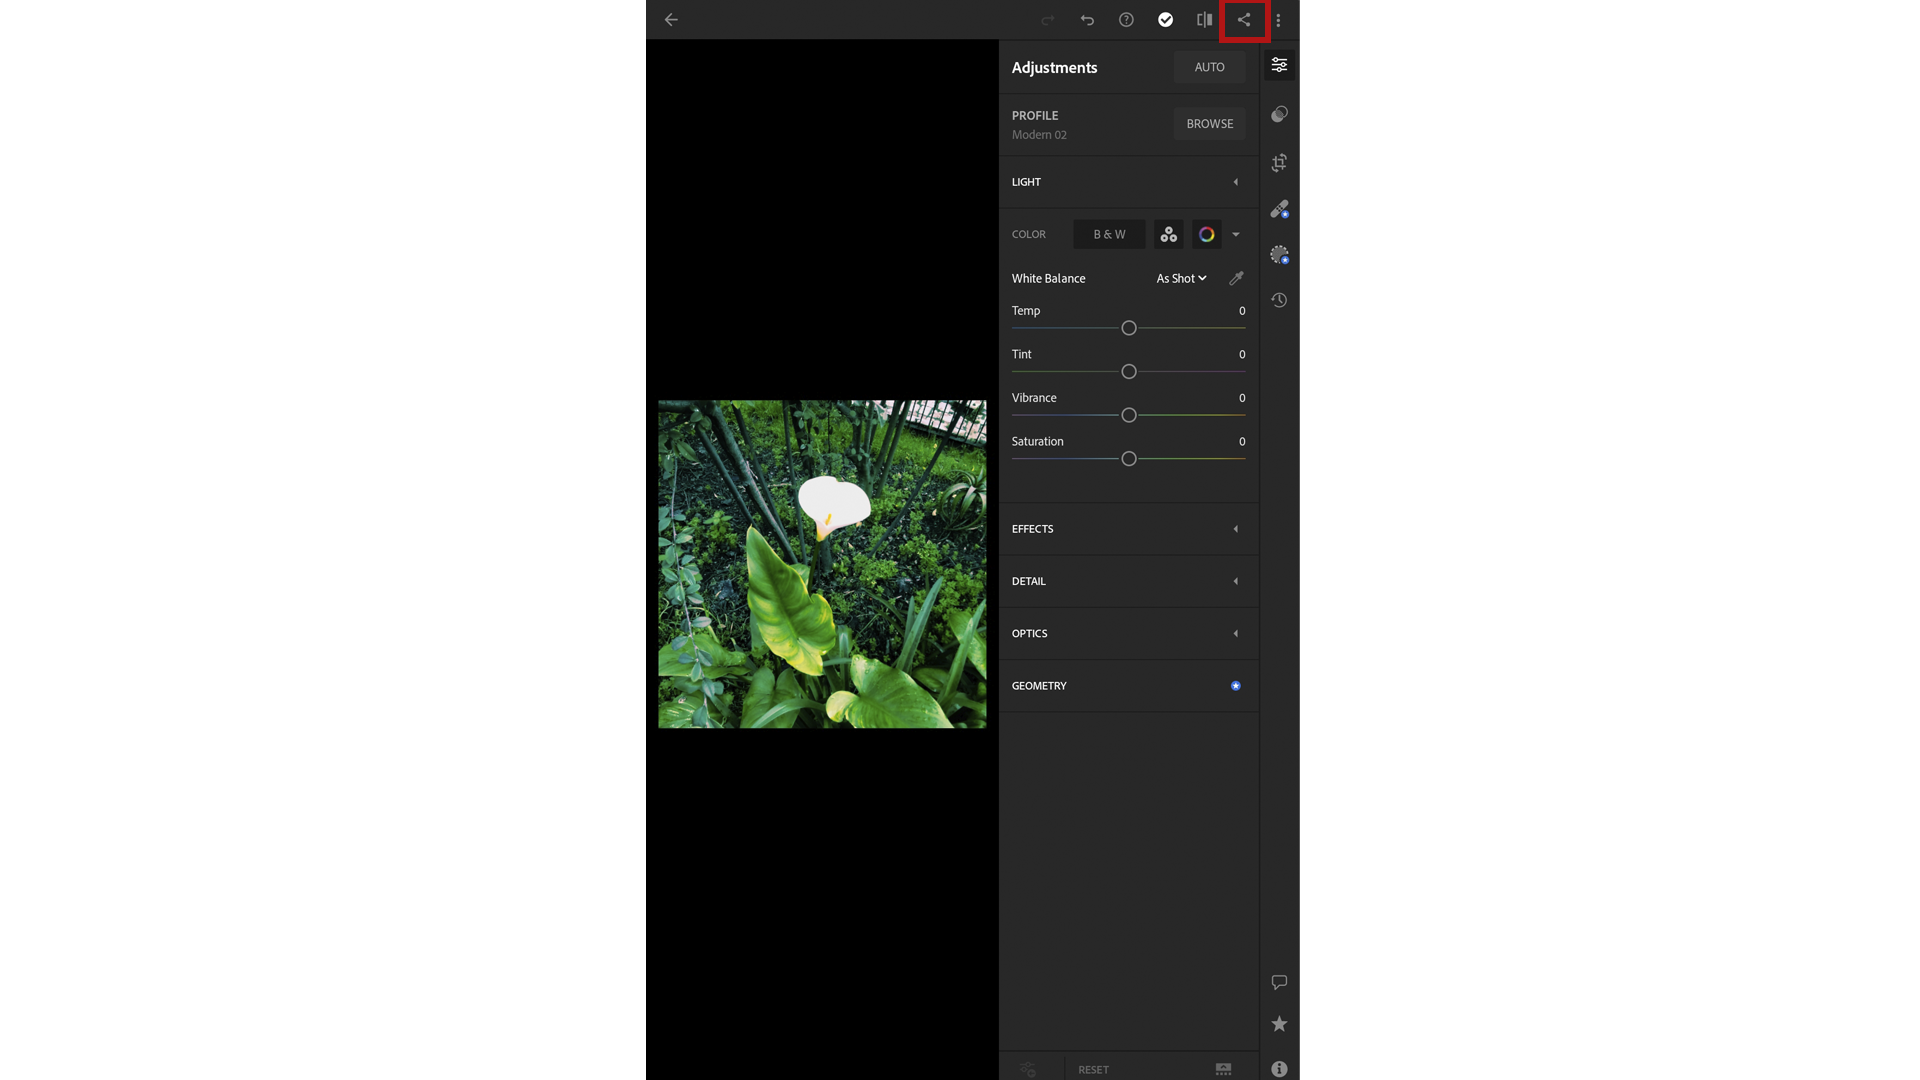
10. Next, click on the COLOR menu. On the tablet, you’ll find the COLOR option under Settings.

11. By dragging the various cursors to the right and left, you can change the values of each item:
Temp (Temperature) – Allows you to add bluer or more yellow tones to the photo;
Tint – Allows you to add greener or more violet tones to the photo;
Vibrance – Increases or decreases the intensity of all the tones, allowing them to become fluorescent or not;
Saturation – Increases or decreases the intensity of all tones, allowing them to be saturated or limited to black, grey and white tones.

These are the main options you can use in Lightroom. Edit your photo to your liking. When you have finished, click on the button highlighted in the image.
12. Here you can share your photo by clicking on Share to… (on Android) or Share with… (on iOS.) You can also save it to your tablet or smartphone by clicking Save to Device (on Android) or Export to Camera Roll (on iOS).
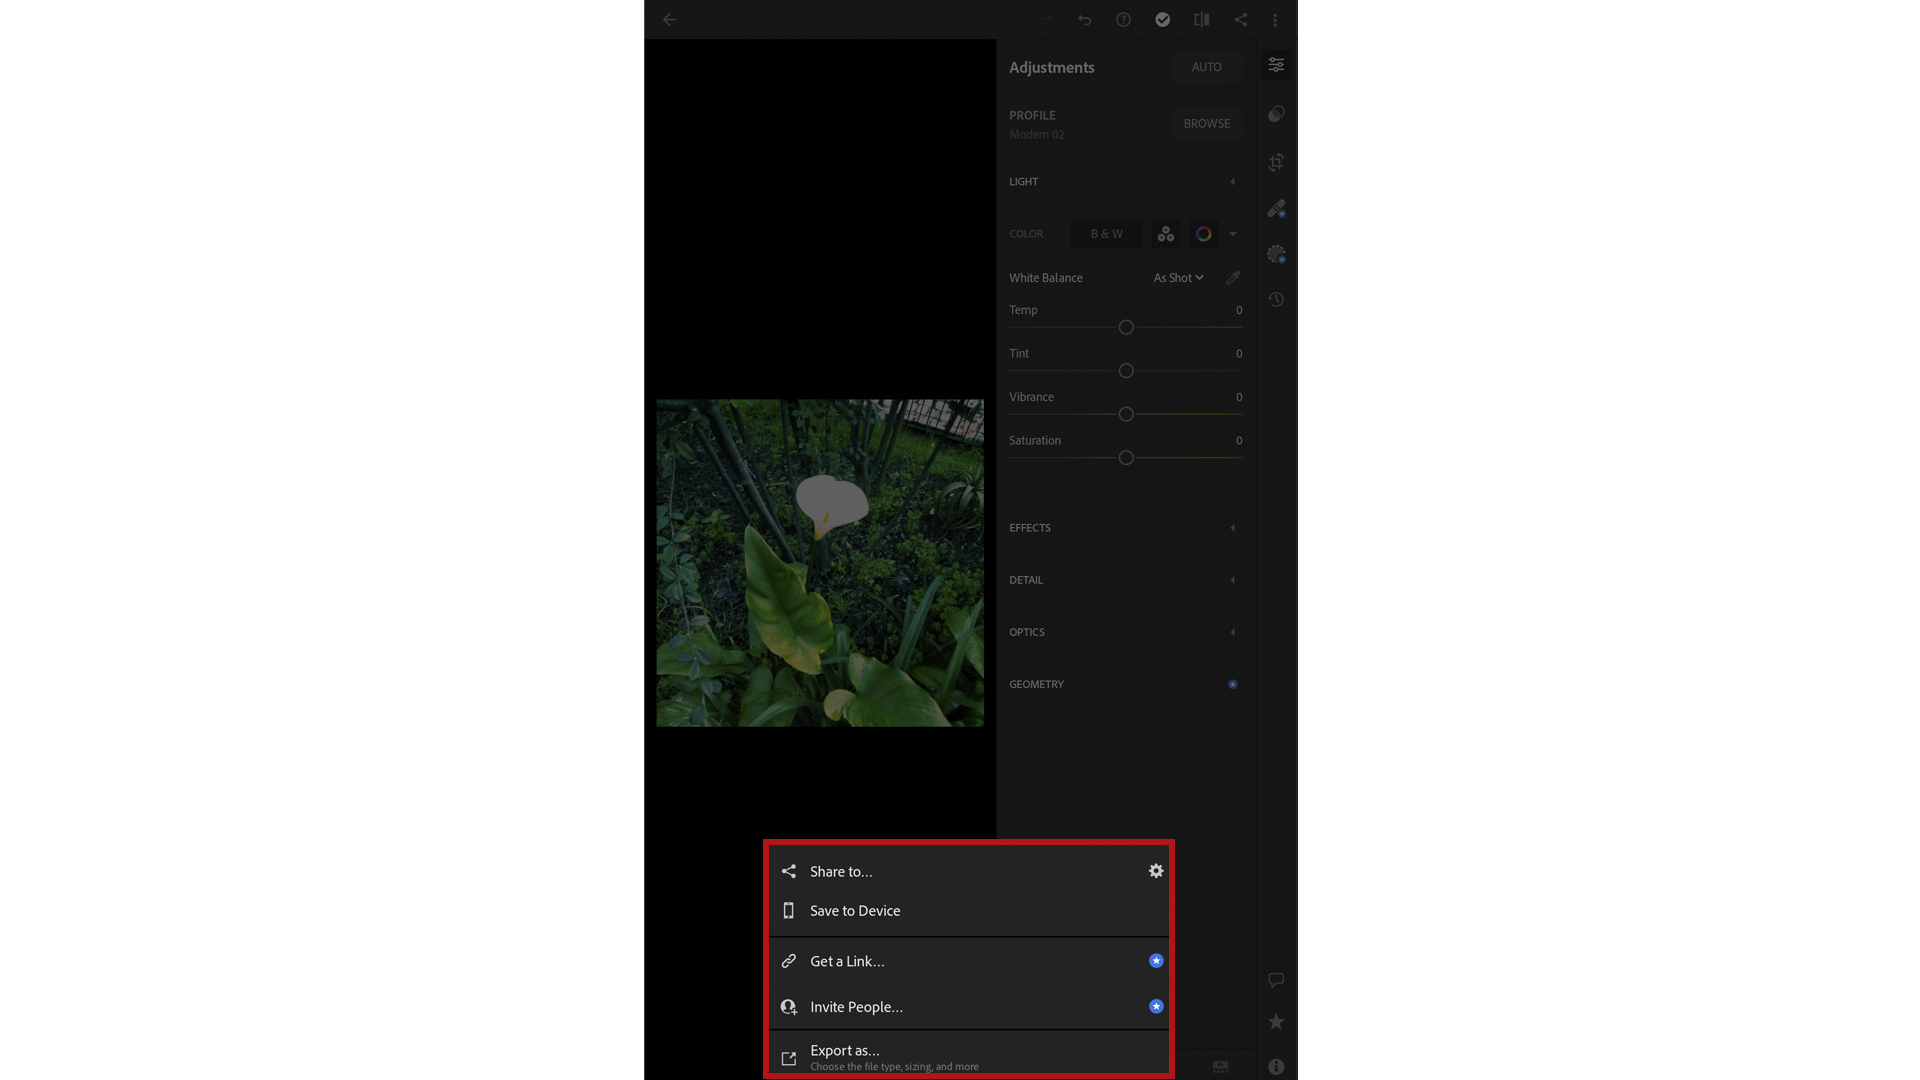
13. Once the export is complete, click OK.

14. Your photo is now edited. Have fun exploring Lightroom!