Activity
1. To start this activity, you have to create your 3D robot. To do this, open the Assemblr app on your tablet or smartphone.


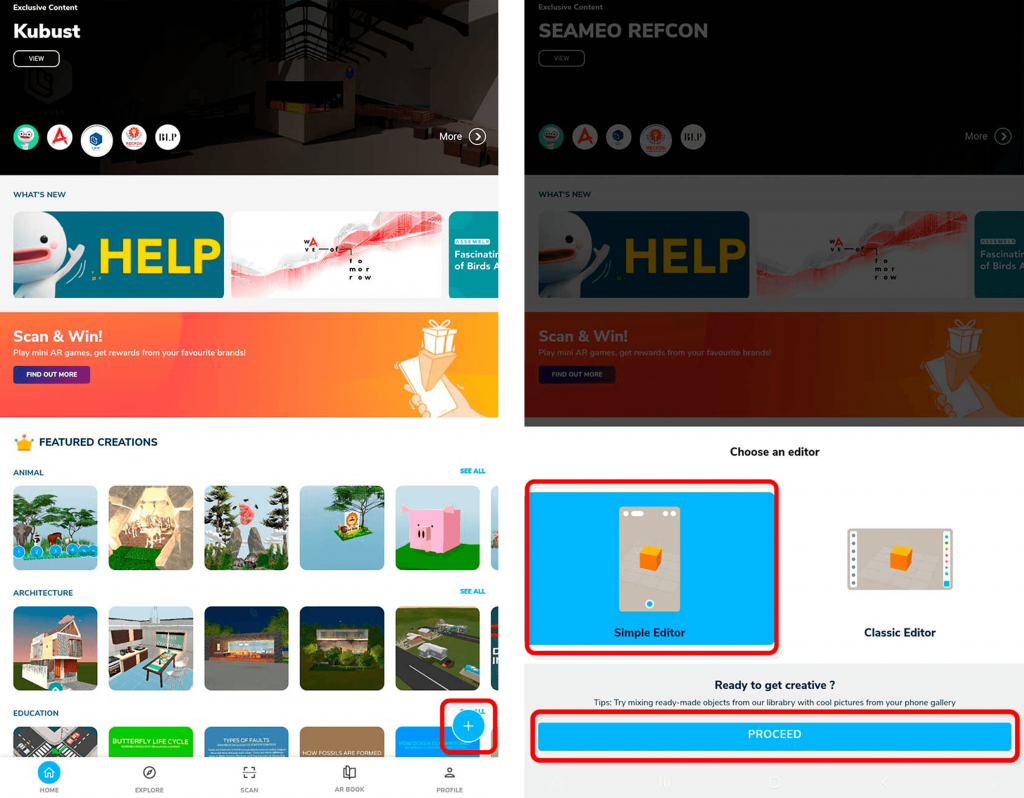
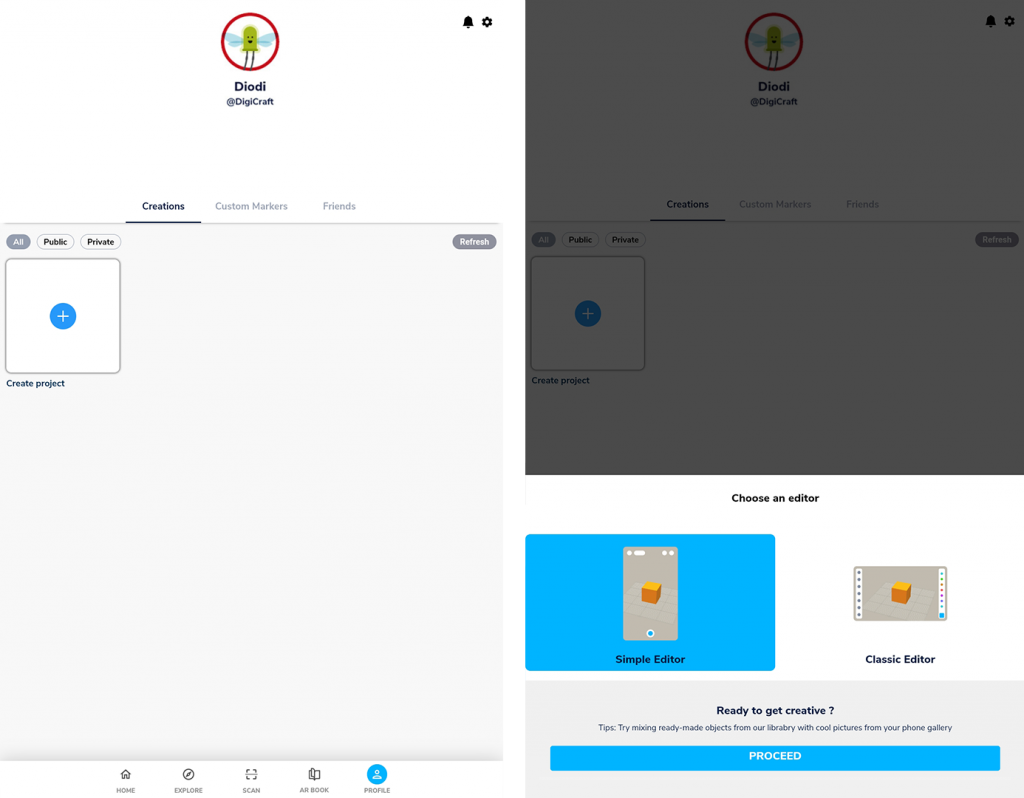
2. Click the blue + button in the bottom right corner. Then click on Simple Editor and then on PROCEED.
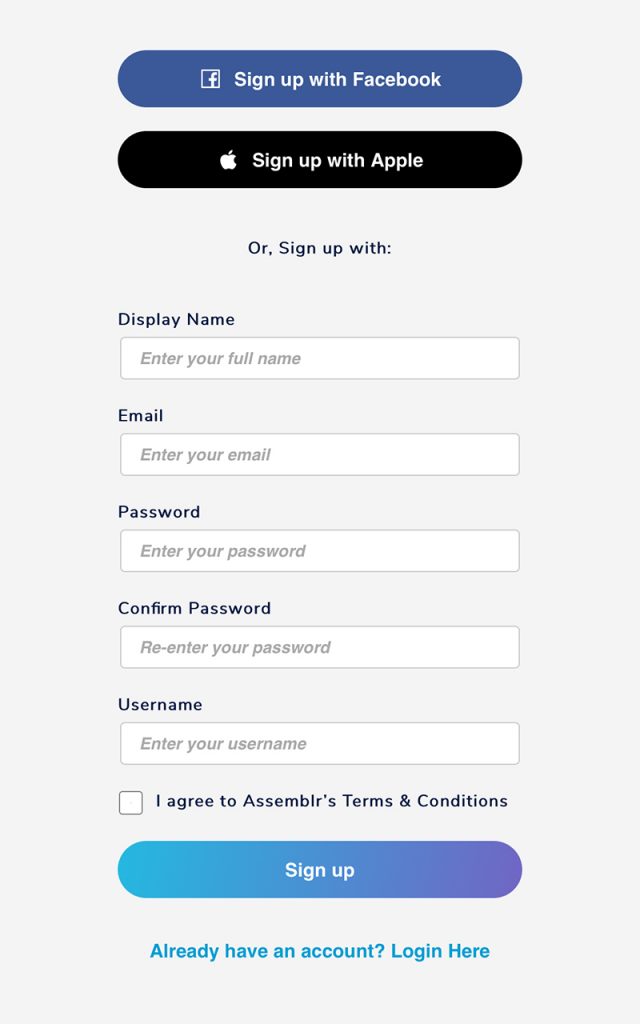
3. To continue, you’ll need to create a user account. Click on Don´t have an account? Sign up Here and ask an adult for help to register on the Assemblr app.
For security reasons and in order to protect our privacy, it is recommended that you:
– avoid using your full name as a username;
– choose a password that contains as many elements as possible (upper-case and lower-case letters, numbers and special characters), but does not include personal data, such as your date of birth.
4. Click the blue + button. Then click on Simple Editor and then on PROCEED.
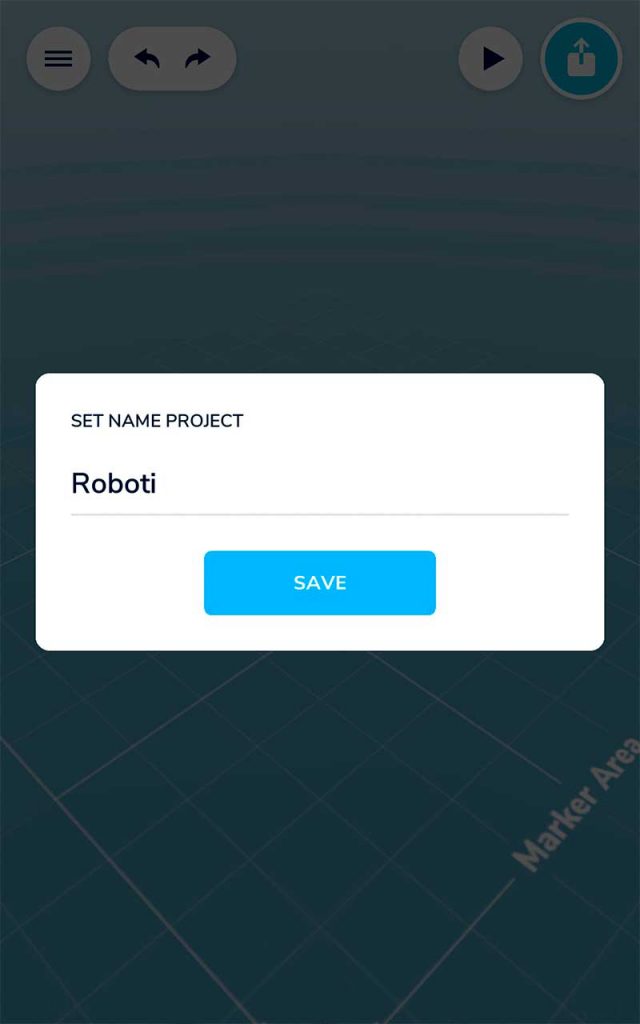
5. Give your robot a name, then SAVE. If a blue welcome box appears, close it by clicking the X in the top right corner of the box.
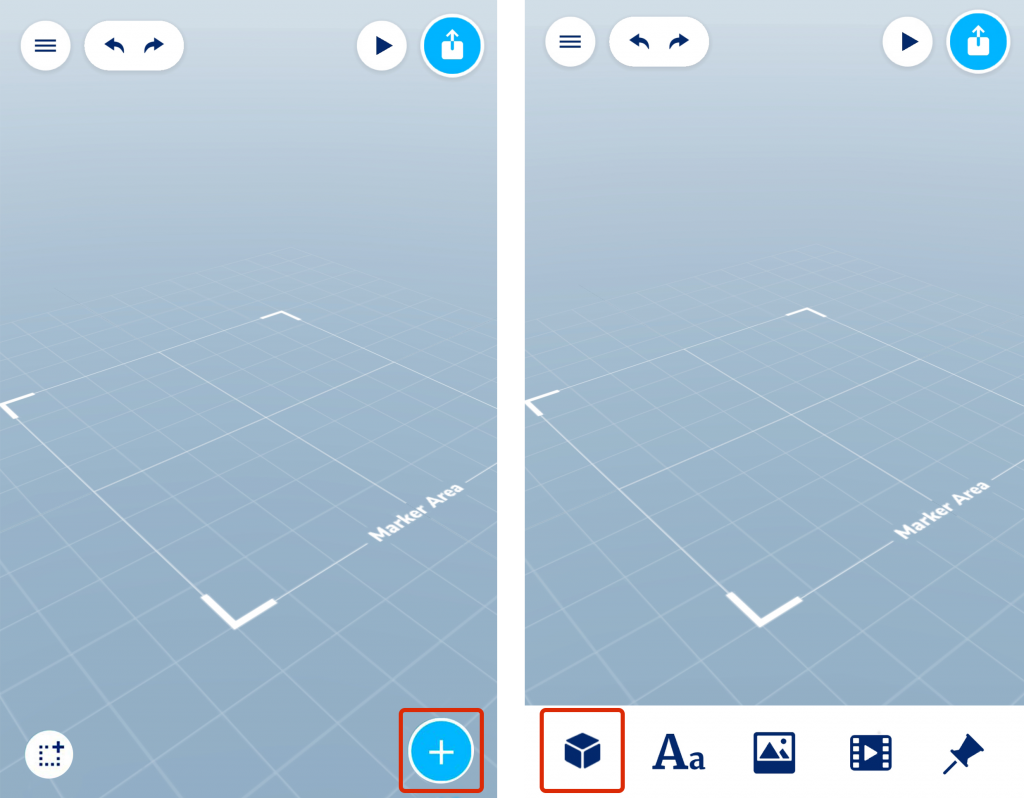
6. Now, everything’s ready for you to build your first robot! To start building the robot and select the parts that make it up, click on the blue + button in the bottom right corner of the screen. Then click on the 3D Object button.
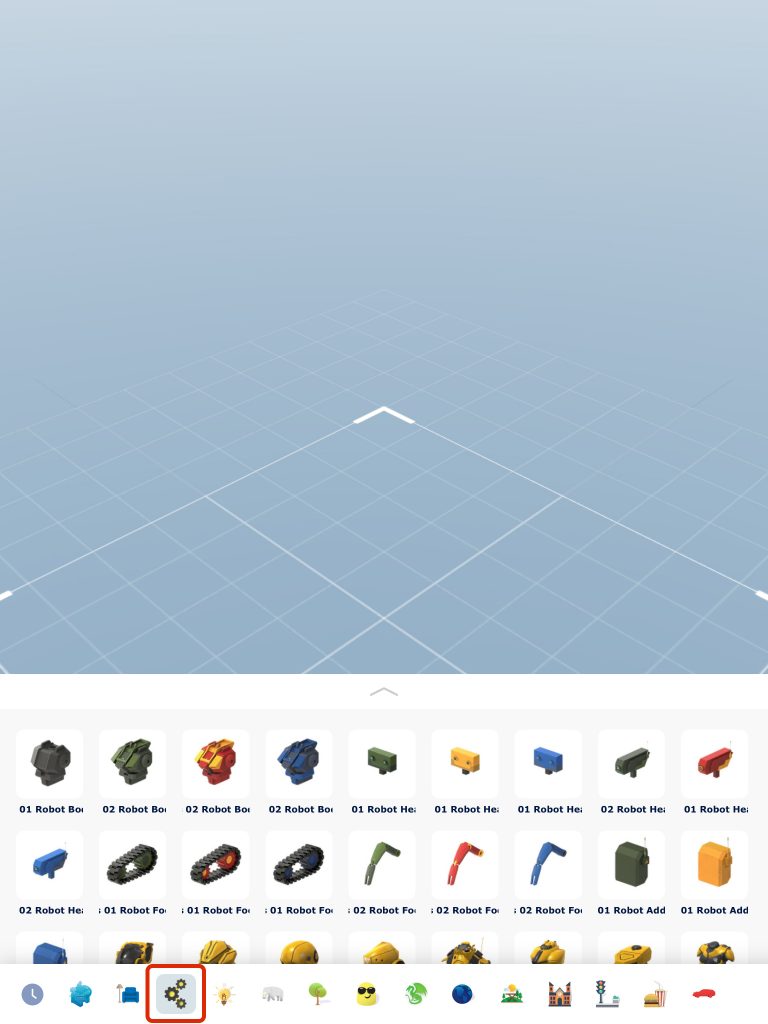
7. Select the Parts category and choose the first part of the robot you want to build from the list shown. You can choose the one you like best! We suggest that you select one of the legs or wheels of the robot.
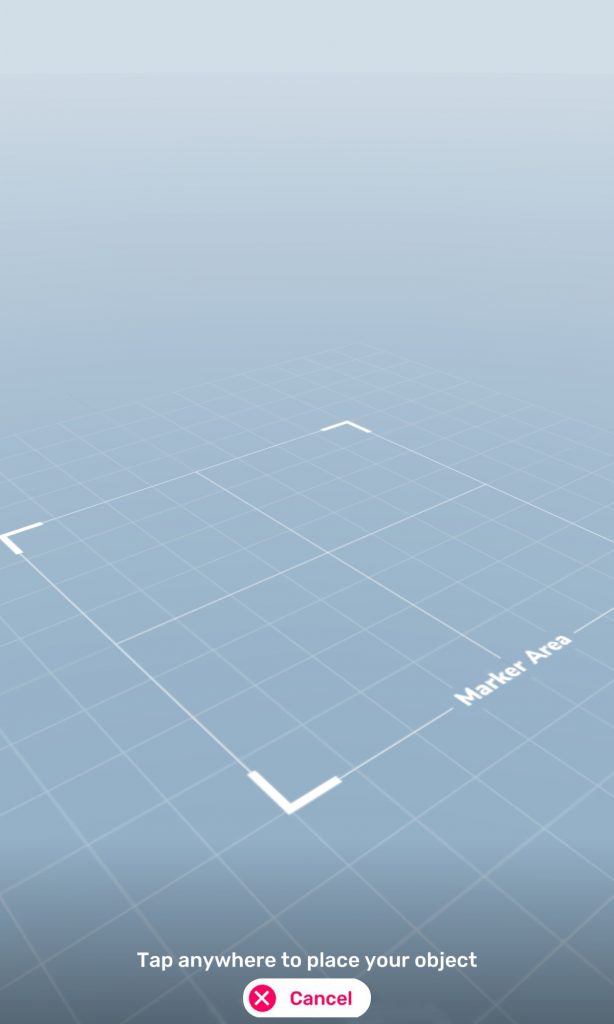
8. Click on the location on the Marker Area where you want to place the robot part.
9. You can view the part and the robot from different angles by clicking anywhere on the screen and dragging your fingers in any direction.
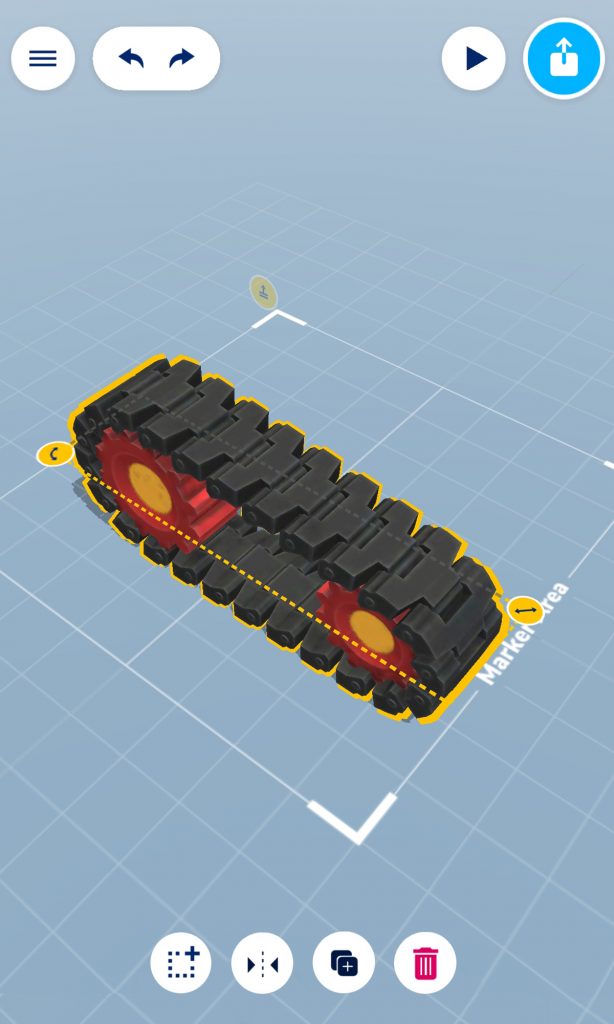
10. If you want to move a part that’s on the Marker Area:
• Select the part by clicking on it until yellow buttons appear;
• Click again and, without releasing, drag it to its new position.
11. To change the size of a part:
• Select the part by clicking on it until yellow buttons appear;
• Find the button highlighted in the picture, click on it and drag the part up or down.
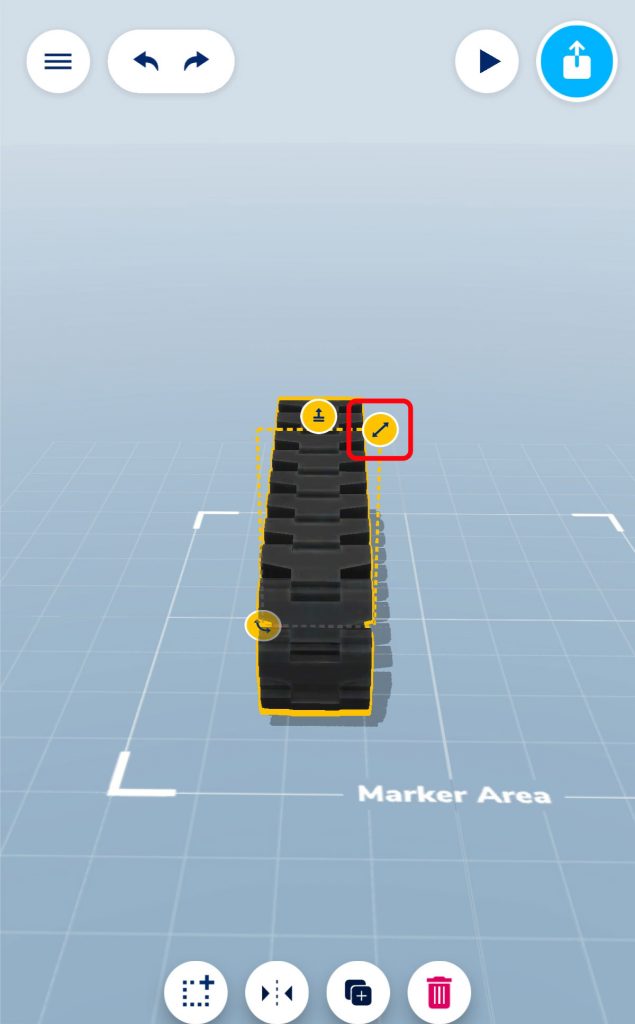
12. You can also rotate or change the height of the parts. To do this:
• Select the part by clicking on it until yellow buttons appear;
• To rotate the part, click on the button highlighted in the picture and, without releasing, drag from side to side;
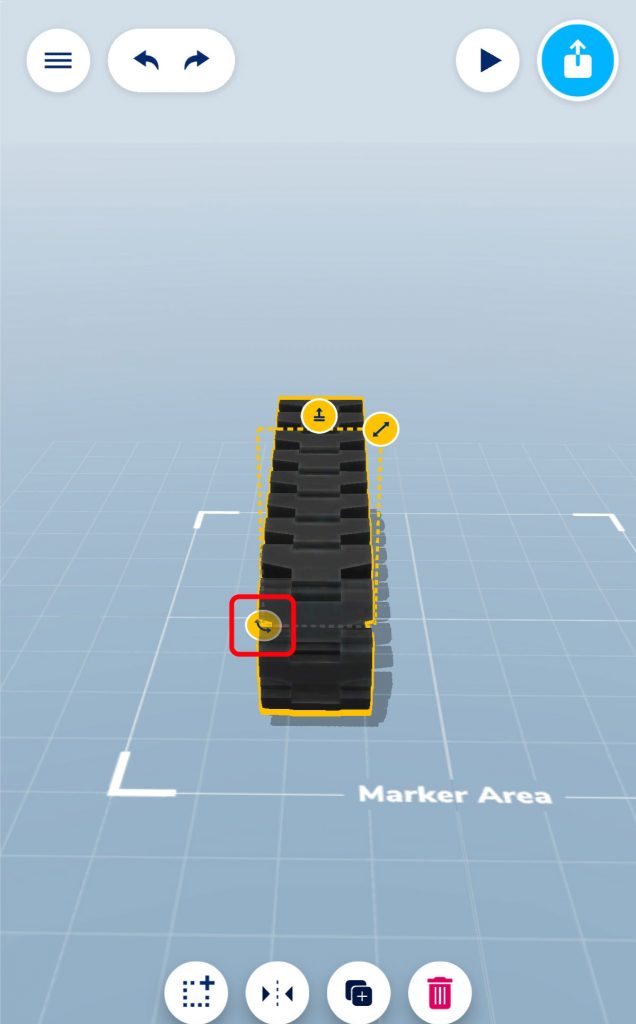
• To change the position of the part, click on the button highlighted in the picture and drag the part up or down.

13. After dragging the first part and placing it in the location you want, select the remaining parts you need to build your robot, and place them on the Marker Area. Make sure the parts are well positioned and that your robot is well structured!
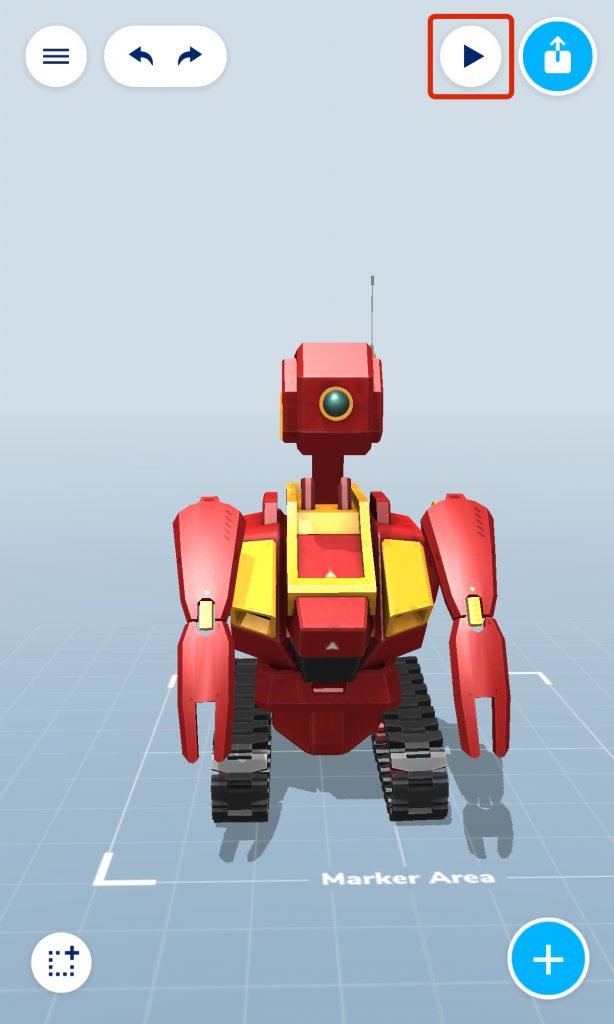
14. Your robot is ready! Now, you can place it somewhere in the real world, for example, on your table. You can use augmented reality technology to do this. Click on the Play button in the top right corner of the screen.
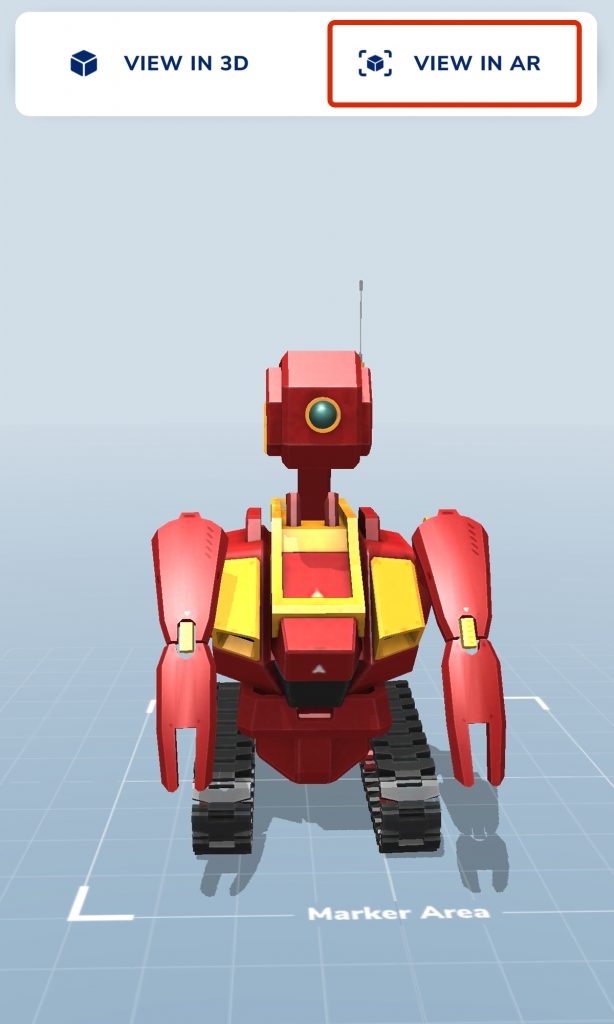
15. Then click on VIEW IN AR.
SIDE NOTE: Ask an adult to help you during the next part of the activity.
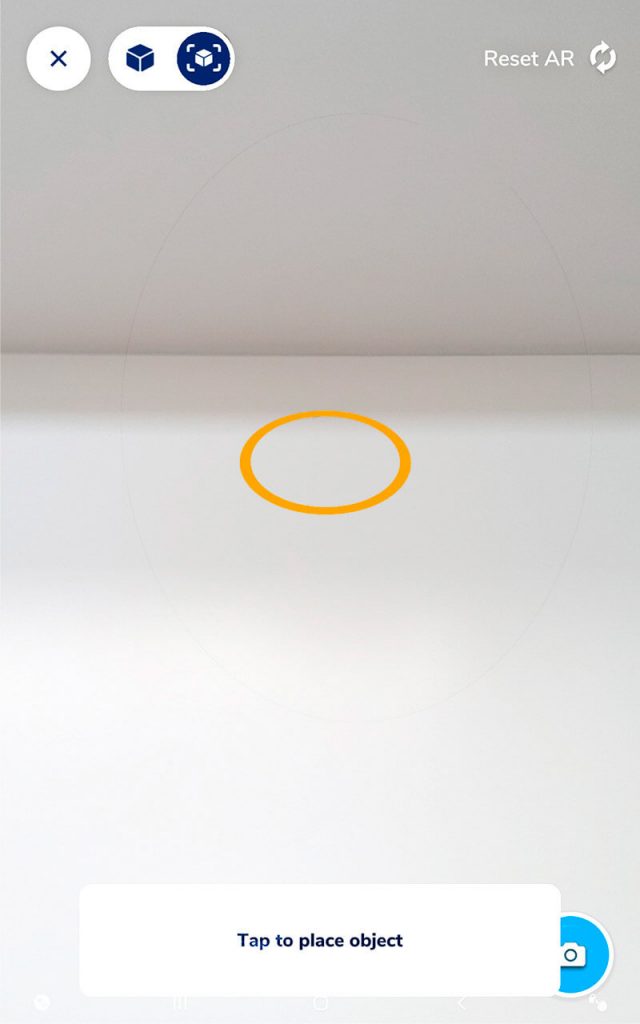
16. Point the tablet or smartphone camera at the table and click on the orange circle. The robot will appear in that circle.
17. Take a photo of the robot by clicking on the camera button in the bottom right corner of the screen.
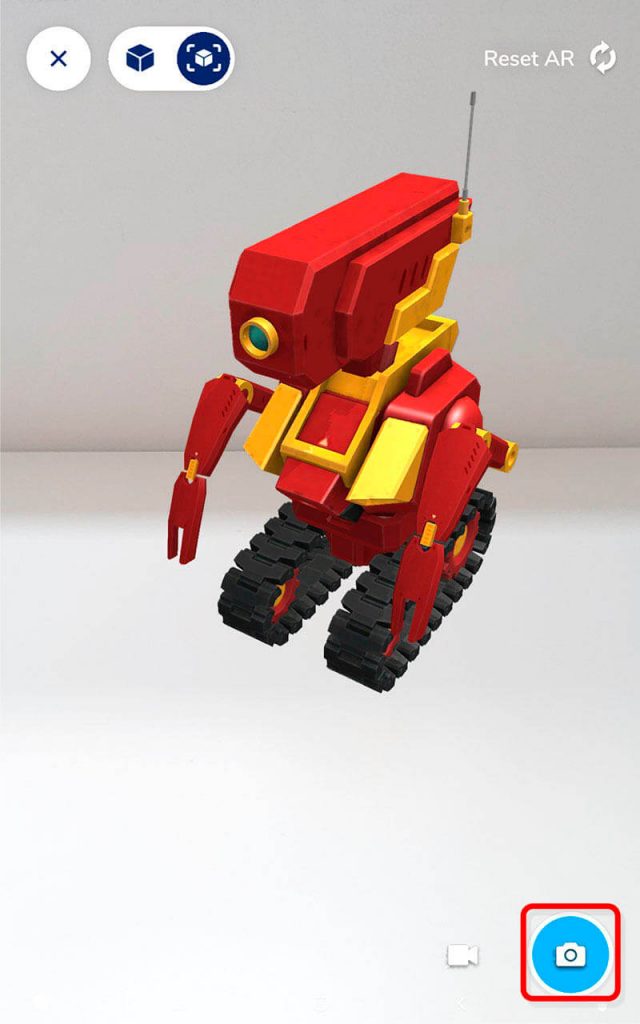
Make sure the photo you take only captures the robot and the table. Ask an adult for help in granting access to the Assemblr app to capture photos and videos by clicking ALLOW.
18. Close the Assemblr app. Install the CR Card Creator. Ask an adult to help you install the app. Open and select the English language. With this app, you’ll be able to create cards to play with each robot, giving them different attributes!
19. Name your robot and describe it in the text boxes highlighted in red in the picture.
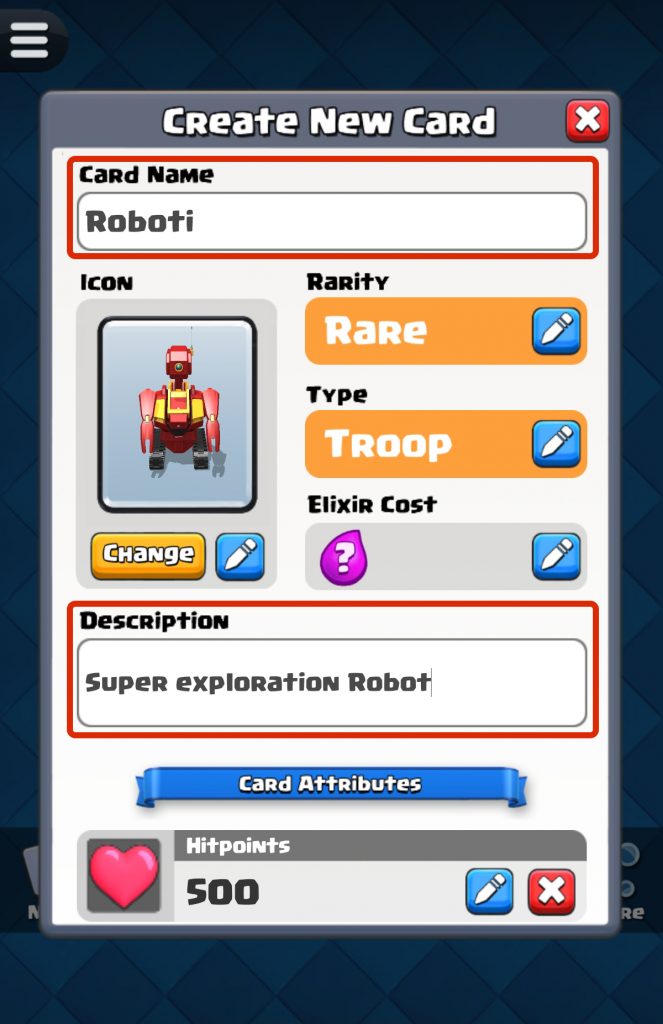
20. Now, add your robot icon by clicking the Change button. Select the photo you took of your robot with the Assemblr app and press OK.
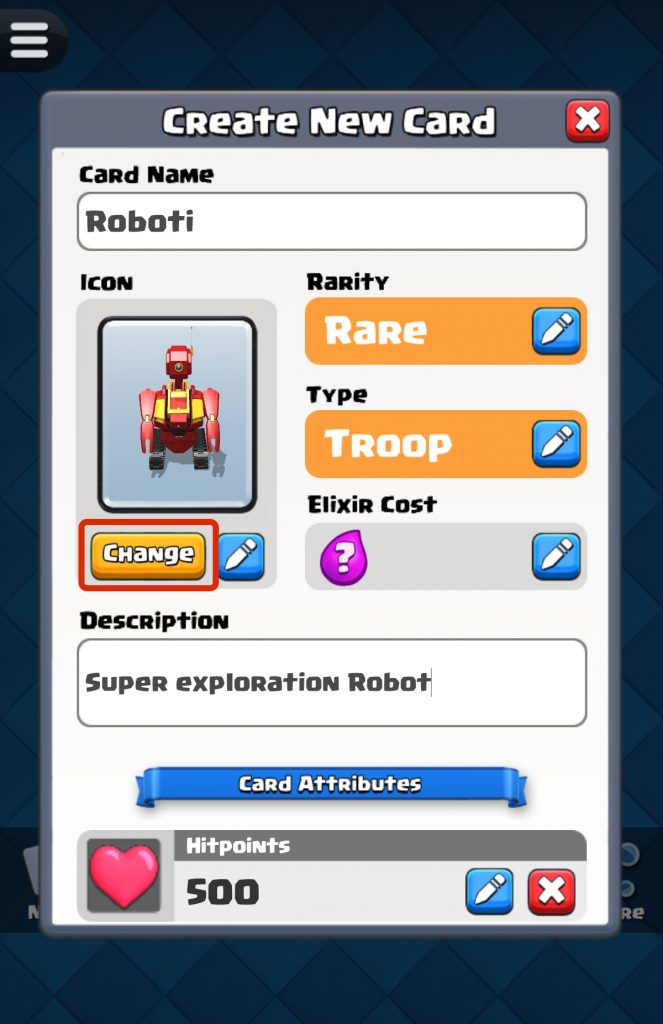
21. Finally, define the attributes of your robot. You can choose Rarity and Type by clicking on the pencil button to the right of each of these attributes. You can also define the characteristics of the cards, so that they have more or less points. In the Hitpoints, click the pencil button, write the number of points you want your robot to have and click OK.
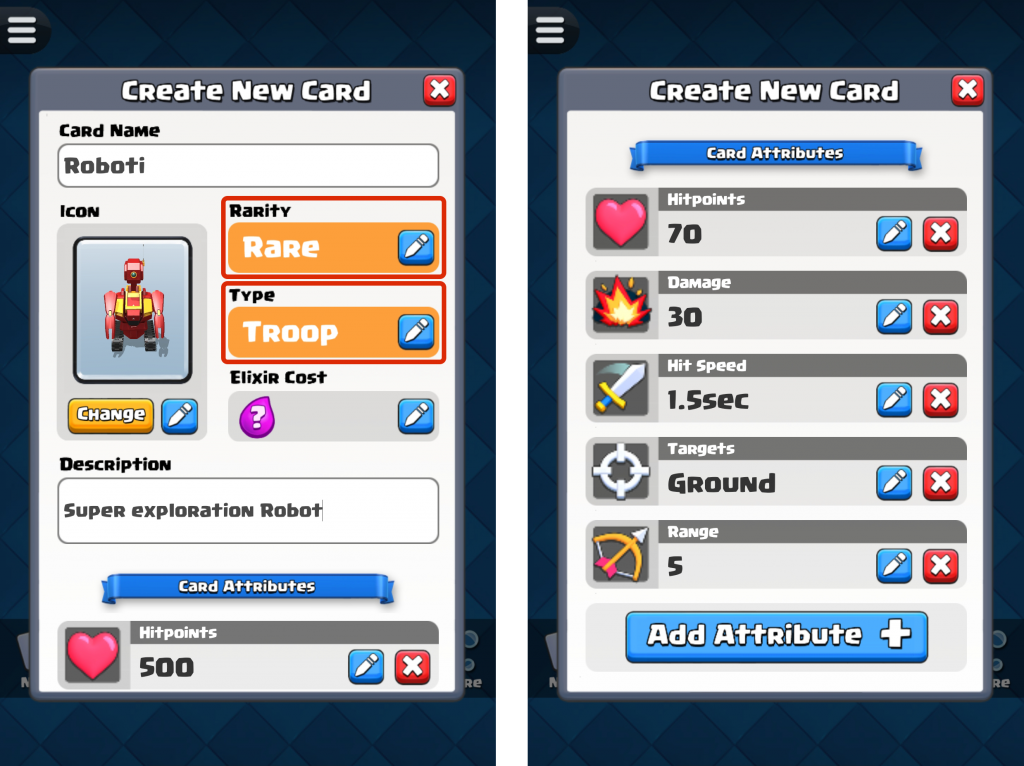
In the card you’re creating, the total of Hitpoints plus Damage attributes cannot be more than 100.
Hitpoints represent the robot’s resistance/defense, and Damage represents the score you take from the other robot’s Hitpoints whenever you attack. This is why it’s important to have robot cards designed to attack (with a higher Damage score) and others with higher Hitpoints to defend against attacks by other robots.
22. You’ve configured your card! Save it to your tablet or smartphone so you can print it out. To do this, click on the Create button and then on the Export button.
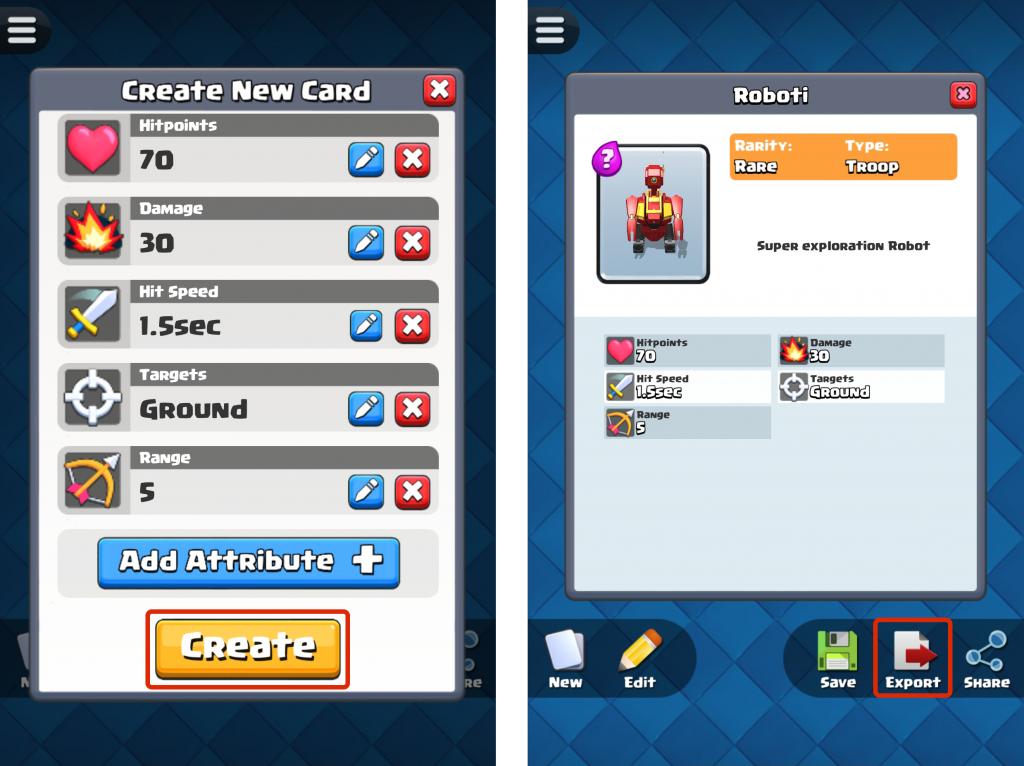
23. To finish your card, write the name of the robot in the File Name field and click on OK.

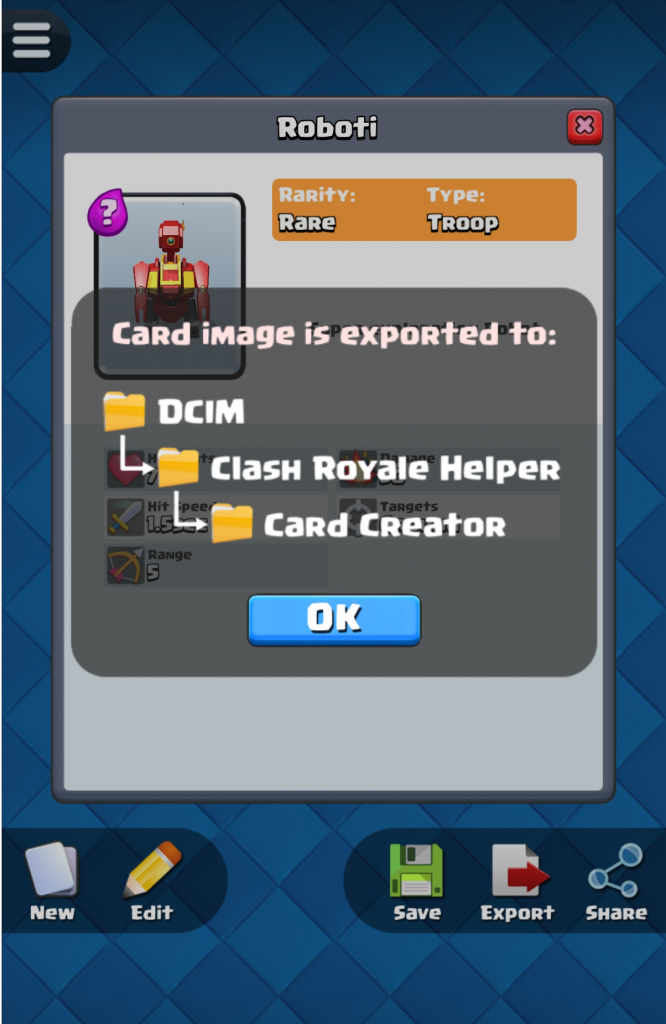
24. Good! You’ve created the first card! You can create as many as you want. With the help of an adult, print the cards on paper or cardboard. The app shows you which folder the letter was kept in.
25. When you have several cards, you can divide them up among all the members of your family, and play with them, in a confrontation between robots.
• Each member of the family chooses a card from the deck and places it face down;
• Count to 3 and turn over your chosen cards at the same time;
• Subtract your Damage from your robot’s card to your right;
• The robot with the highest Hitpoints wins the round.
You can go on writing down the matches you won on a piece of paper. For each game you win, you get one point. At the end of the game, add up each player’s points. Whoever has the most points wins!