Activity
1. In this activity, you will learn how to edit films. To begin, open the OpenShot program on your computer.
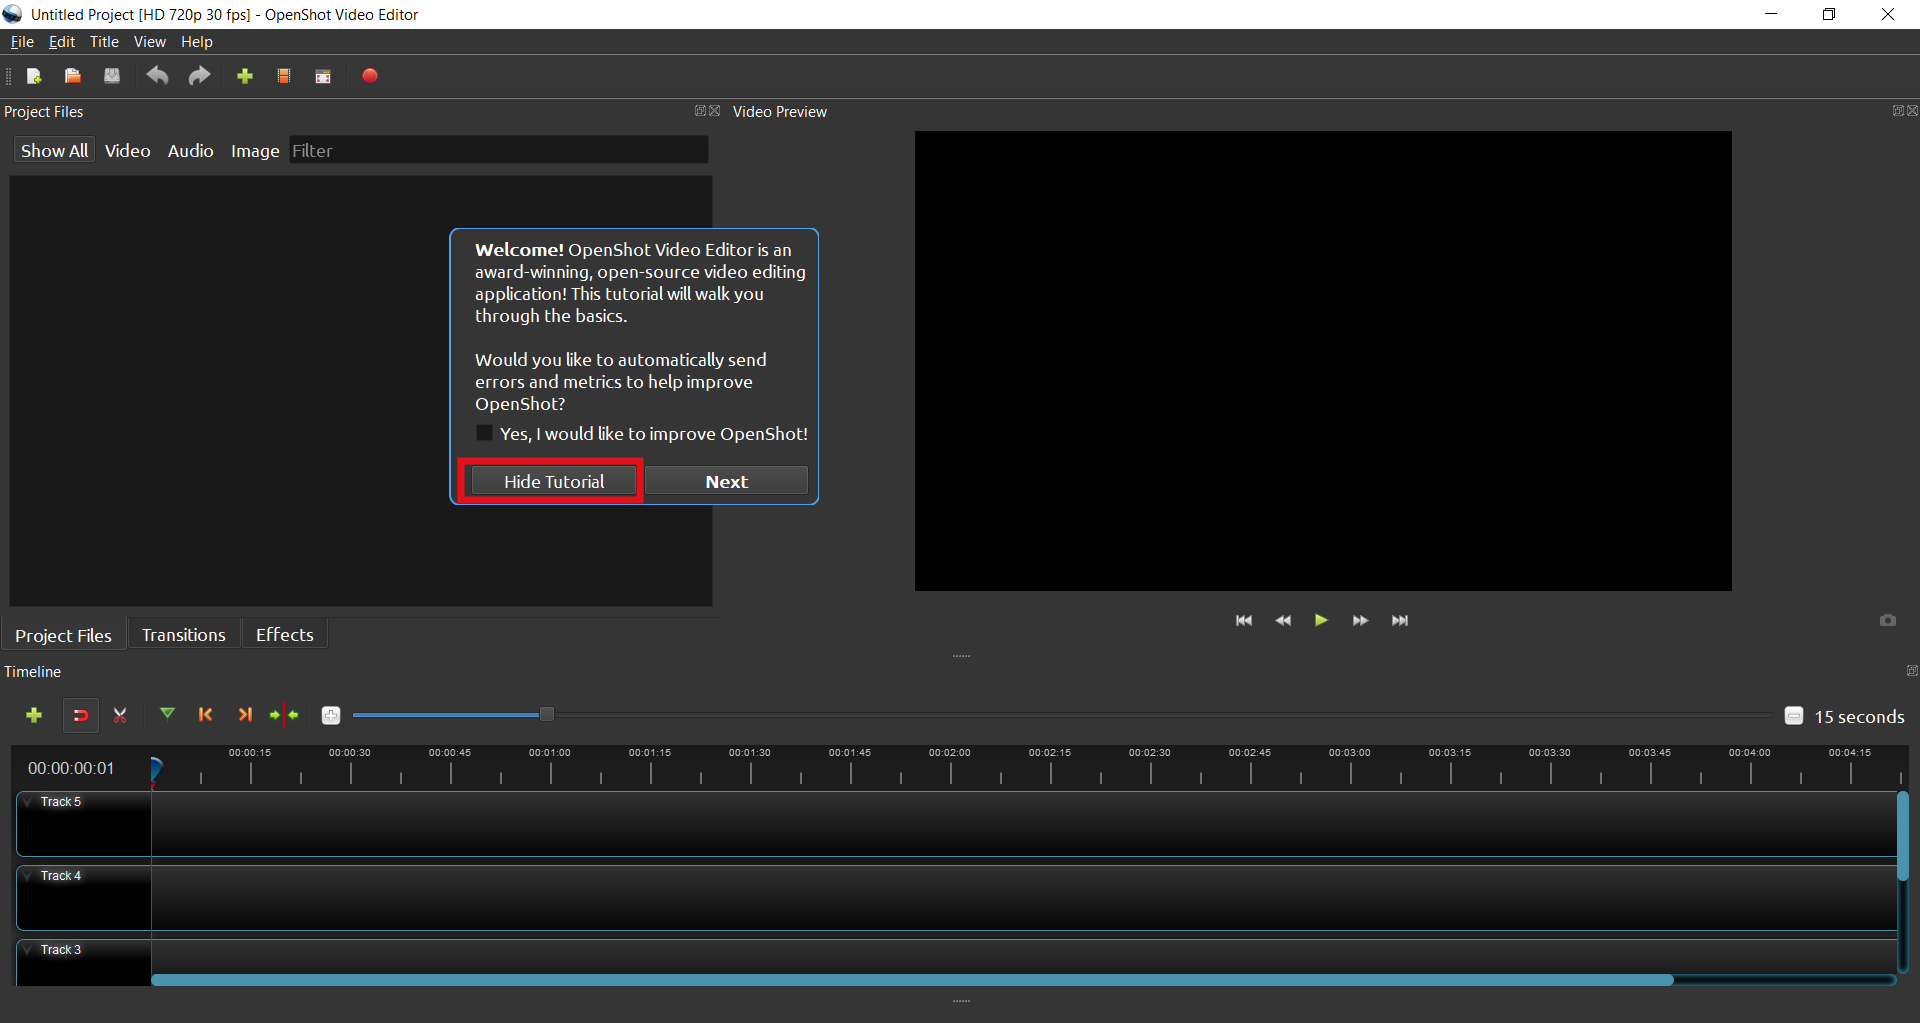
SIDE NOTE: When you start the program, it shows a tutorial, which you can follow by clicking Next. If you don’t want to, click Hide tutorial, and follow these step-by-step instructions.
SIDE NOTE: You may click the images to amplify.
OpenShot’s main screen has different areas:
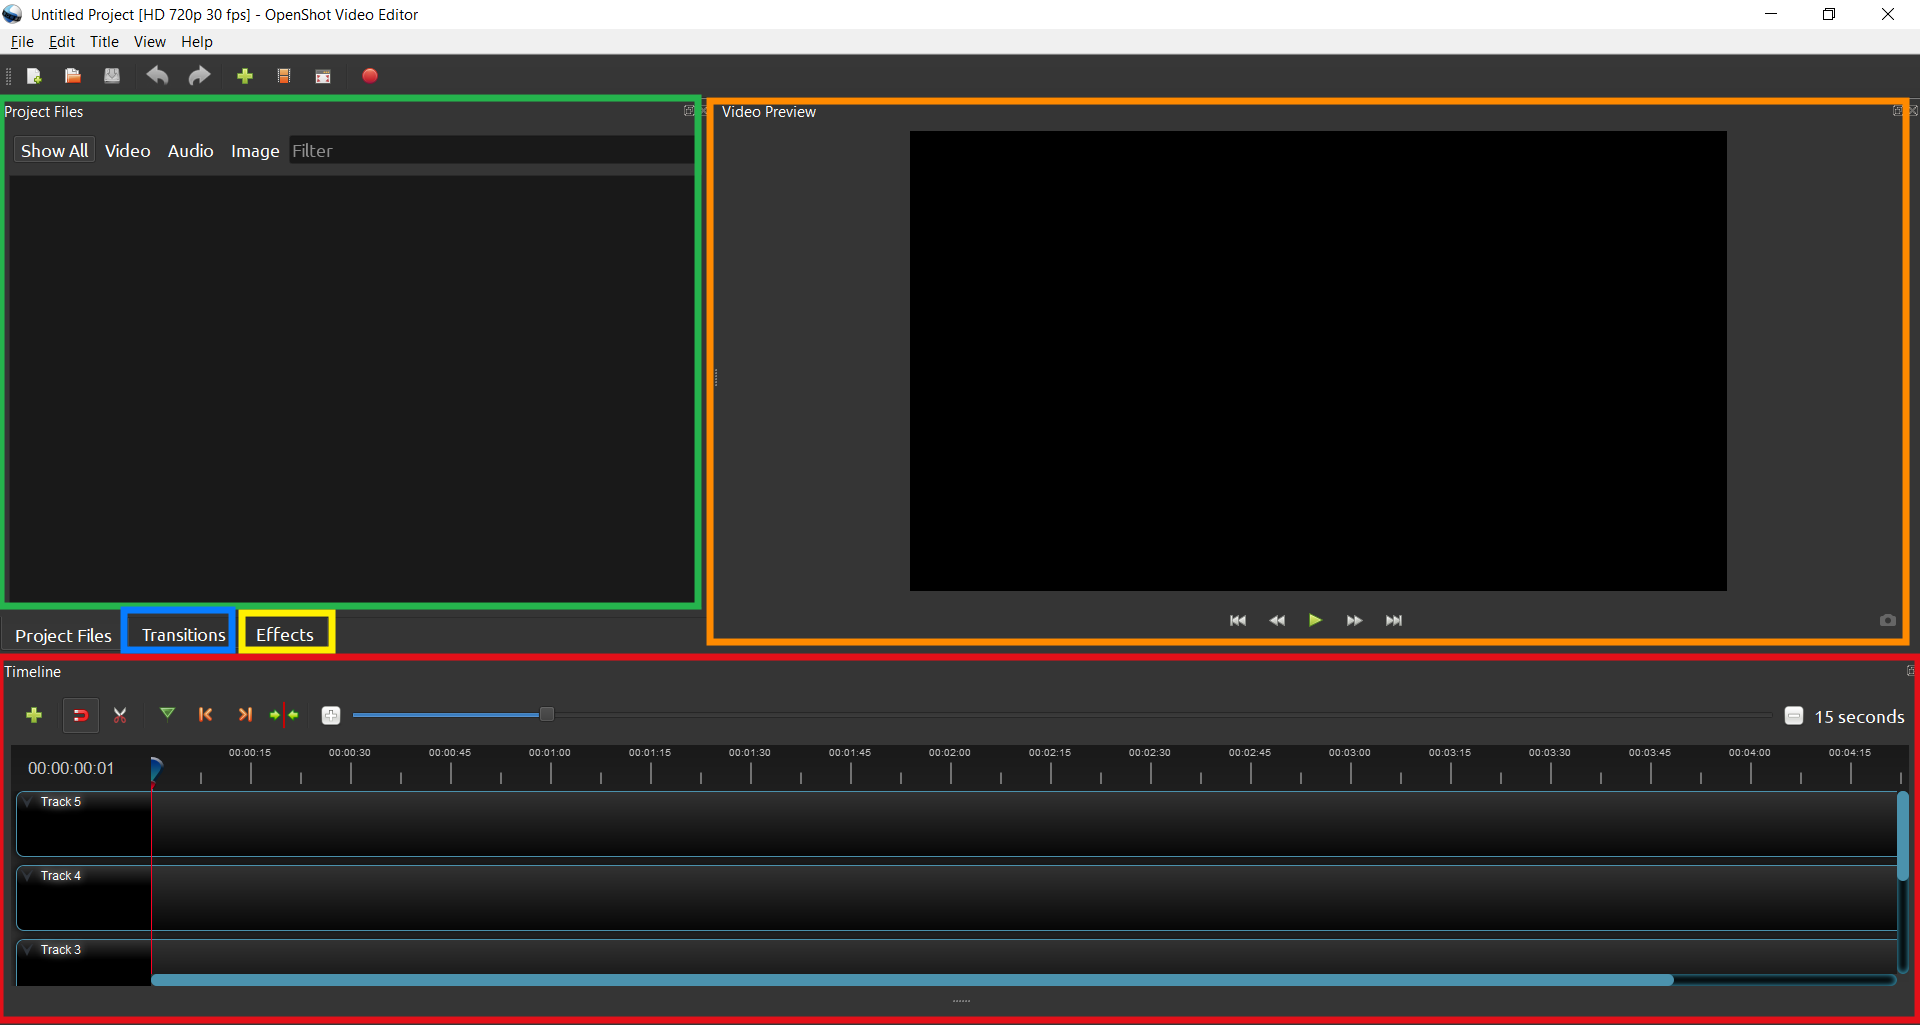
• On the left side, under Project Files (area highlighted in green in the image), you will find the different video and audio files to be used in projects. At this time, you don’t have any, since you haven’t selected them yet. By selecting the Transitions tab (marked in blue in the image), you will find the various transitions available to put between scenes. In the Effects tab (marked in yellow in the image), there are effects you can use in the scenes;
• On the right hand side, under Preview video (area highlighted in orange), you can preview all the changes you make to your project;
• Below, you have the Timeline, the area marked in red in the image,where you can add video and audio files, sort them and do all the cutting and editing of your project. This is where you will work on and develop your film.

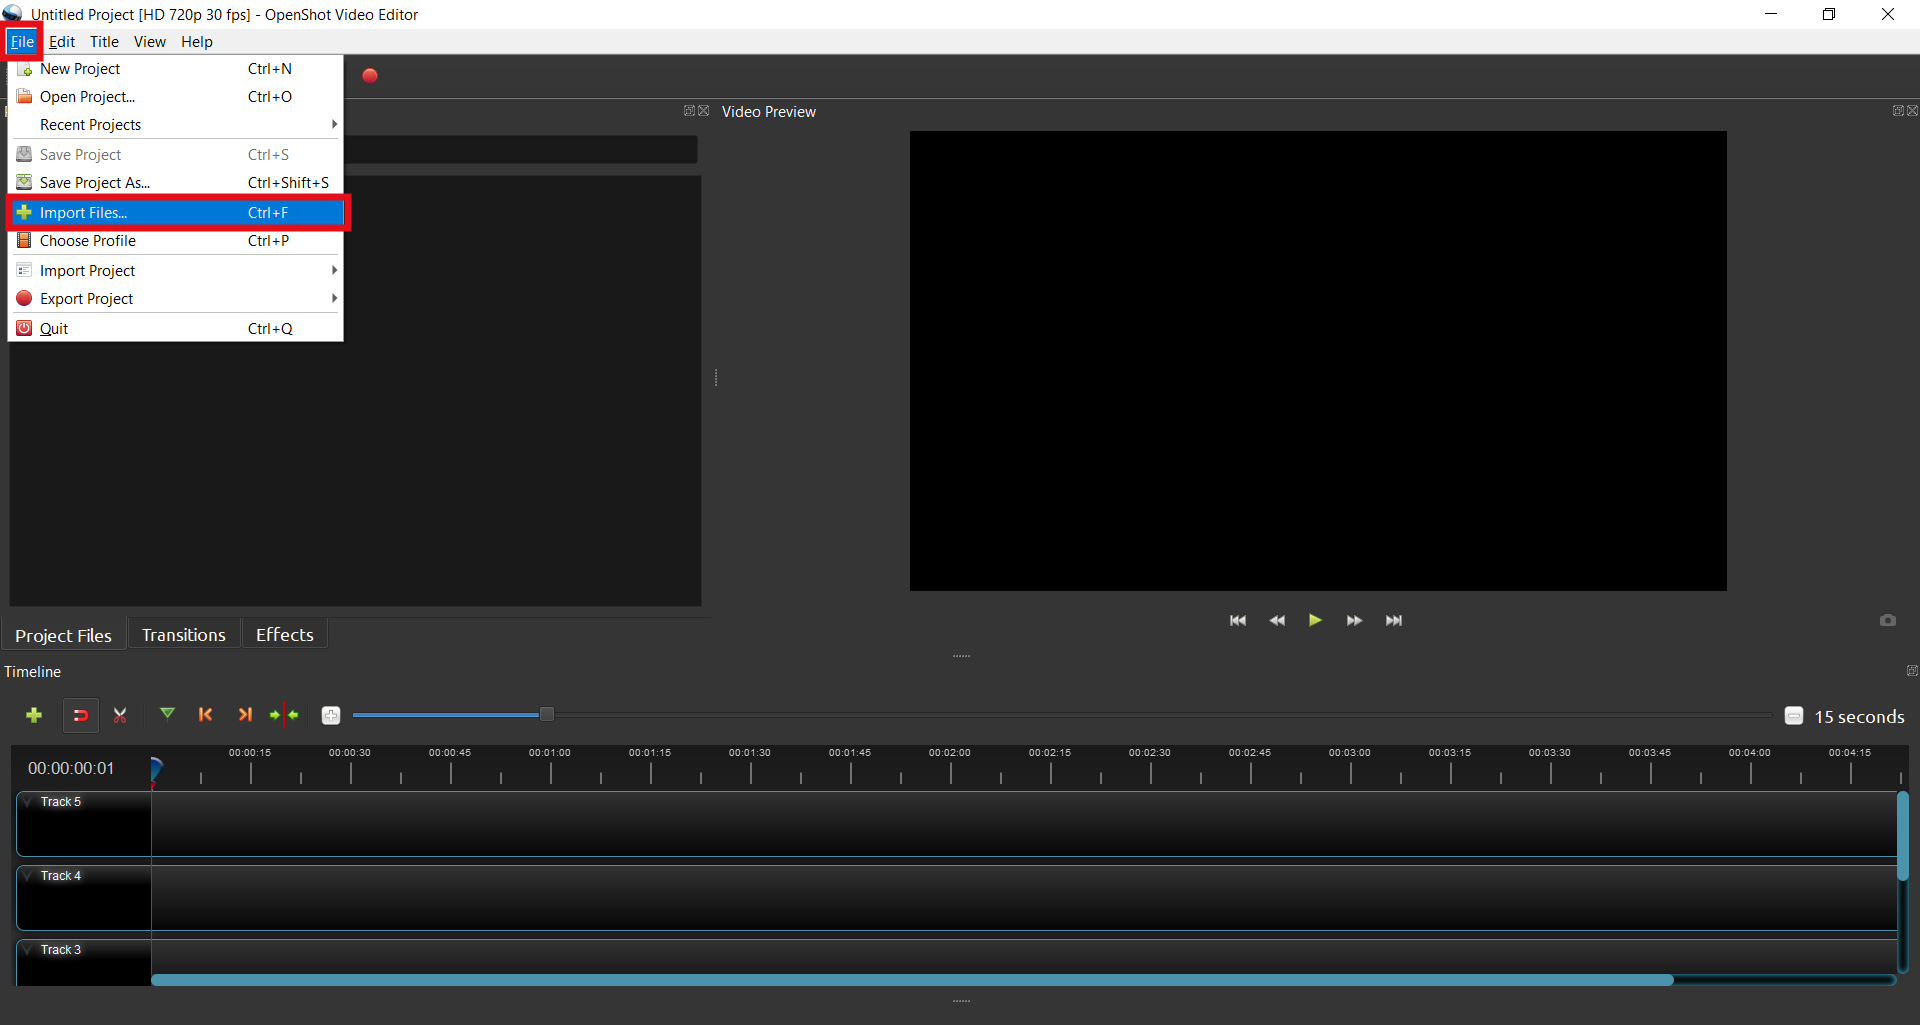
2. Start by adding the necessary files to the project. In the menu above, go to File and click on Import Files ….
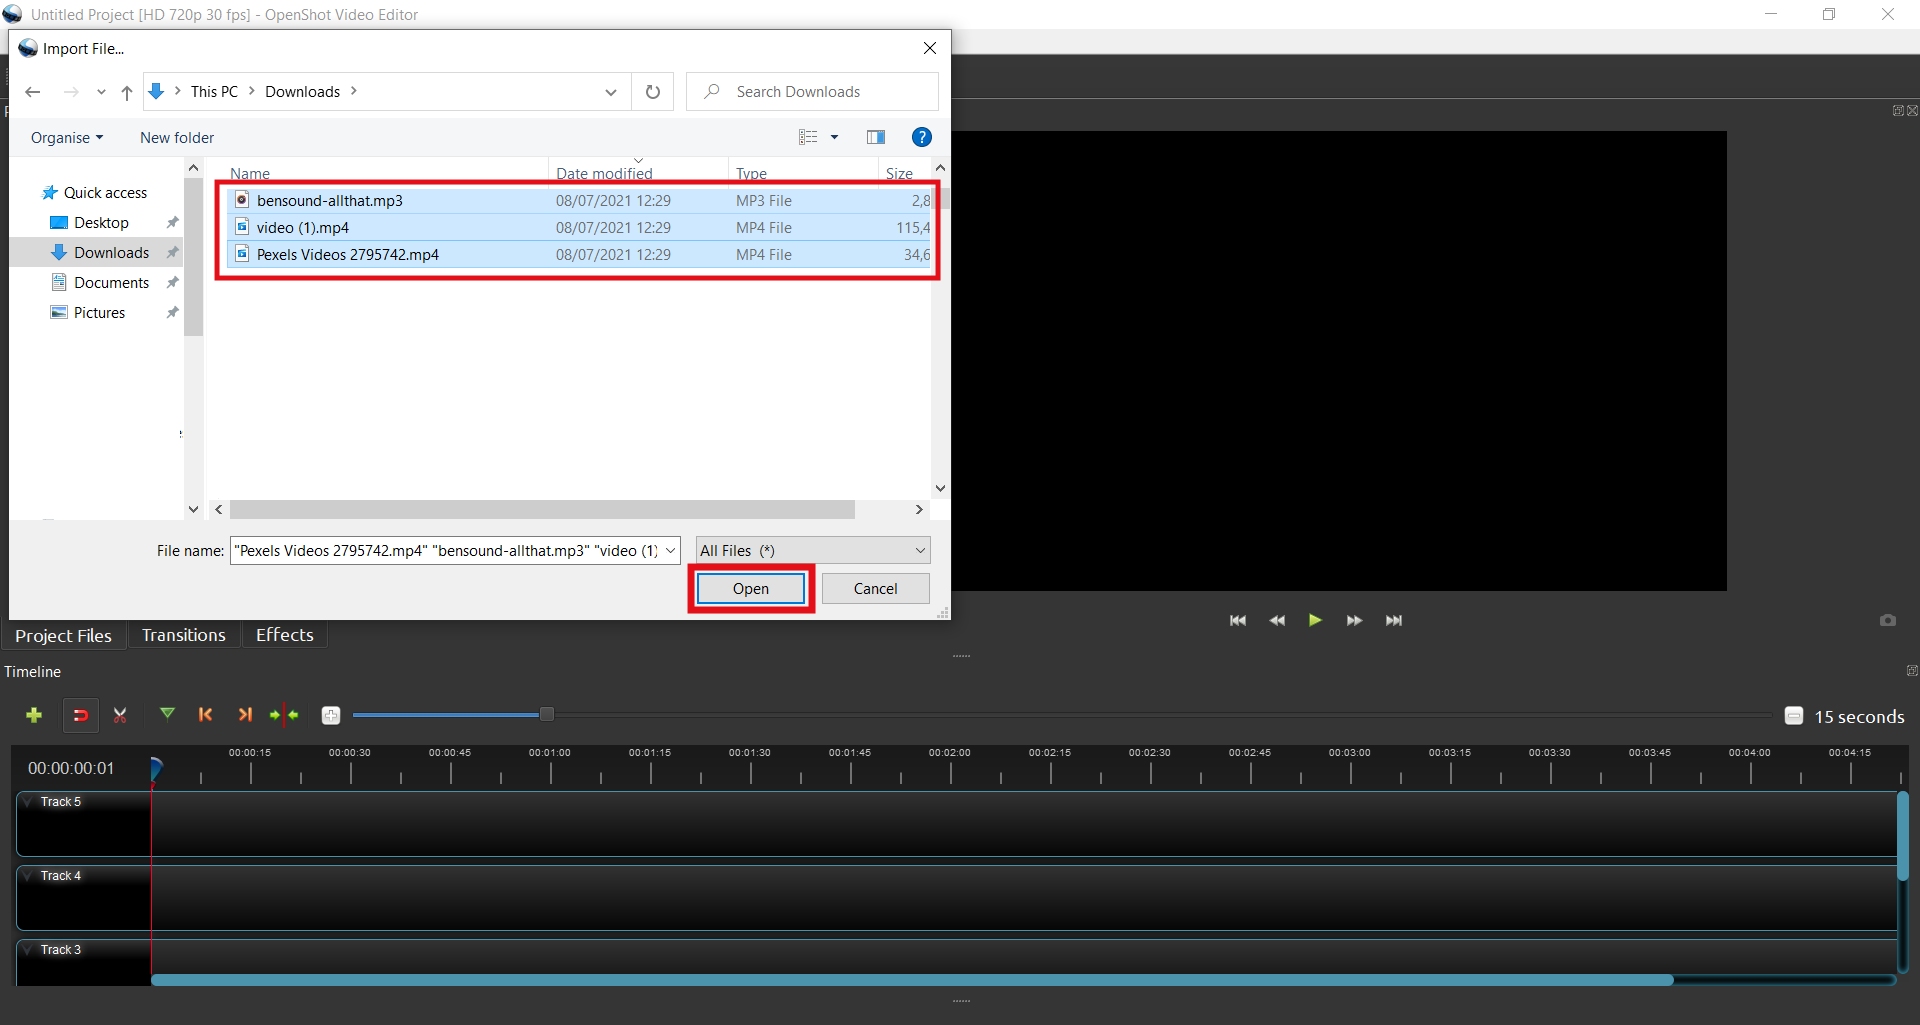
Browse your computer for the files we asked you to download from the materials list in this activity. Select them and click Open.
Now you can use these files to create your film. If you want to change the size of the window with the list of working files, click on the symbol with the vertical dots between the windows and drag, as shown below:
3. Let’s start with the music. Drag the music file to the start of Track 1 in the Timeline. The bar on Track 1 corresponds to the music file.

To listen to the music, and to see how your video is going so far, click on Play, the green arrow marked in the image, or click on the space key on your computer keyboard to play and stop the video.
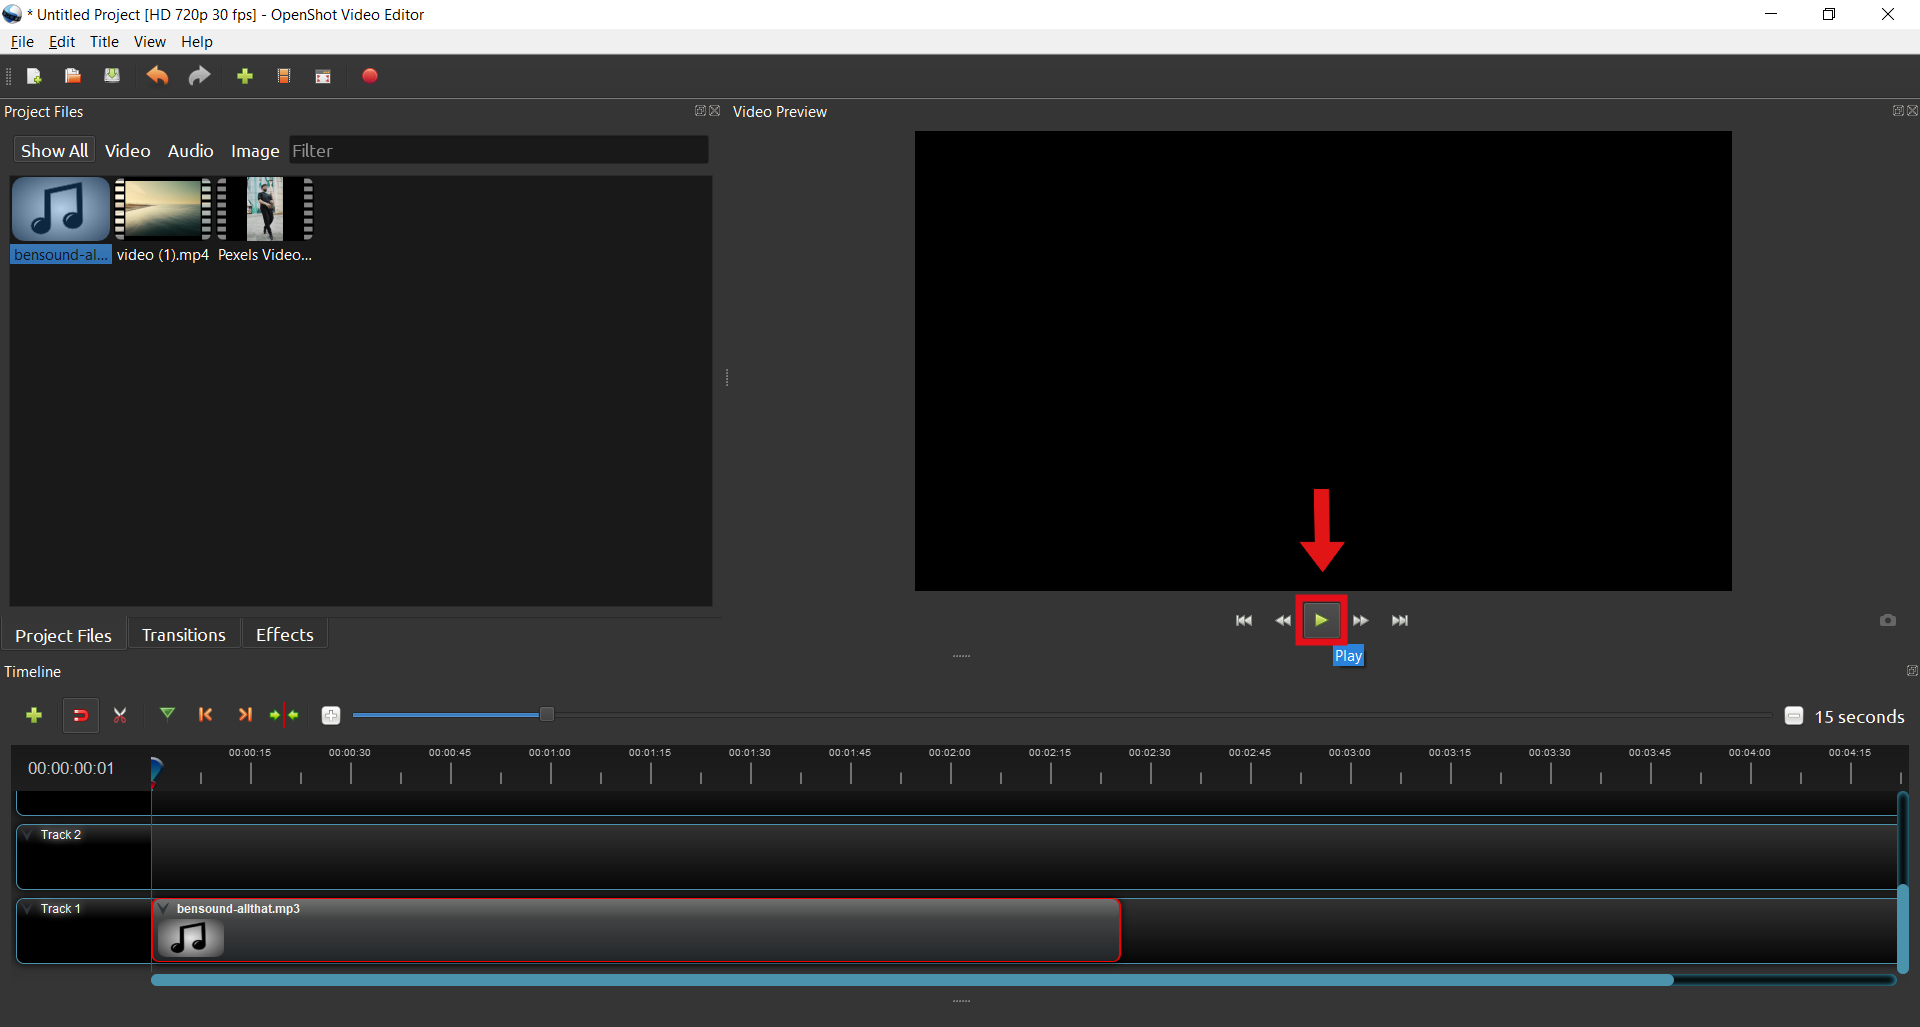
The music is now playing! Nothing appears in the window on the right because you haven’t added the video to your project yet.
We will now decrease the length of the song. To do this, onTimeline, drag the playhead, the blue object with the red line, to the time 00:01:03:13. If it’s easier, drag the playhead with your mouse first, and then move using the arrow keys until you get the right time.

Next, click on the end of the audio file bar on theTimeline, and drag it backwards to the playhead.The music will stop at this moment.
Zoom in to theTimeline if you need to see more clearly where the audio track should end. To do so, drag the Zoom bar on top of the Timeline to the left.

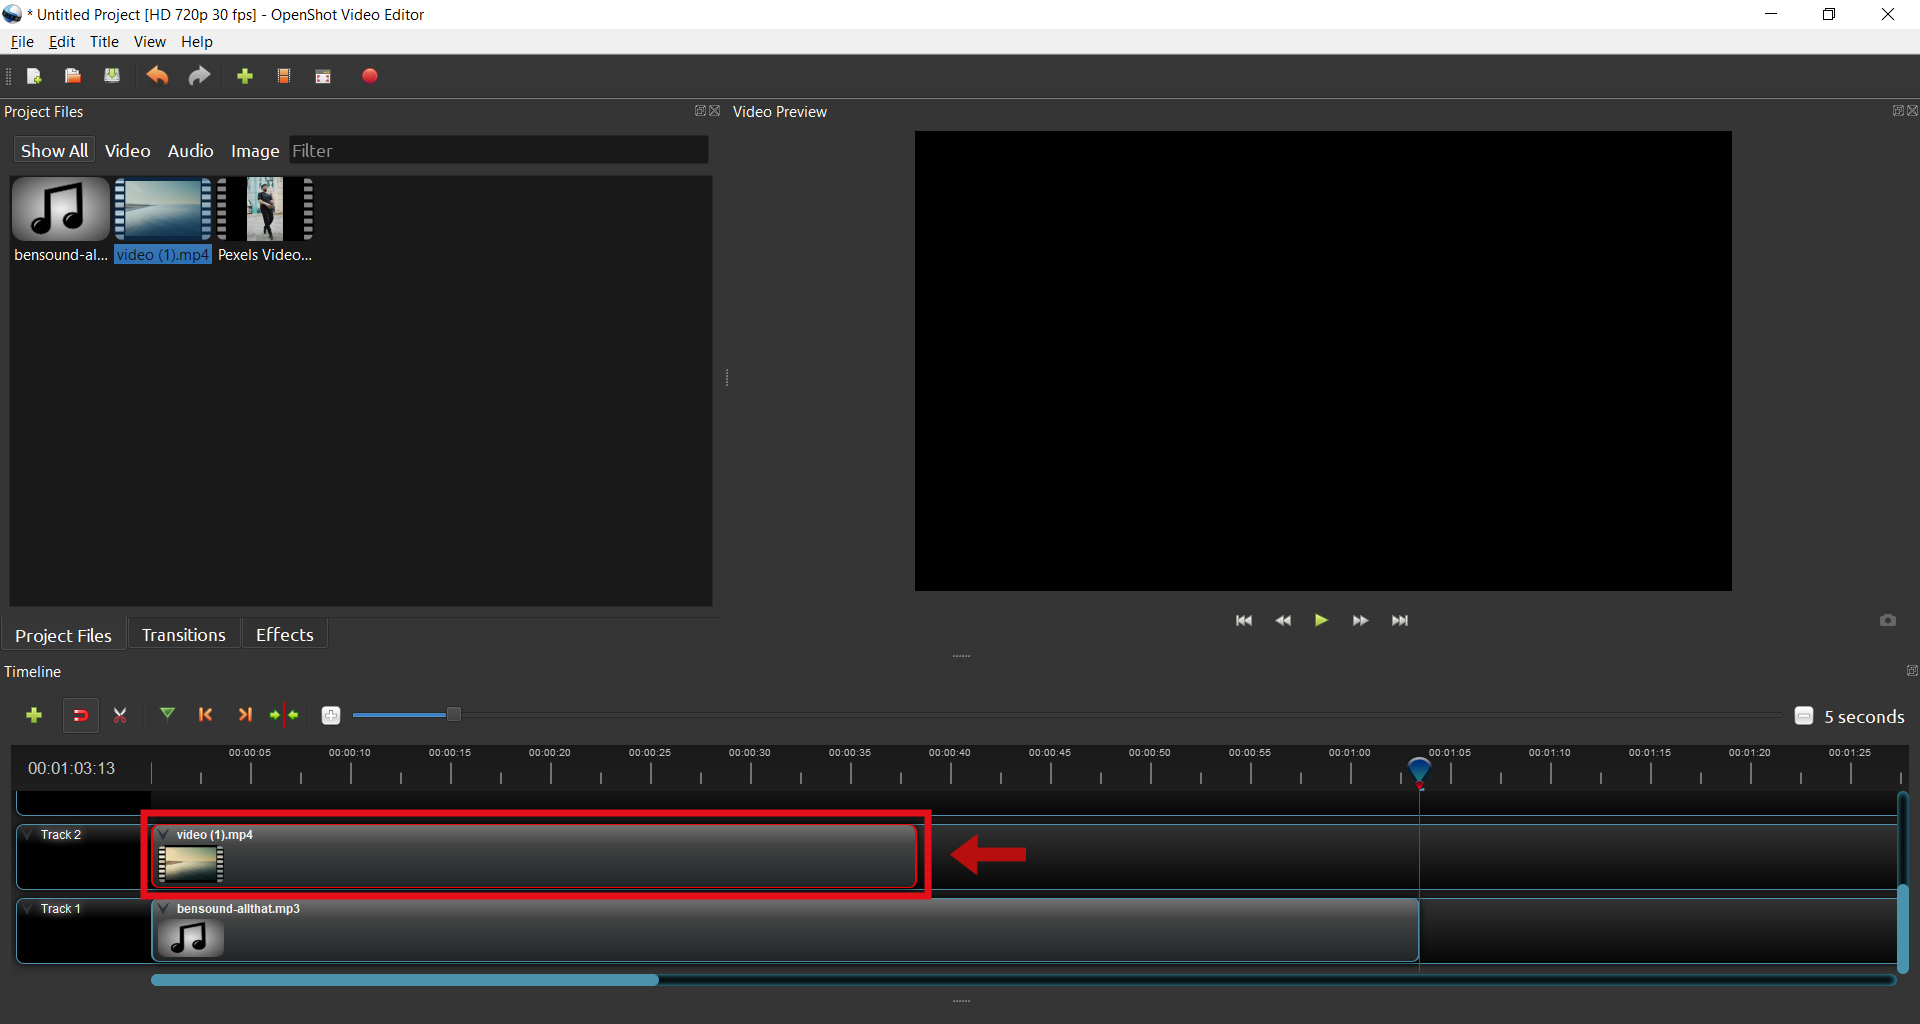
4. Next, you’ll add the beach video to your project by dragging it to the beginning of Track 2 on the Timeline. Notice that a bar has appeared on Track 2. This corresponds to your video clip.
As you did with the music file, shorten the length of the beach video so that it ends at 00:00:24:25. Remember to use the playhead to help you.

Next, you’ll duplicate your video clip of the beach so that two bars appear on Track 2. Click on the video clip (i.e. the video bar) on Track 2, and press Ctrl+C at the same time to copy it. Before pasting the video, make sure the playhead is at the place on the Timeline where you want the video to be copied to. Next, press Ctrl+V to paste the video, placing it at the end of the first beach video already existing in Track 2, as marked in orange in the image. You now have two tracks, i.e. two video clipsof the beach.

Increase the length of the video so that it ends at the same time as the music. In other words, align the end of the video bar with the end of the music bar, like this:
At any time during your project, you can go back and fix anything you may have done wrong. To do so, simply click Ctrl+Z!
5. As you can see, your video now has music accompanying it. Now, let’s edit it a little further. In Track 2, you will cut the first video clip of the beach, i.e. the first bar of Track 2. First, drag the playhead to the exact time where you want to make the cut. Then select the Razor Tool, with the scissors symbol on top of the Timeline. Using this tool, you can cut the video and audio files in the Timeline and give each of them different effects.
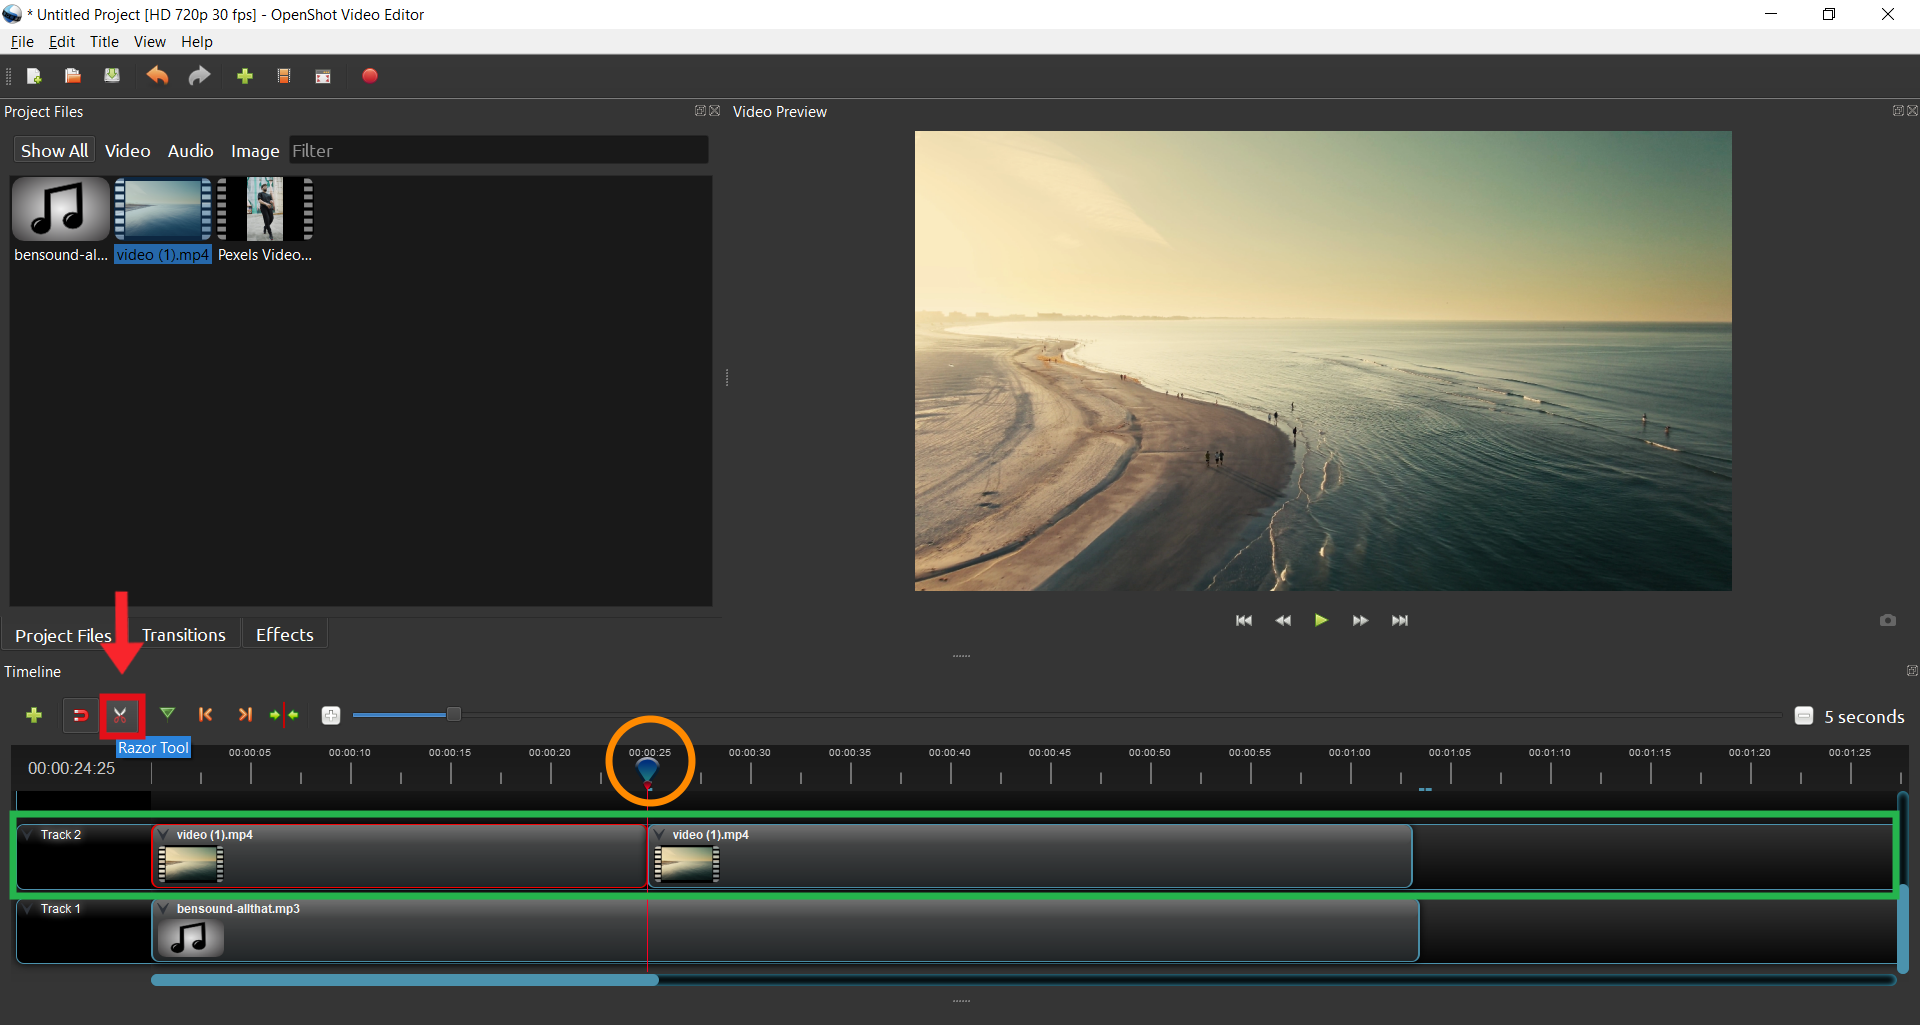
Cut the first video clip of the beach at the following points:
• First cut at 00:00:05:08;
• Second cut at 00:00:10:02;
• Third cut at 00:00:15:02;
• Fourth cut at 00:00:19:29.
The video with these cuts should look like this:
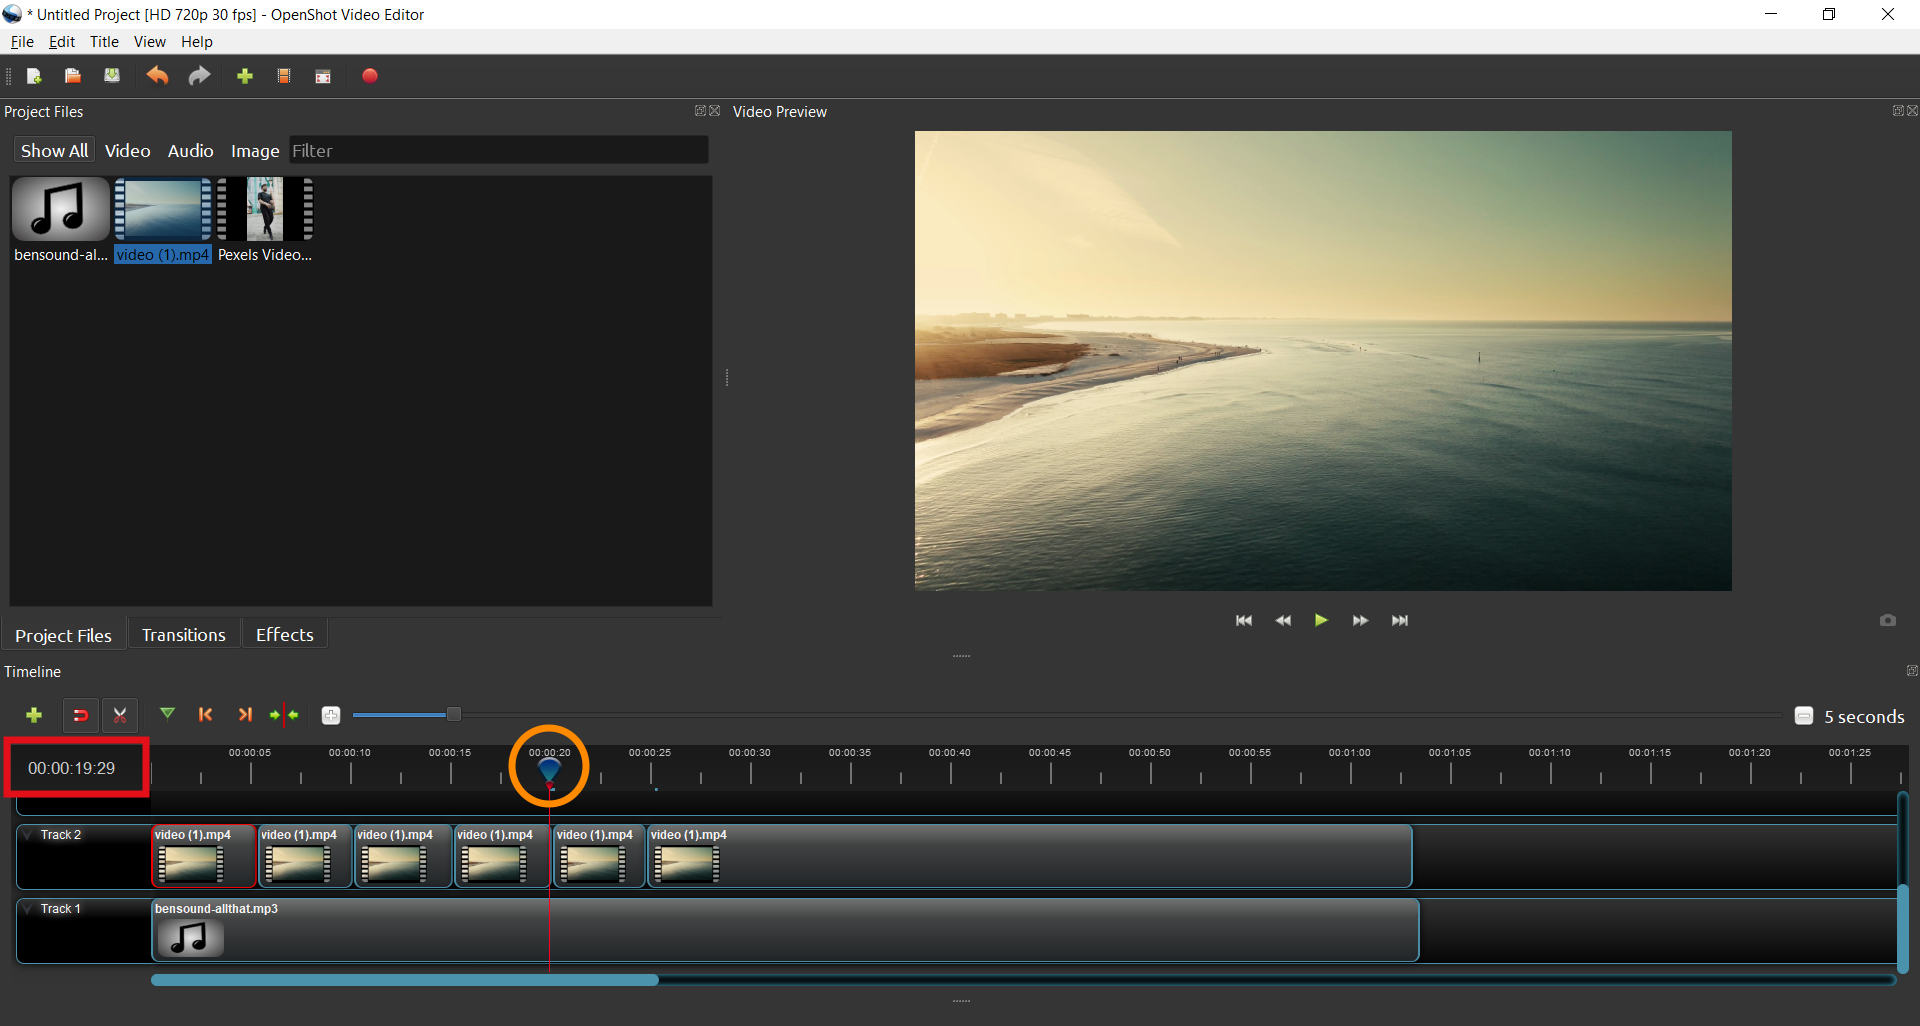
When you have finished cutting the video, click on the Razor Tool again to deactivate it.
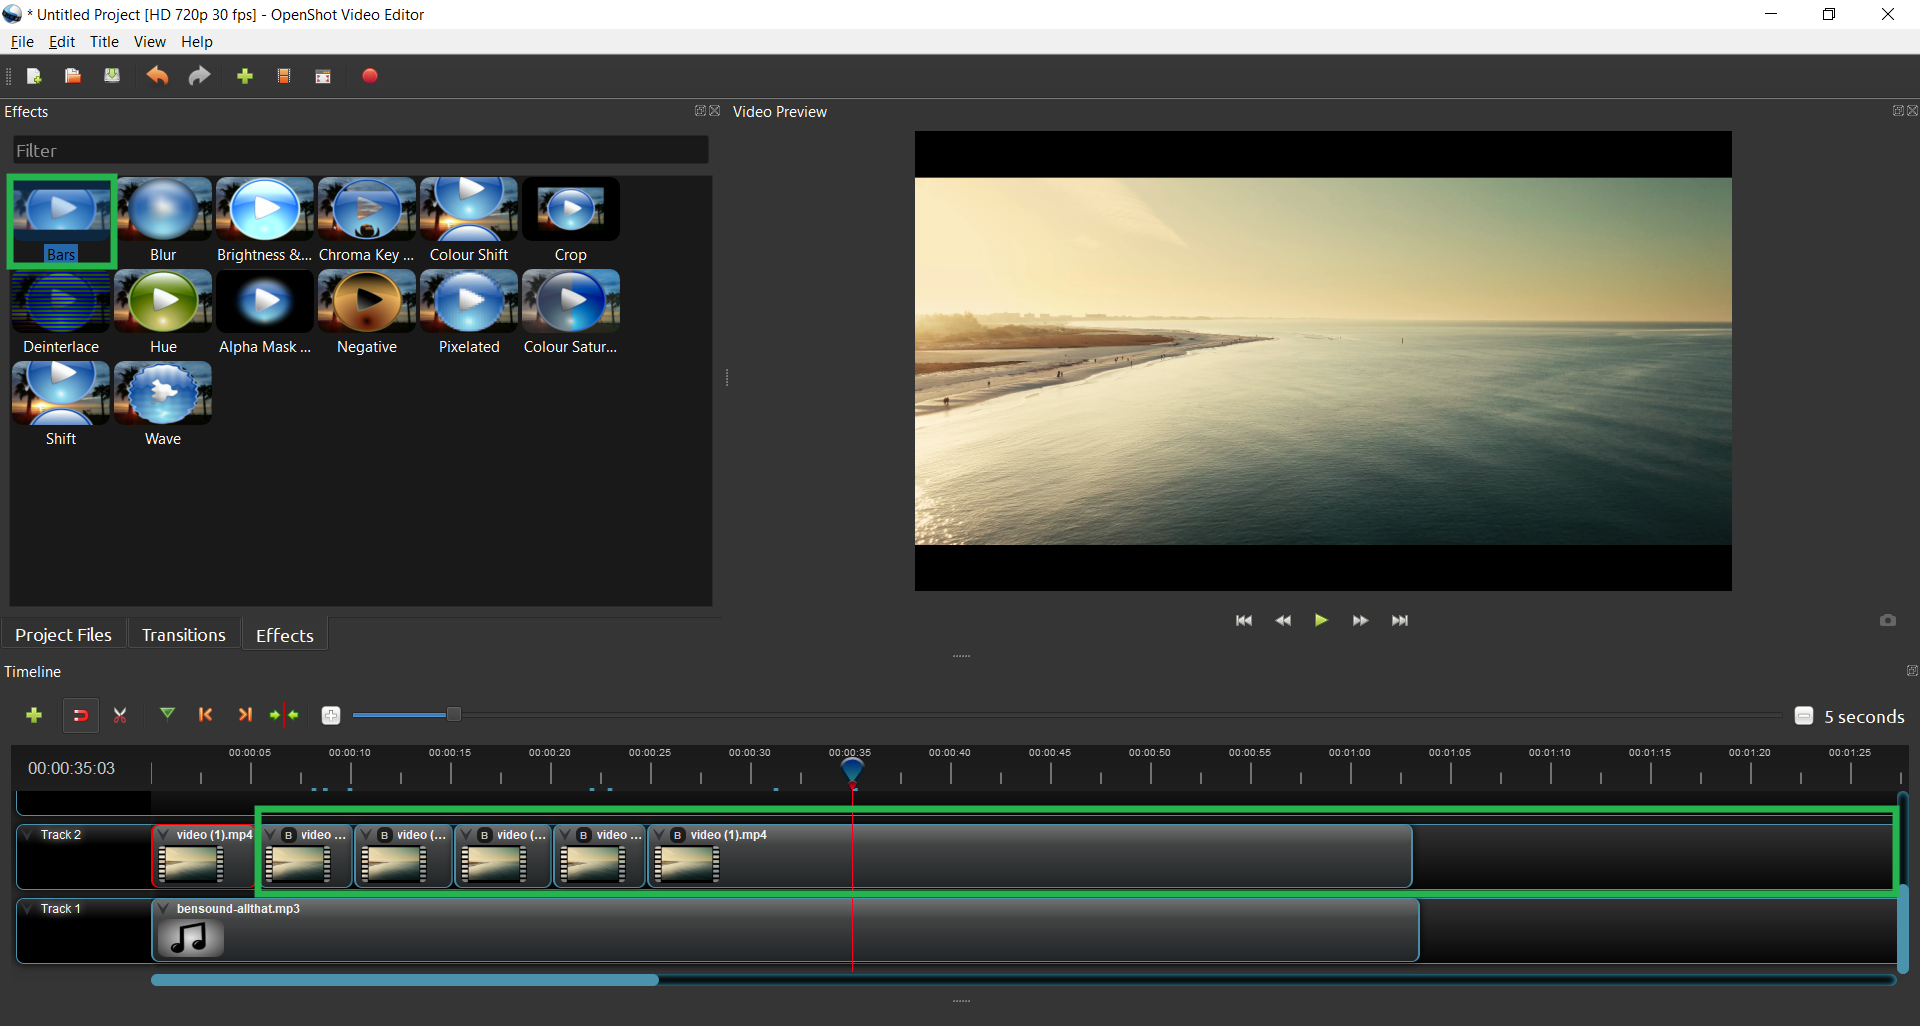
6. Next, you will add effects to your video! To do this, click on the Effects tab, marked in red in the image.
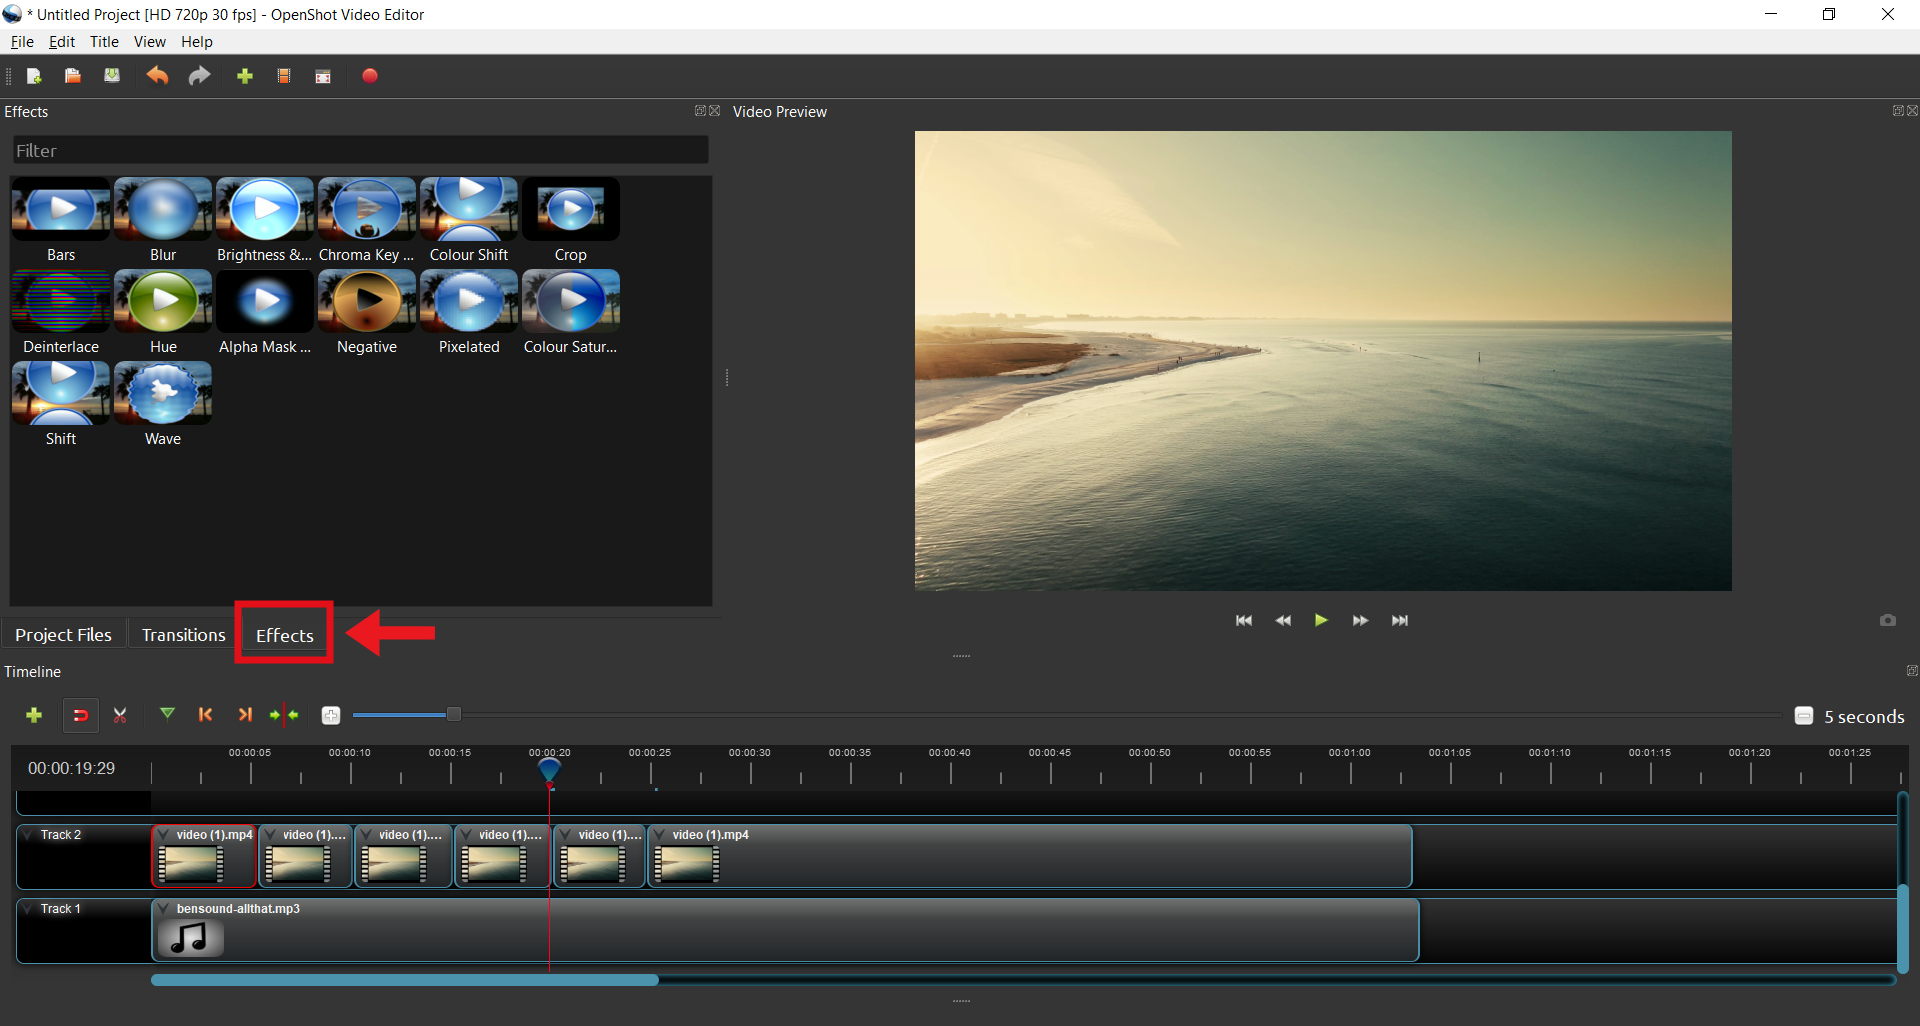
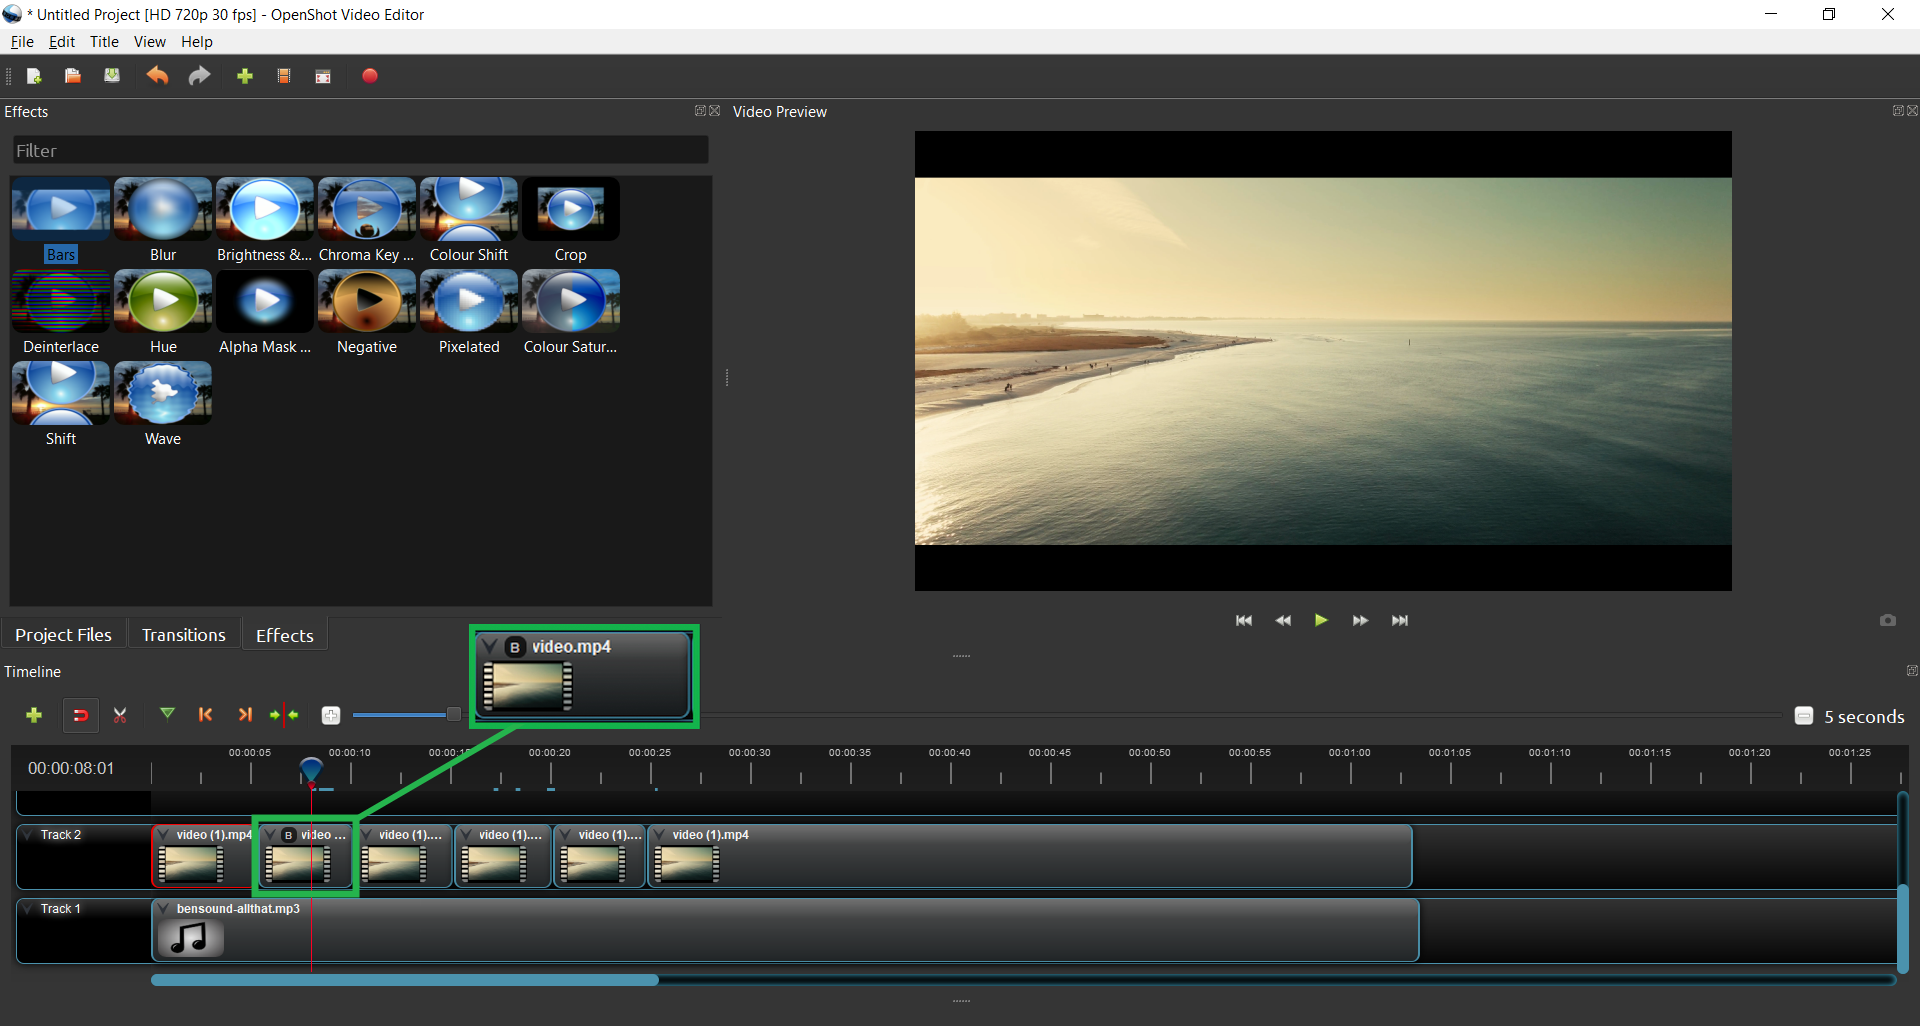
Click on the first effect, Bars, and drag it on top of the second video clip, as shown below.
The little B (which corresponds to the first letter of the word “bars”) on top of the video clip means that you have already applied the effect to this clip.
SIDE NOTE: At any time, you can click on the Play button to see the changes being made to your film.
Add the Bars effect to all the subsequent video clips.
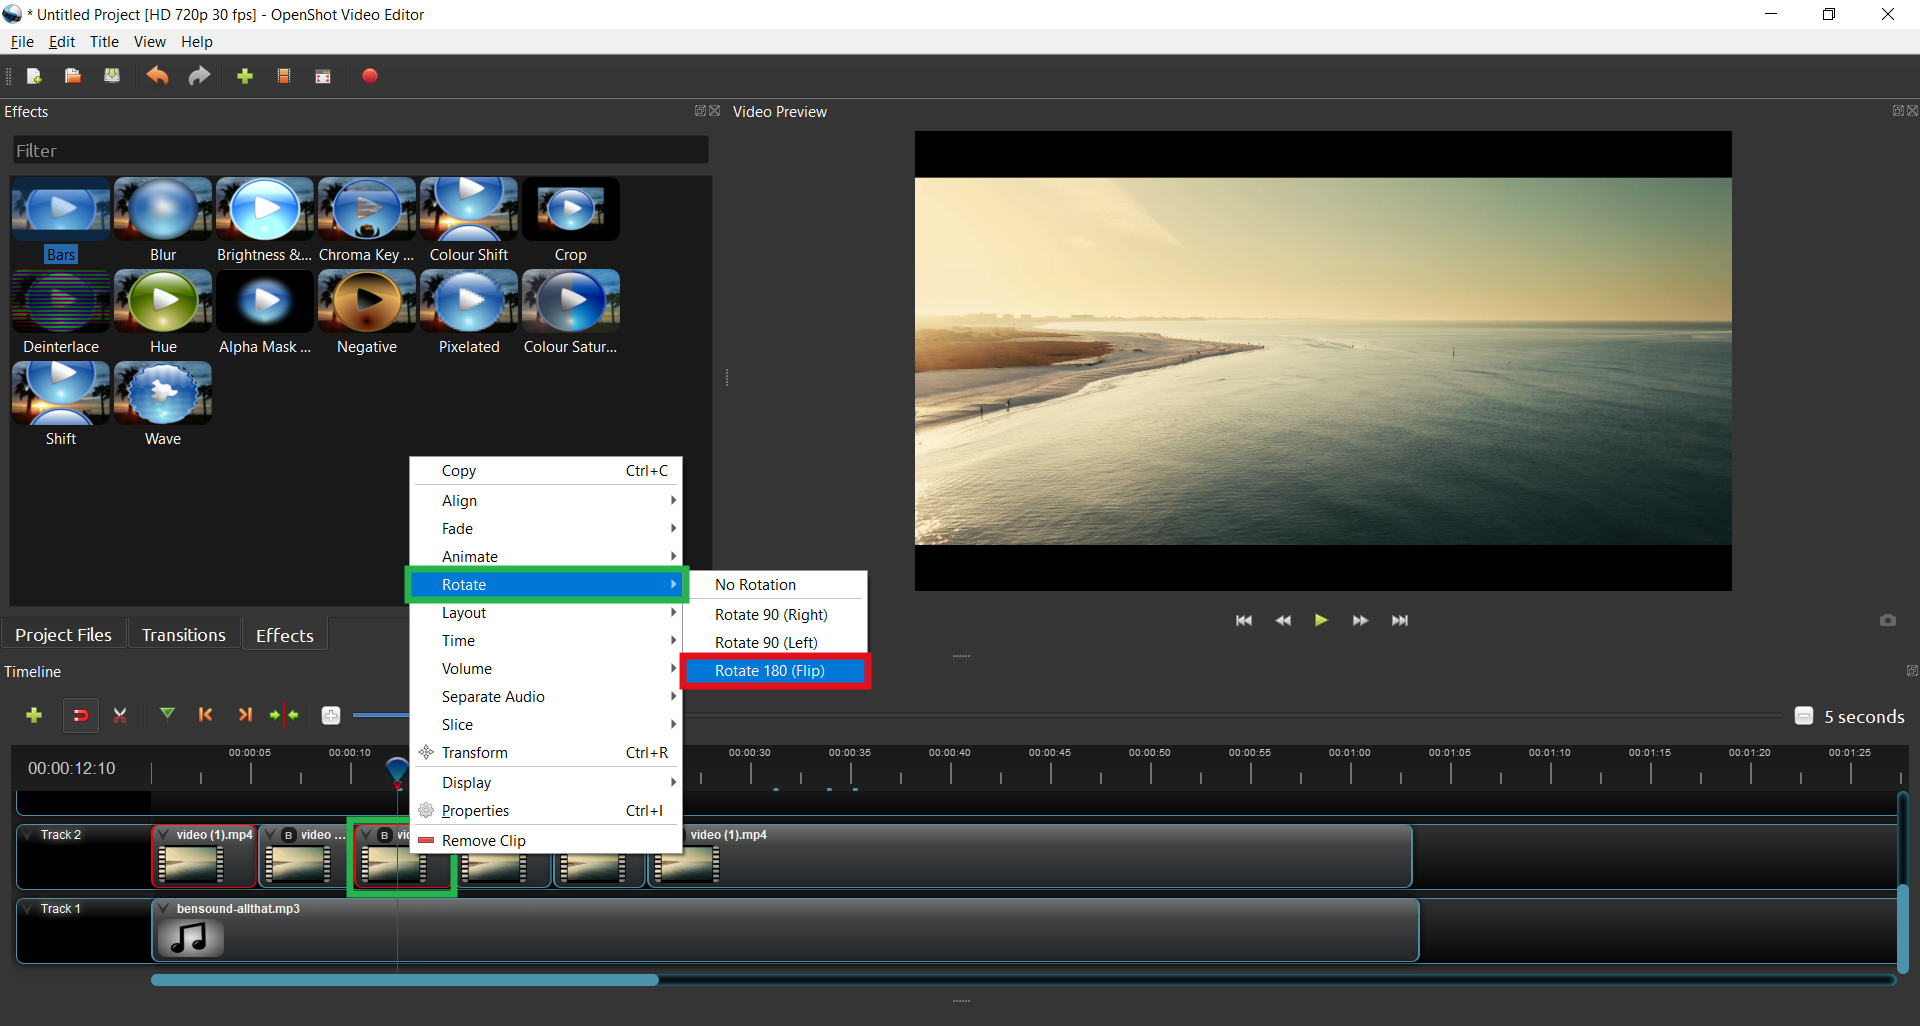
7. Very good! Now, you’re going to flip the third part of the video, that is, the third bar that appears in Track 2. Right-click on this bar and, under Rotate, select Rotate 180. This video clipis now turned upside down!
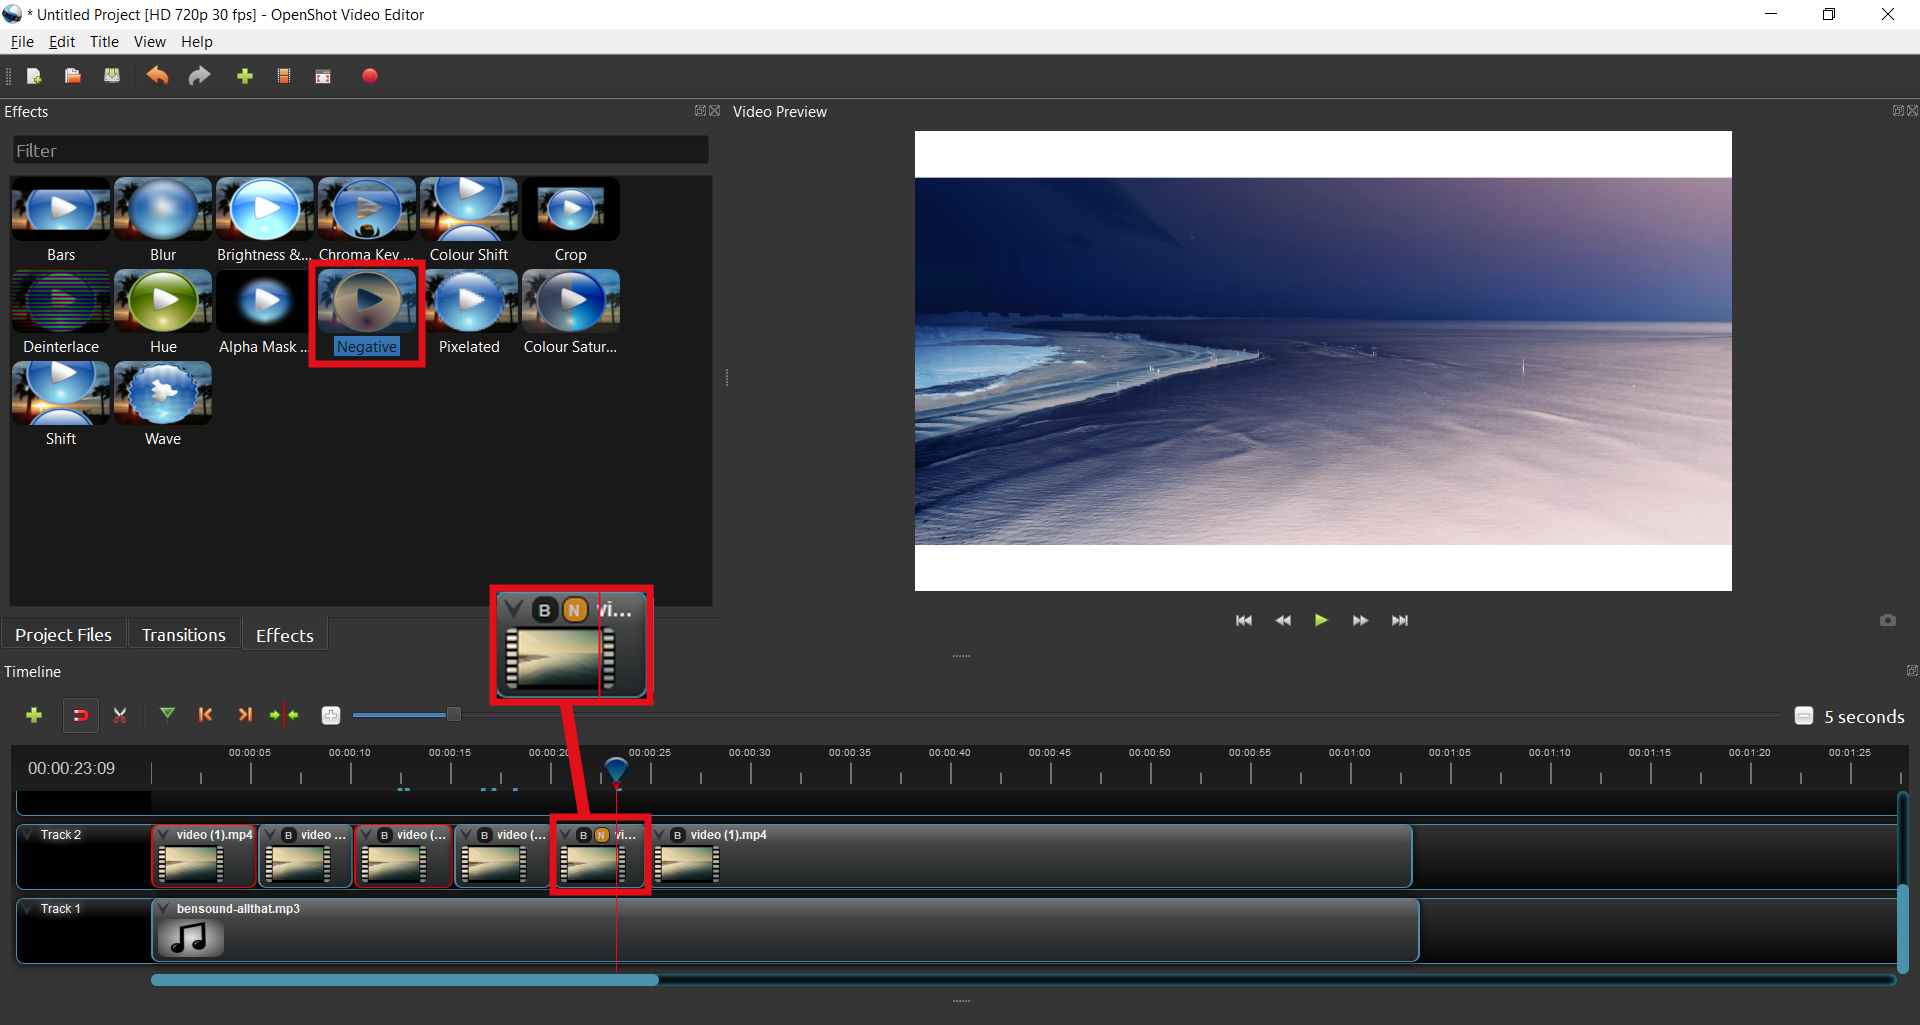
Next, in the fifth video clip, apply the Negative effect. When this is done, the letter N will appear in the upper left corner of that bar.
8. Let’s start editing the other video you imported at the start of the activity. Click on Project Files. Drag the hip-hop dancer’s video to Track 3. This should start at the same time as the last video clip of the beach, at 00:00:24:25. In other words, you should put the start of this video’s bar in line with the start of the last video clip of the beach, as shown in the image.
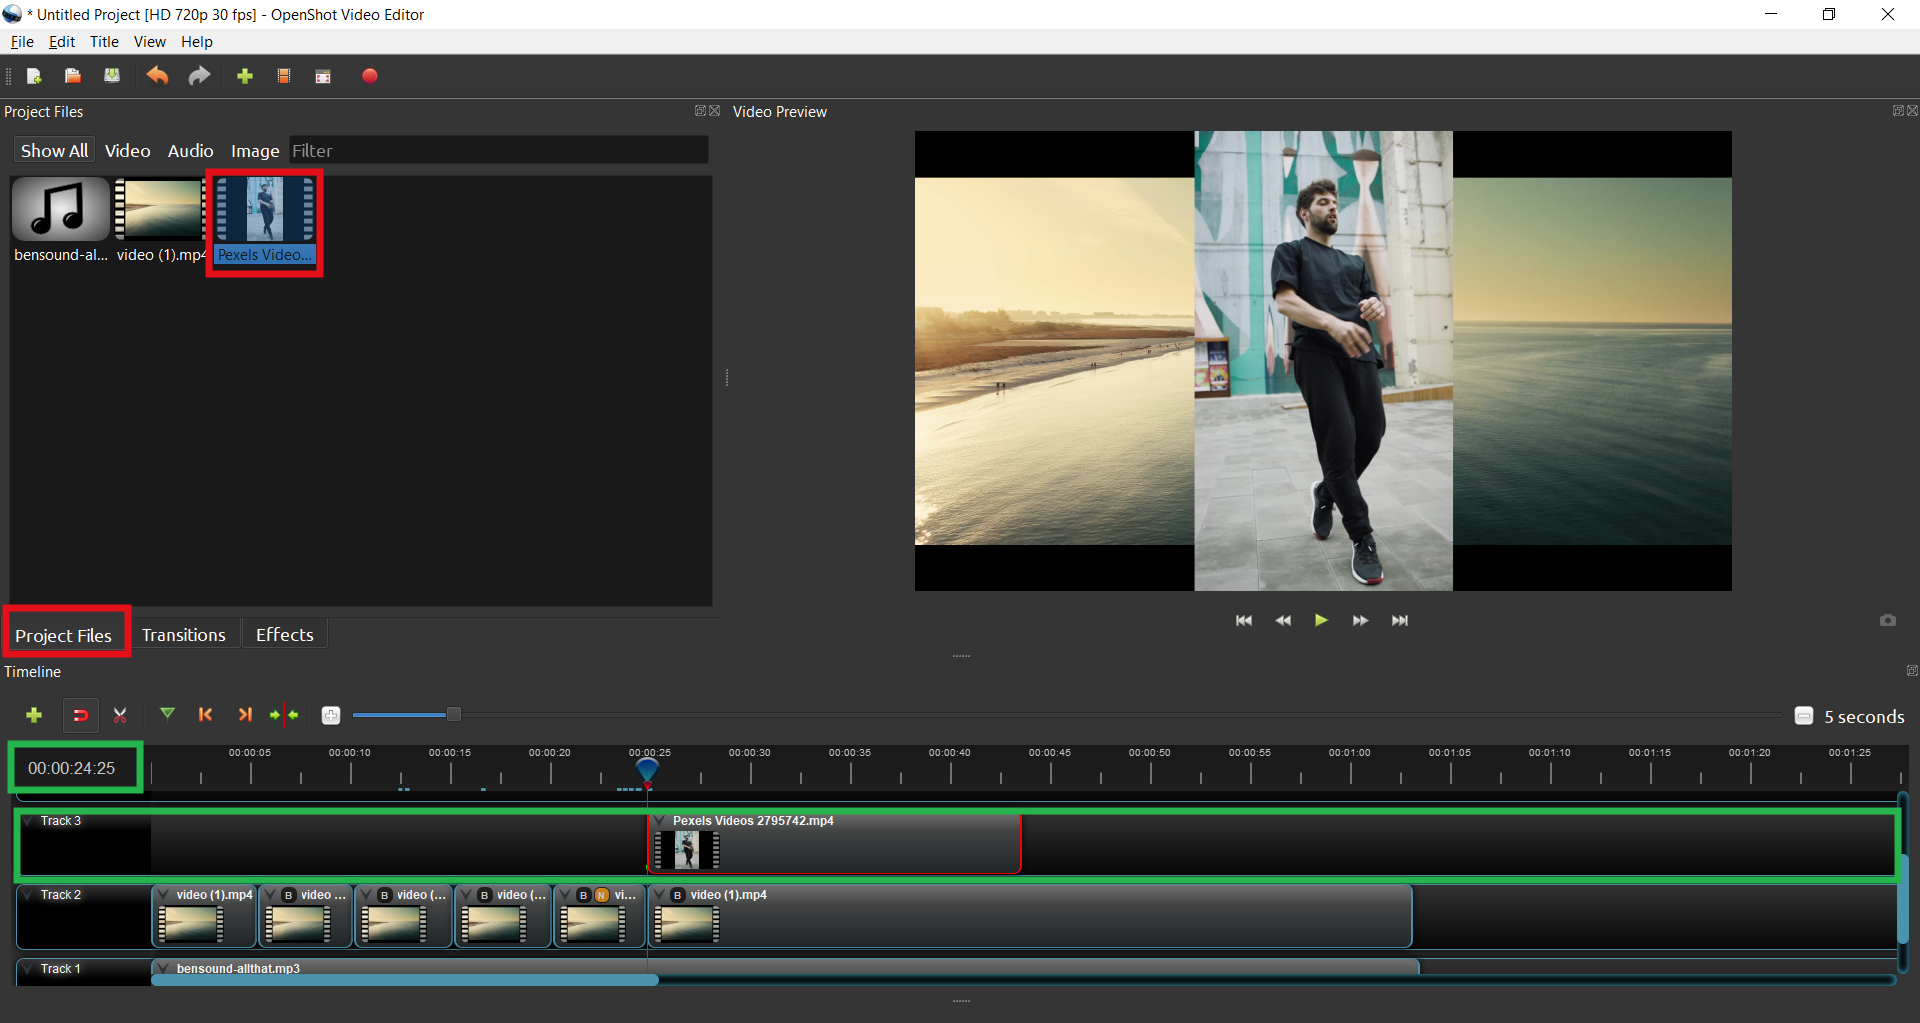
The video has been put on top of the previous one. The higher tracks on the Timeline overlap the ones further down.
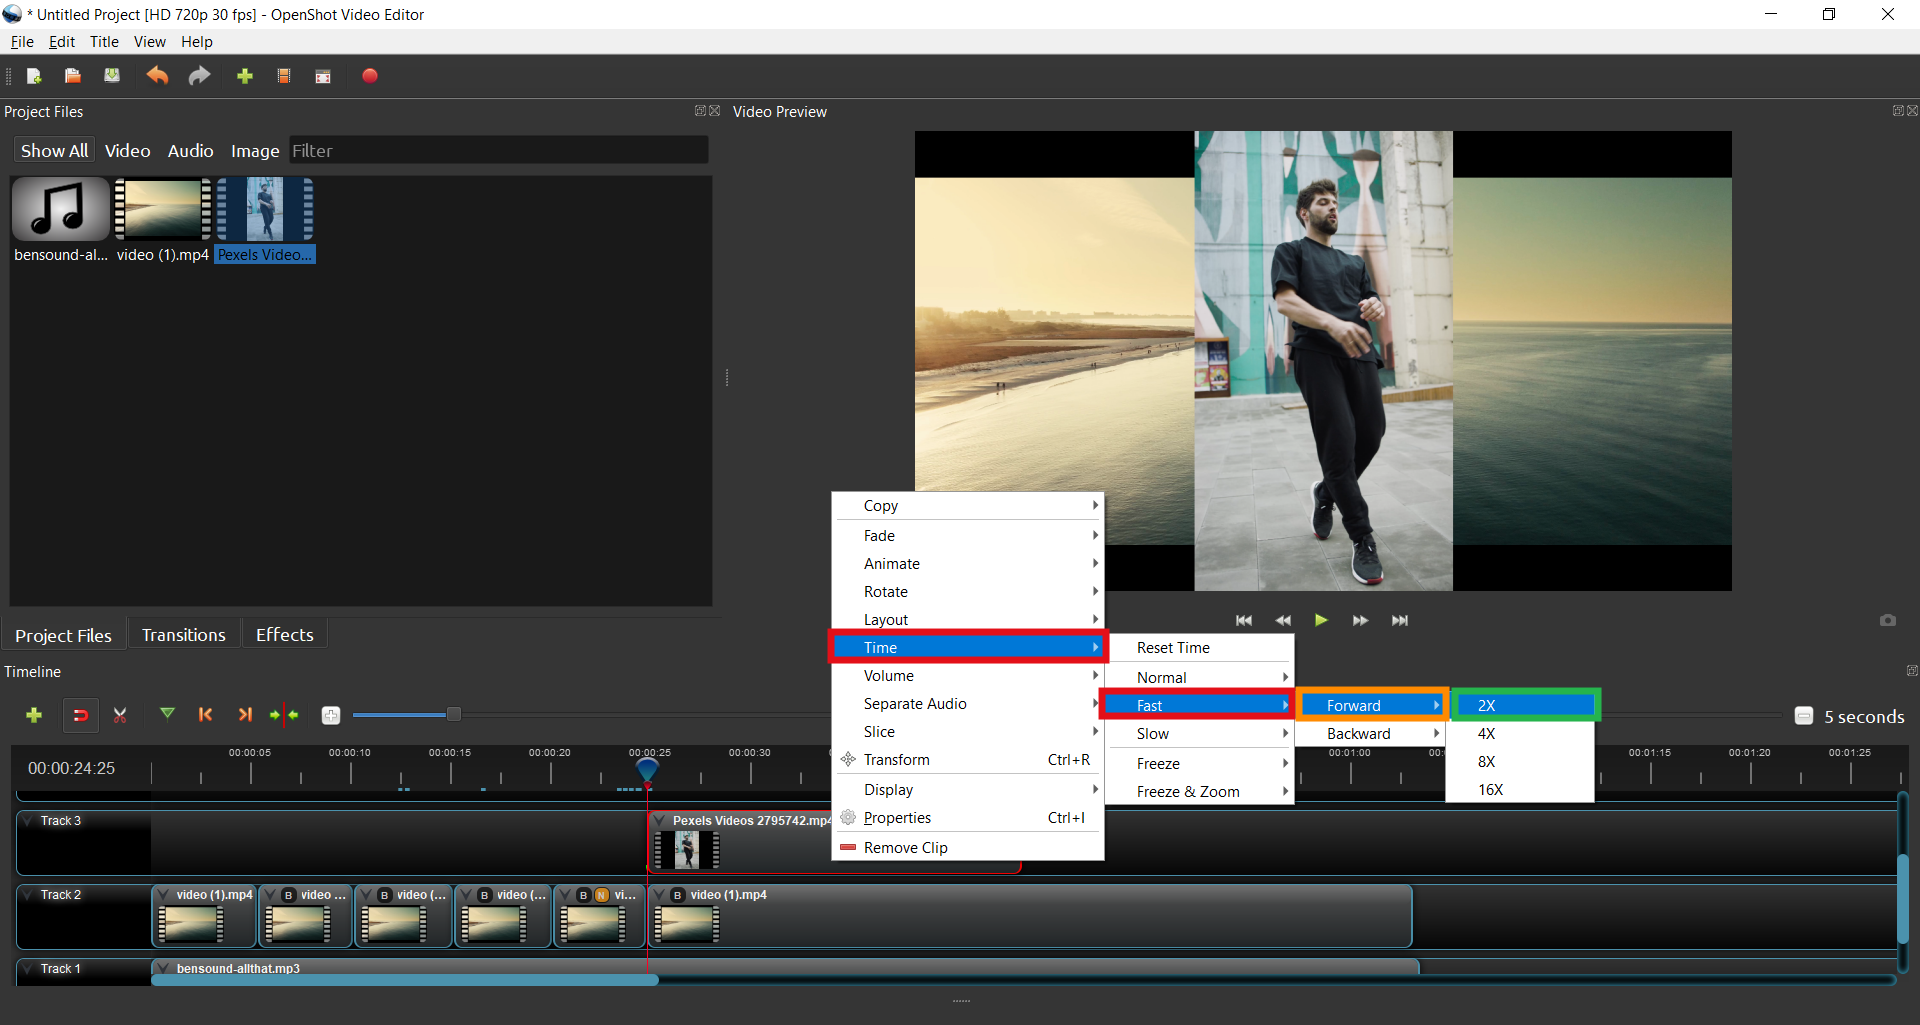
Right-click on the dancer’s video bar in Track 3, and under Tempo, select the Fast option, then select Next and finally click 2X. Now, this video will play at twice the original speed!
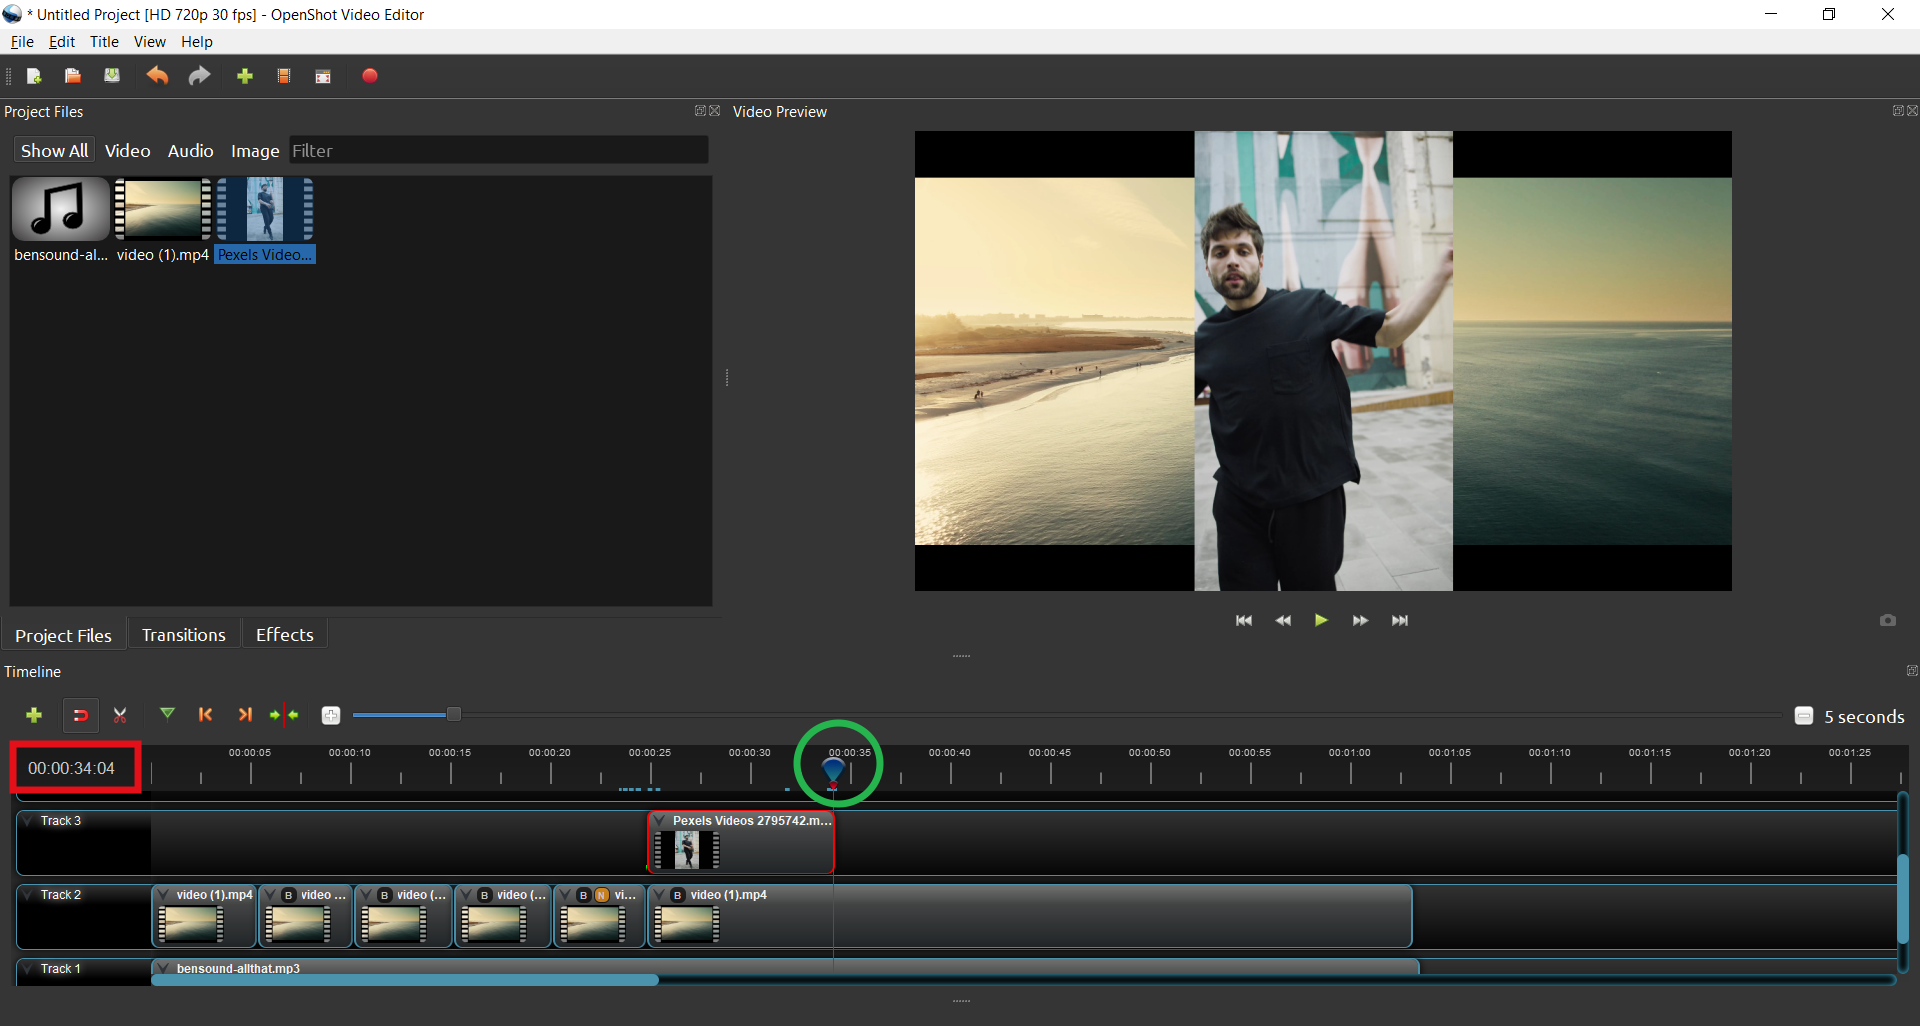
Decrease the length of this video, so that it ends at 00:00:34:04. Don’t forget to use the playhead.
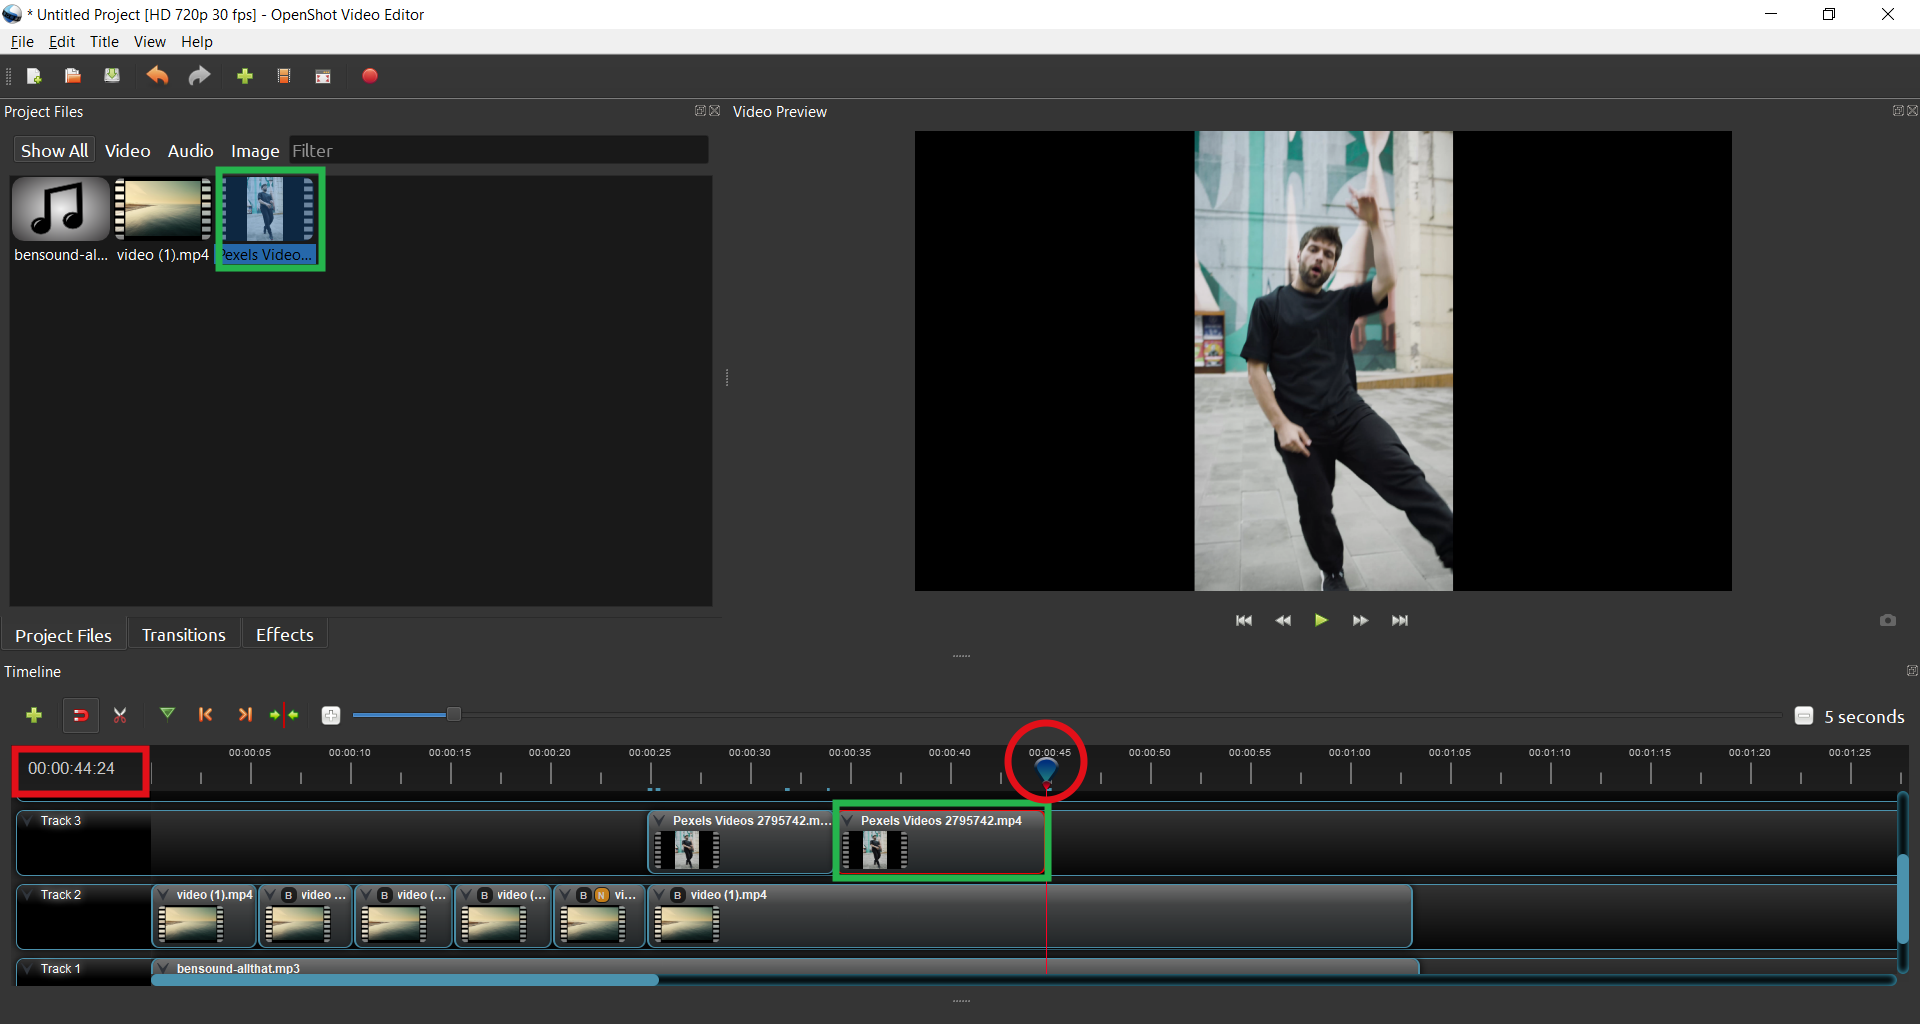
Next, go to Project Files, drag a second video of the hip-hop dancer and add it to the right of the previous one, as marked in green in the image. Its duration must not exceed 00:00:44:24.
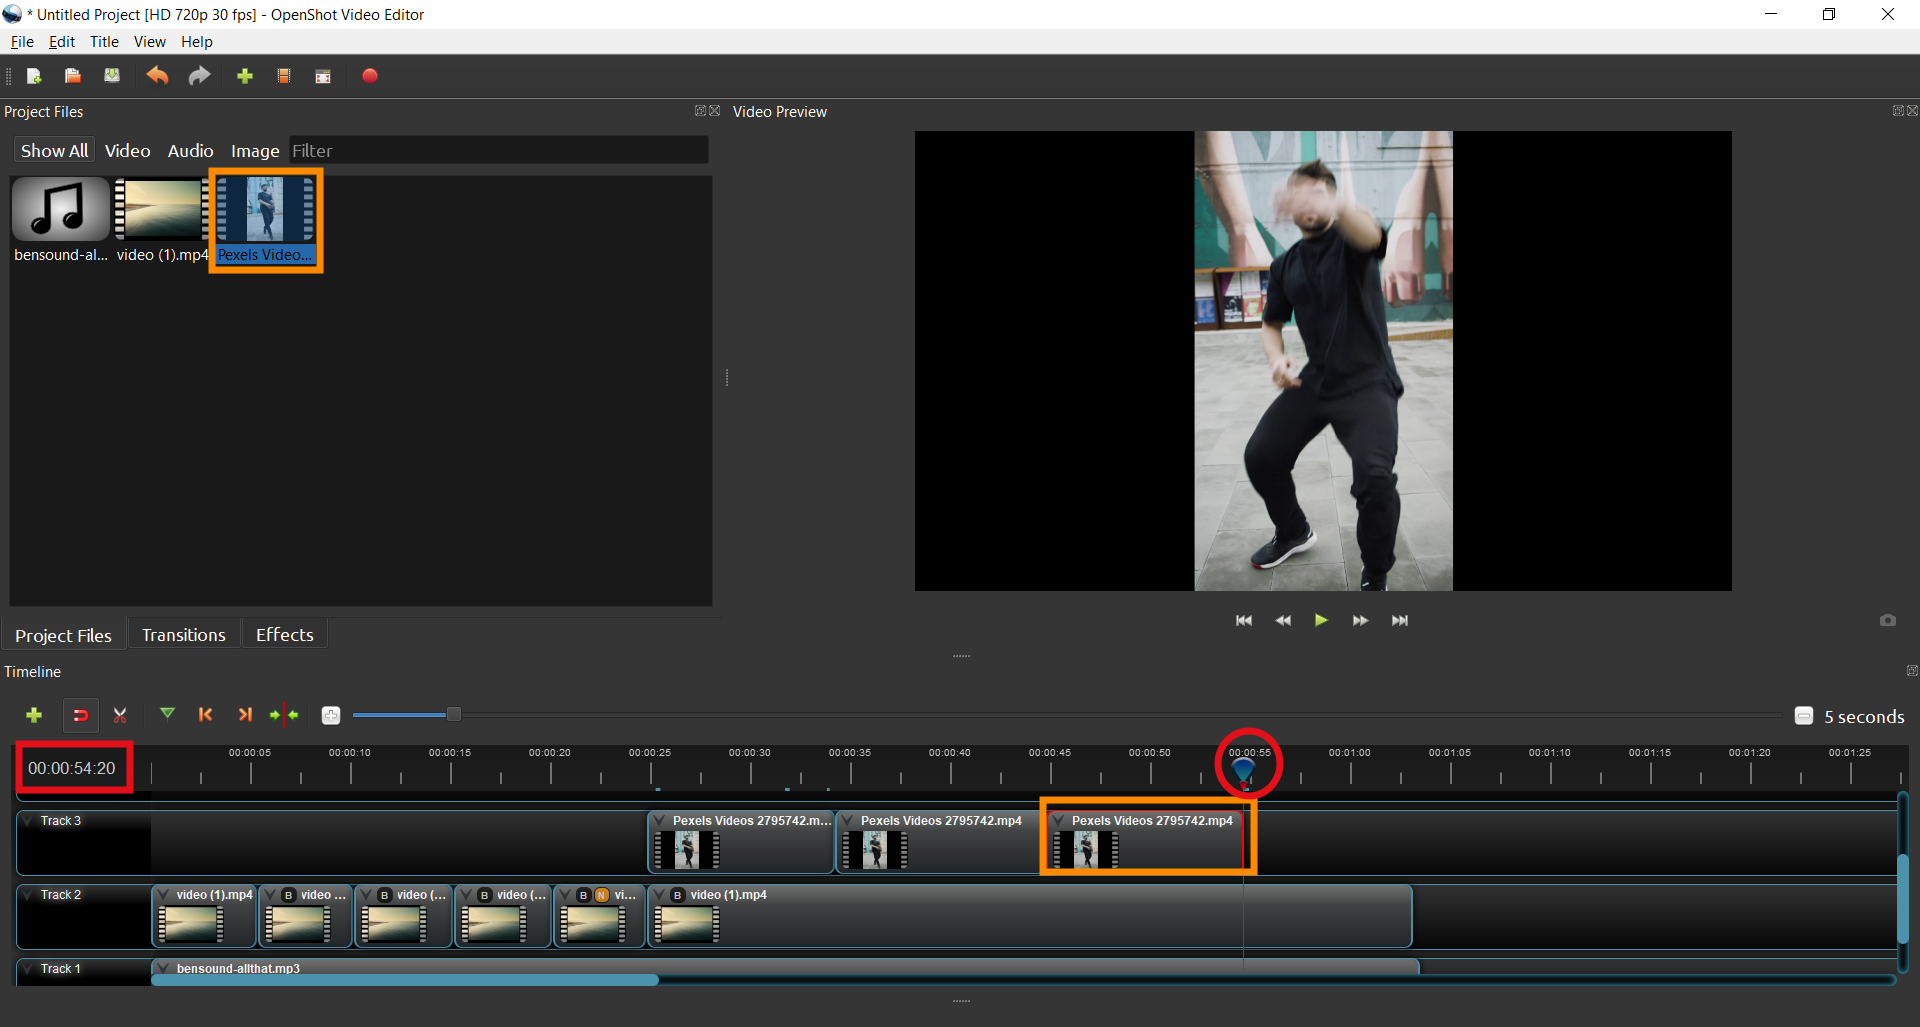
Again, drag a third video of the hip-hop dancer and add it to the right of the previous ones. This one should end at 00:00:54:20.
Right click on this last video with the mouse button and, under Tempo, select Normal, then Back, and finally 1X. The video will now play backwards!

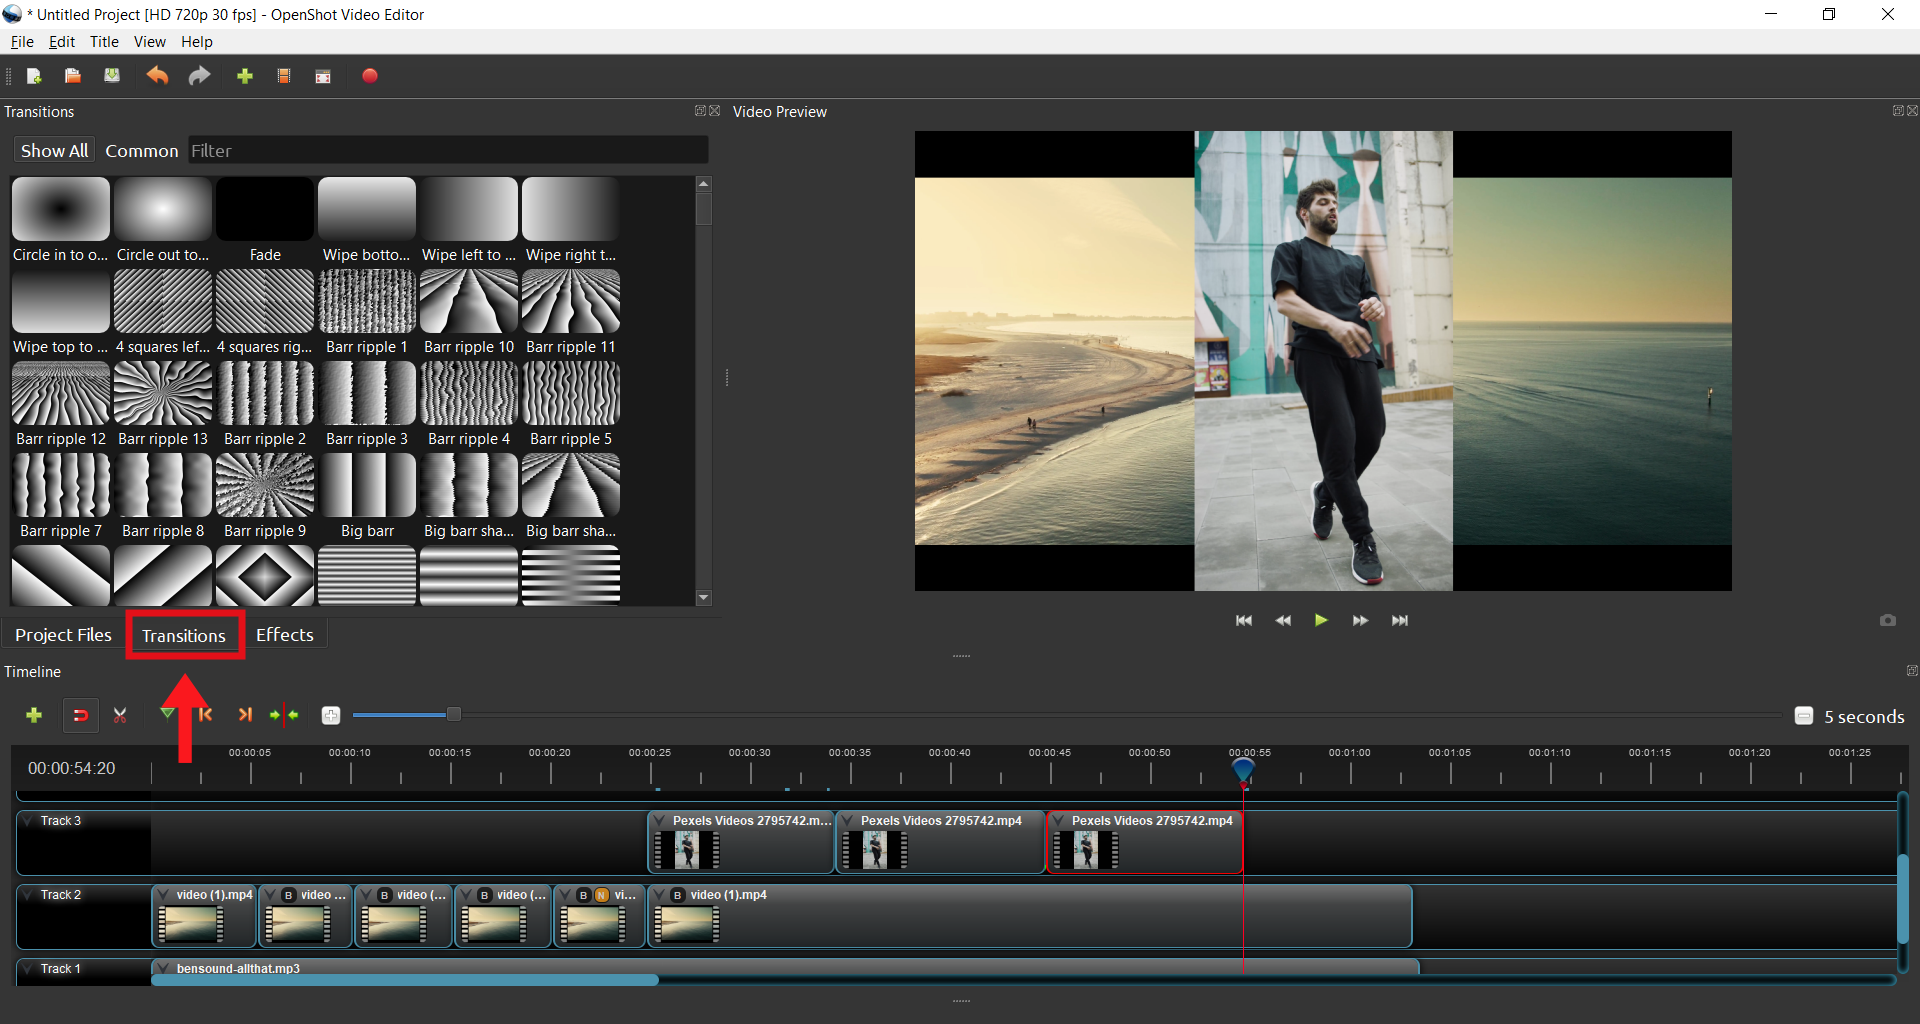
9. This video is starting to get quite good! Let’s also add Transitions. To do so, on top of the Timeline, click on Transitions, marked in red in the image.
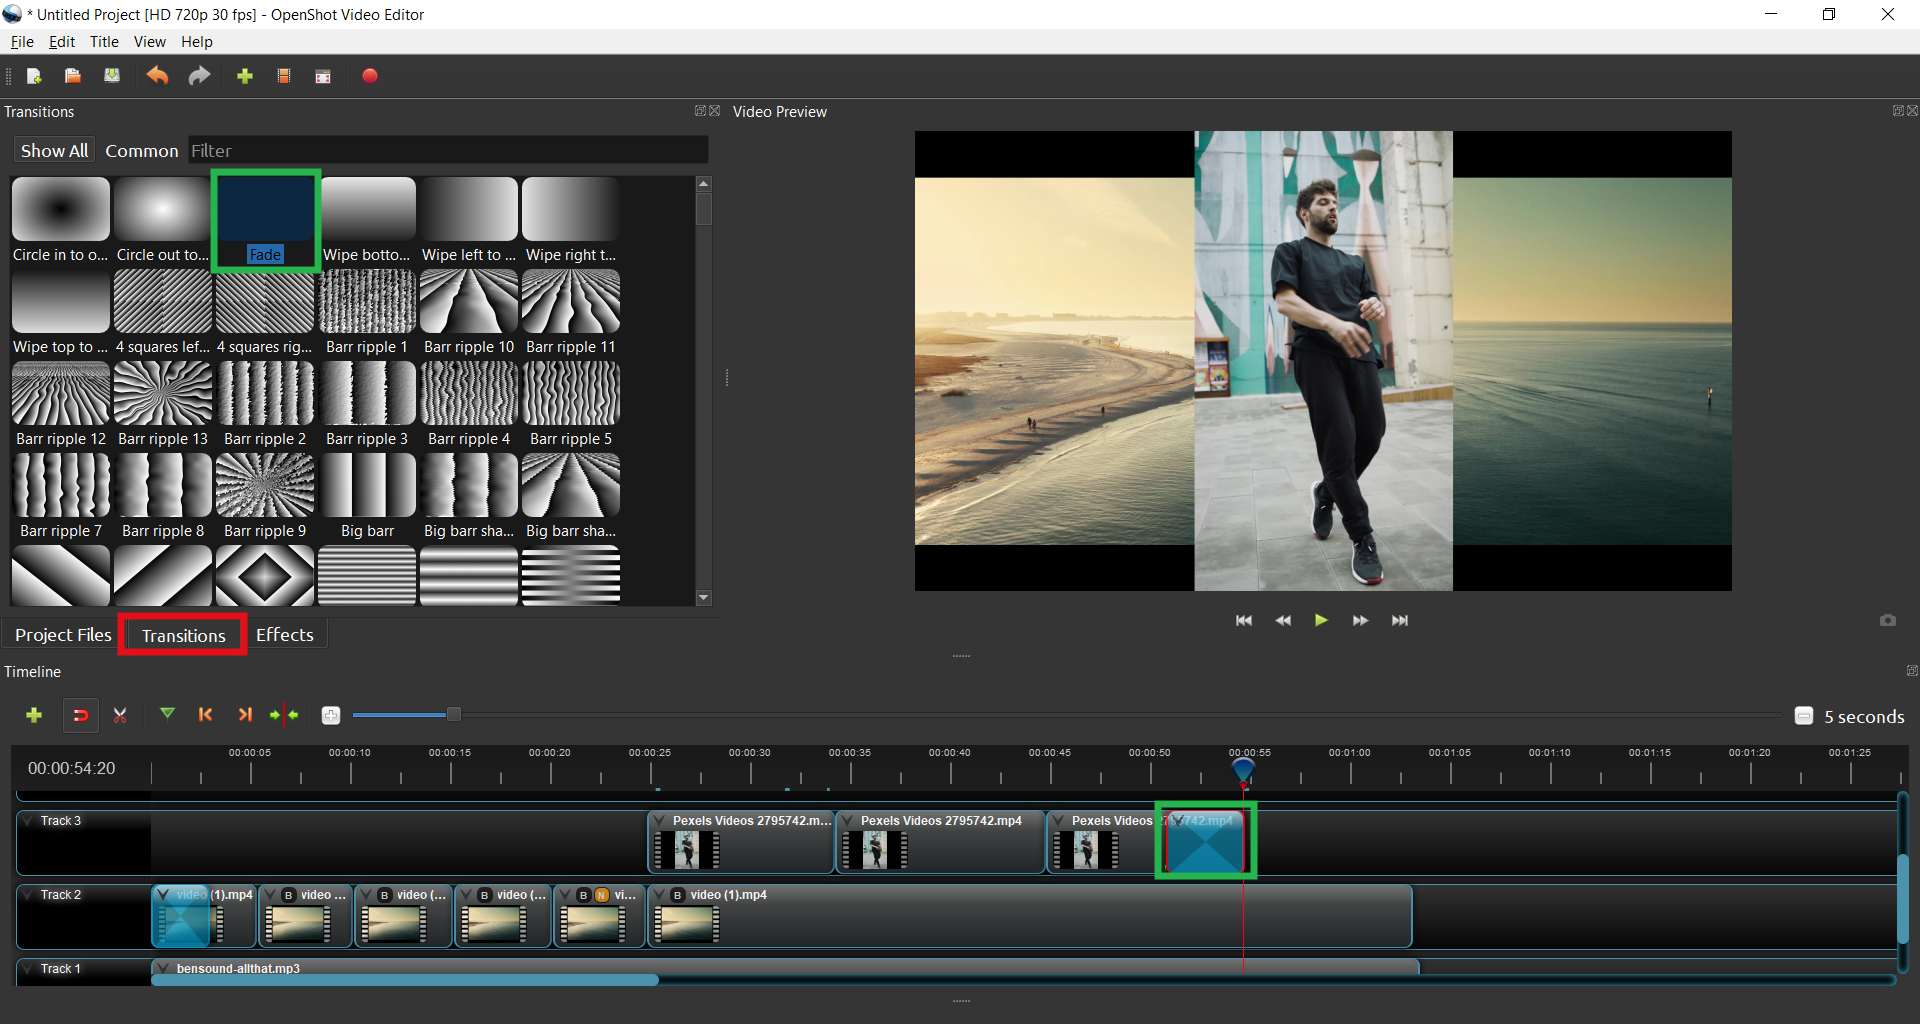
Select the Fade effect and drag it over the first bar of the beach video on Track 2. Change the duration of this effect so that it only applies to the first bar of the video, like this:
Also add the Fade transition to the hip-hop dancer’s latest video. Change the duration of the transition so that it only occupies the last half of the video.
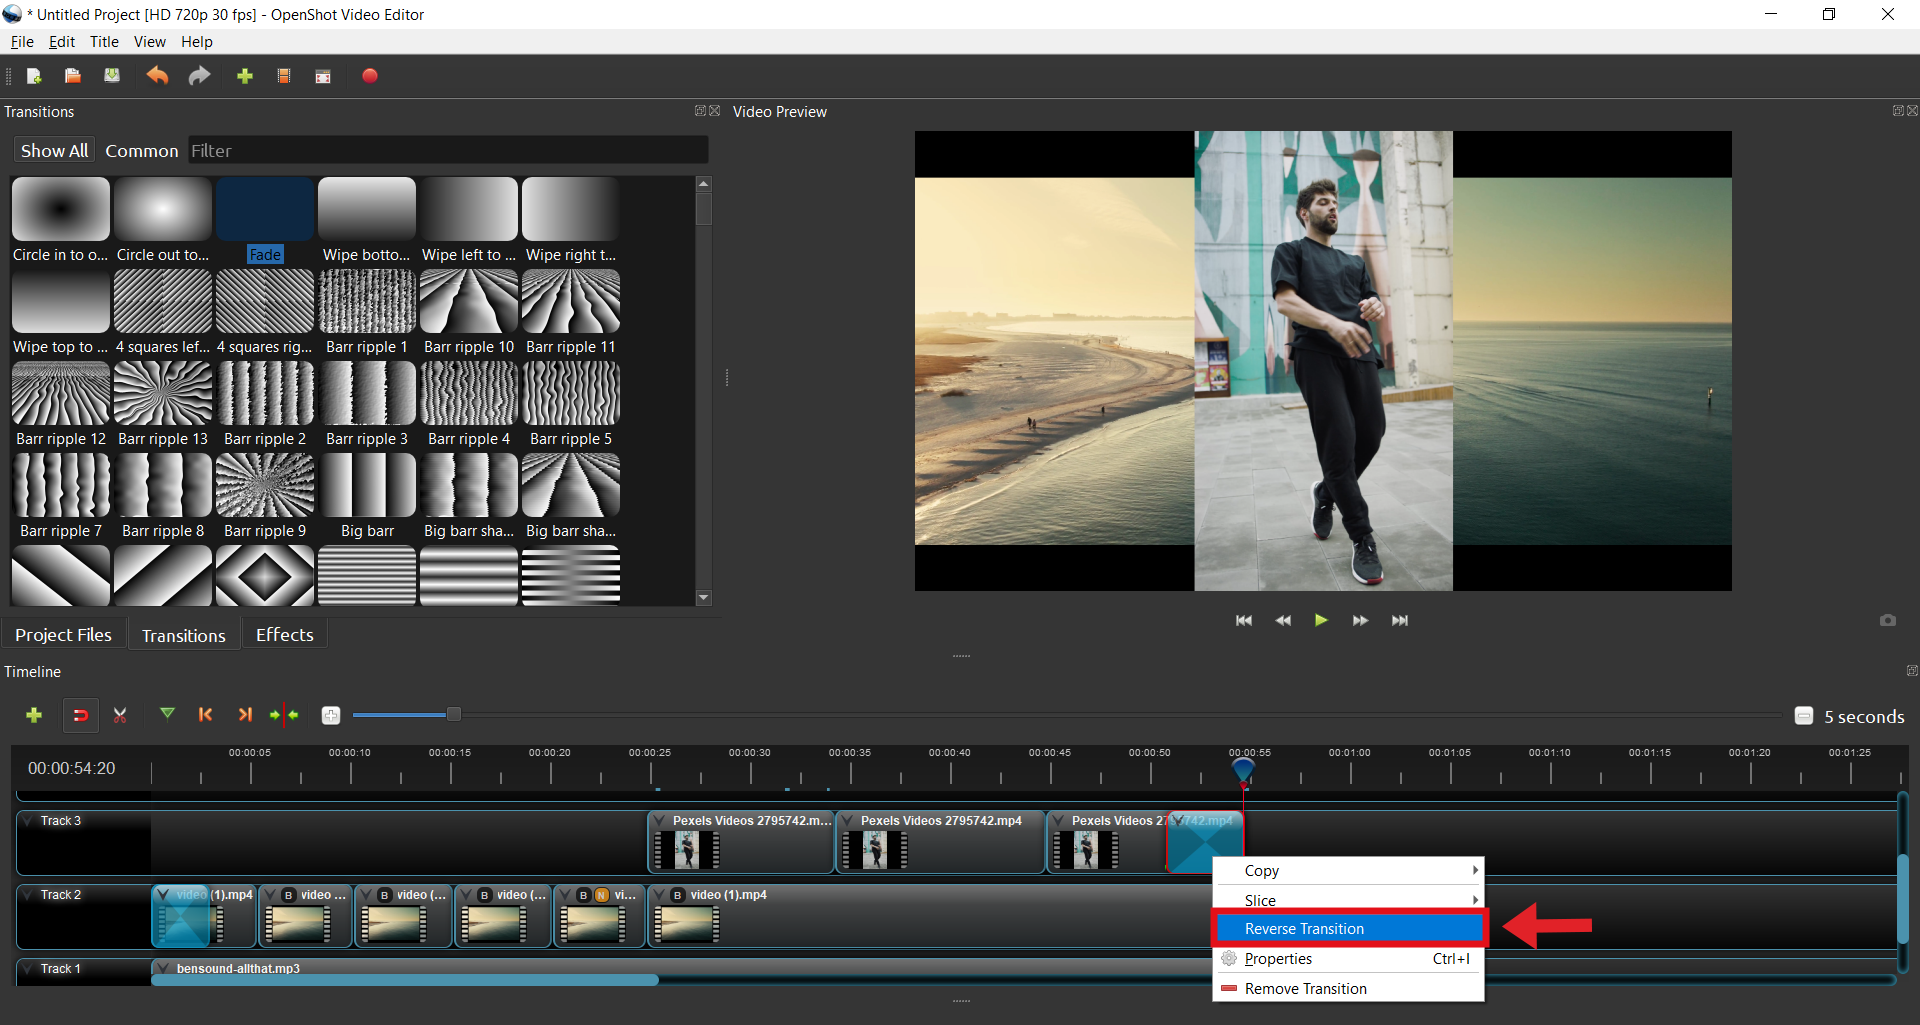
Now, right-click on the Fade transition, which was used for the dancer’s video, and select the option Reverse transition. The Fade transition makes the video fade in smoothly, while the Reverse Fade transition makes it fade out smoothly.
Next, drag the Wipe top to bottom transition onto the last bar of the beach video, changing its duration so that this effect starts when the dancer video ends.
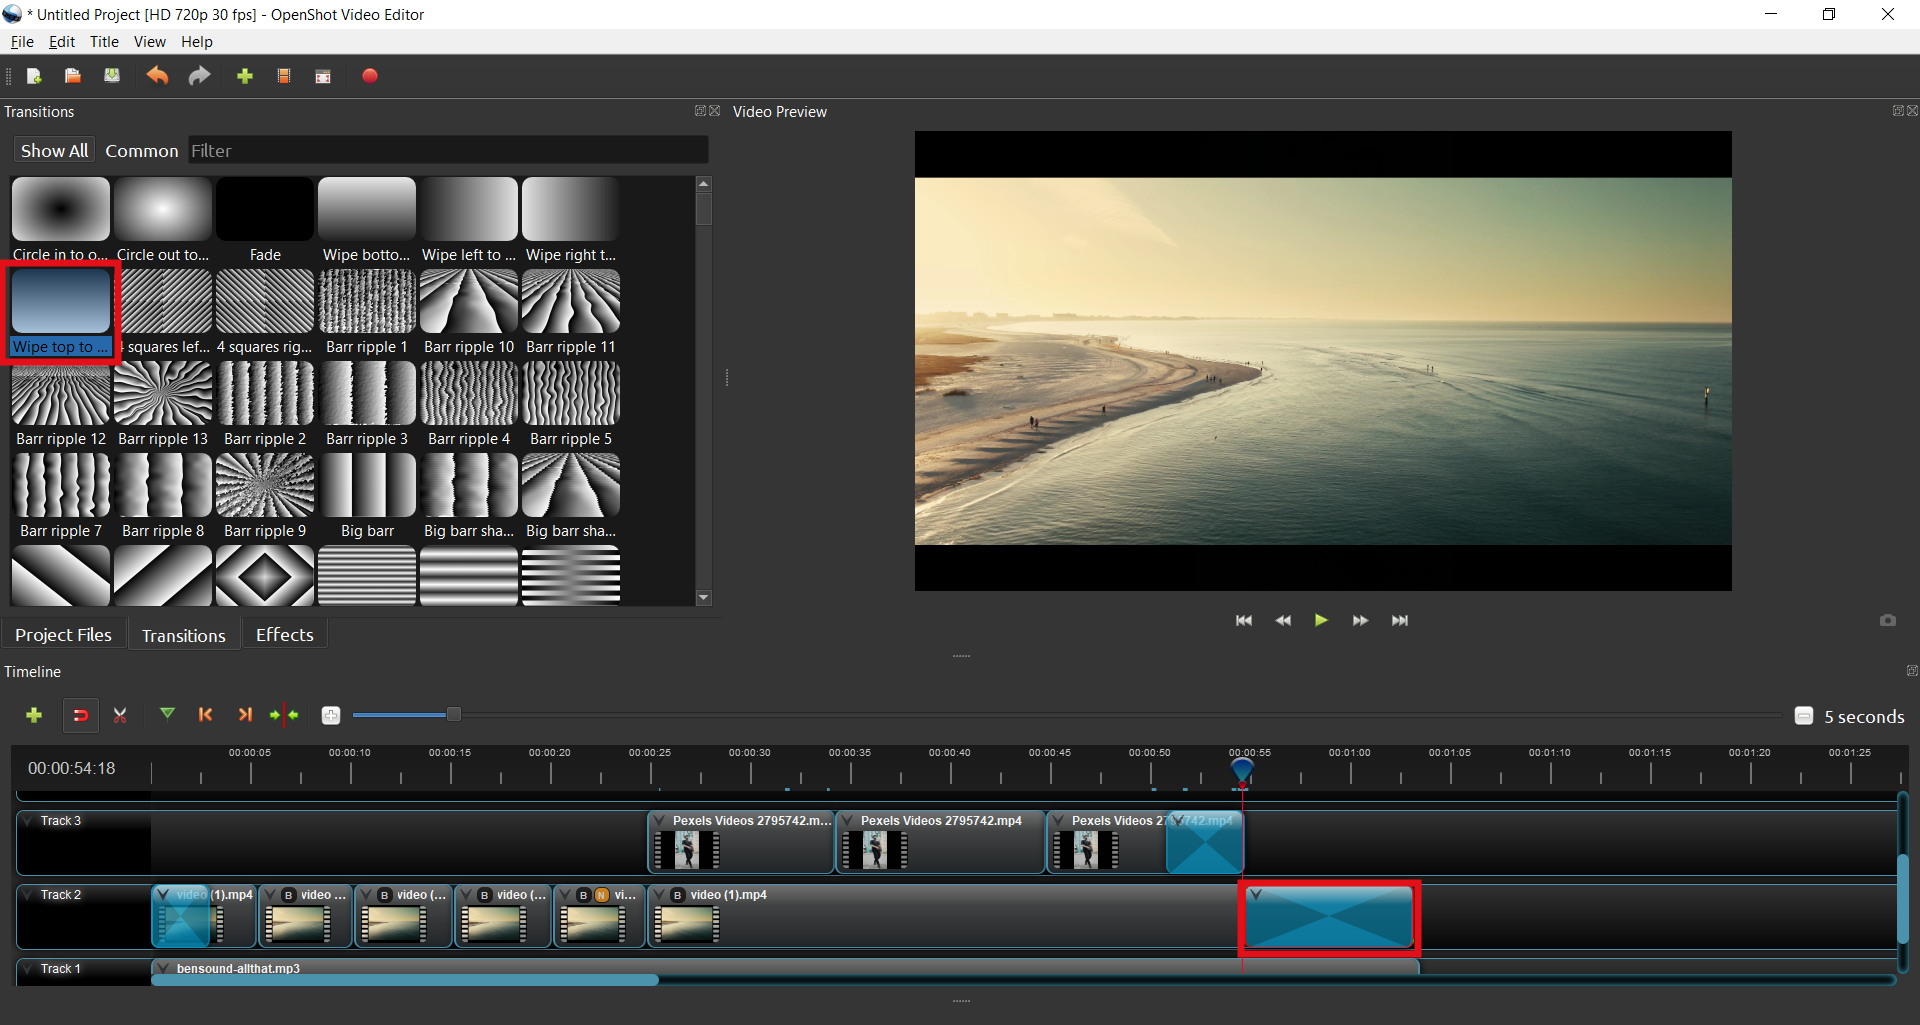
Right-click on the dancer’s video and also select the Reverse transition effect.
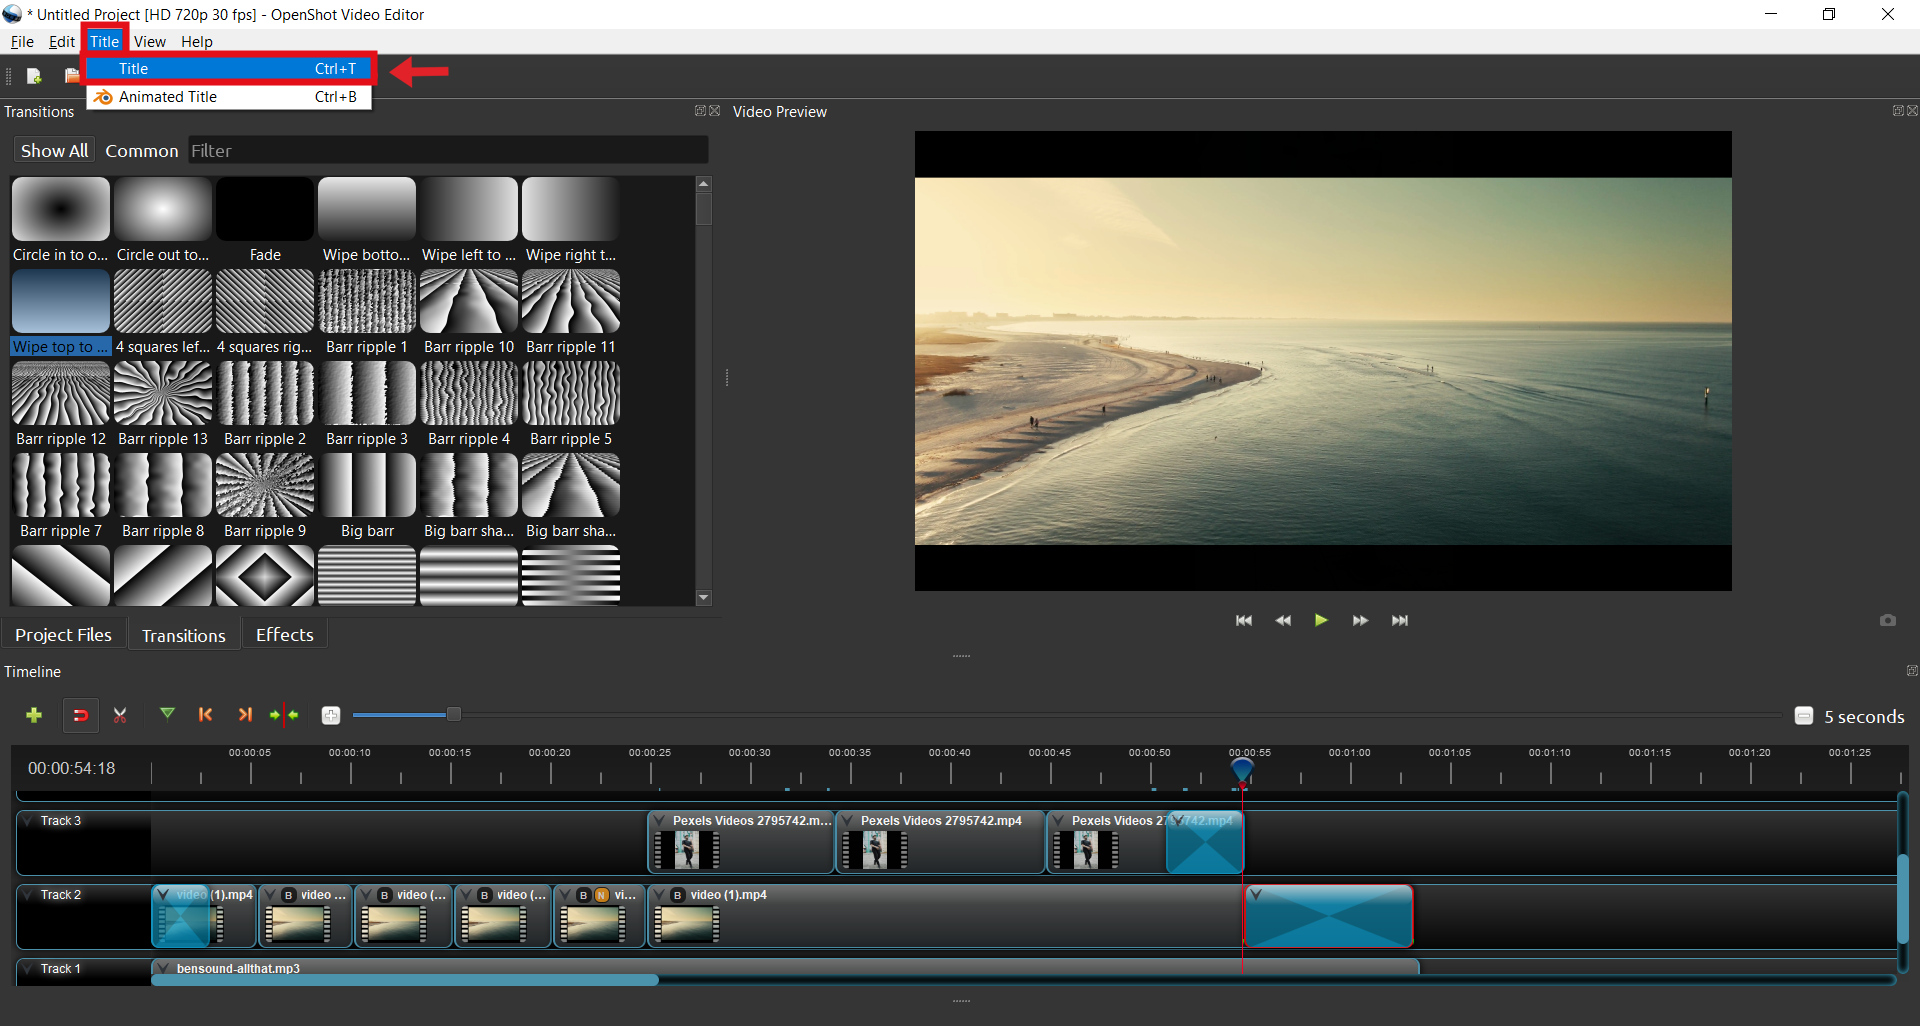
10. Finally, give your film a title. To do this, from the top menu, under Title, select Title.
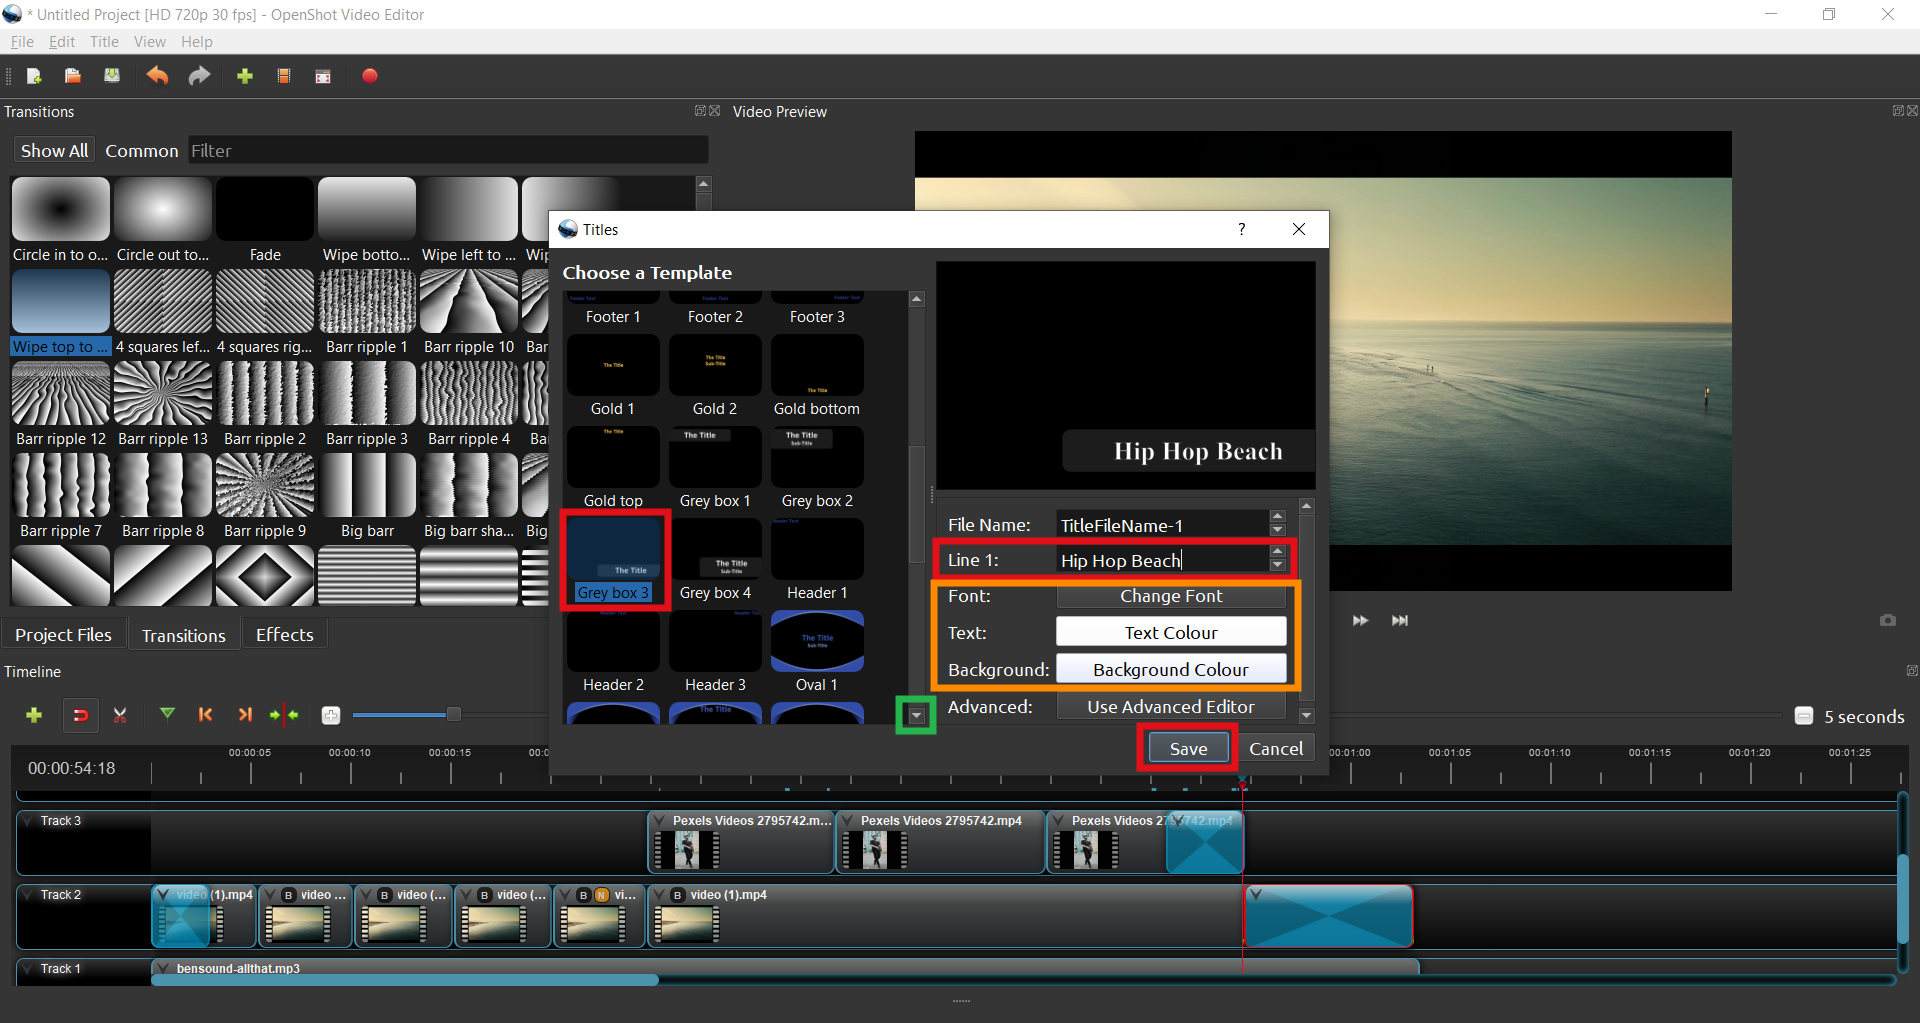
Under Choose a Model, find the option Grey Box 3 and select it. On the right, write Hip-Hop Beach in Line 1. If you want, you can Change font, change the Text colour or even the Background colour. When you are done, click Save.
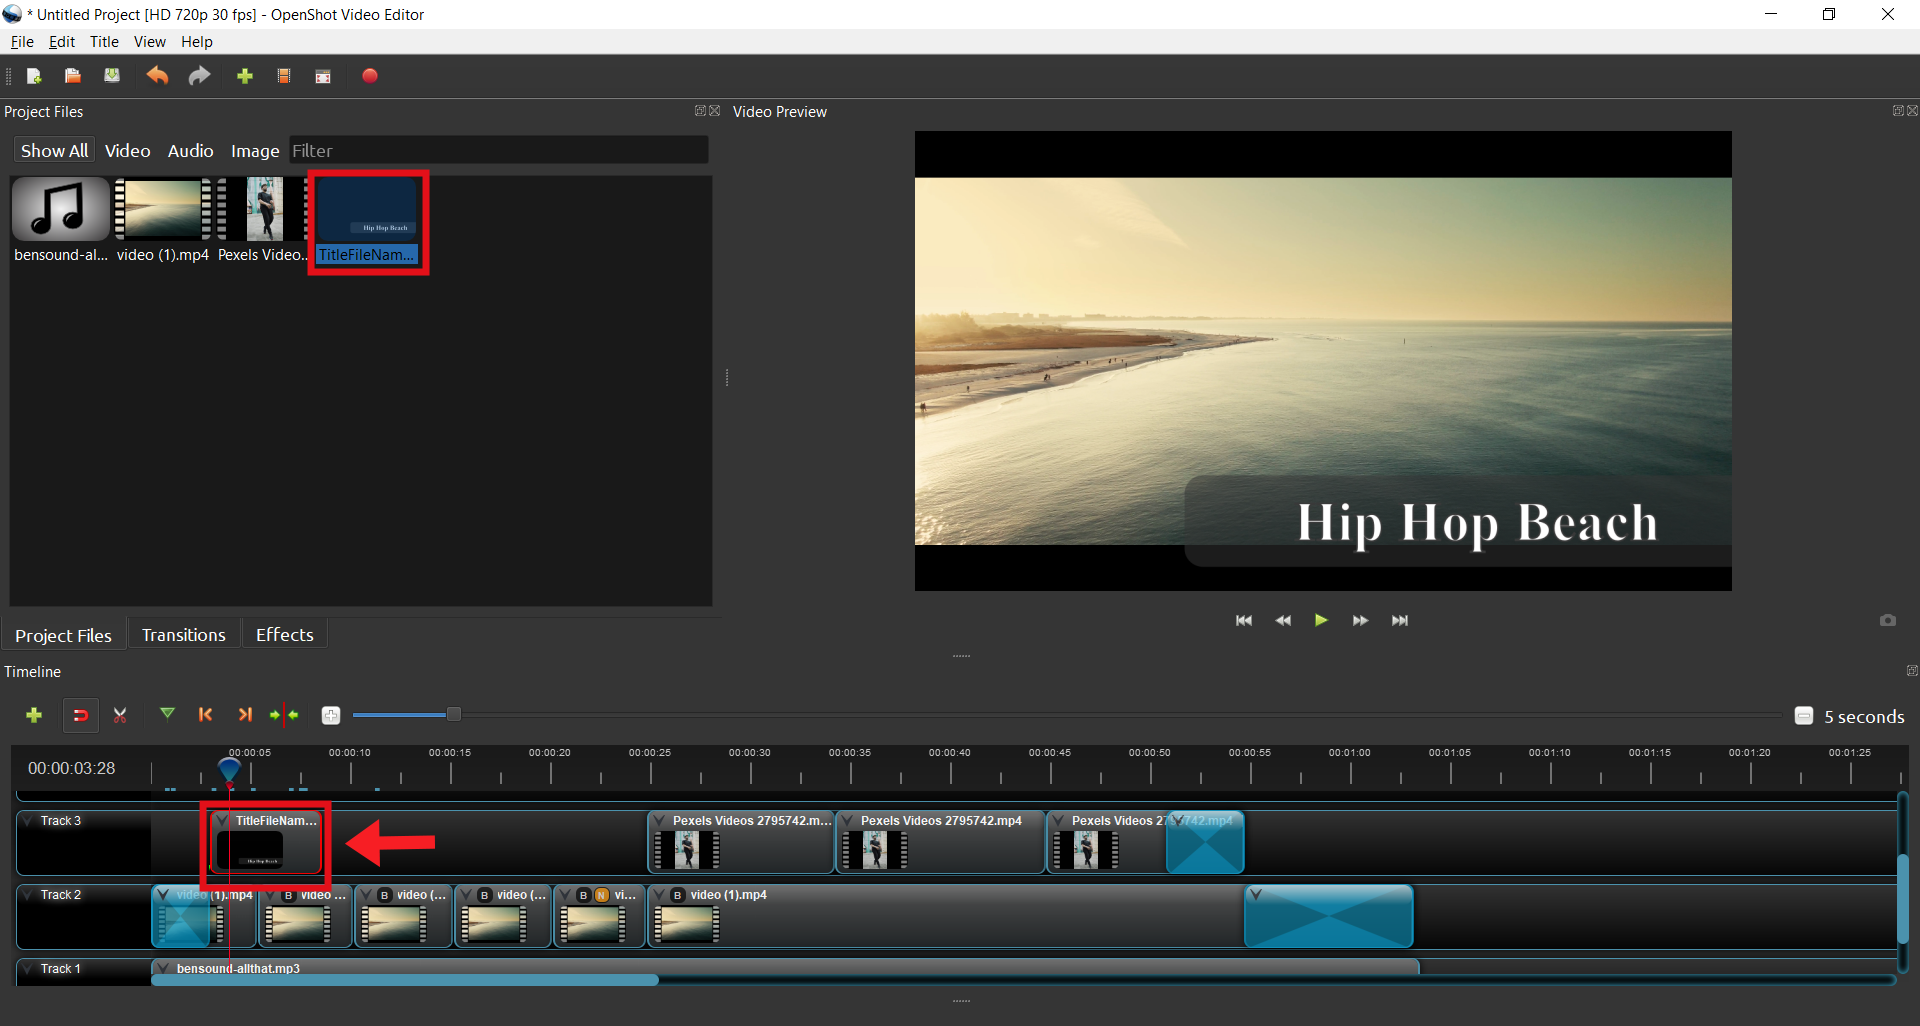
The title is now in the Project Files. Drag it to Track 3, and position it between the middle of the first beach video and the middle of the second beach video, changing its duration.
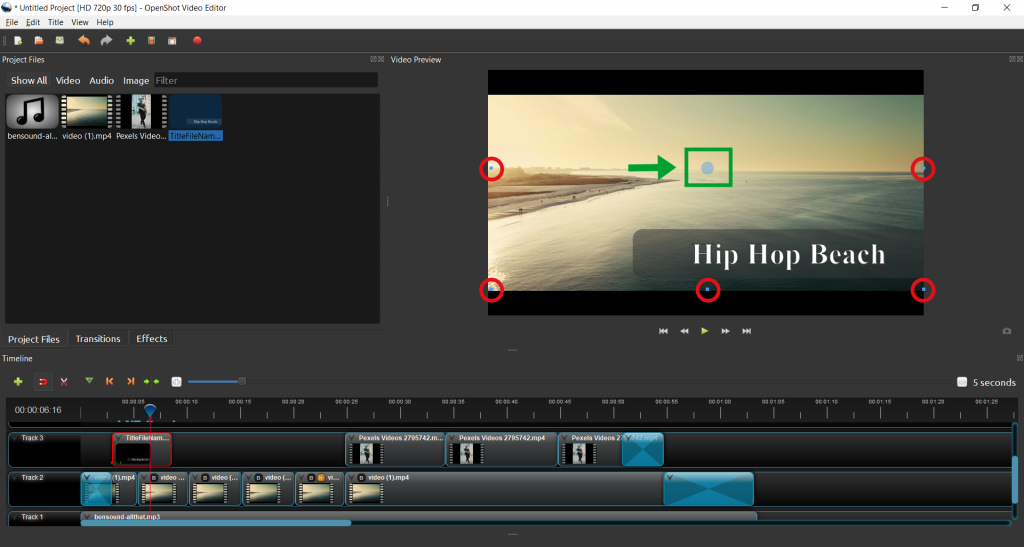
Then right click on the title bar and click Transform.

On the screen where you watch your film, you will see some blue squares at the ends and a circle in the middle. Click and hold the circle and drag it, changing the position of the title.
11. Your video is now finished! In the Preview Video window, click Skip to Start and then Play.

12. To save your project, from the top menu under File, select Save project as…
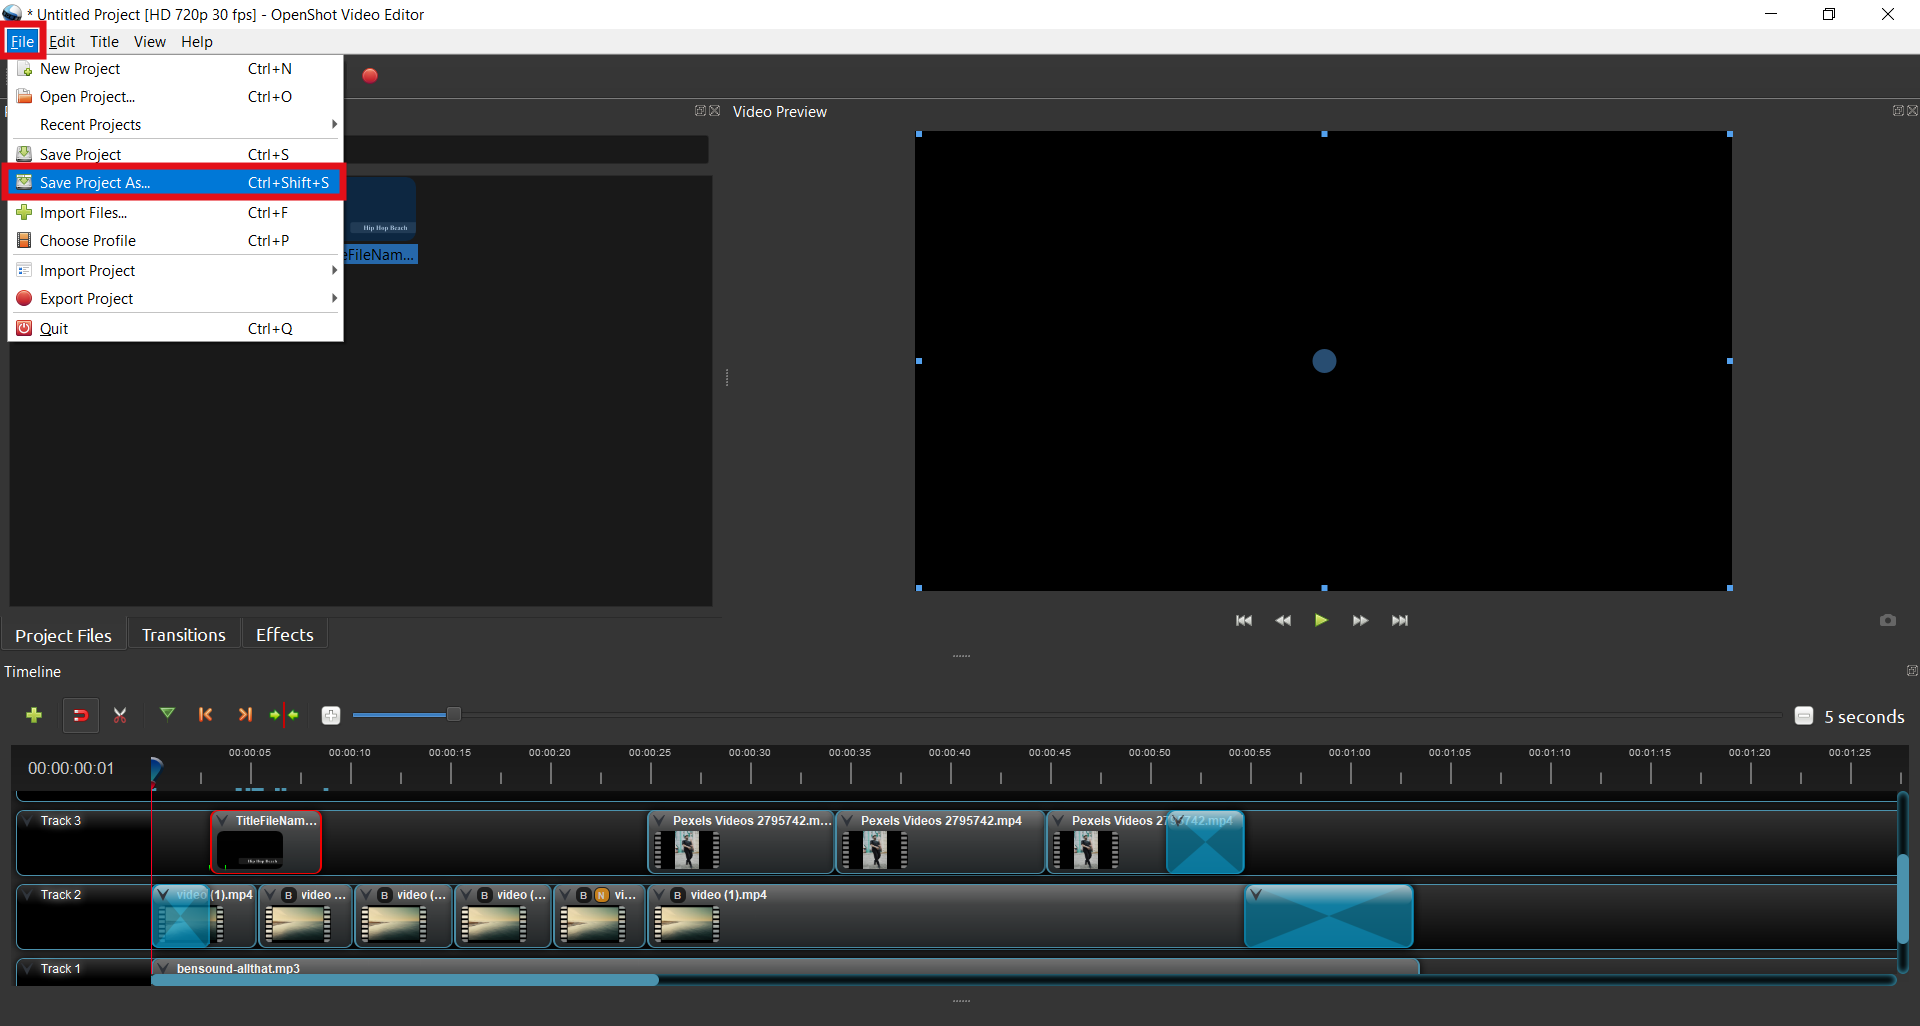
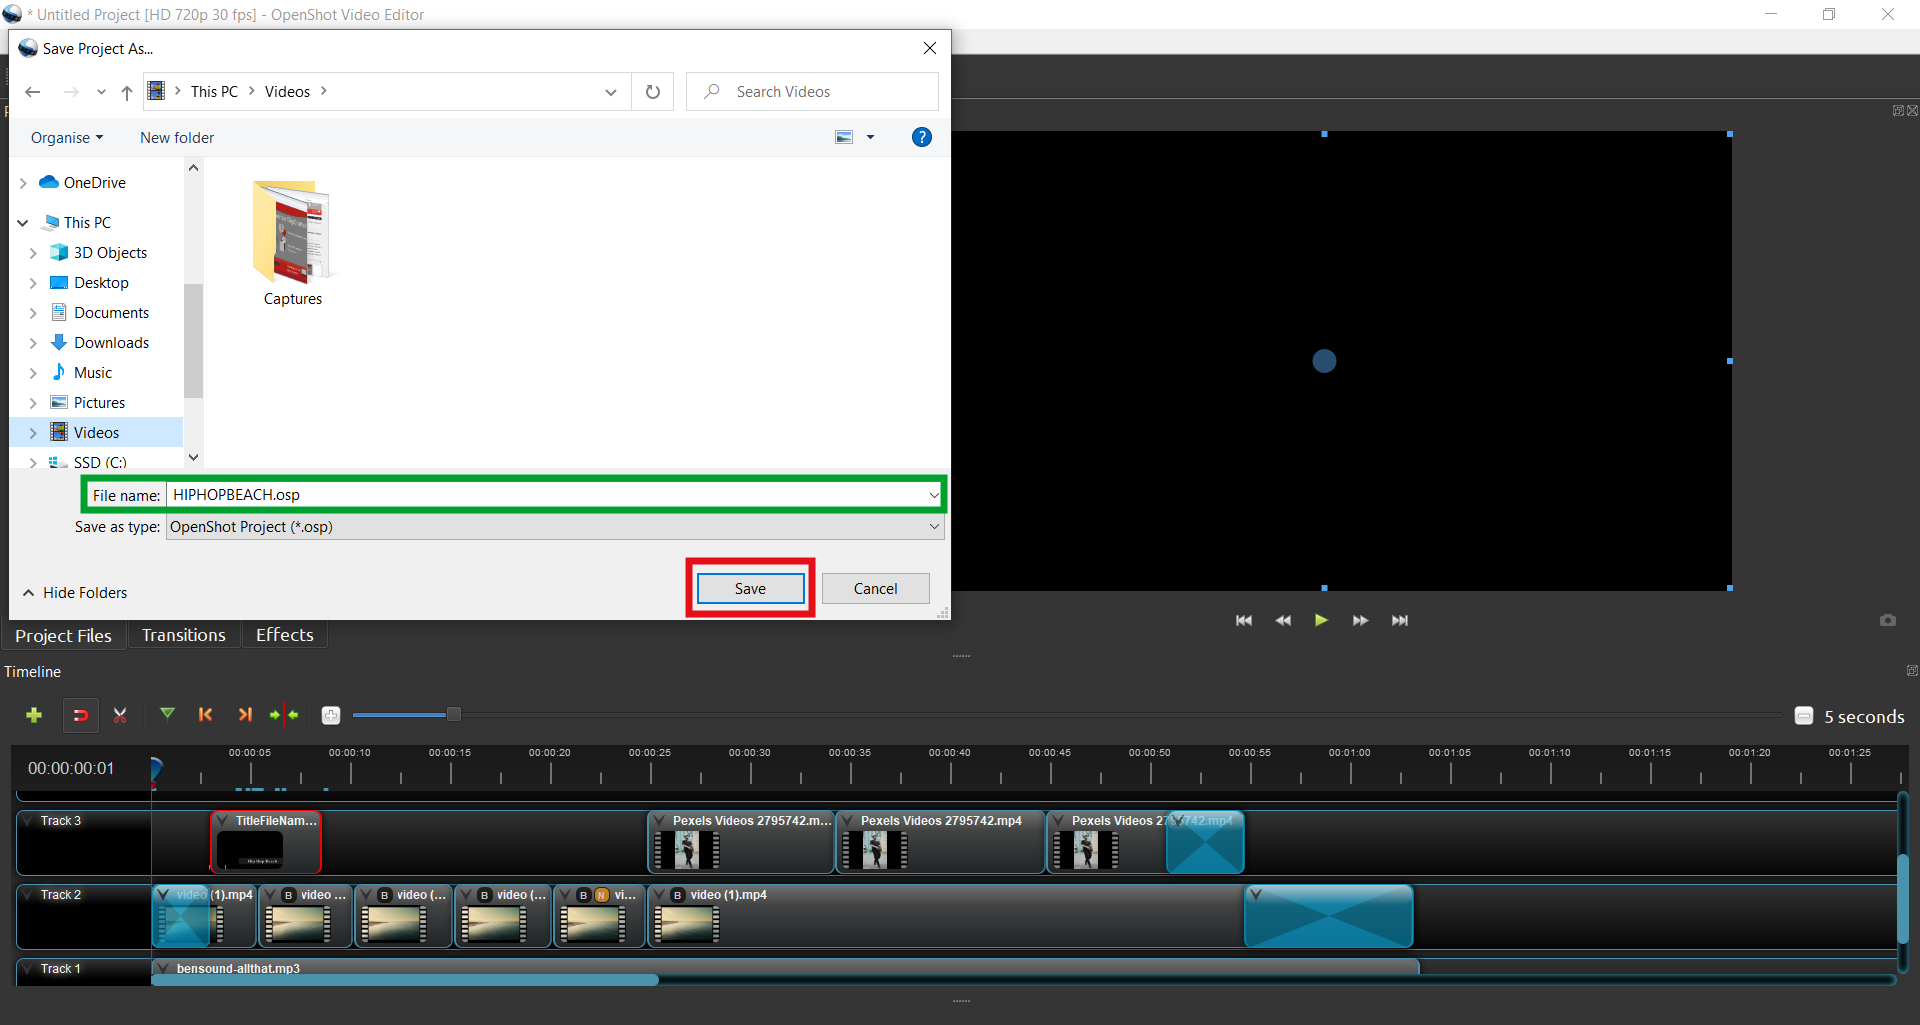
Give your project a name and choose a place to save it. If you want to make changes to your video, just open this file you are saving! Click Save.
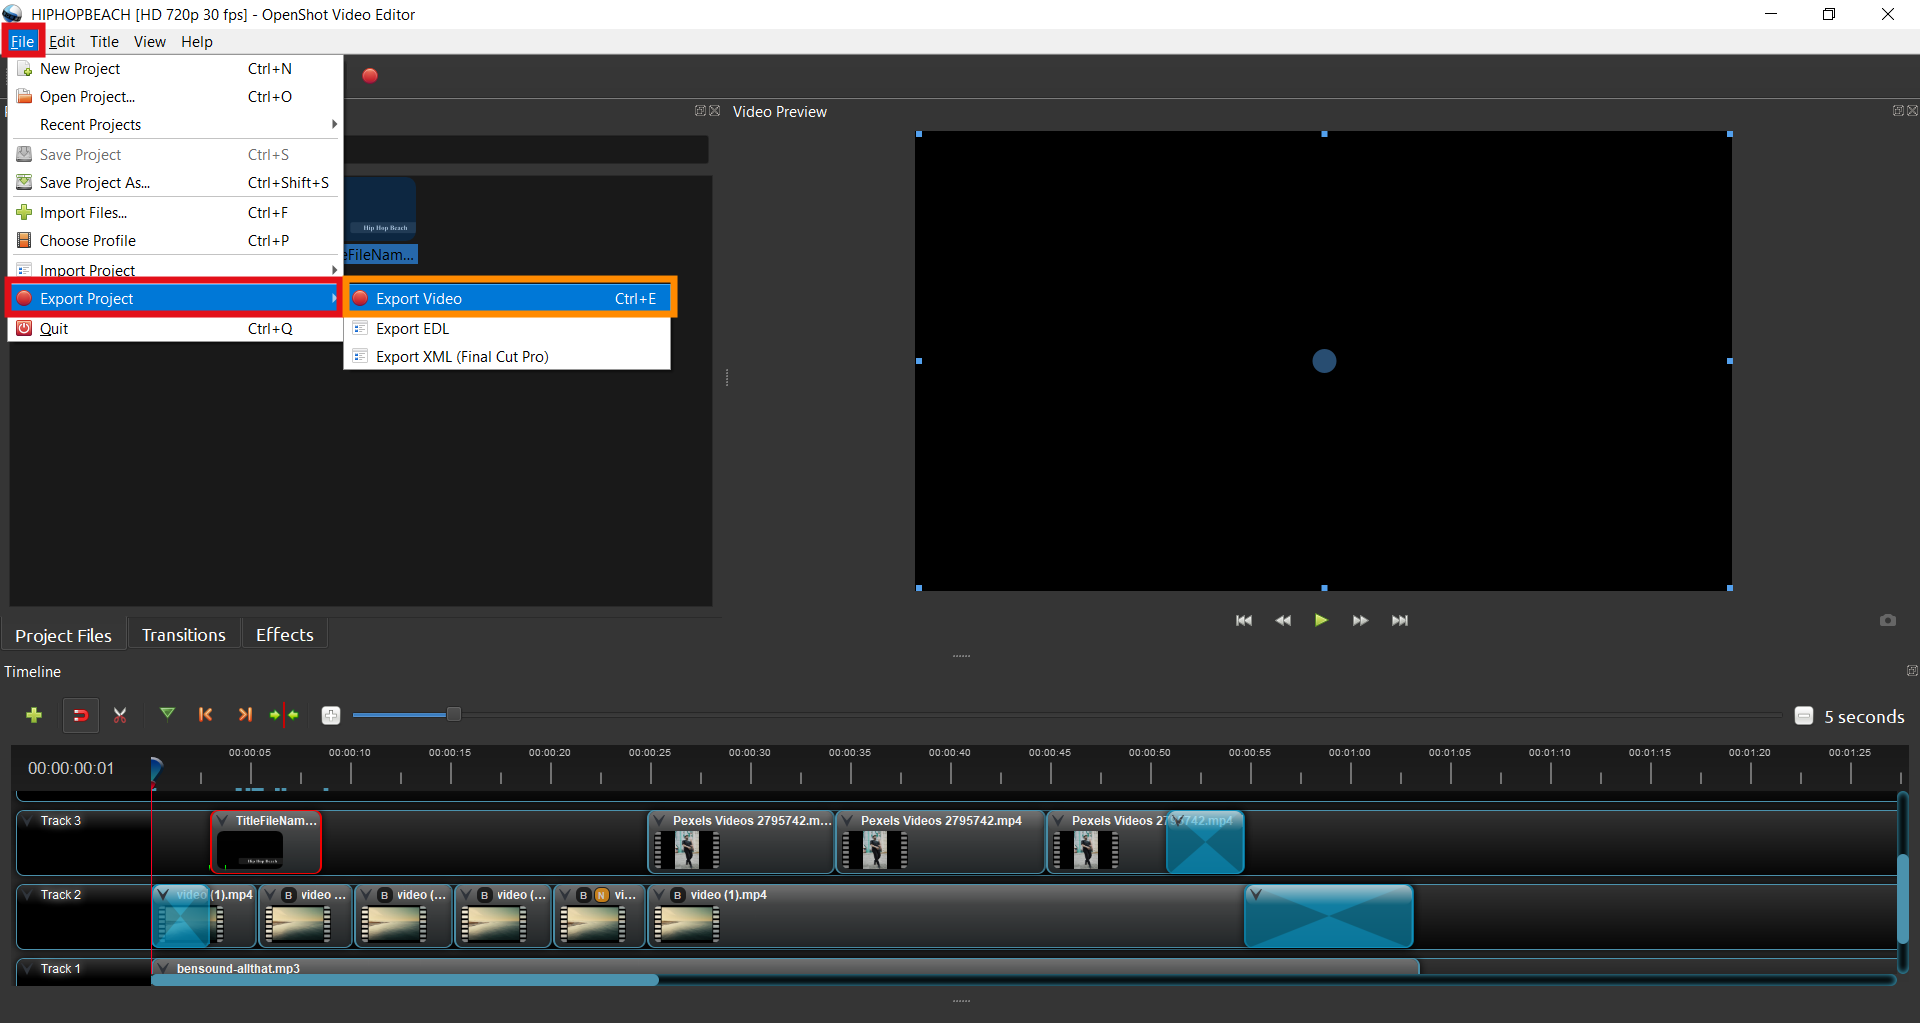
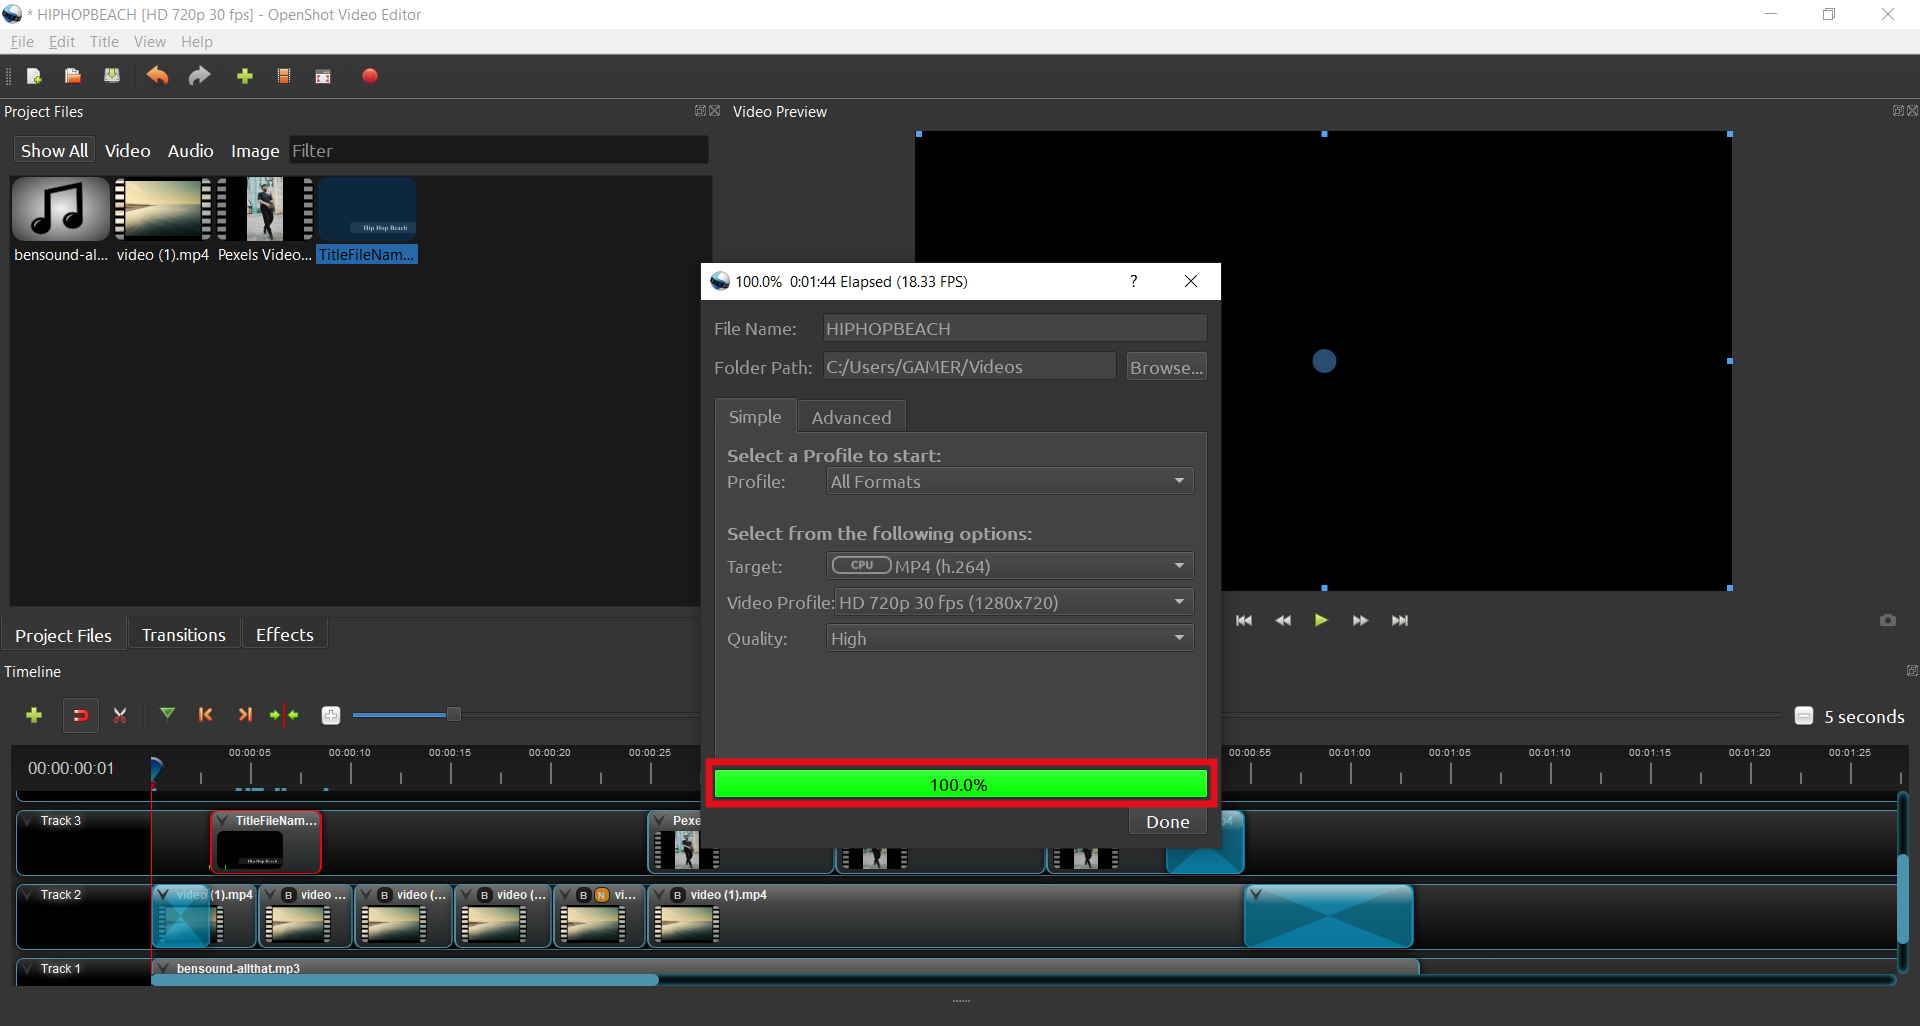
13. To export the video to your computer, go back to File, select Export Project and then Export Video.
Choose a name for your file, in the box marked orange in the image, and click Export video.
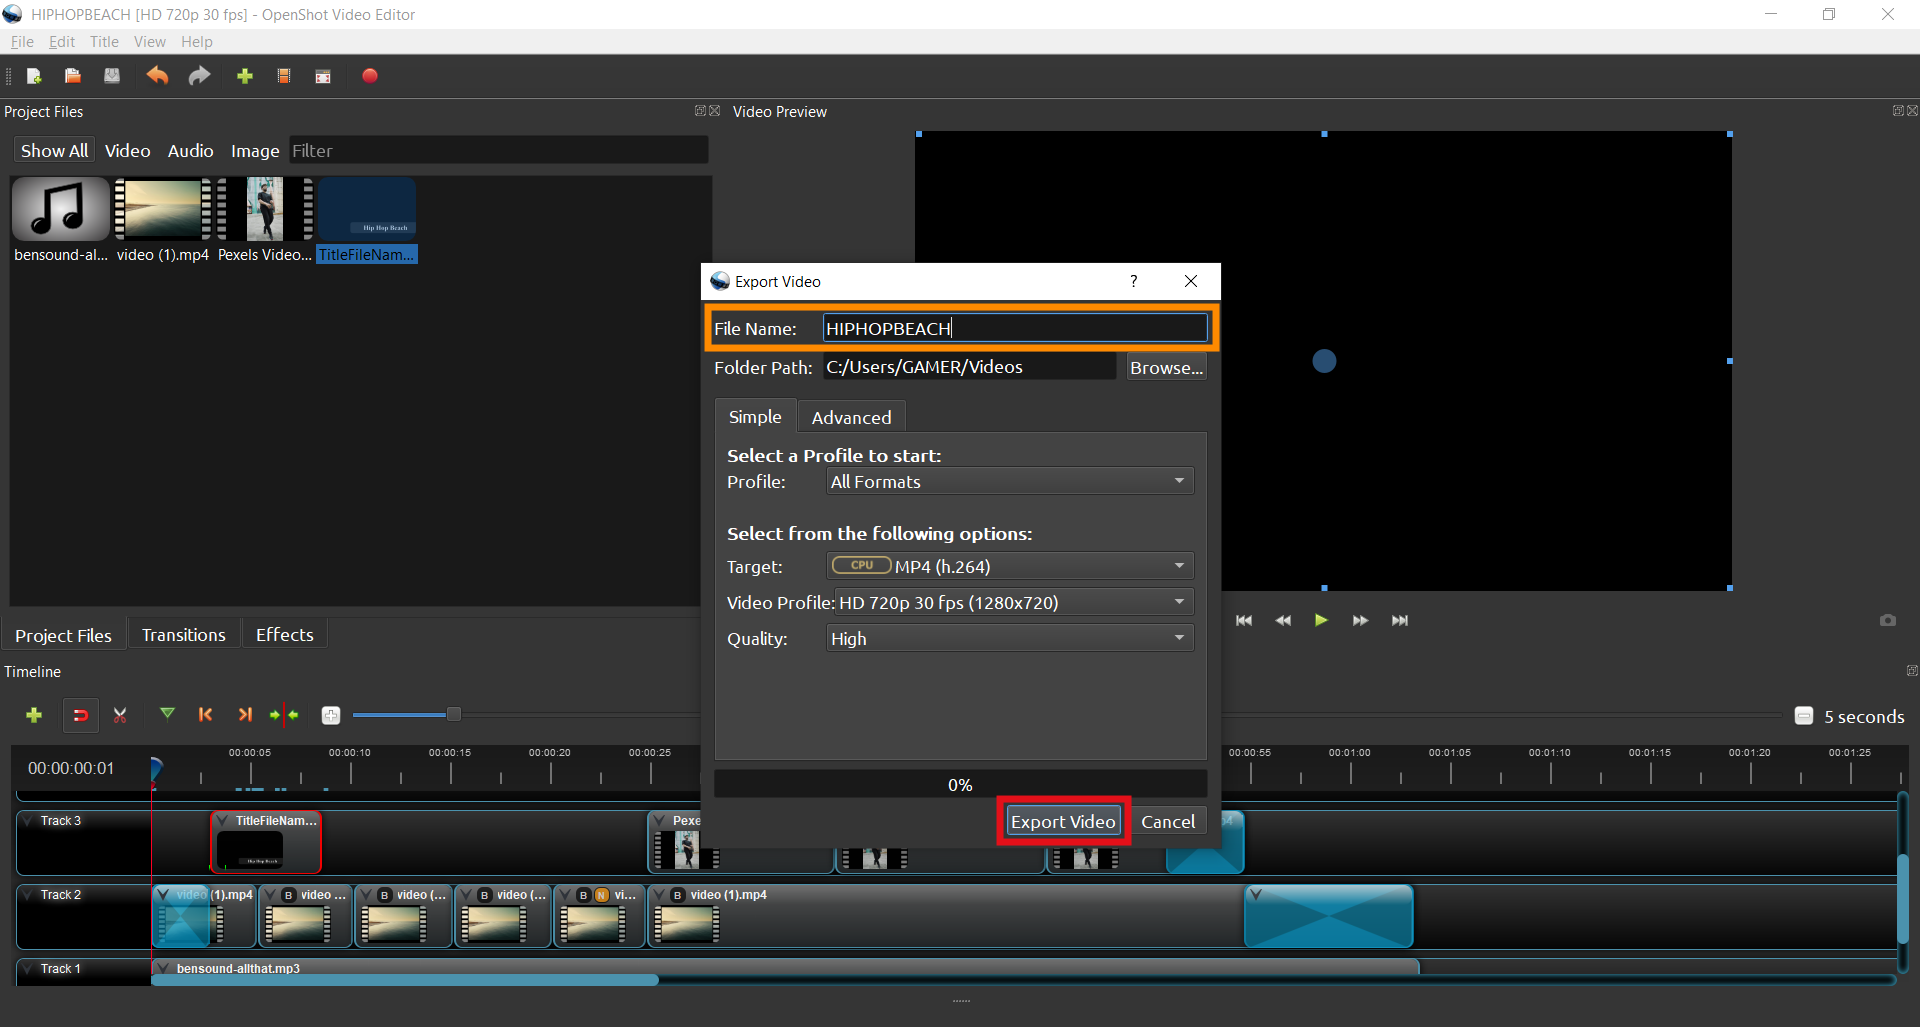
Wait for the bar to reach 100%. And that’s it, your film is now saved!
14. You have just made your first film! It should look very similar to this one:
Now, you can keep editing videos and films with OpenShot and use your creativity to make even cooler projects!