Activity
1. To start the activity, click on musiclab.chromeexperiments.com/Song-Maker.
SIDE NOTE: You may click the images to amplify.
This is Song Maker. Here, you can create simple songs using the grid of squares. Each square corresponds to a musical note. To create your songs, click on the little squares to paint them. Only these will emit sounds.
You can also add the rhythm and tempo of the song. In the end, you can listen to your songs as many times as you want… until you stop it!

2. Try playing this children’s song. Click on the little squares, painting them as shown in the image:
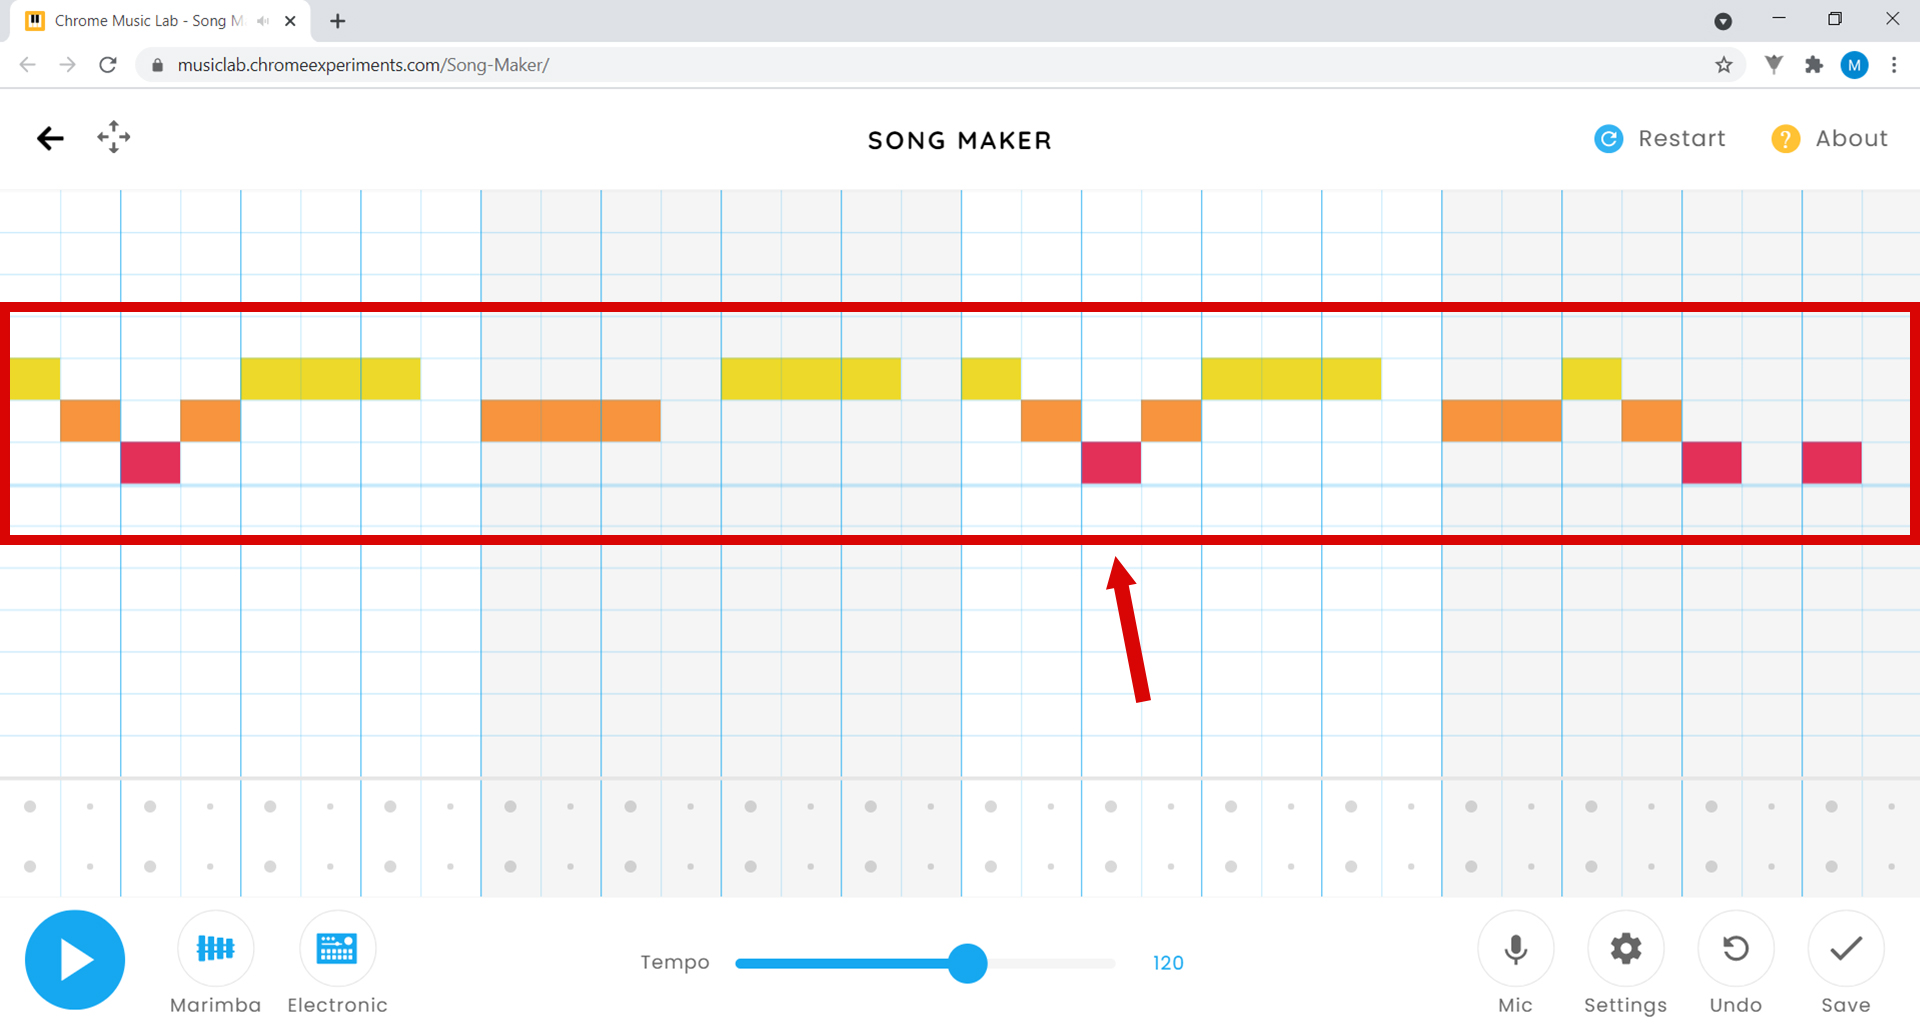
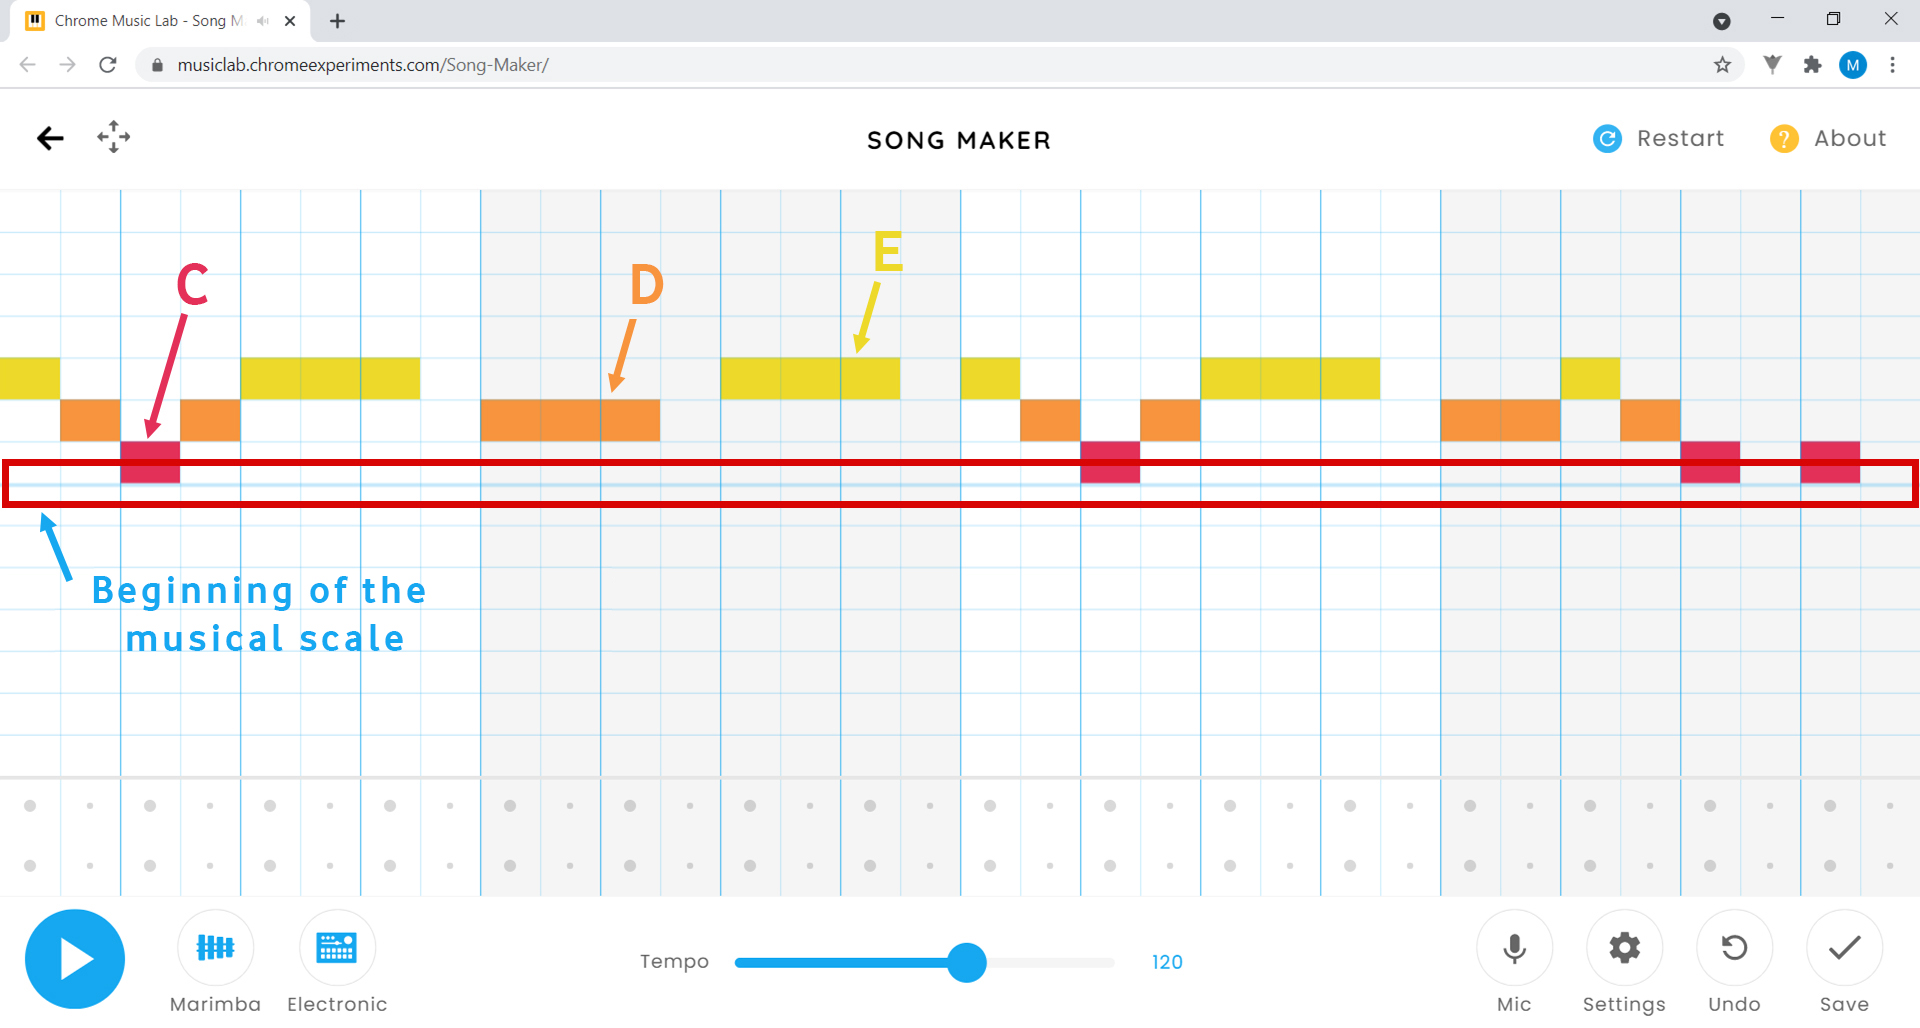
3. The horizontal line in the middle of the screen corresponds to the start of the musical scale, i.e. from that line upwards, the squares correspond to the notes C, D, E, F, G, A. As you can see, in this example, the red squares correspond to the note C, the orange ones are D and the yellow ones are E.
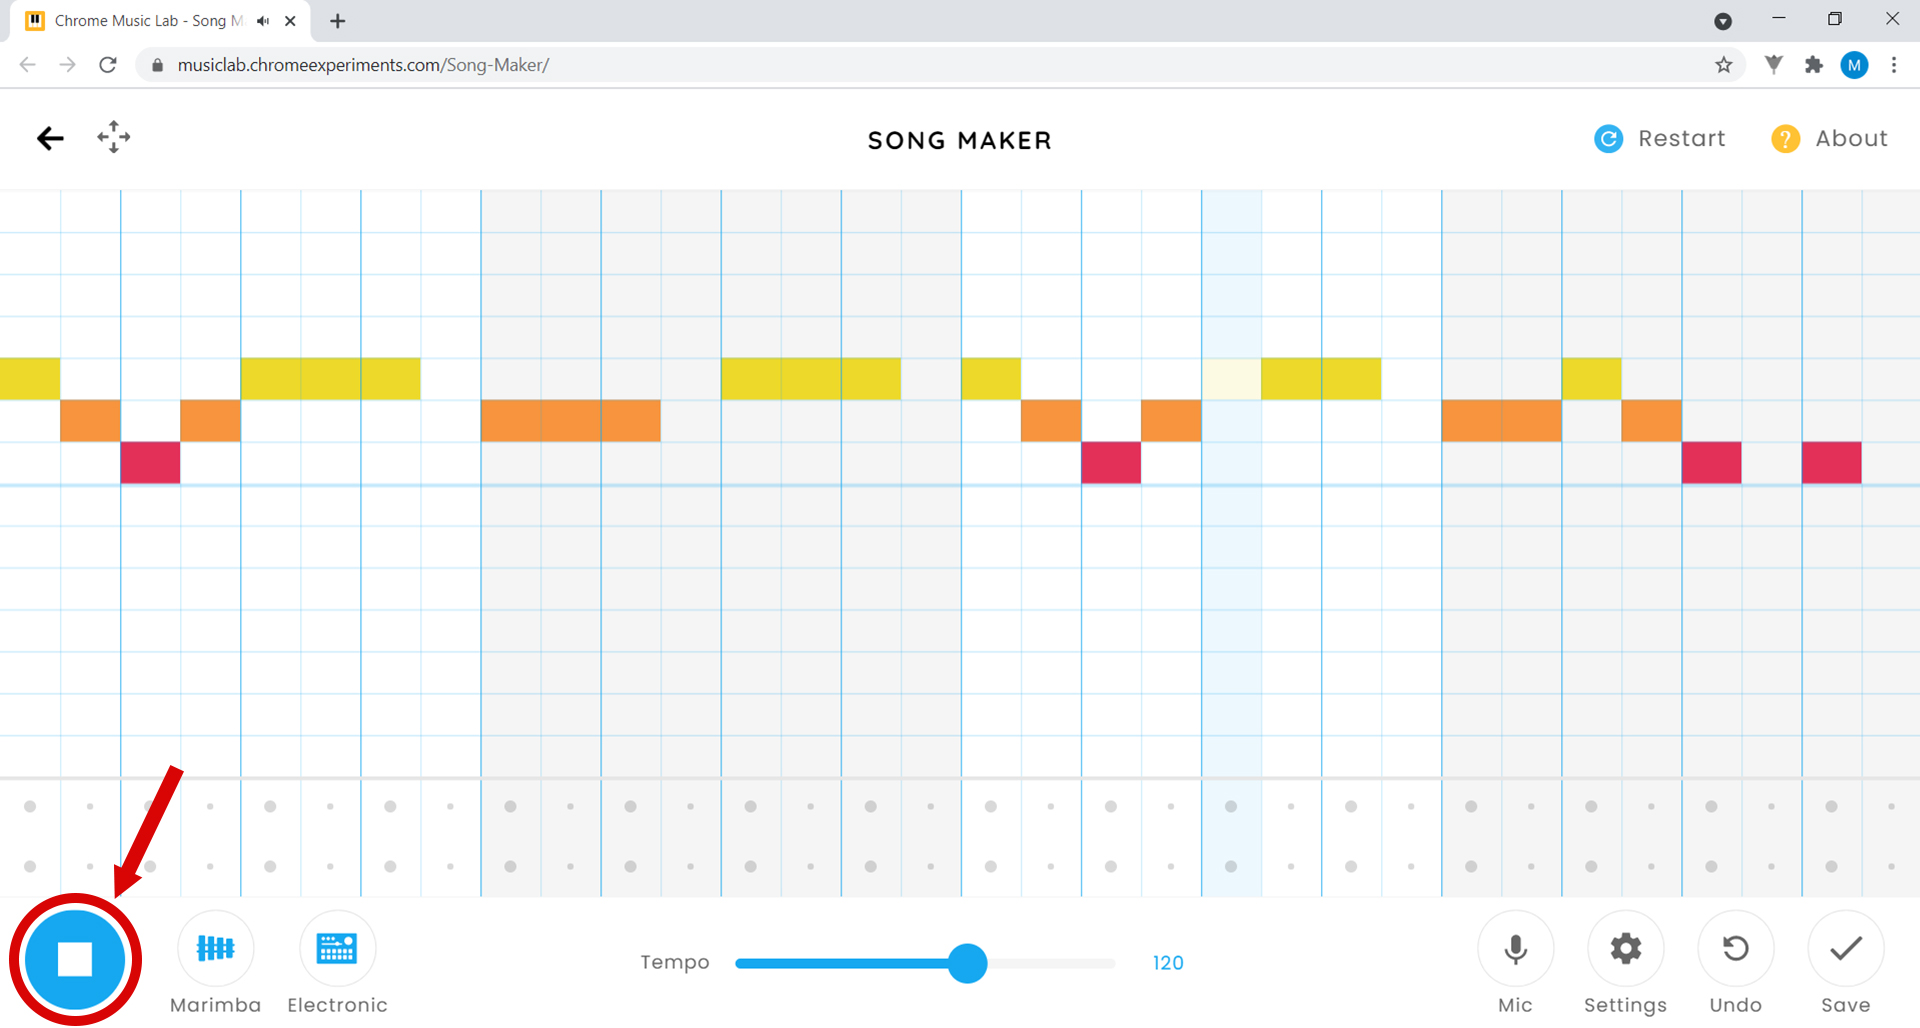
4. Click the play button and watch the magic happen!

This is a well-known children’s song: Mary Had a Little Lamb. When you want to stop, click on the button highlighted in the image.
5. To complete the song, add at the bottom the exact same combination of squares as you put at the top, like this:
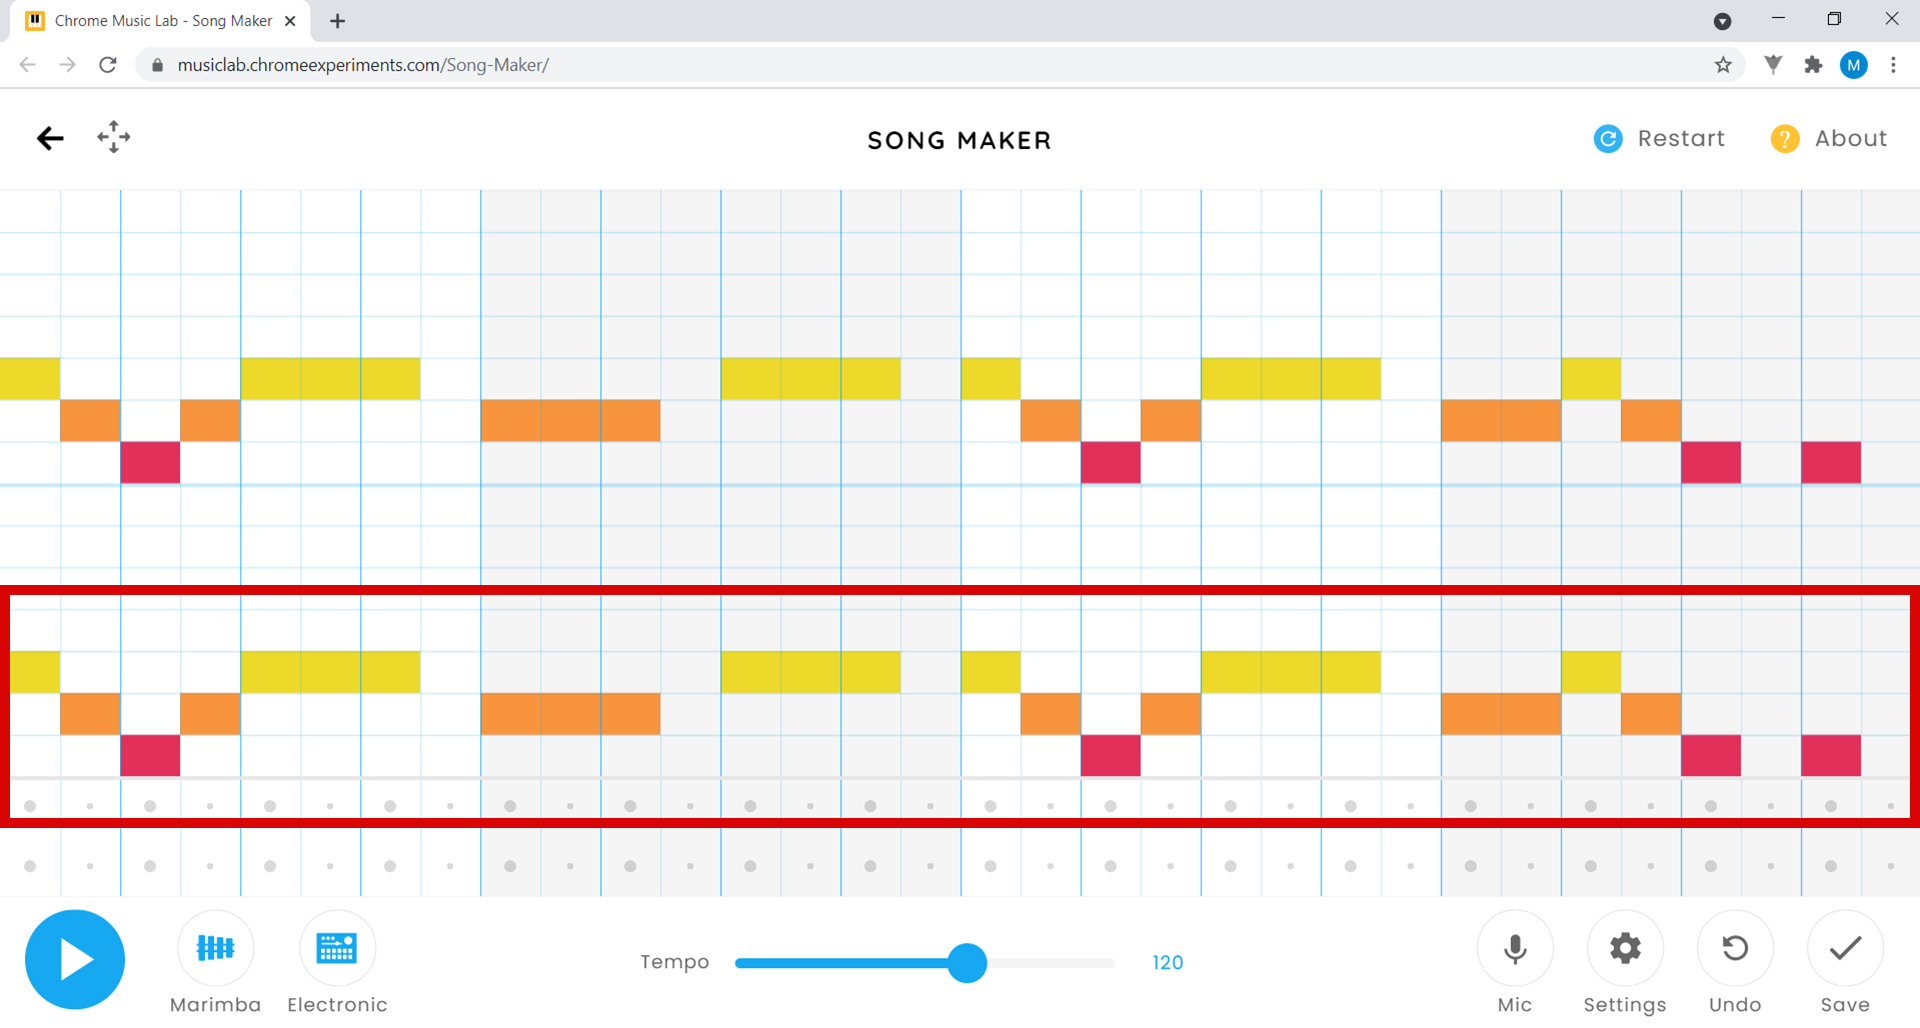
You’ve just added another melody line, the same as the one above, but whose sound is lower. This is known as being one “octave” below the previous line. Click the play button to hear how it sounds now.
6. Much better, right? Then paint another line similar to the two already there, as shown in the image:
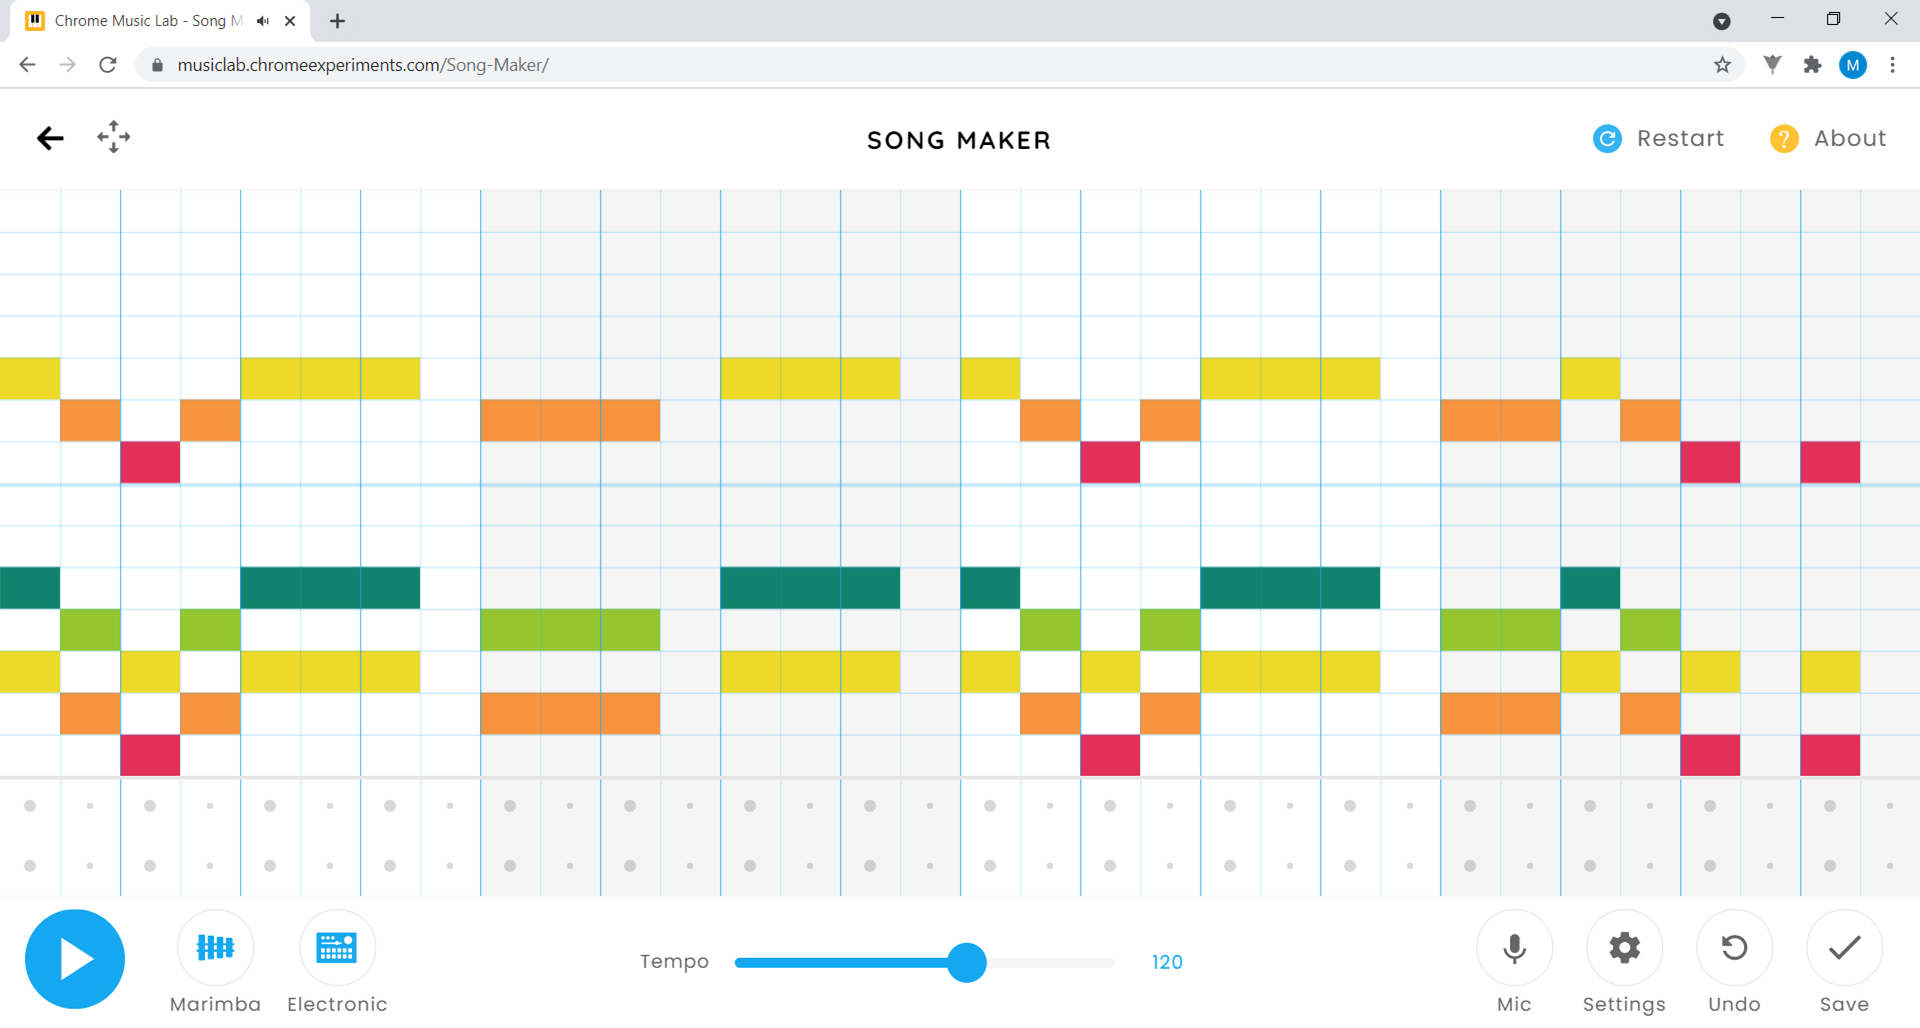
Each time you hear a C (red square) you hear an E (yellow square) at the same time.
Each time you hear a D (orange square) you hear an F (light green square) at the same time.
And for every E you hear, you also hear a G (dark green square).

This is called harmony. Many songs you know have harmony. It makes them sound fuller and more beautiful. Shall we try it? Click the play button and listen.
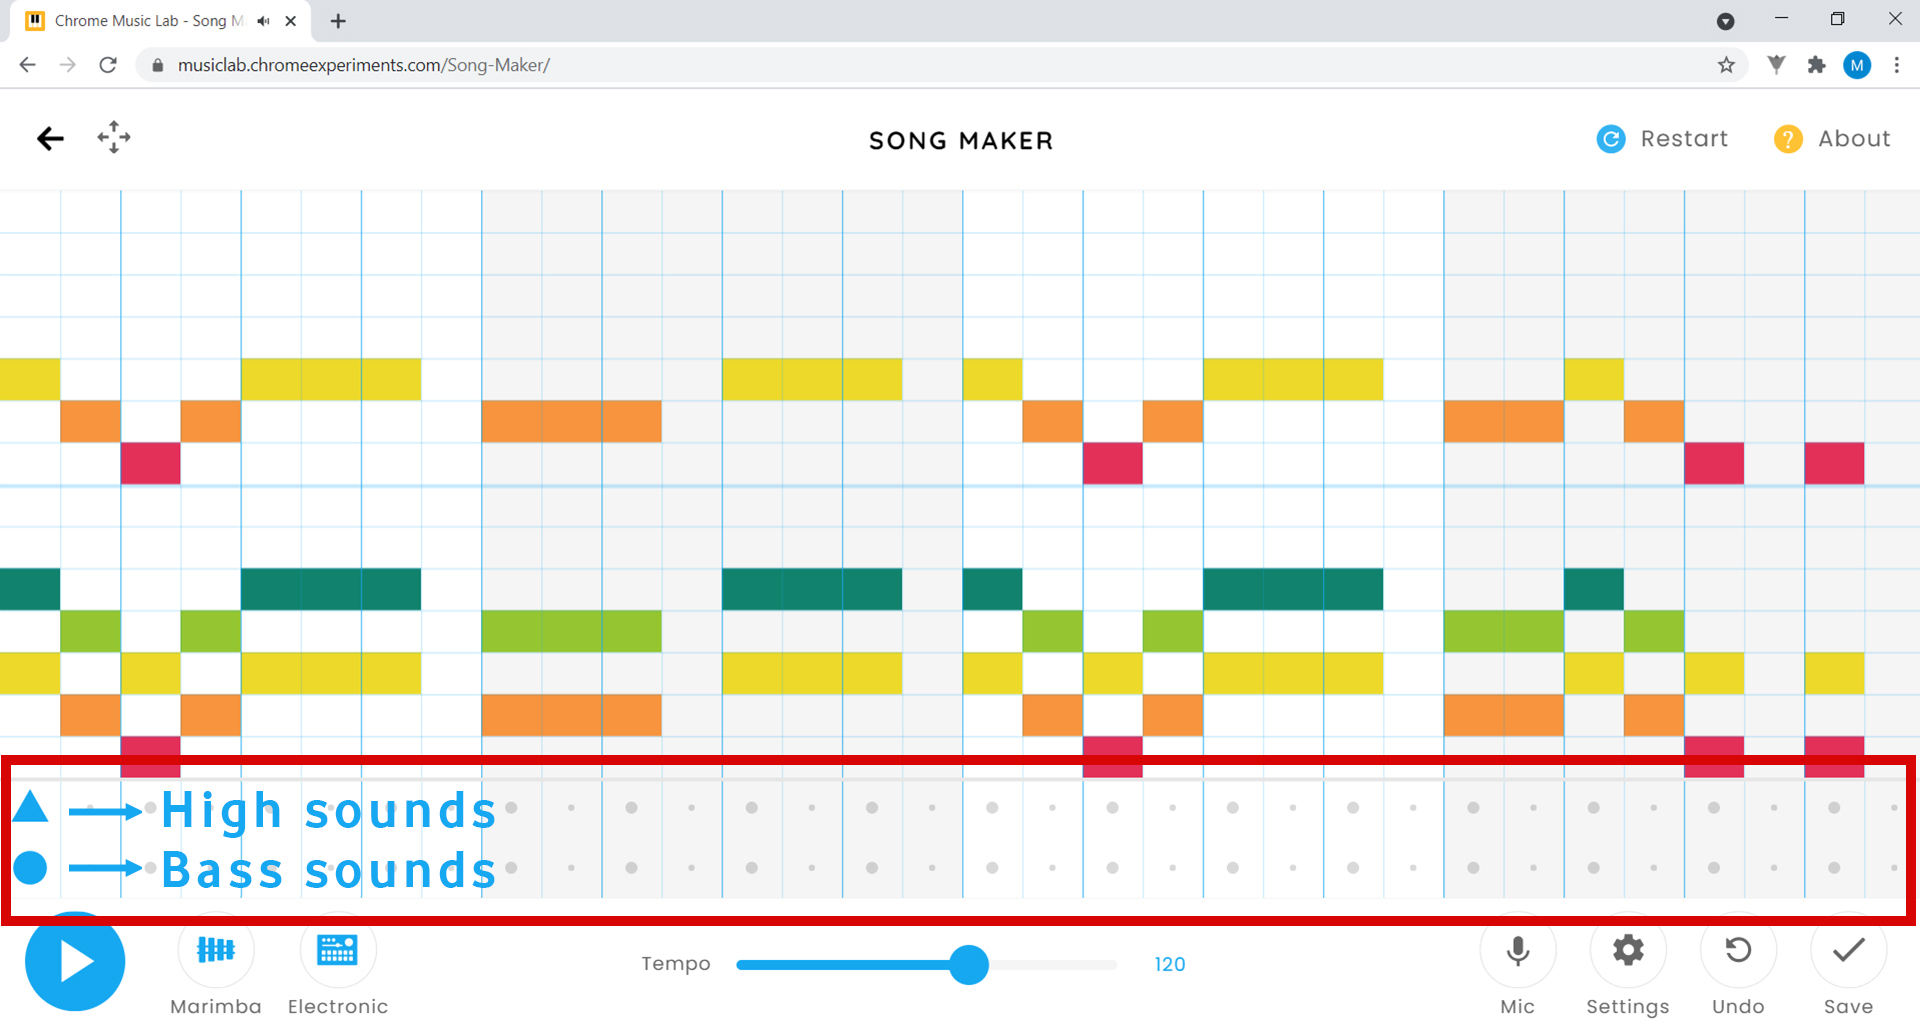
7. We now have enough melodies. It’s time to add rhythm, or beats, to your music. Between the squares area and the options bar, there are two lines. These allow you to add percussion, i.e. the beats to the music. If you click on the bottom line, circles appear representing the bass sounds. On the top line, triangles representing high-pitched sounds appear.
Put the symbols in the positions shown in the picture:
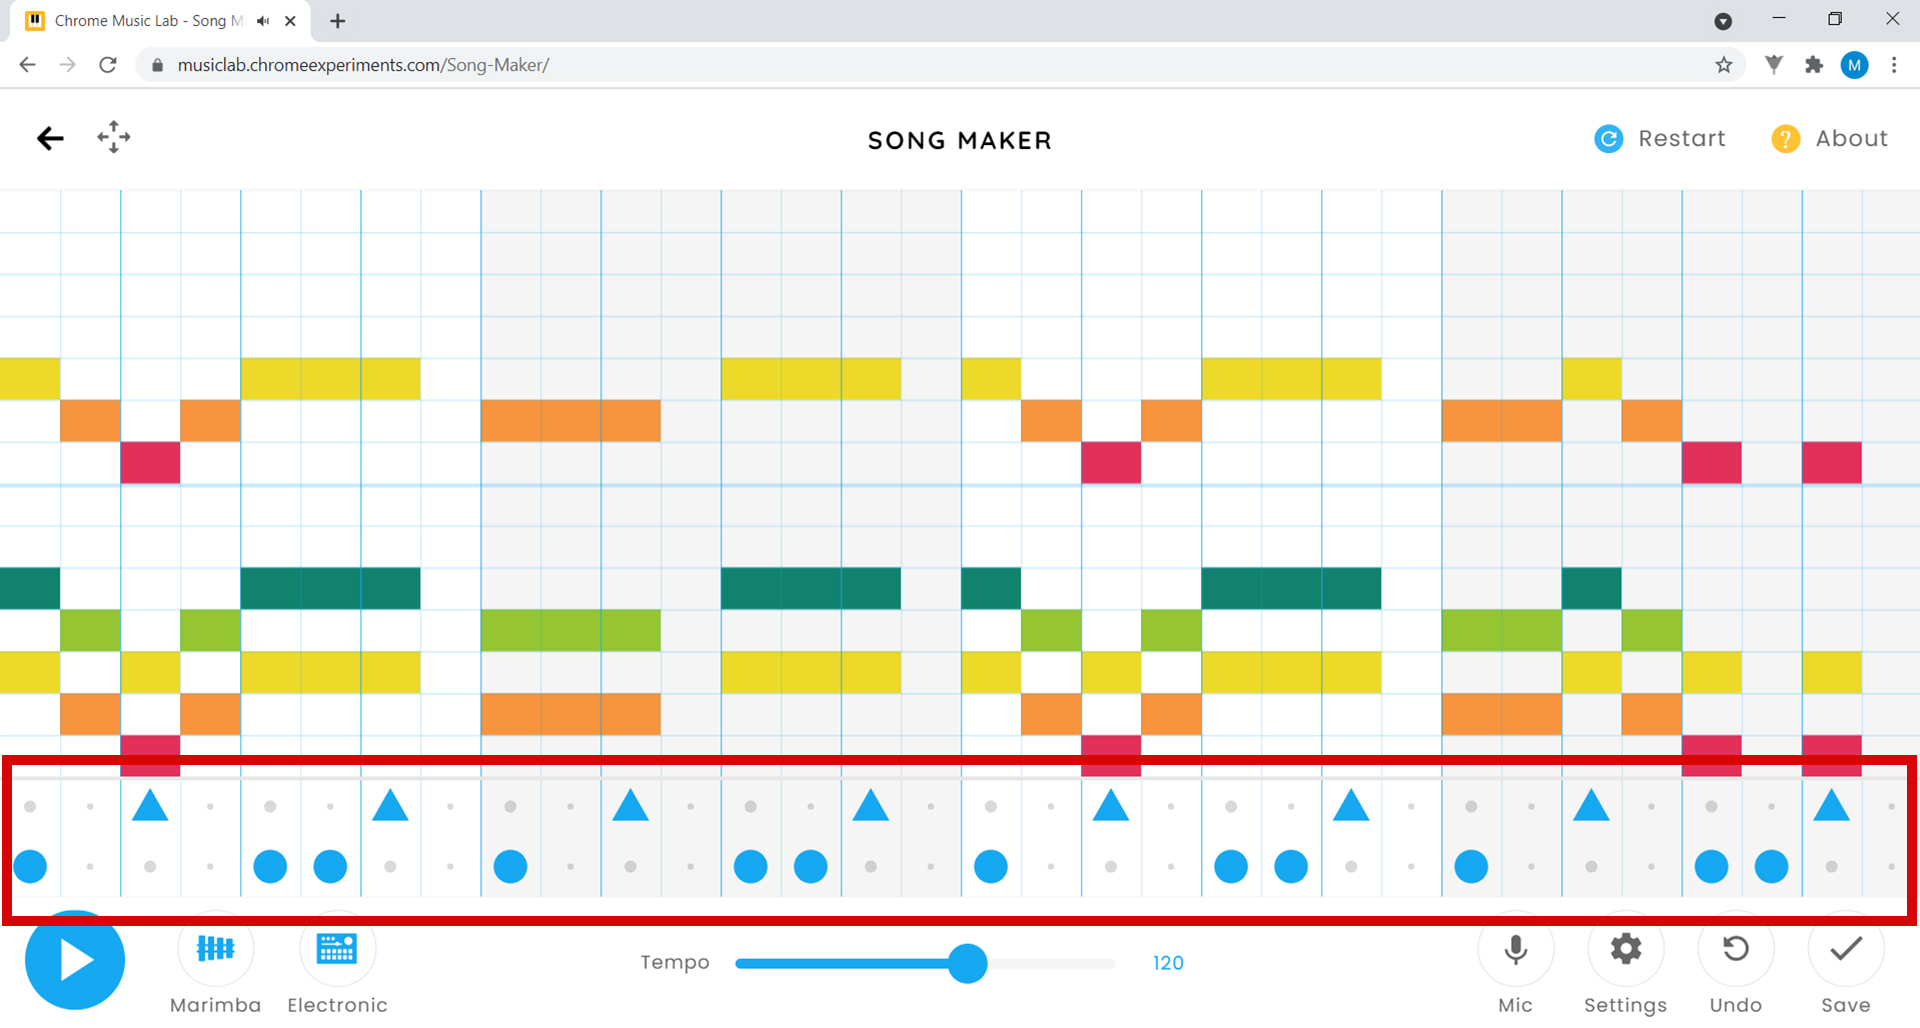
Test by clicking the play button. Listen to the beats!
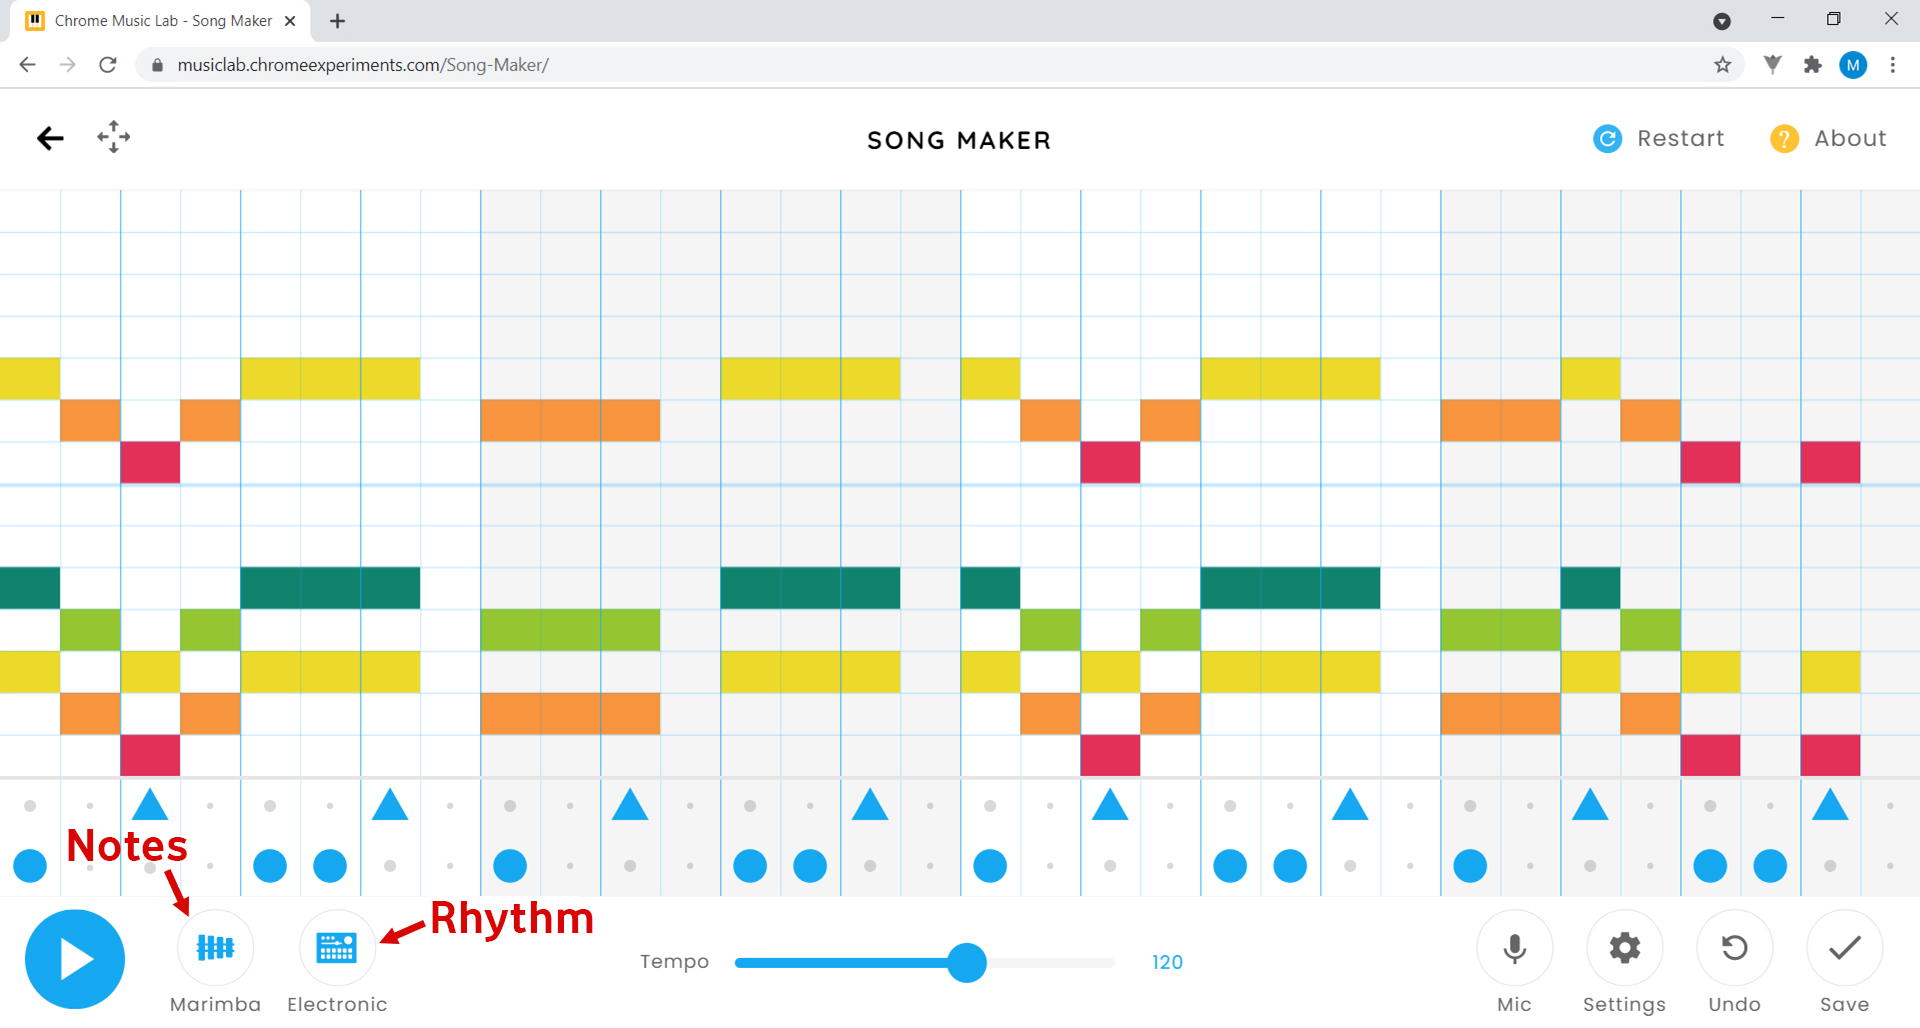
8. You now know how to make melodies and add rhythm to them. Now let’s see what other sounds you can use to create music with Song Maker. In the bottom left-hand corner, you can change both the sound of the melody instruments and the percussion instruments. To choose the different instruments, simply click on the buttons highlighted in the image.
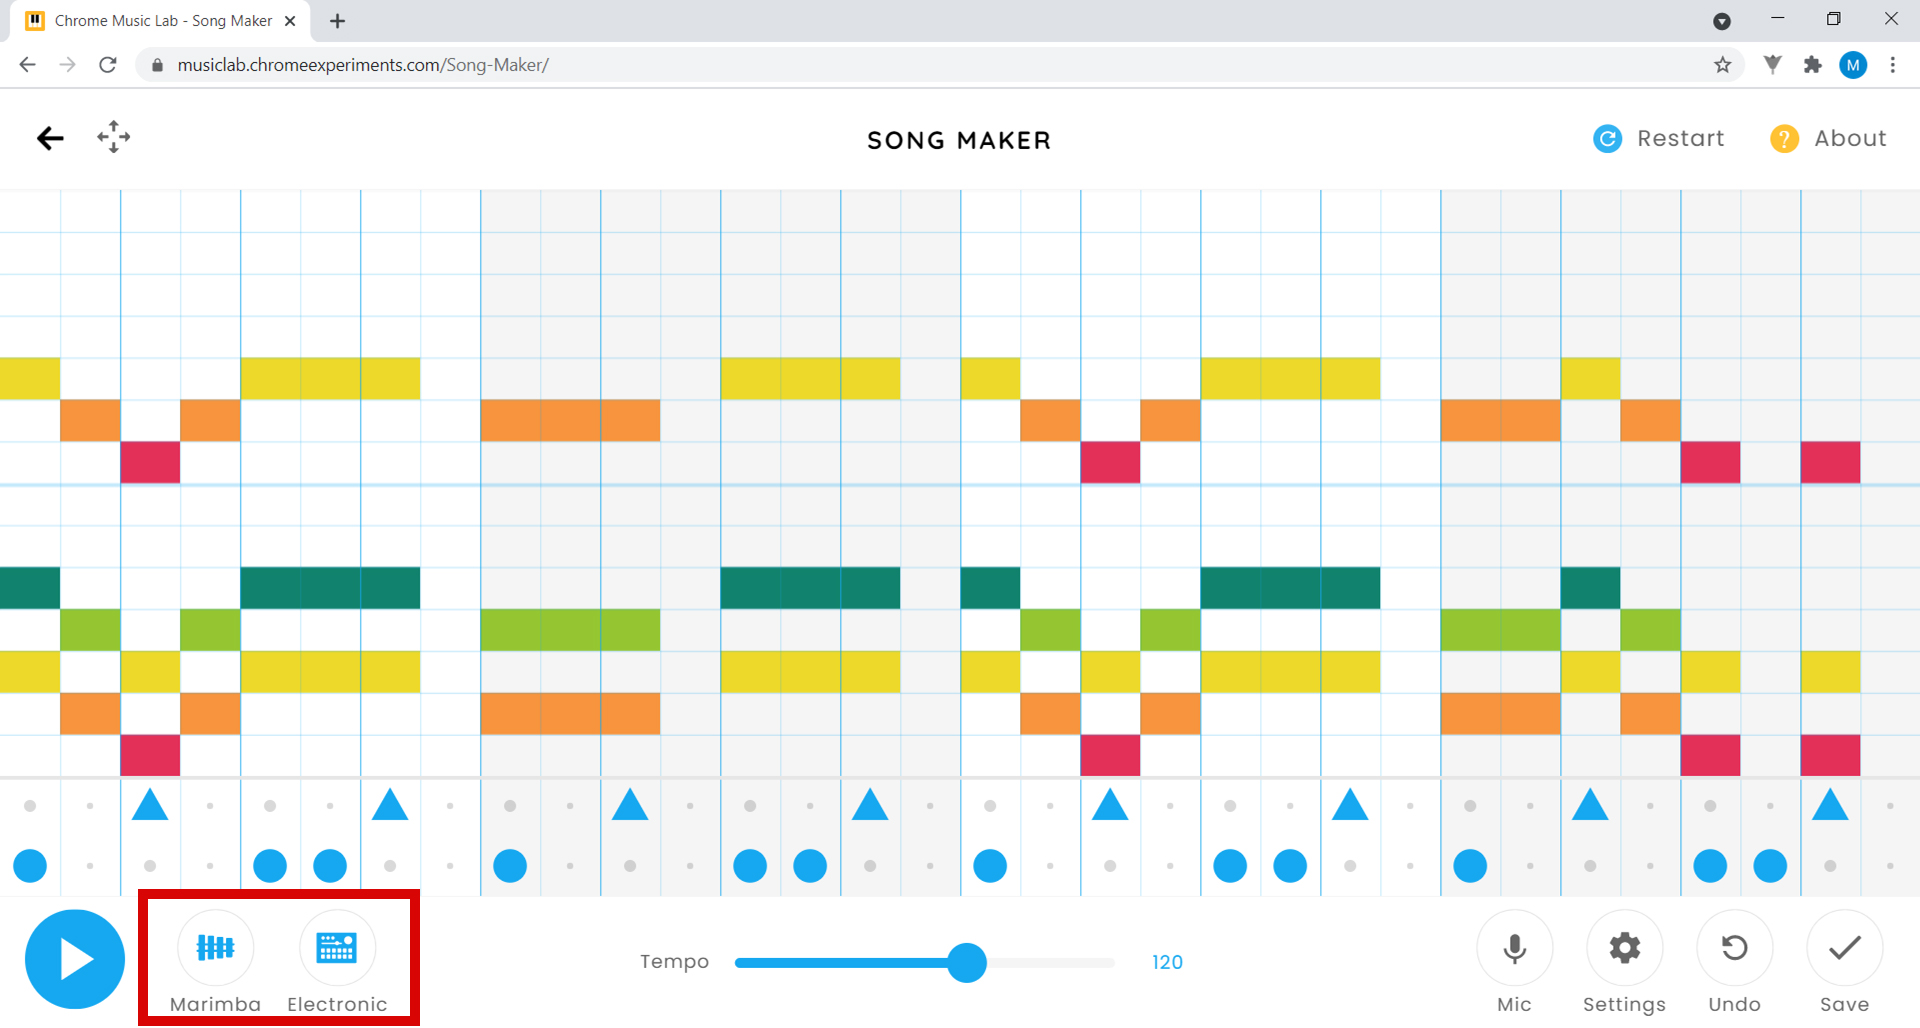
For notes and melody, you can choose between the marimba (which is a xylophone-like instrument) and the piano, string instruments, wind instruments or synthesizer. For percussion instruments, you can use electronic rhythm, woodblocks, drums or conga. This latter instrument is a type of drum of Cuban origin with a very unique and interesting sound.
9. In the menu, you can also change the song’s tempo, which is automatically set at 120 BPMs (Beats Per Minute). If you slide the little ball to the right, you increase the BPMs and the song gets faster. If you slide it to the left, you decrease the BPMs and it gets slower.

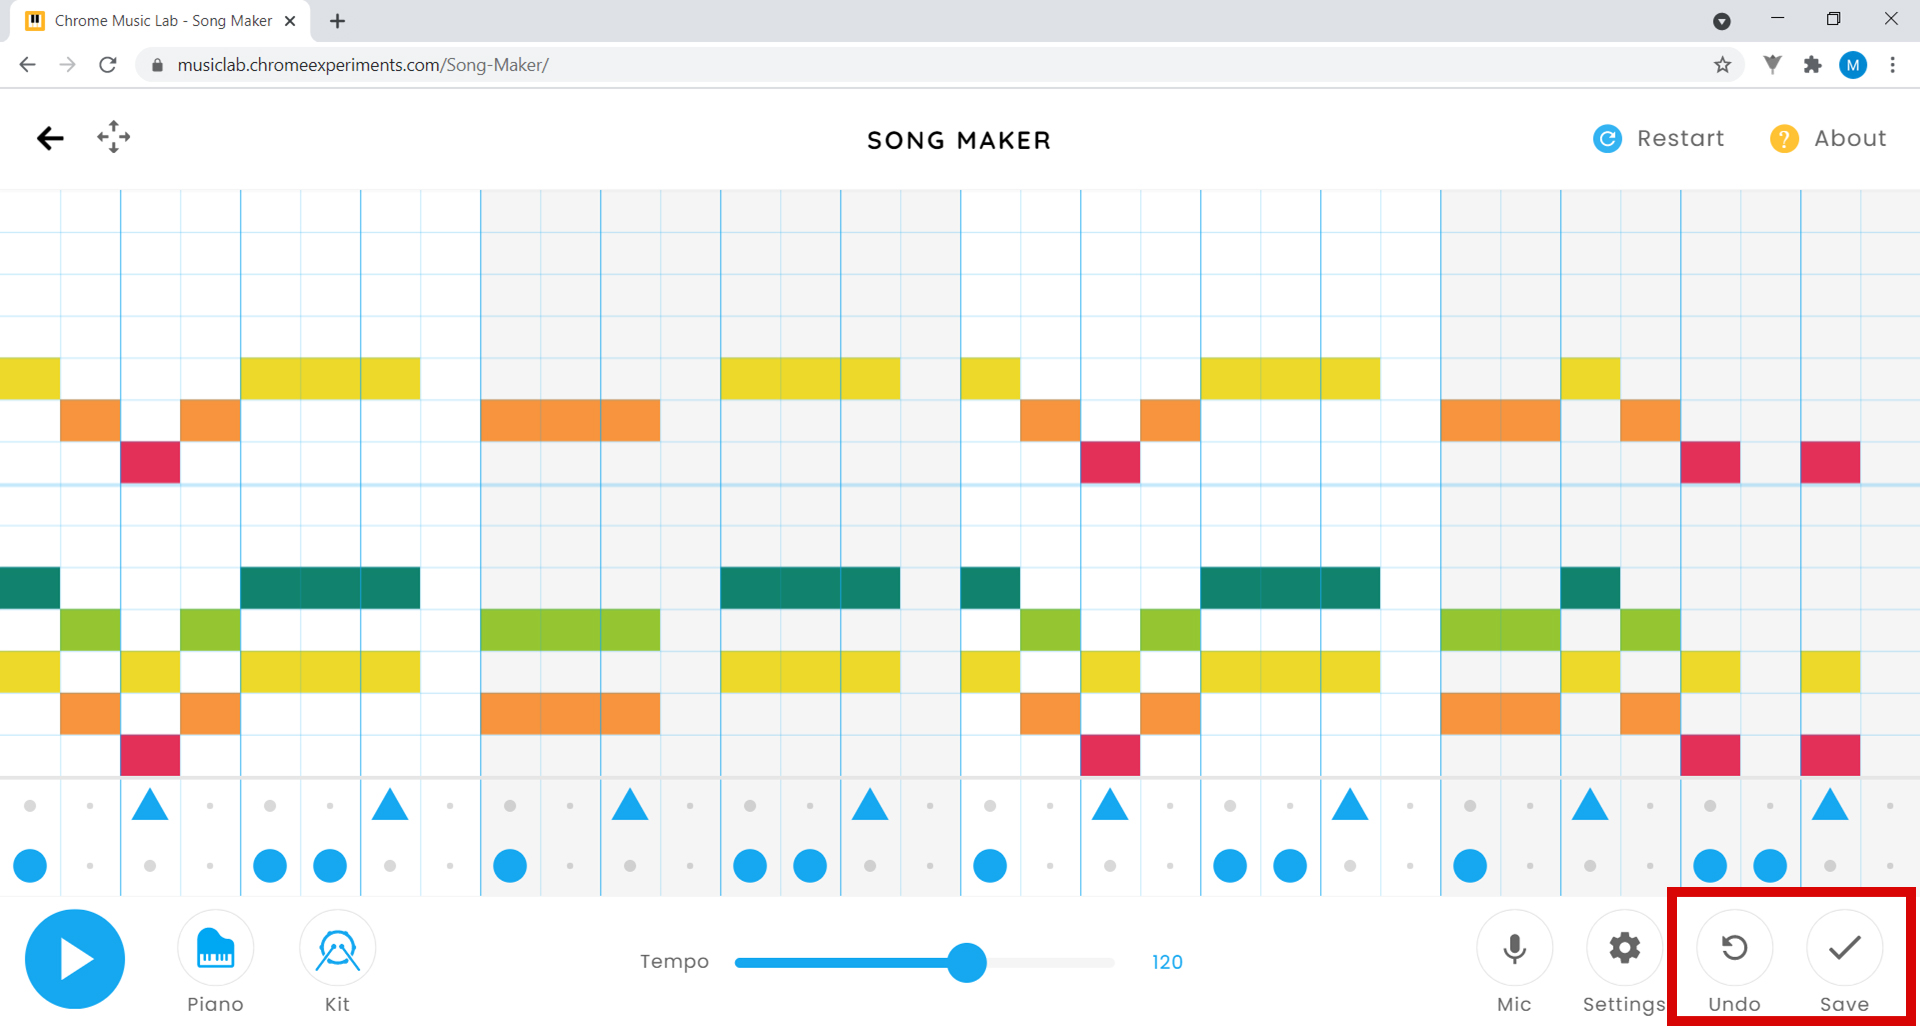
10. In the bottom right-hand corner, you have the Undo button. Click here to go back if you think you did something in the song that you didn’t mean to. You also have a Save button. By clicking on this button, you will receive a link where your song has been saved so you can access it whenever you want. You can also share this link with your friends.
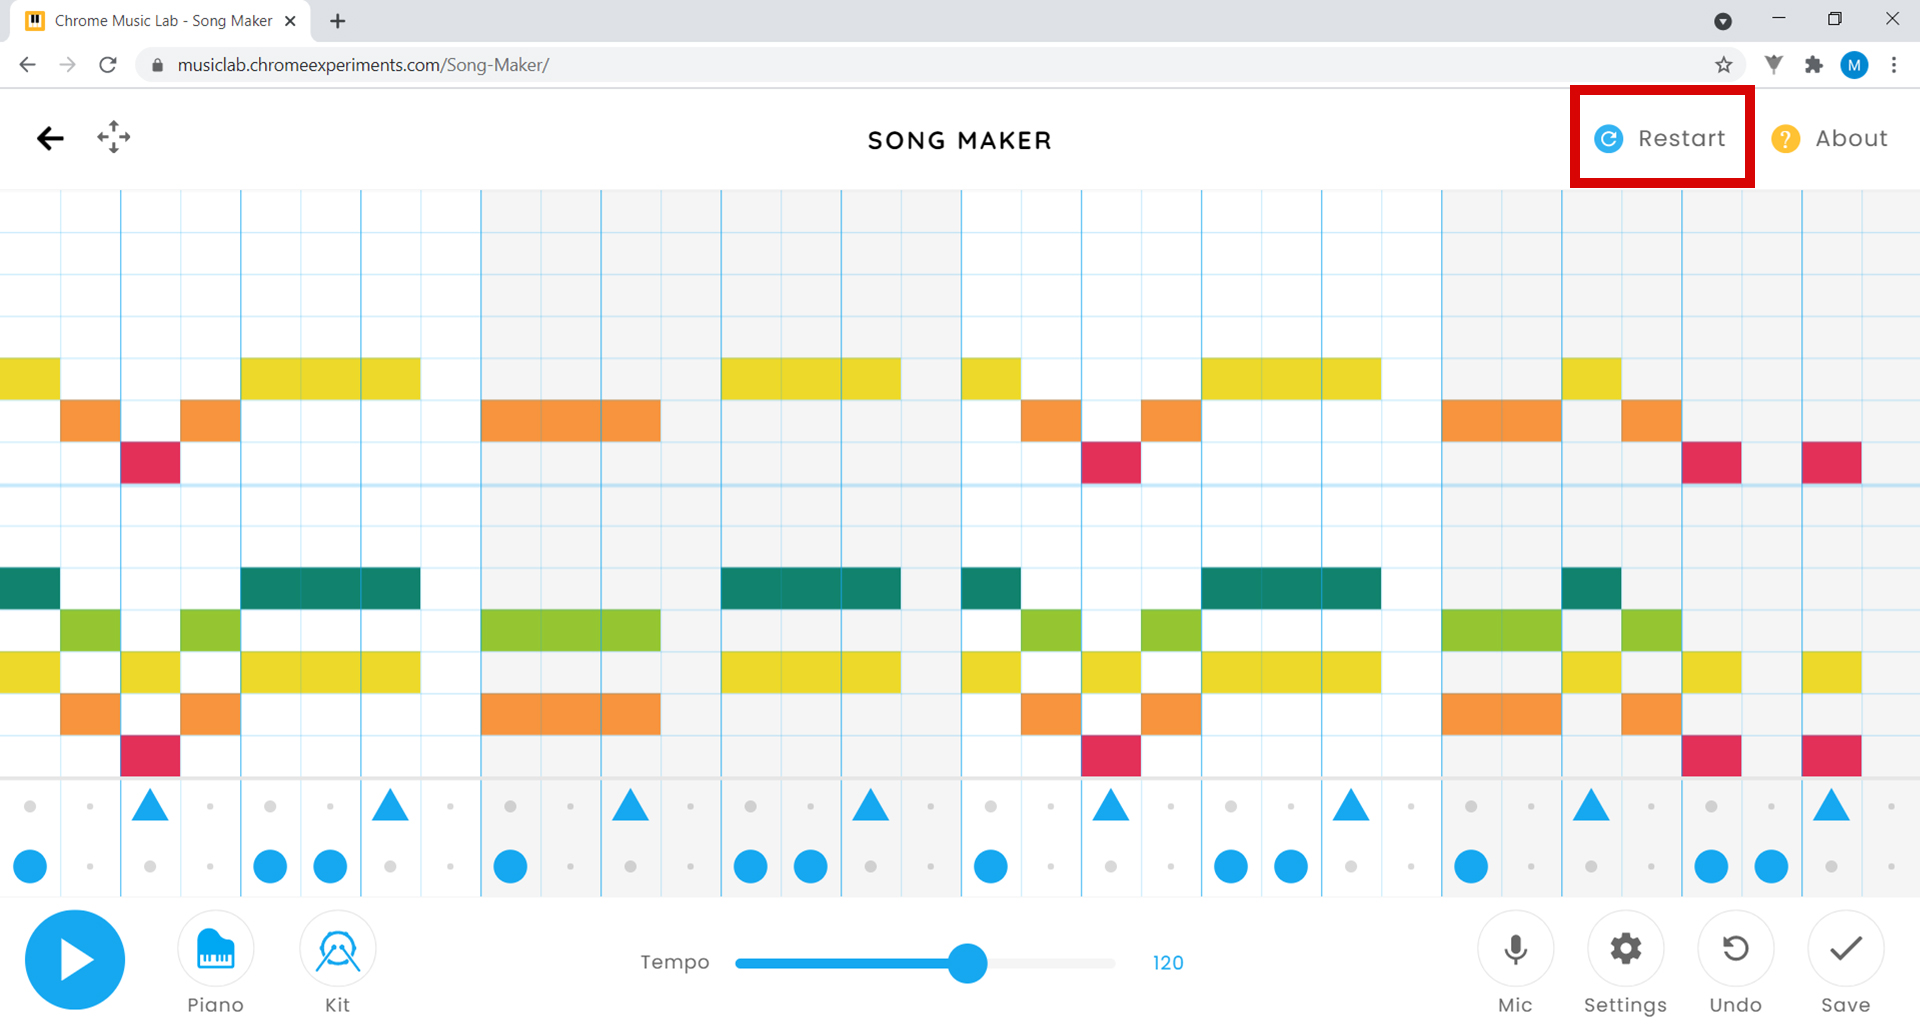
11. If you want to delete everything you have done and start over, click on Restart in the top right-hand corner.
12. Now that you know everything you can do with this program, you can explore it as you like and make some great music! Unleash your imagination and have fun with music!